
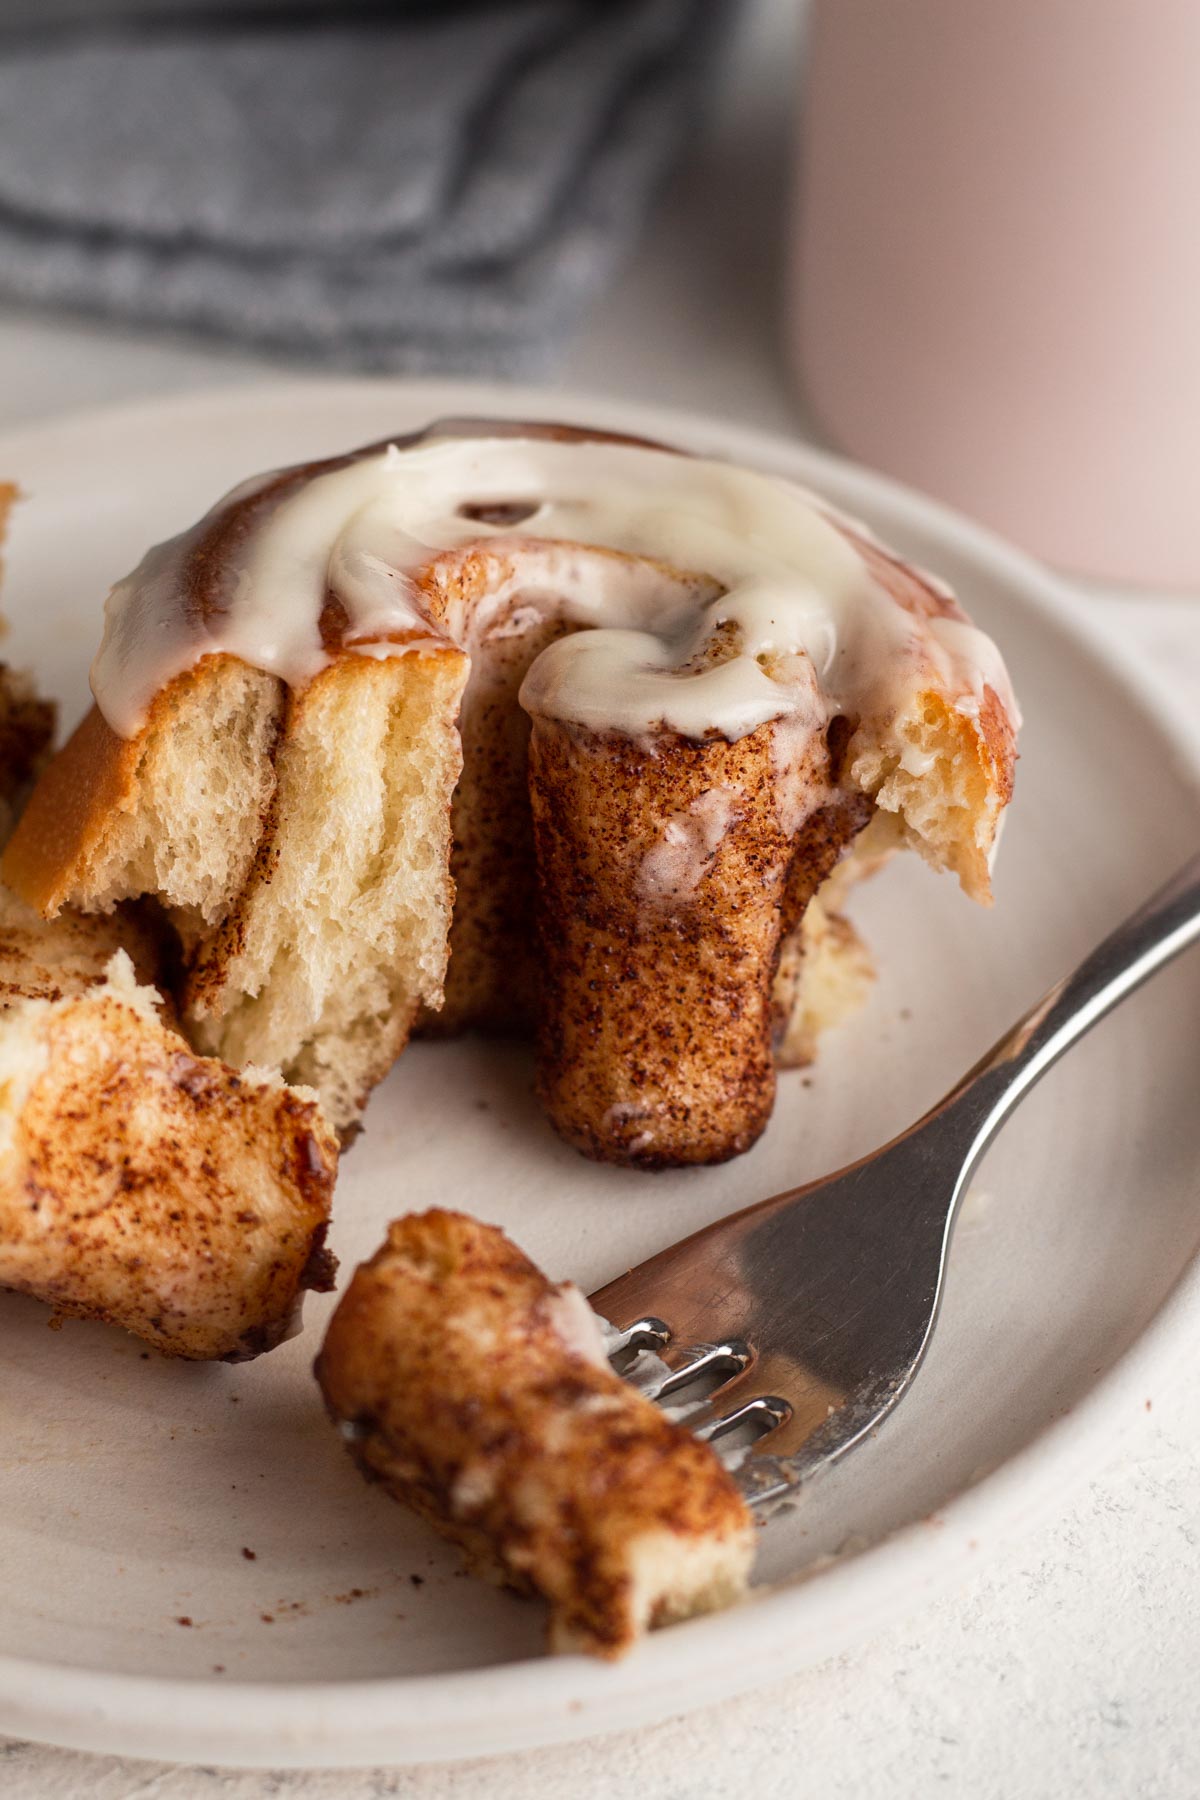
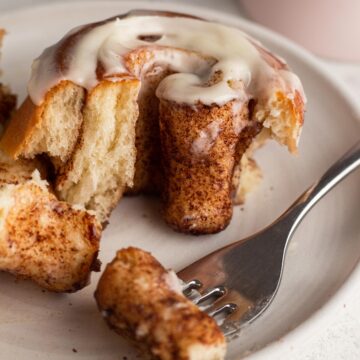
These soft and gooey brioche cinnamon rolls are the absolute best, made from scratch with a plush and tender brioche dough, sweet cinnamon spice filling, and vanilla cream cheese icing. This easy-to-follow recipe walks you through every step with step-by-step photos and tons of tips and tricks along the way. This small batch recipe makes just 6 homemade cinnamon rolls but can easily be doubled for a crowd!

I'll eat dessert any time of day, but there's something extra special about breakfast dessert. And when we're talking about breakfast dessert, cinnamon rolls are always the first thing to come to mind. There's something comforting and nostalgic about the pillowy soft dough packed with cinnamon and sugar and glazed with cream cheese icing.
I've baked tons of cinnamon rolls - everything from the canned variety at the grocery store to Cinnabon copycat recipes - and these brioche cinnamon rolls are truly the best! Nothing can beat their richness, tenderness, and cinnamon cream cheese flavor.
Making these small batch cinnamon rolls from scratch requires just about one hour of hands on time (plus time for the dough to rise and the rolls to bake) - and it will be well worth it when you sink your teeth into these soft and tender rolls!
Jump to:
What is Brioche?
Brioche is a type of bread dough that's enriched with egg and butter. While the bread itself isn't sweet, it has a rich, buttery flavor and a soft, tender (even puffy) crumb that makes it perfect for sweet treats like cinnamon rolls and French toast.
Why This Recipe Works
Whether you're baking for Christmas morning, hosting overnight guests, or just trying to make Sunday morning a little more special, this recipe will serve you well! It's a favorite for many reasons, and here are a few:
Brioche Dough: You just can't beat the pillowy texture and buttery flavor of brioche, especially when it comes to baking cinnamon rolls.
Spice Filling: The filling includes a delicate but flavorful boost from nutmeg and cloves (in addition to classic cinnamon), giving it a little something extra.
Make Ahead: The true key to breakfast dessert is doing the prep work ahead of time so that you don't have to wake up at the crack of dawn to indulge. Here the dough is made the day before and allowed to rise at a warm room temperature before it's transferred to the refrigerator to rest overnight. The cool temperature of the fridge slows the yeast's rising so that the dough won't overproof (rise too much) before the cinnamon rolls are assembled and baked in the morning. And you'll still get a full night's rest!
Ingredient Notes & Substitutions
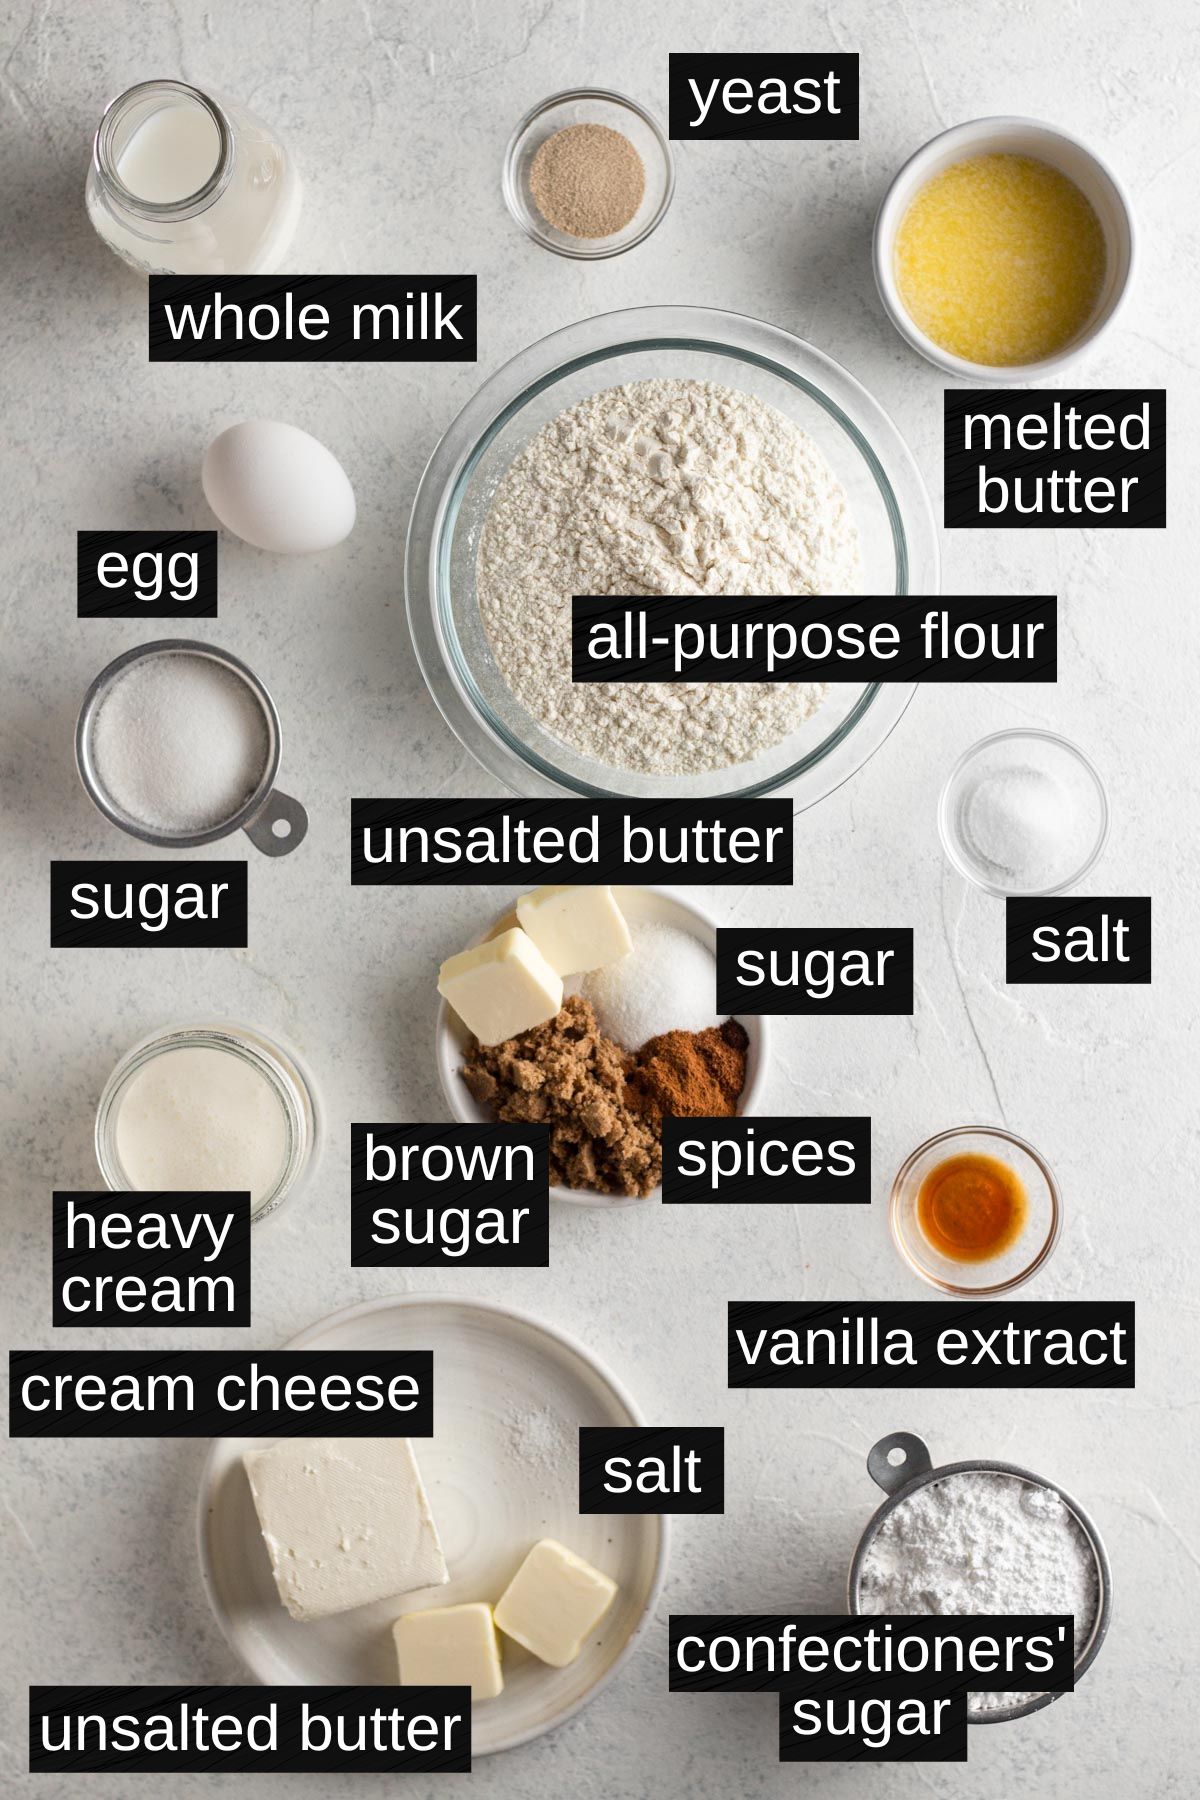
Whole Milk - Water is commonly used in bread recipes, but since this is a rich bread dough we're using whole milk instead.
Instant Yeast - Yeast is crucial to this recipe because it's what causes the dough to rise. You can substitute active dry yeast for instant yeast, but you will need to allow a bit of extra time for the dough to rise. Also, if using active dry yeast be sure to proof the yeast by letting it sit in the milk for 5 minutes. It should activate and become foamy. If it doesn't, the yeast is dead and you'll need to start over with a new batch of yeast.
Sugar & Brown Sugar - While the dough includes a little bit of white granulated sugar, the filling includes both white and brown sugar to take advantage of brown sugar's molasses flavor.
Cinnamon, Nutmeg & Cloves - A classic cinnamon and sugar filling is typical, but the addition of a little bit of ground nutmeg and cloves helps to up the spice flavor without going over the top.
Heavy Cream - This ingredient is an optional add-on, but if ooey-gooey cinnamon rolls is what you're after then don't skip it! Pouring a bit of heavy cream over the rolls just before baking is the trick to ultra-pillowy cinnamon rolls.
Cream Cheese - Cream cheese icing is the classic cinnamon roll topping for a reason... it's delicious and pairs with the rich dough and cinnamon filling perfectly! Just like when making cream cheese frosting, make sure your cream cheese is room temperature to avoid lumps is your icing.
See recipe card at the bottom of this post for full ingredient list and measurements.
Special Equipment
In addition to essential baking equipment (like a mixing bowl and spatula), I recommend some special tools for making this recipe.
- An instant read thermometer, for checking the temperature of the milk.
- A stand mixer with dough hook attachment for mixing and kneading the brioche dough.
- Unflavored dental floss (or pizza cutter or serrated knife) for cutting the cinnamon roll dough.
- A stand mixer with paddle attachment or electric hand mixer for mixing the cream cheese frosting.
Step-By-Step Recipe Instructions

Step 1: Make the brioche dough. Pour the warm (between 110ºF and 115ºF) milk into the bowl of a stand mixer and add the yeast.
Step 2: Add the egg, melted butter, flour, sugar, and salt and mix until the ingredients are blended. Let the mixture stand for 5 minutes.
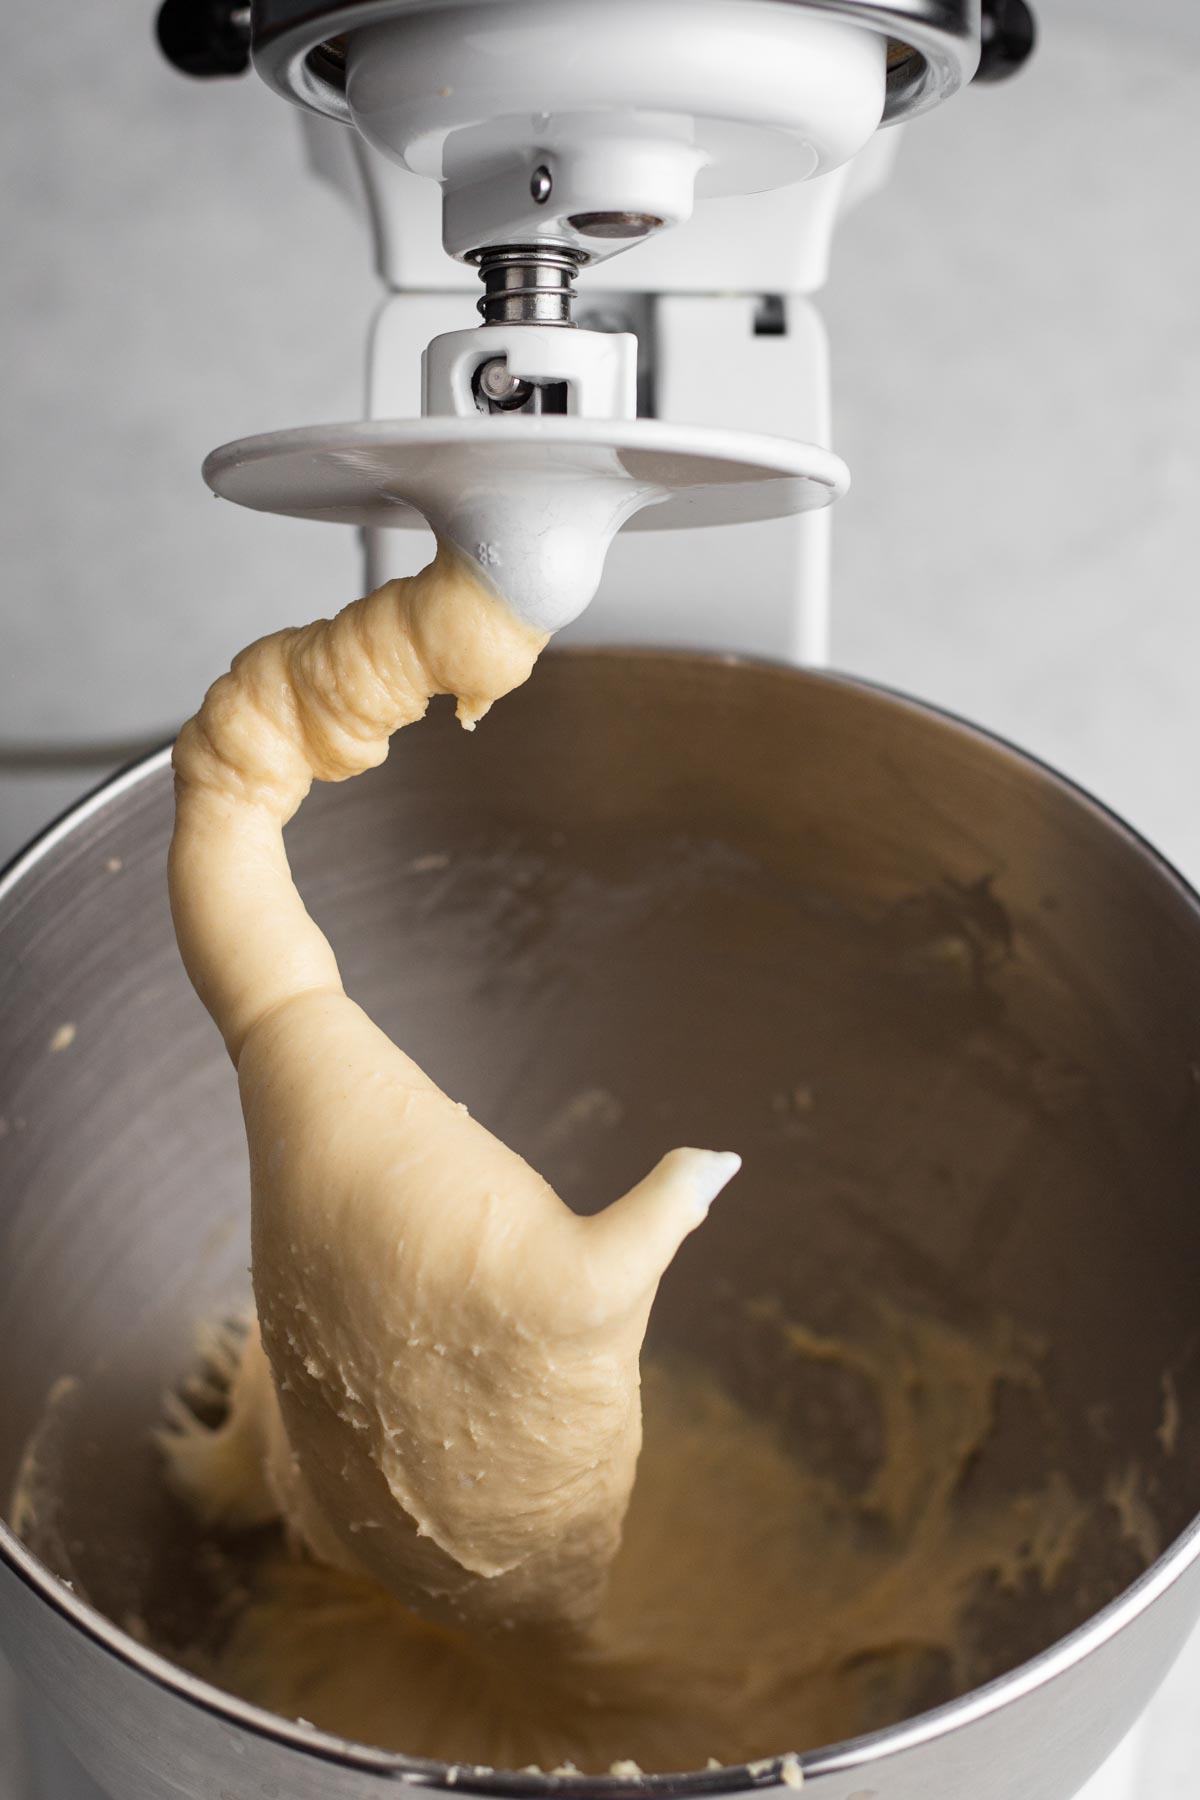
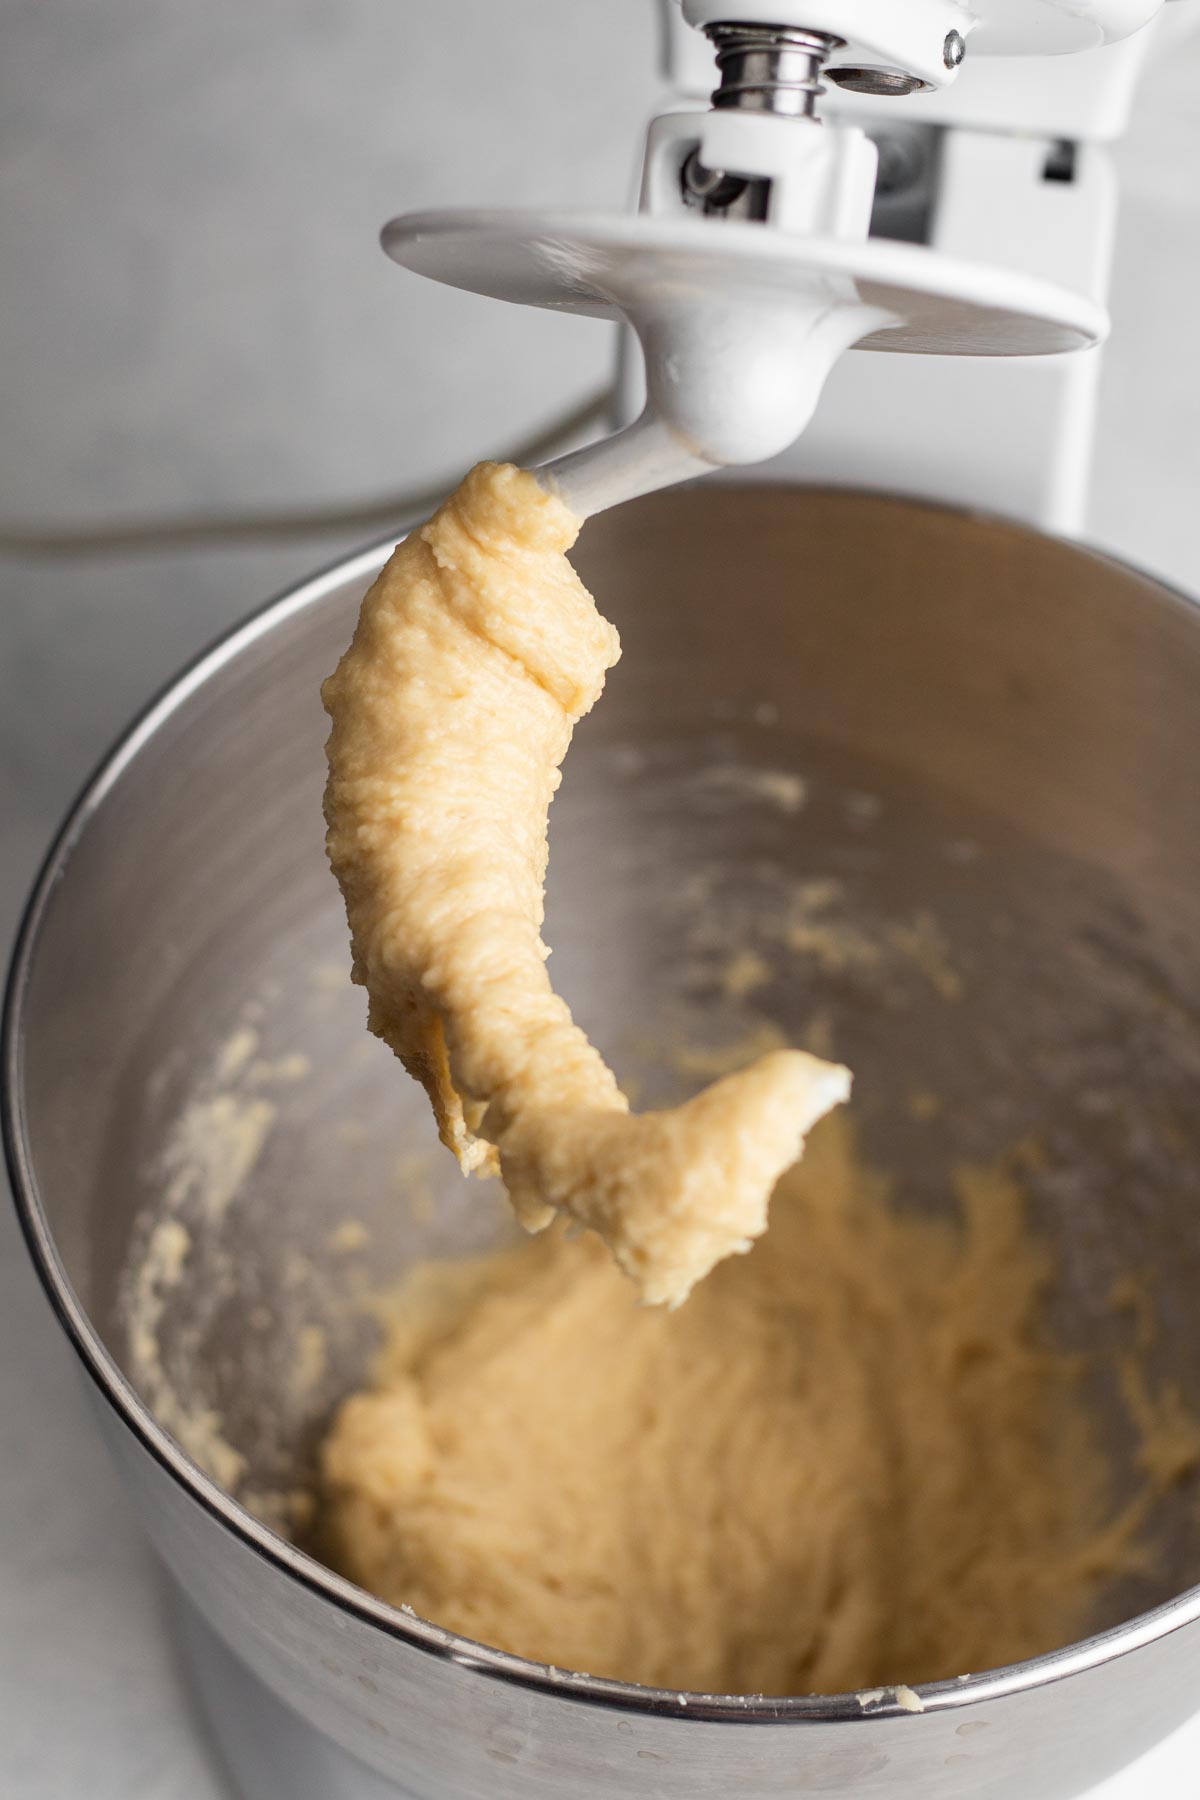
Step 3: Using the stand mixer's dough hook attachment, beat on medium speed until a sticky dough forms. Increase speed to medium-high and beat for another 5 minutes, or until the dough is soft and smooth.
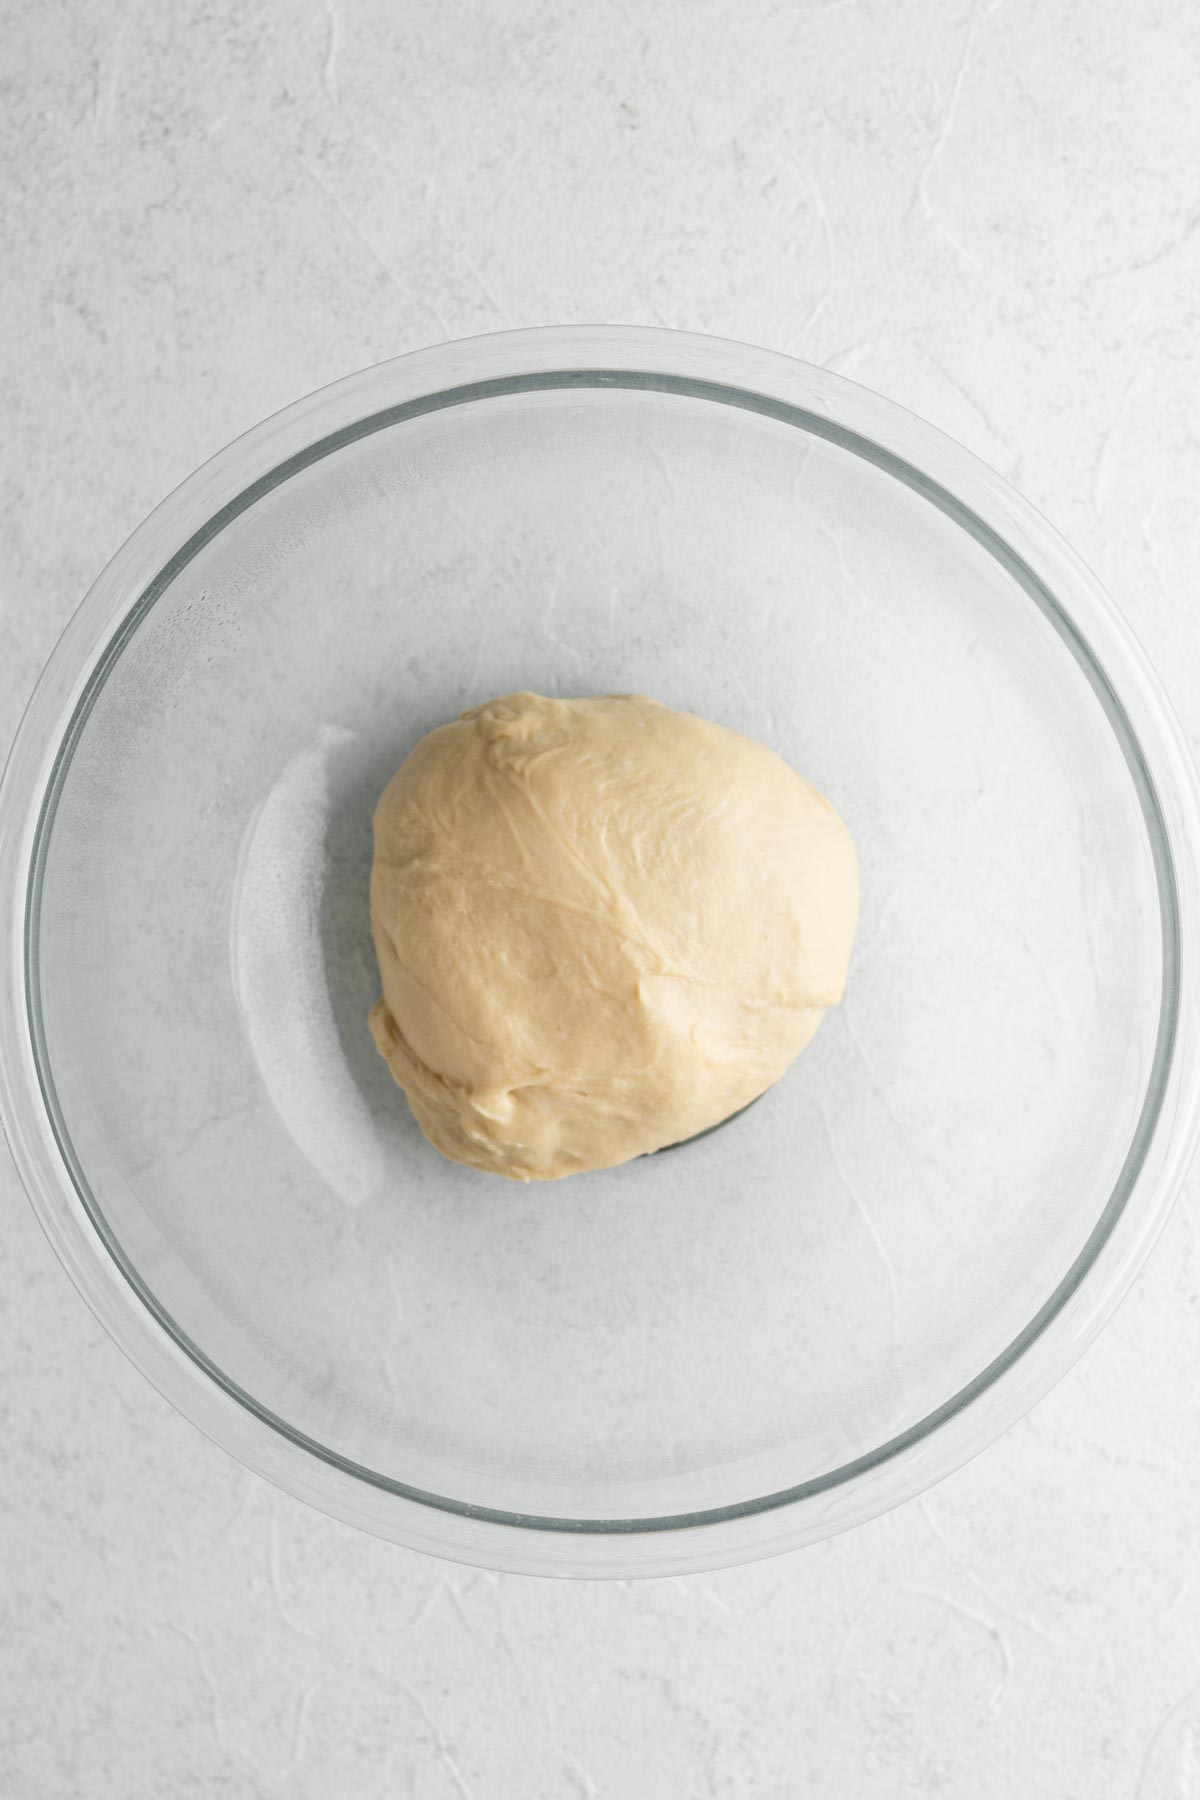
Step 4: Knead the dough gently with your hands on a lightly floured surface for 1 minute before gently forming the dough into a ball. Transfer the ball of dough to a lightly greased bowl and cover the bowl with a clean dish towel.
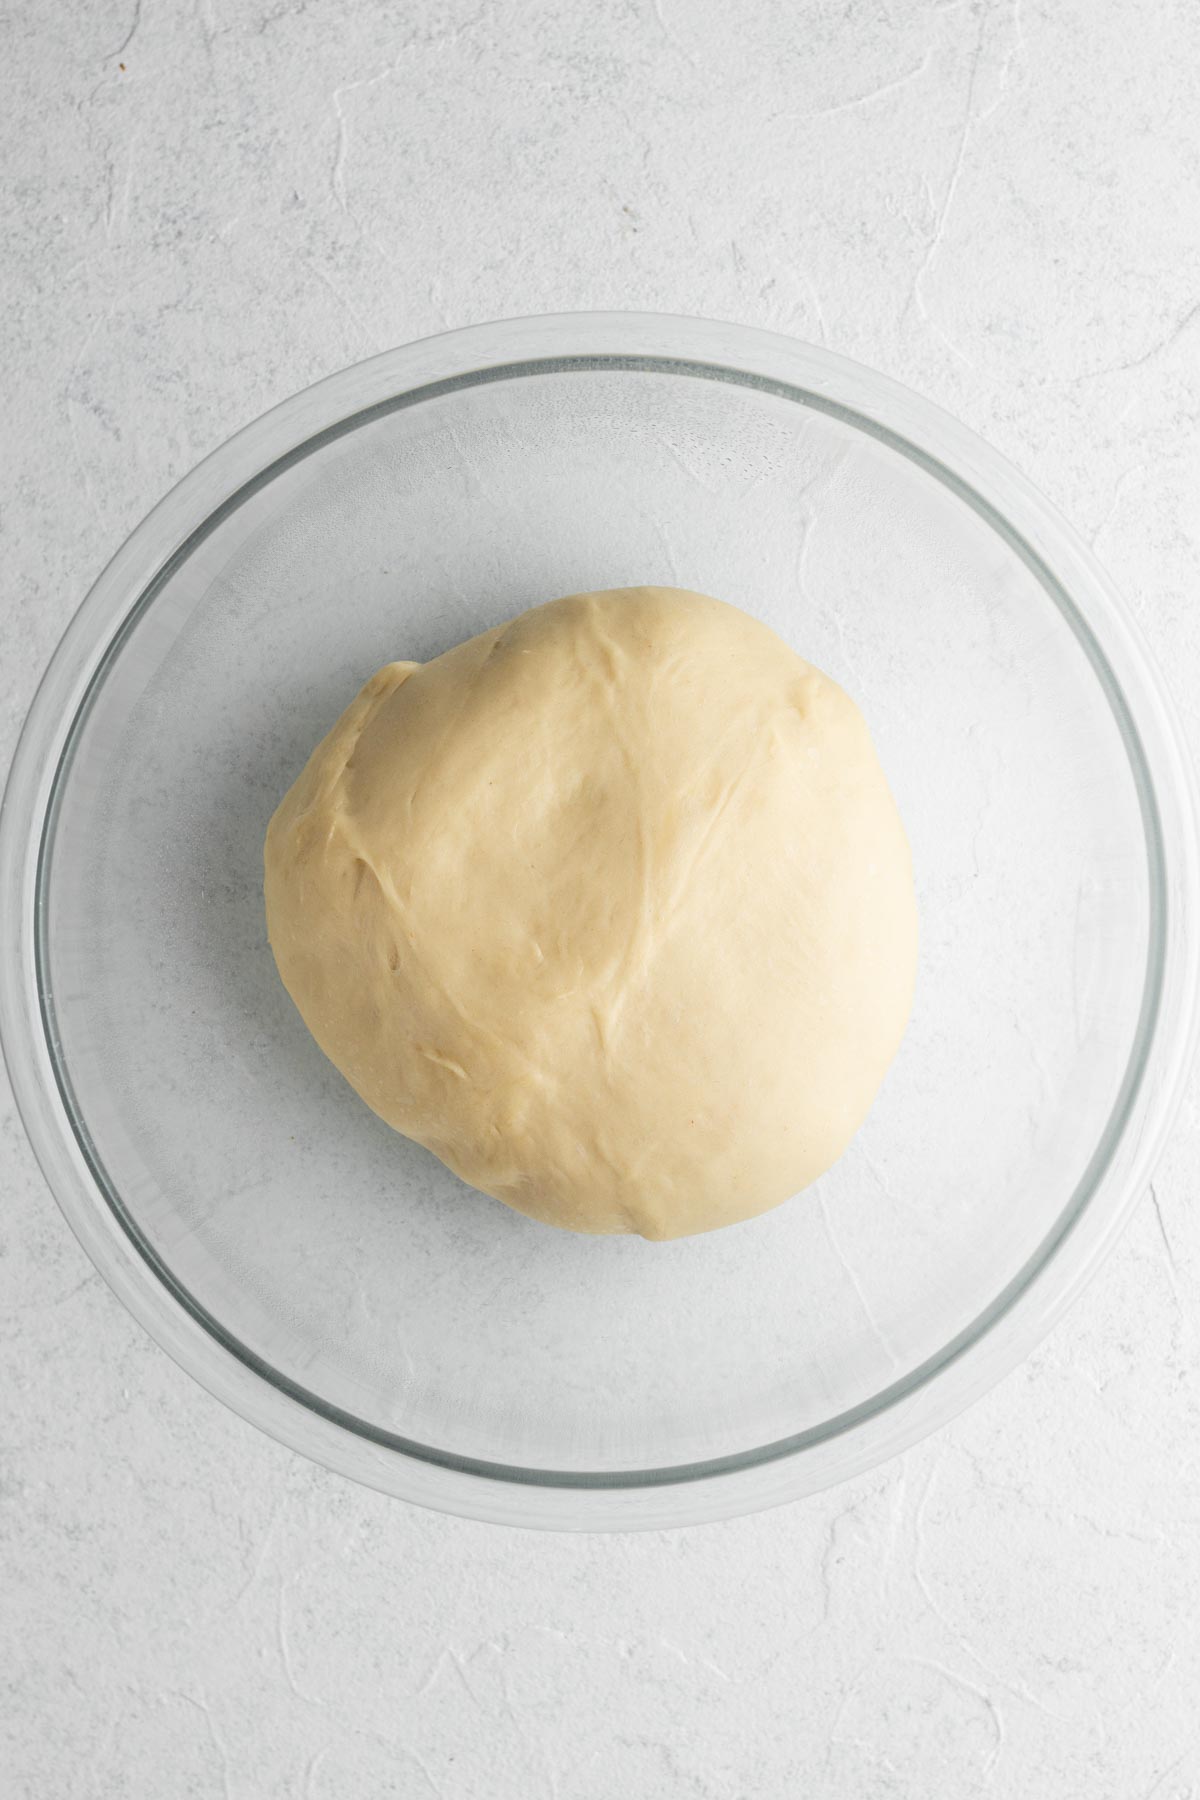
Step 5: Place the dough in a warm spot and let it rise until doubled in size, about 45 to 60 minutes. Cover the bowl loosely with plastic wrap and refrigerate the dough for at least 1 hour or up to overnight.
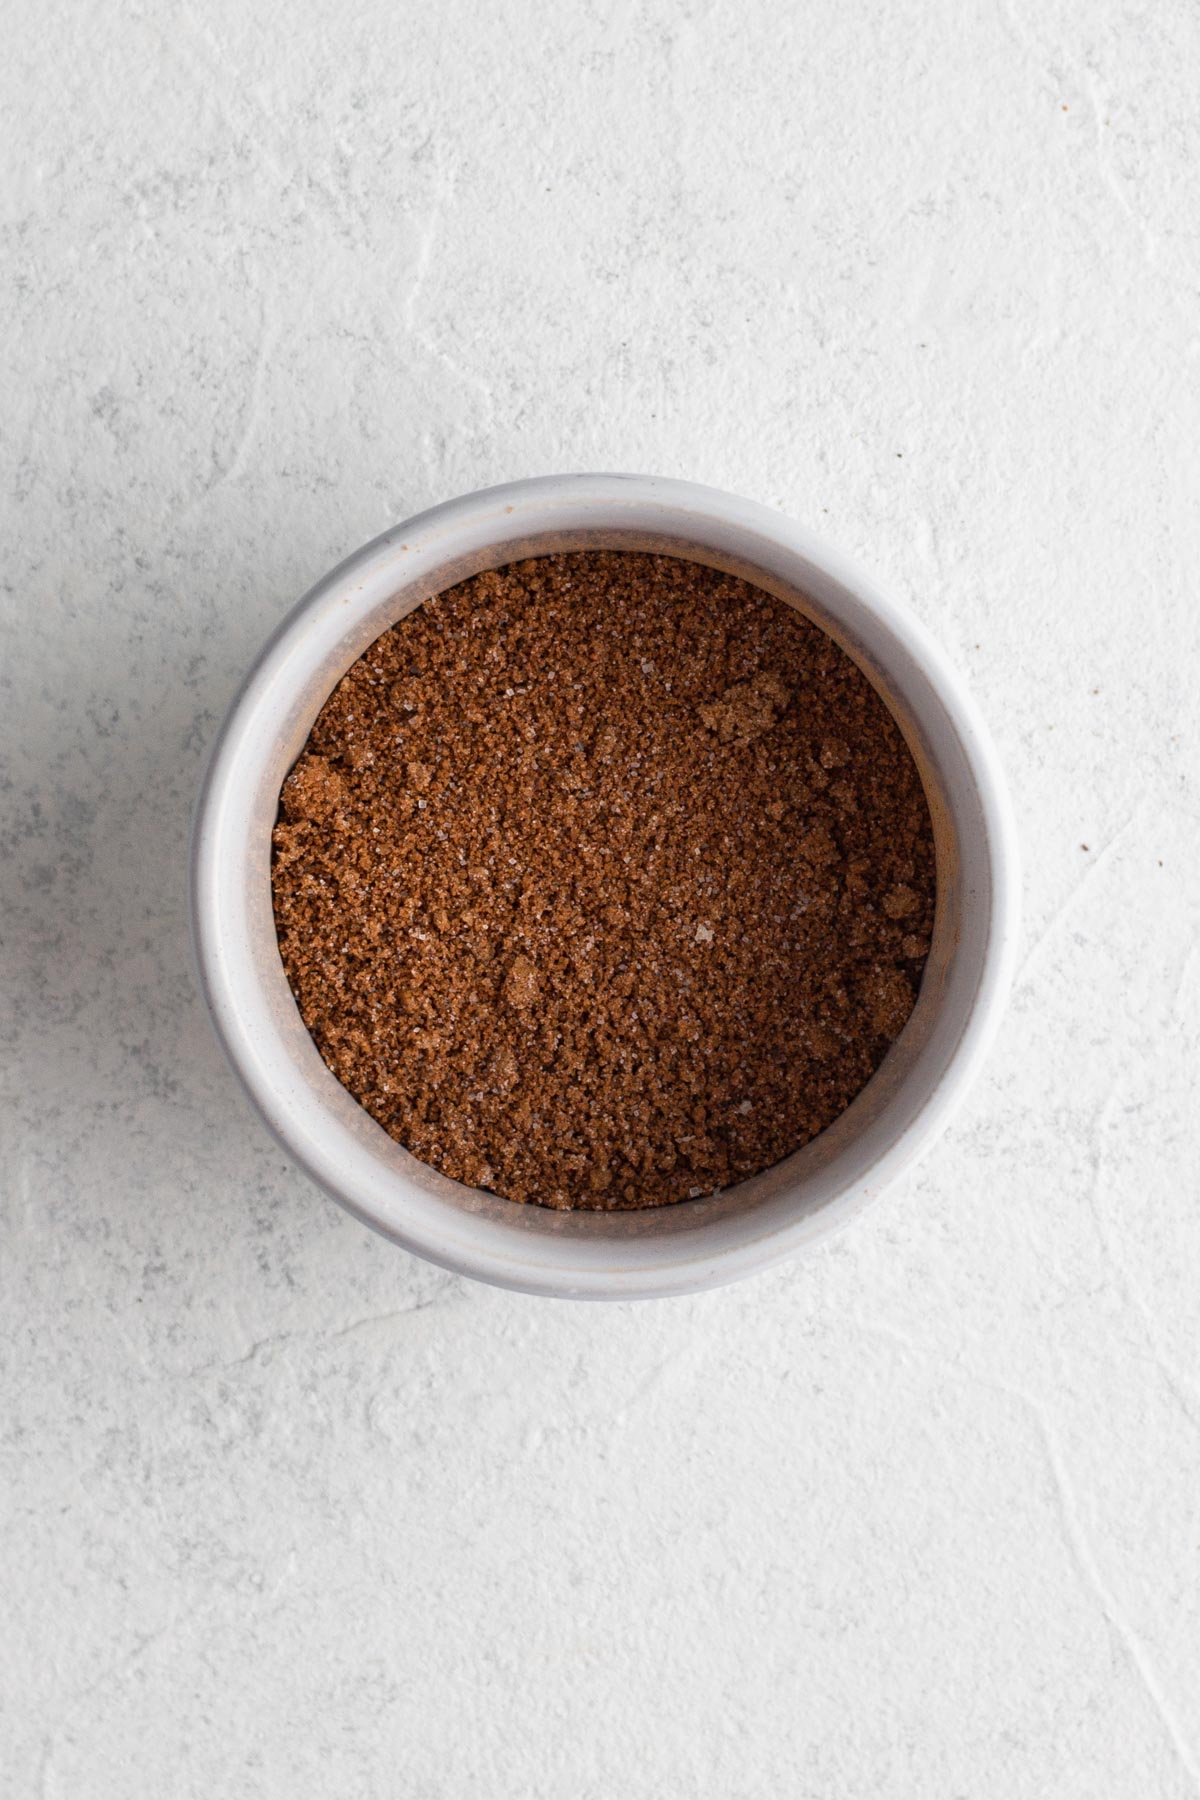
Step 6: Prep the cinnamon filling. In a small bowl, whisk together the sugars and spices. Set aside.

Step 7: Shape the cinnamon rolls. Place the dough onto a lightly floured surface and, using a rolling pin, roll the dough into a rectangle that's 9 inches x 12 inches.
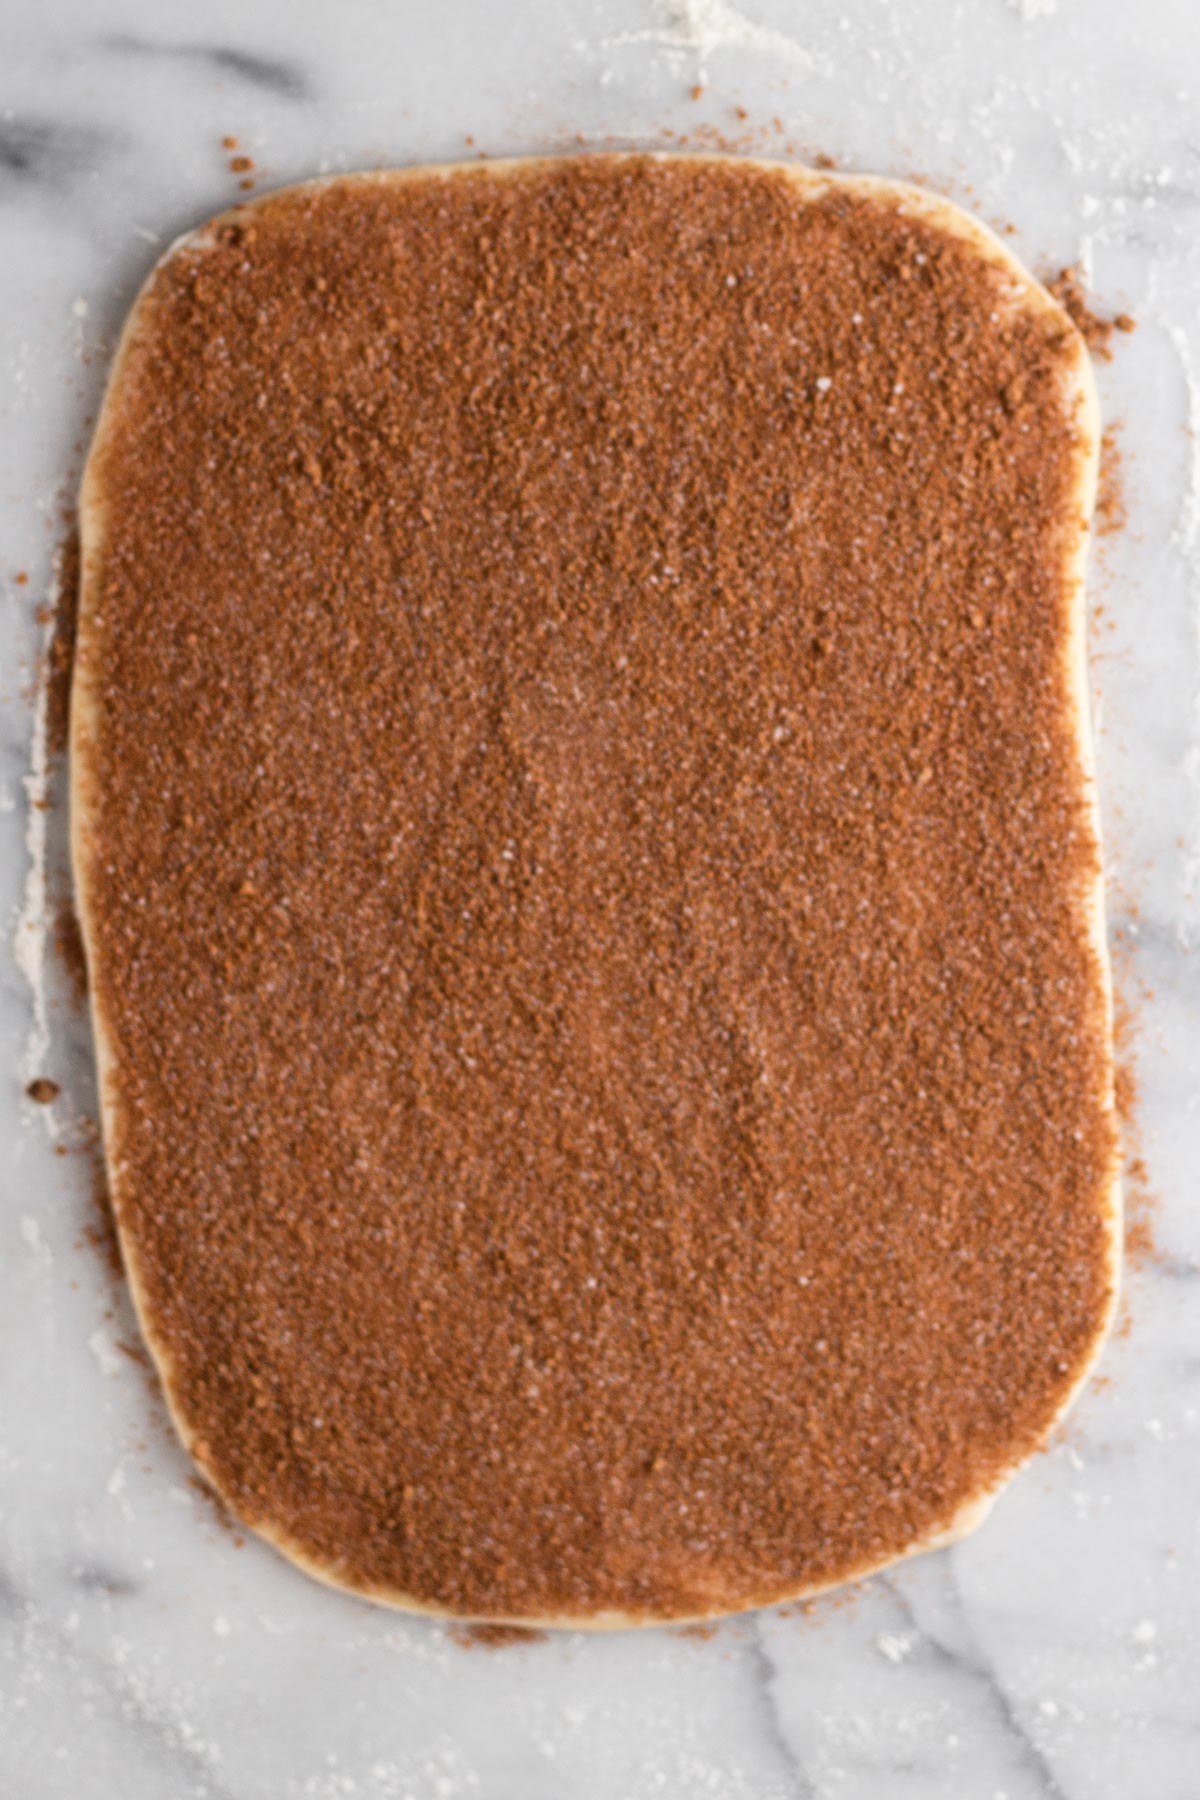
Step 8: Use a small spatula to spread the softened butter over the rectangle of dough. Sprinkle the cinnamon sugar mixture evenly over the butter, covering the dough all the way to the edges.
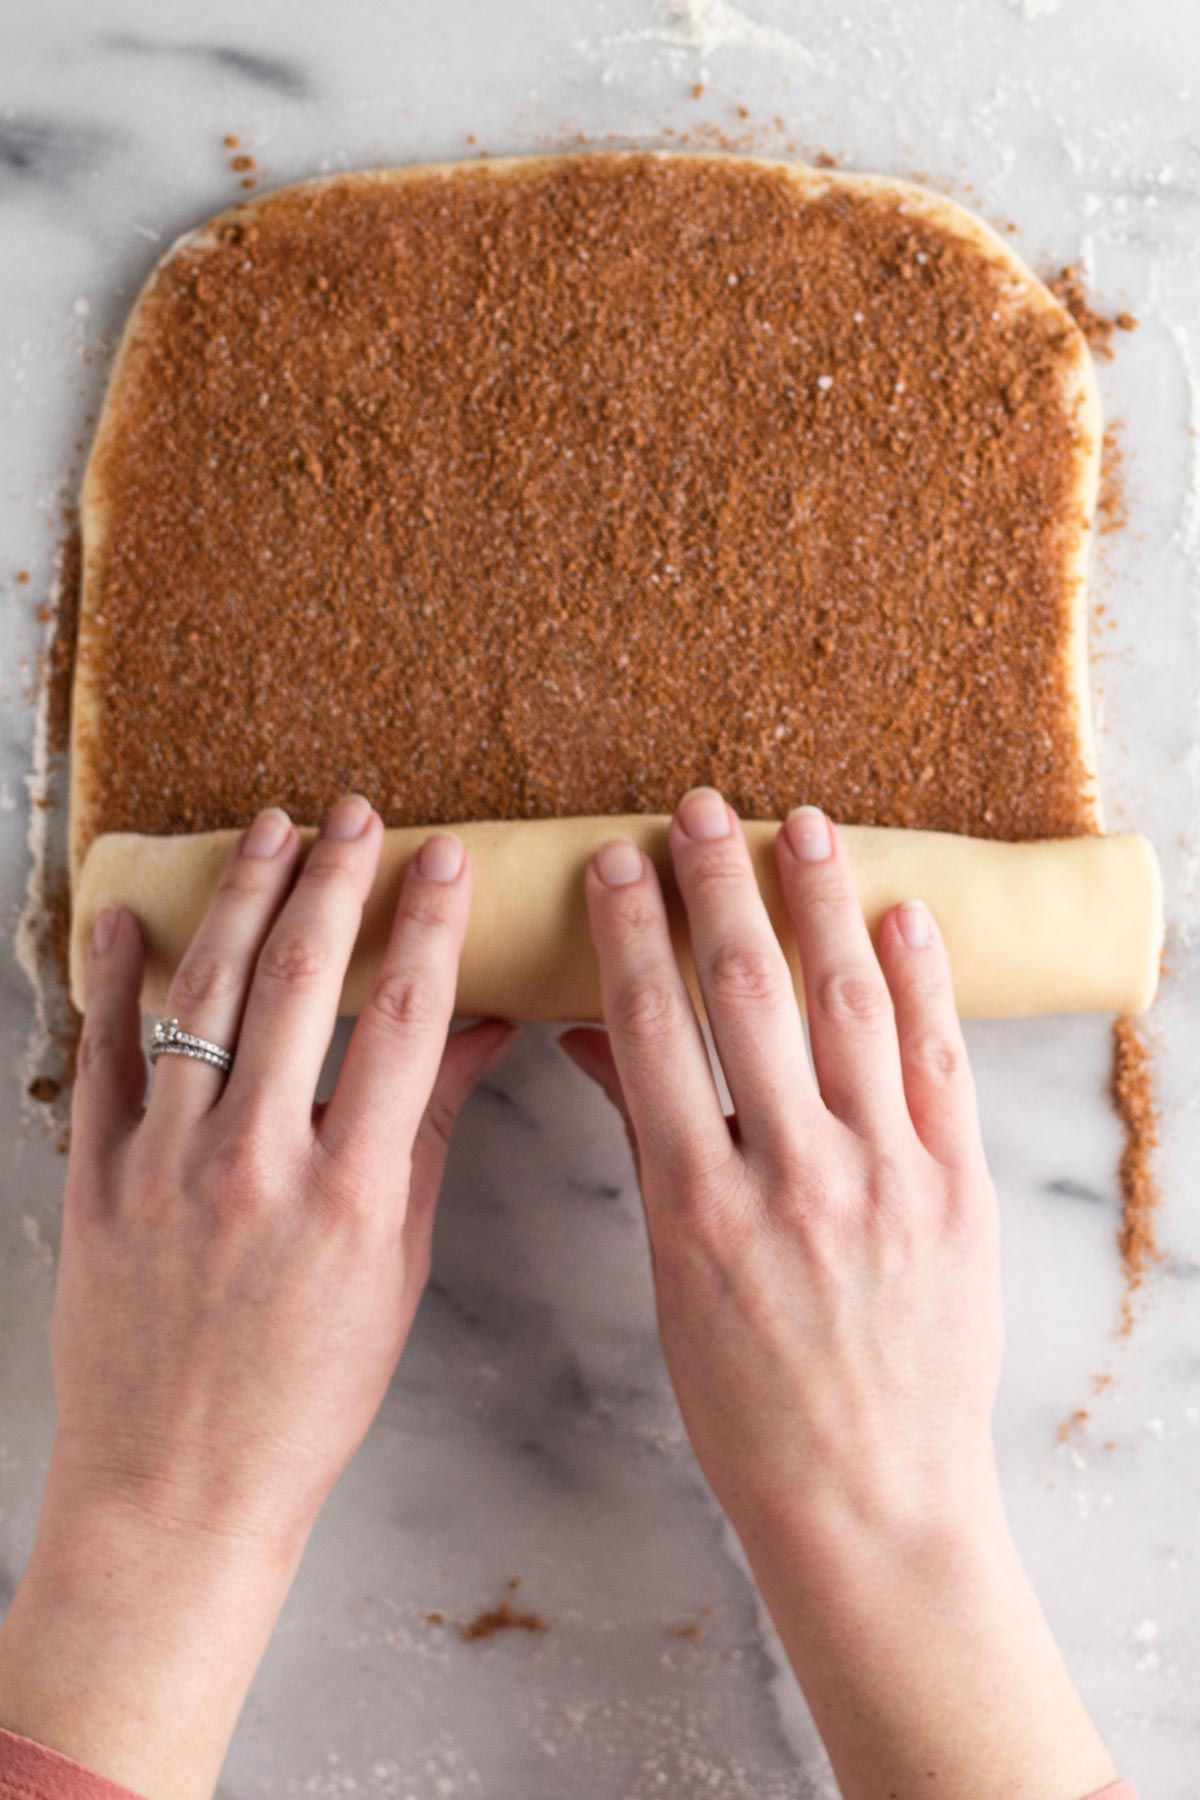
Step 9: Beginning at the short (9 inch) end of the rectangle of dough, roll the dough tightly to form a log that's 9 inches long.
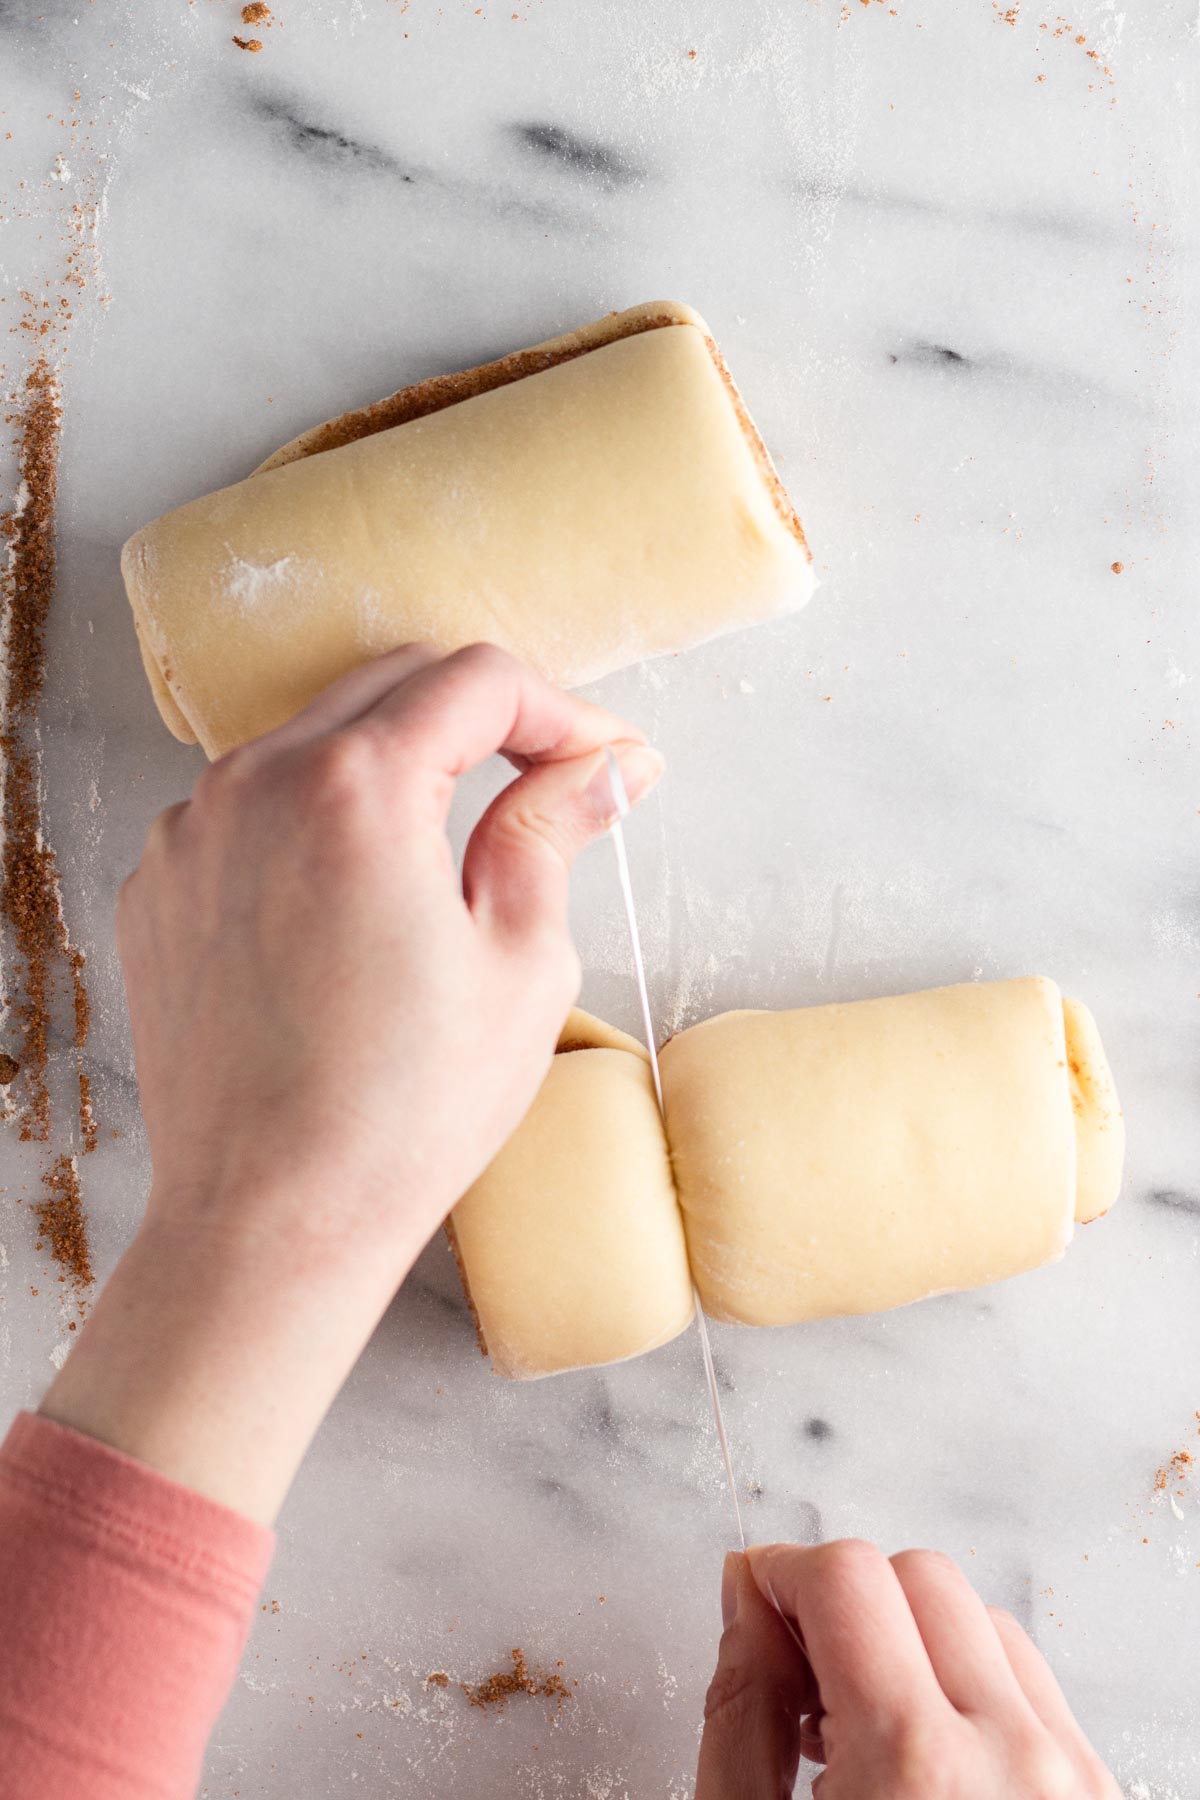
Step 10: Slice the log into 6 equal pieces. (See Best Way to Cut Cinnamon Rolls below for more information.)
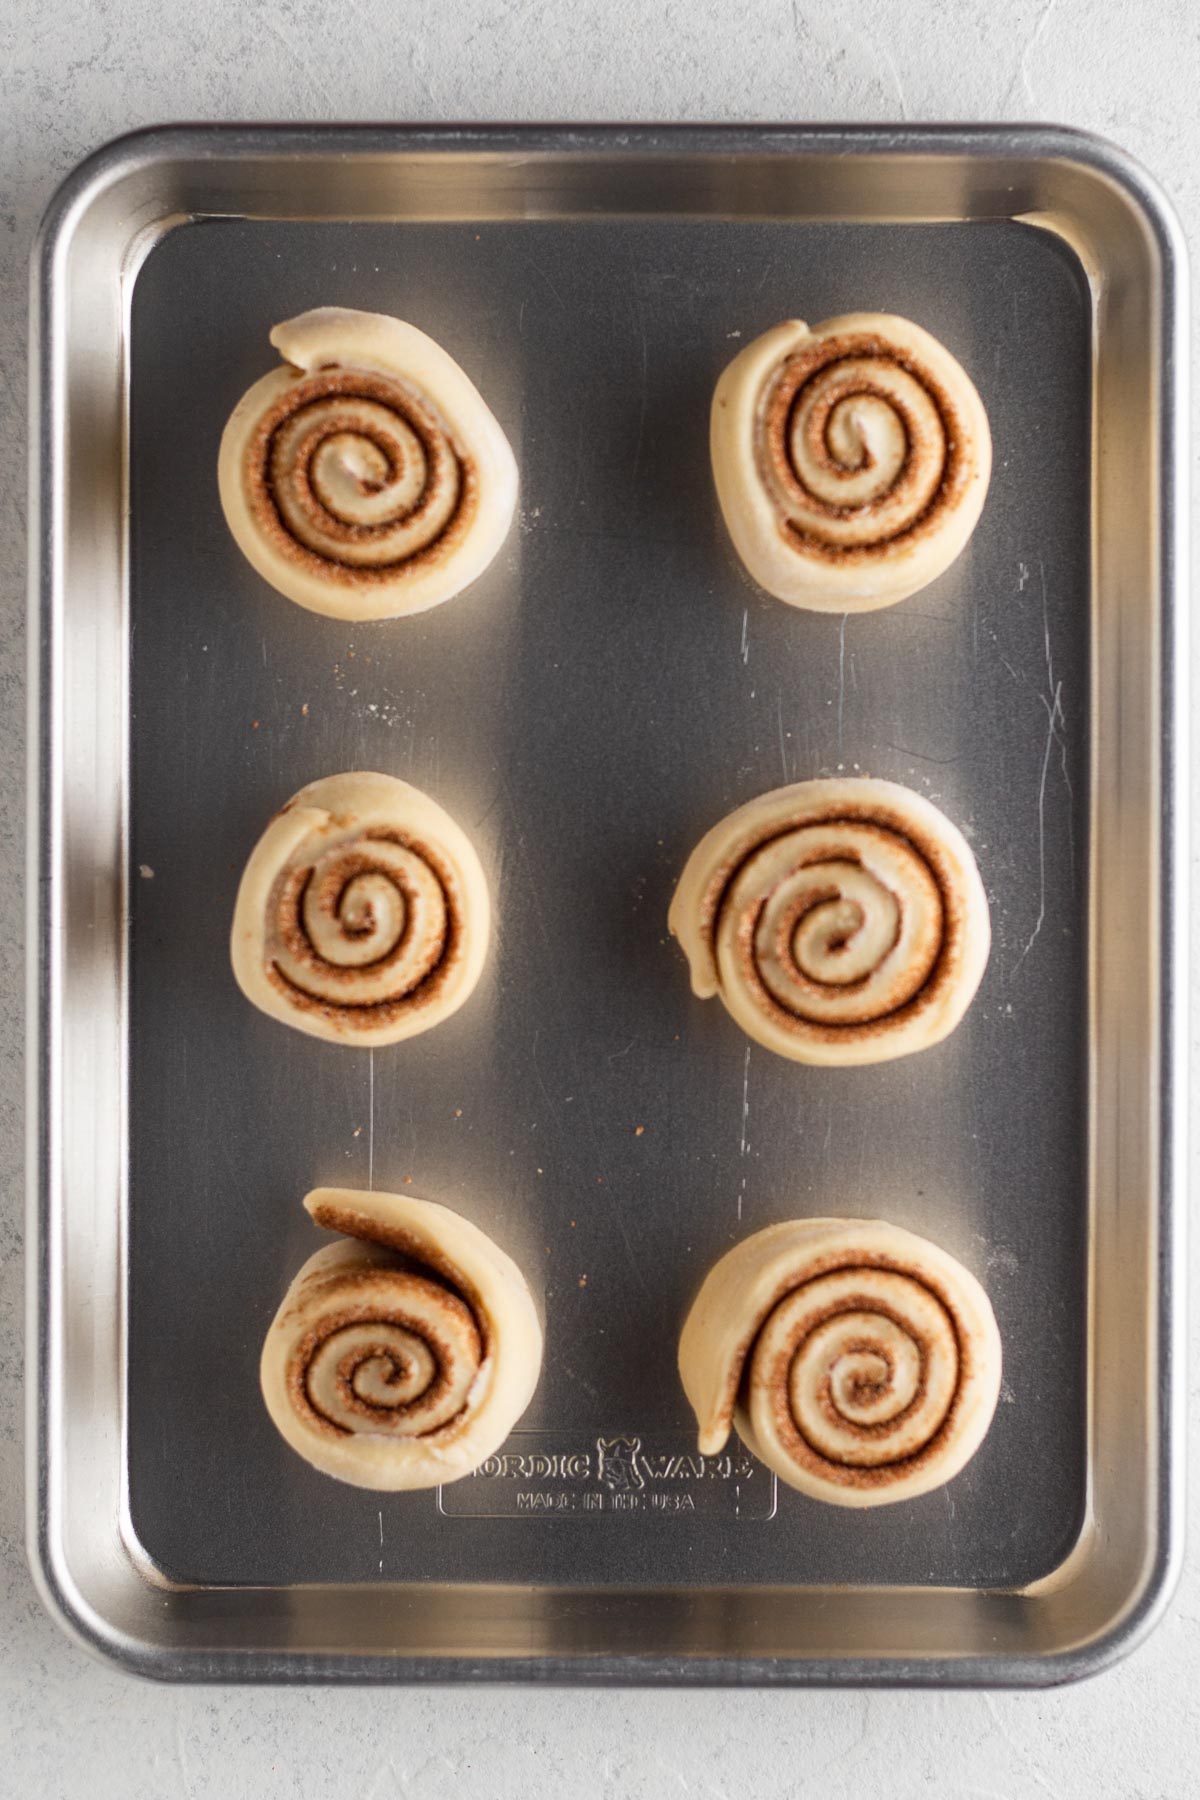
Step 11: Place the rolls cut side up onto your baking sheet or pan.
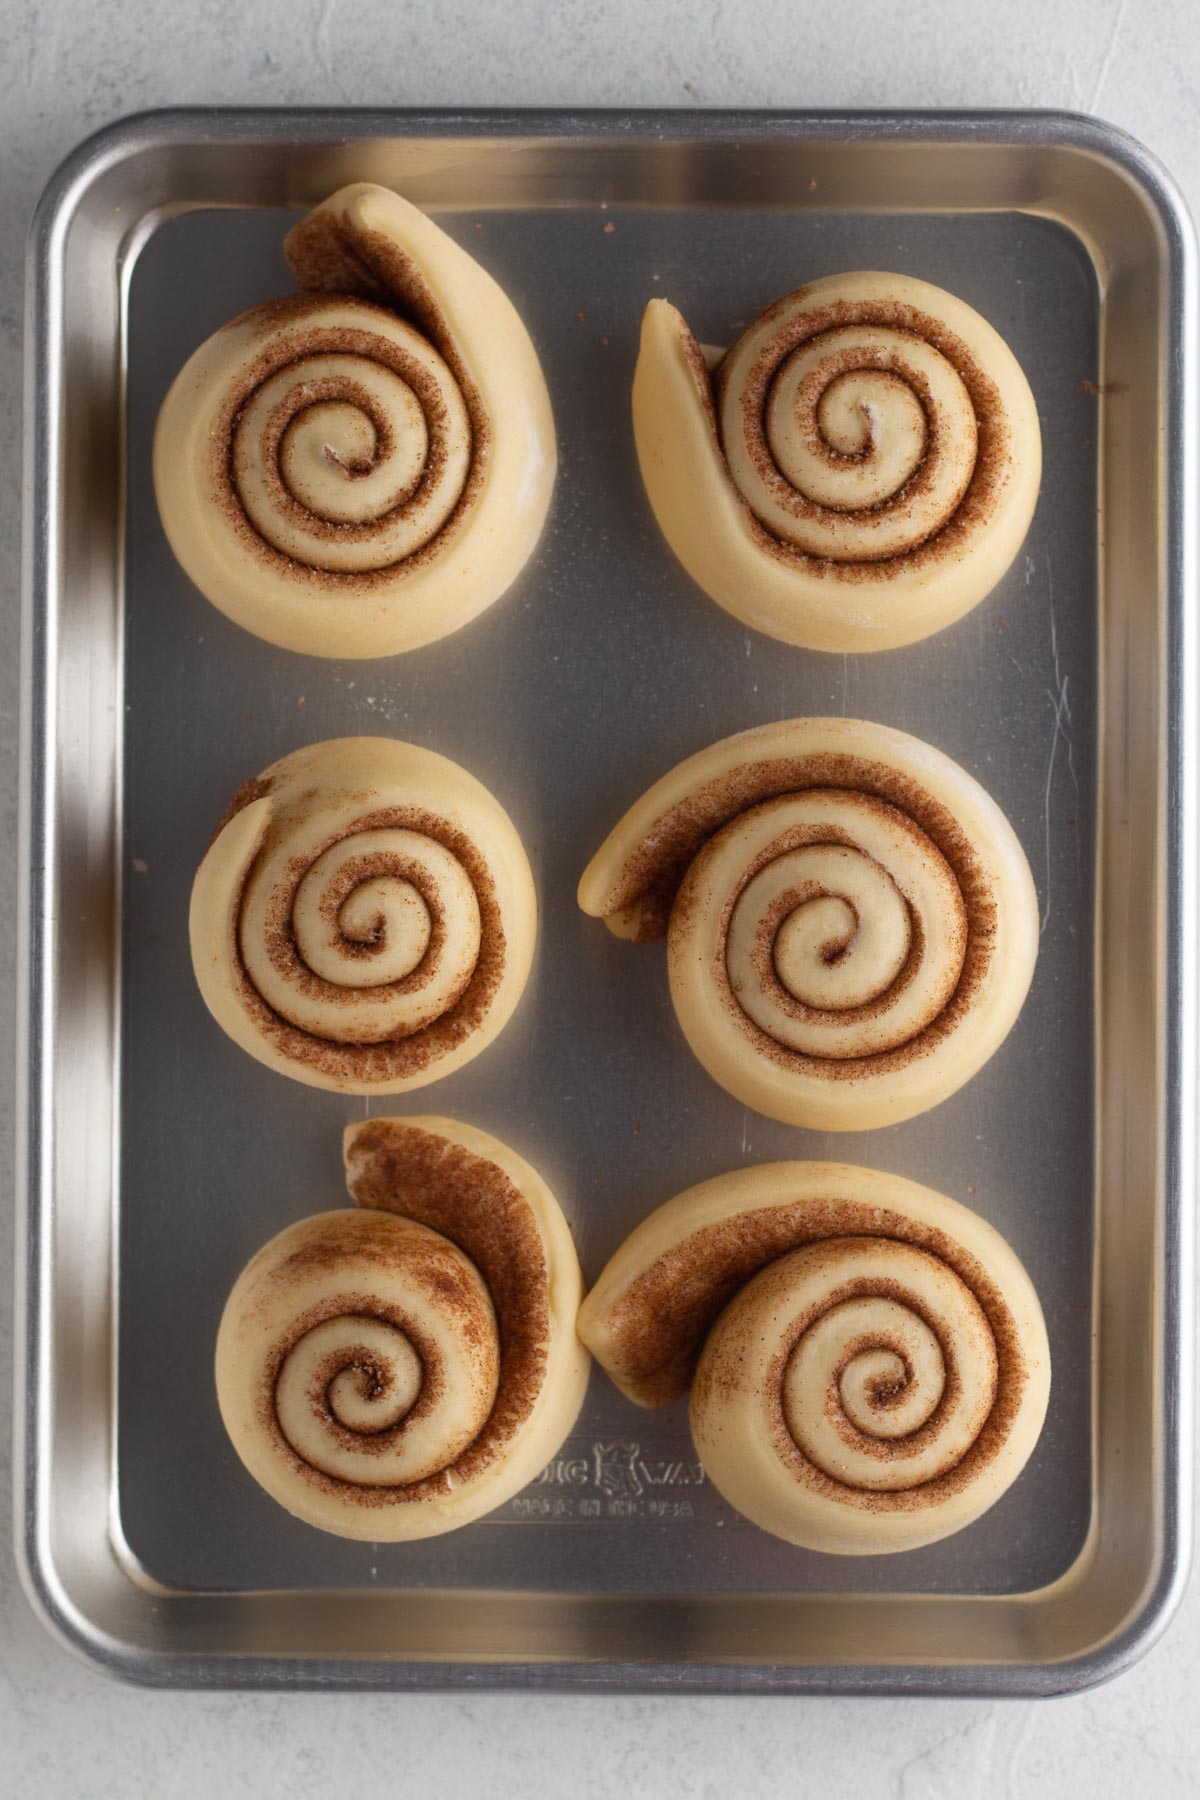
Step 12: Cover the pan with a clean dish towel and place it in a warm spot until the rolls have doubled in size, about 20 to 30 minutes.
Step 13: While the rolls rise, position the oven rack in the bottom third of the oven and preheat the oven to 375ºF.
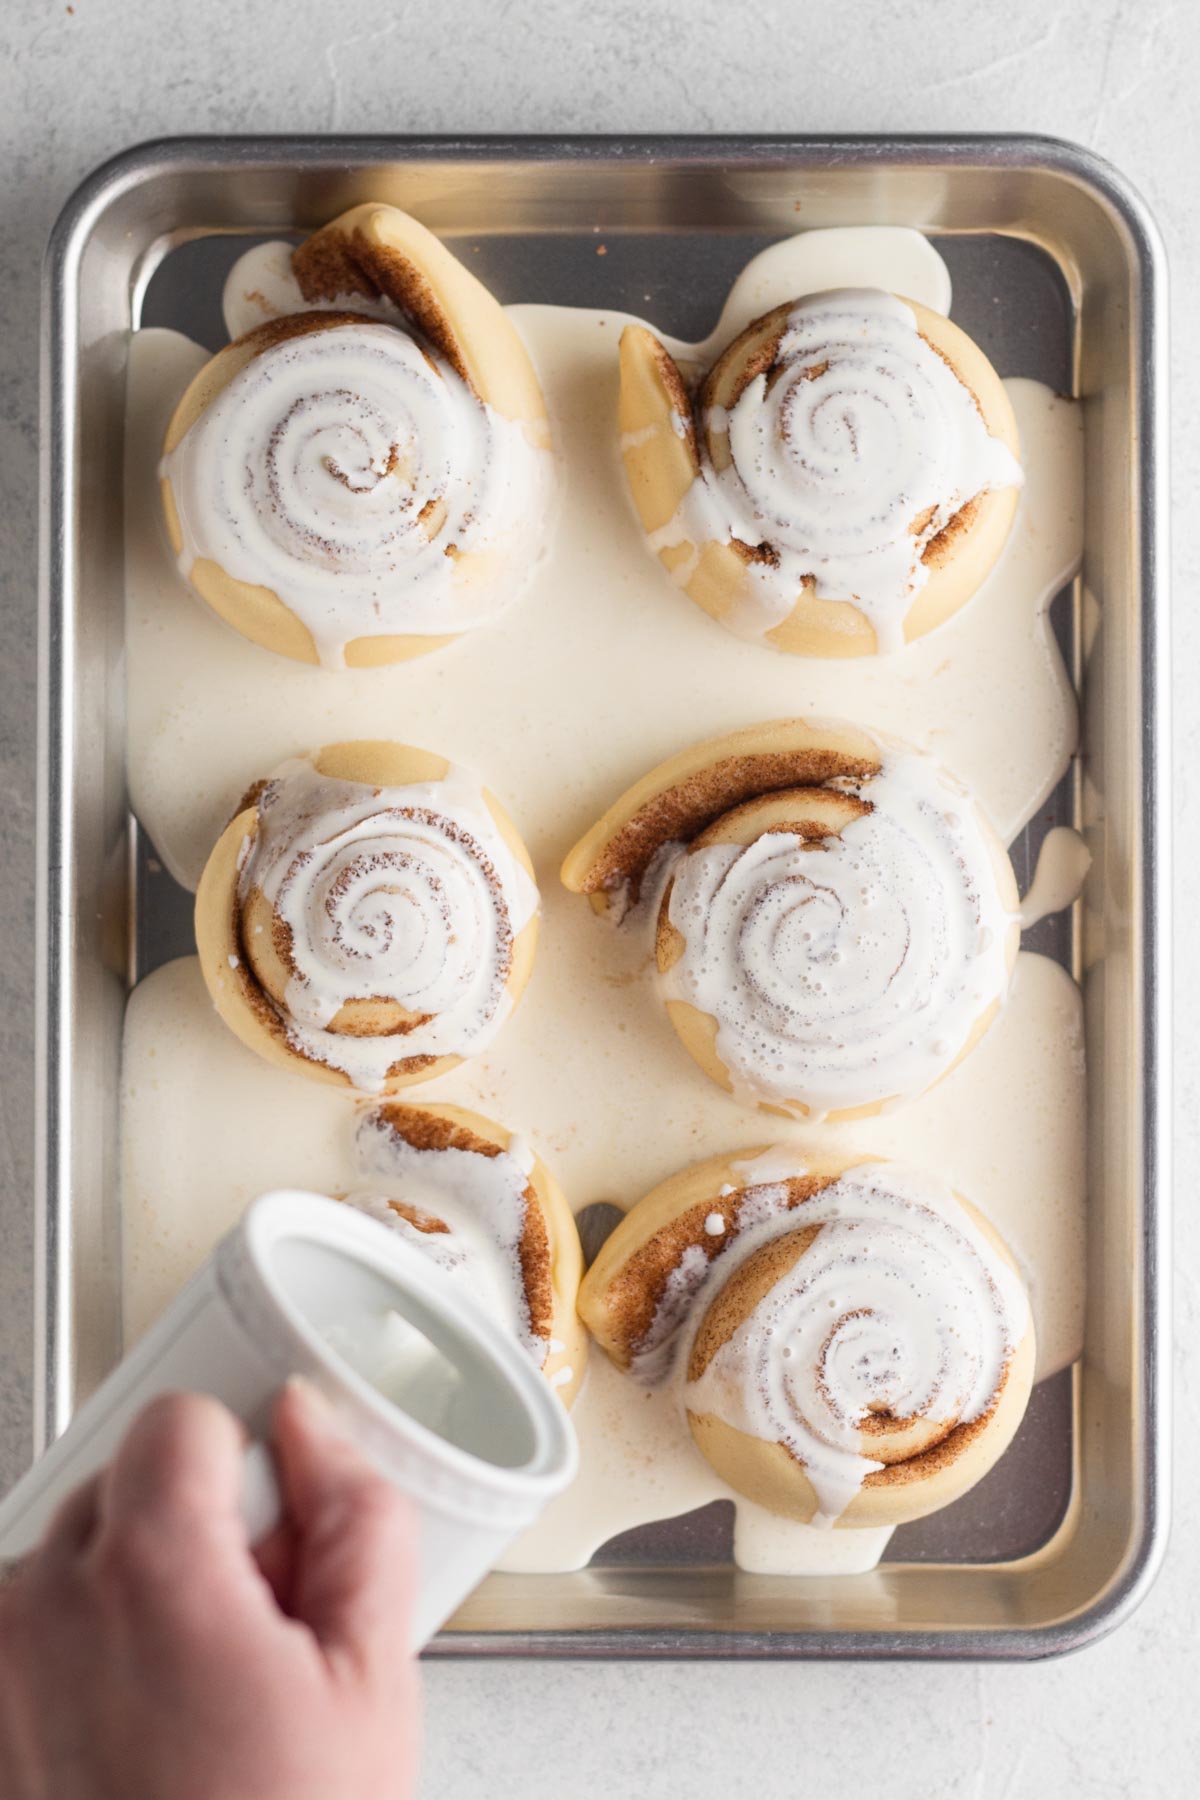
Step 14: Once the rolls have risen, pour heavy cream over them immediately before baking.
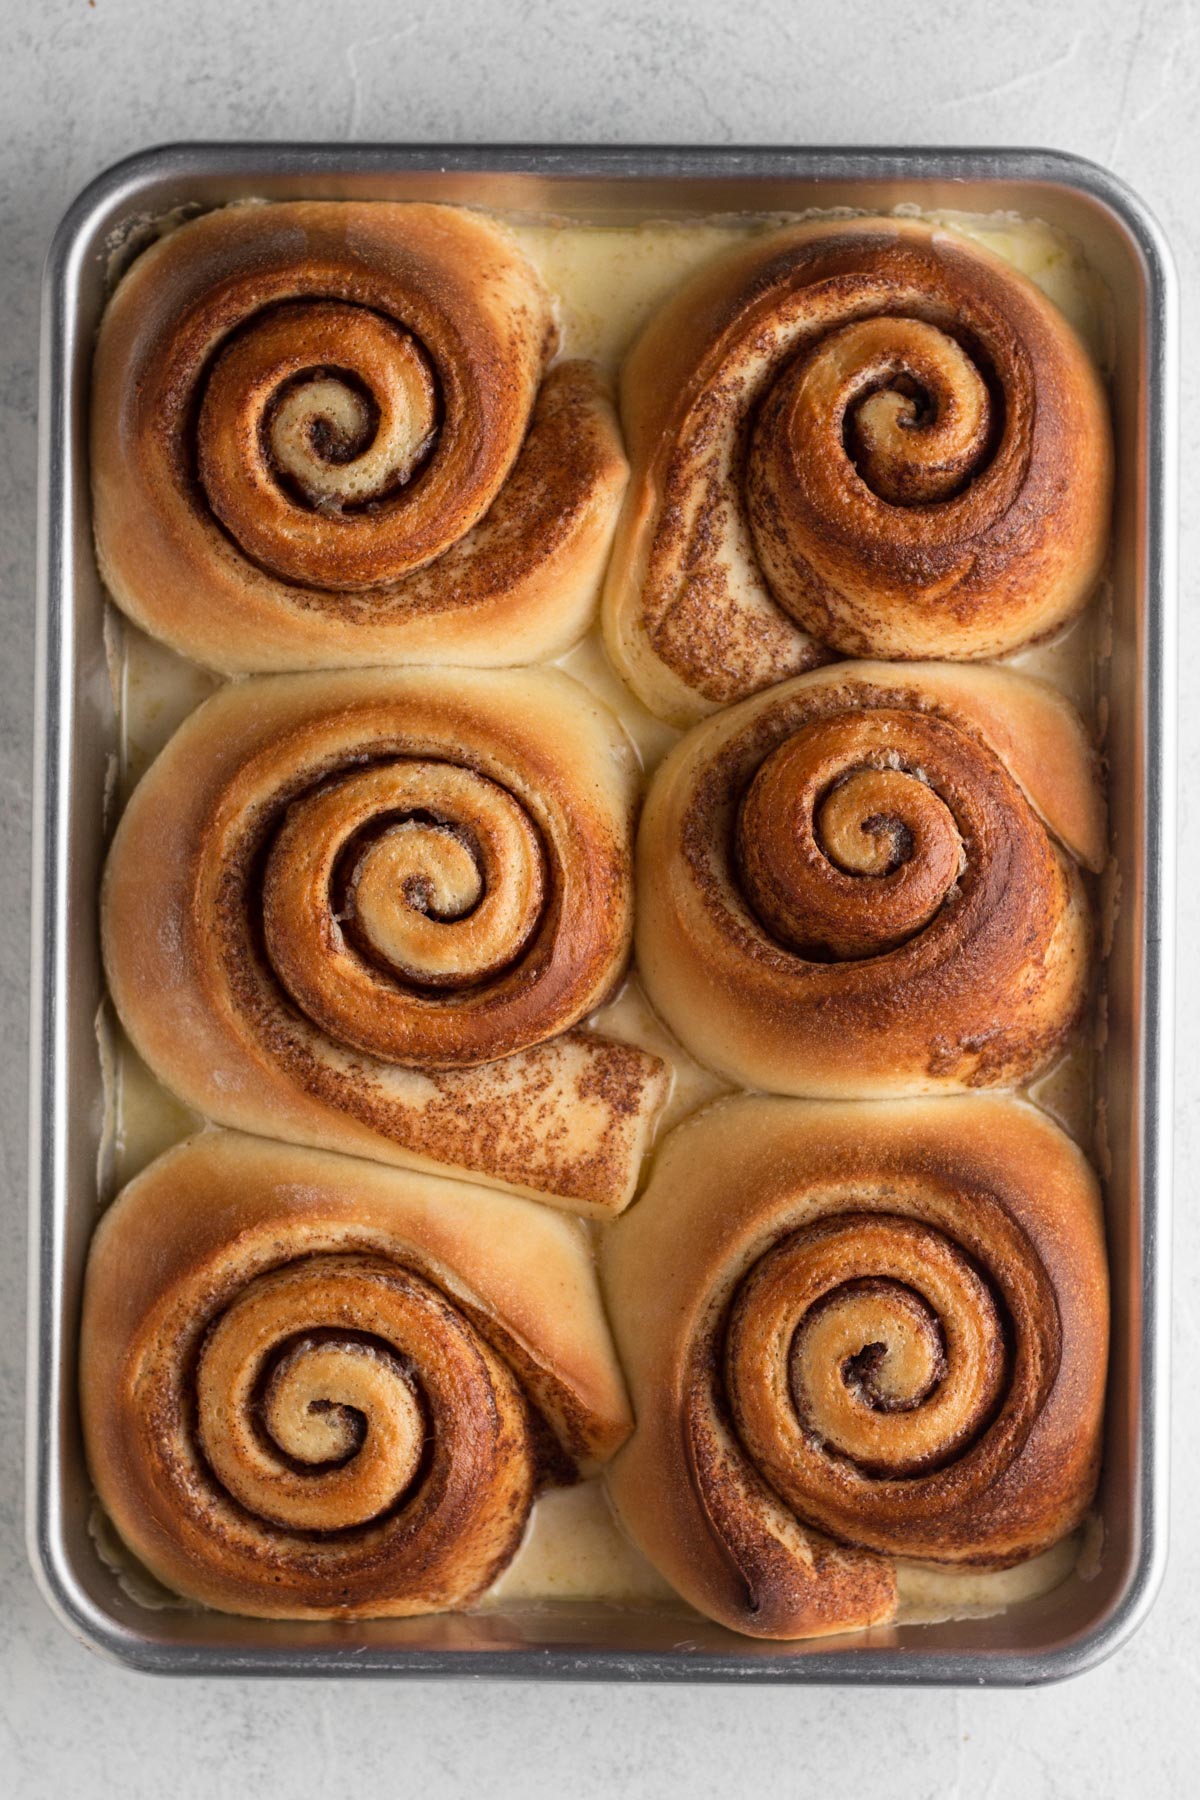
Step 15: Bake the rolls for 15-20 minutes, or until they're golden brown.
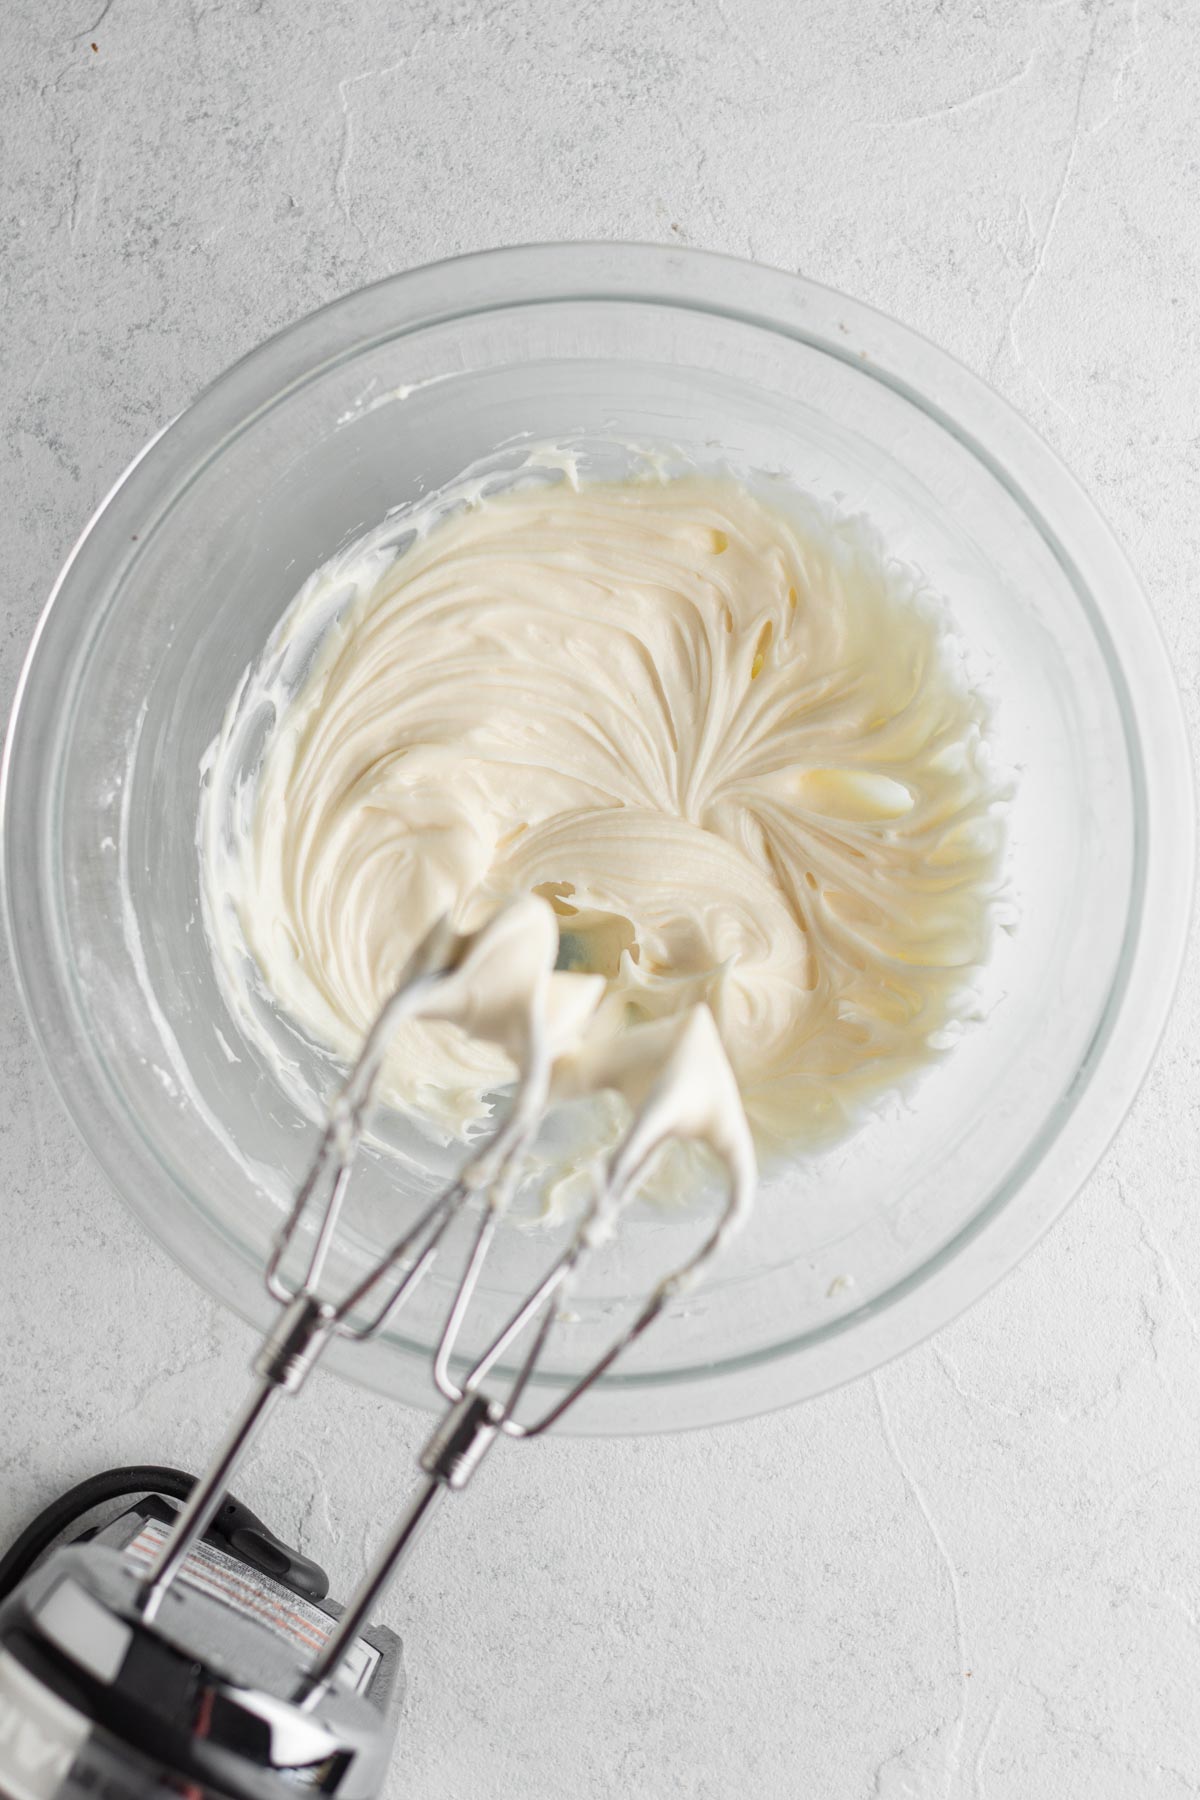
Step 16: Make the cream cheese icing. Beat the cream cheese and butter until smooth and combined. Add the salt and vanilla and beat until combined. Add the confectioners' sugar slowly and continue to beat until blended and smooth.
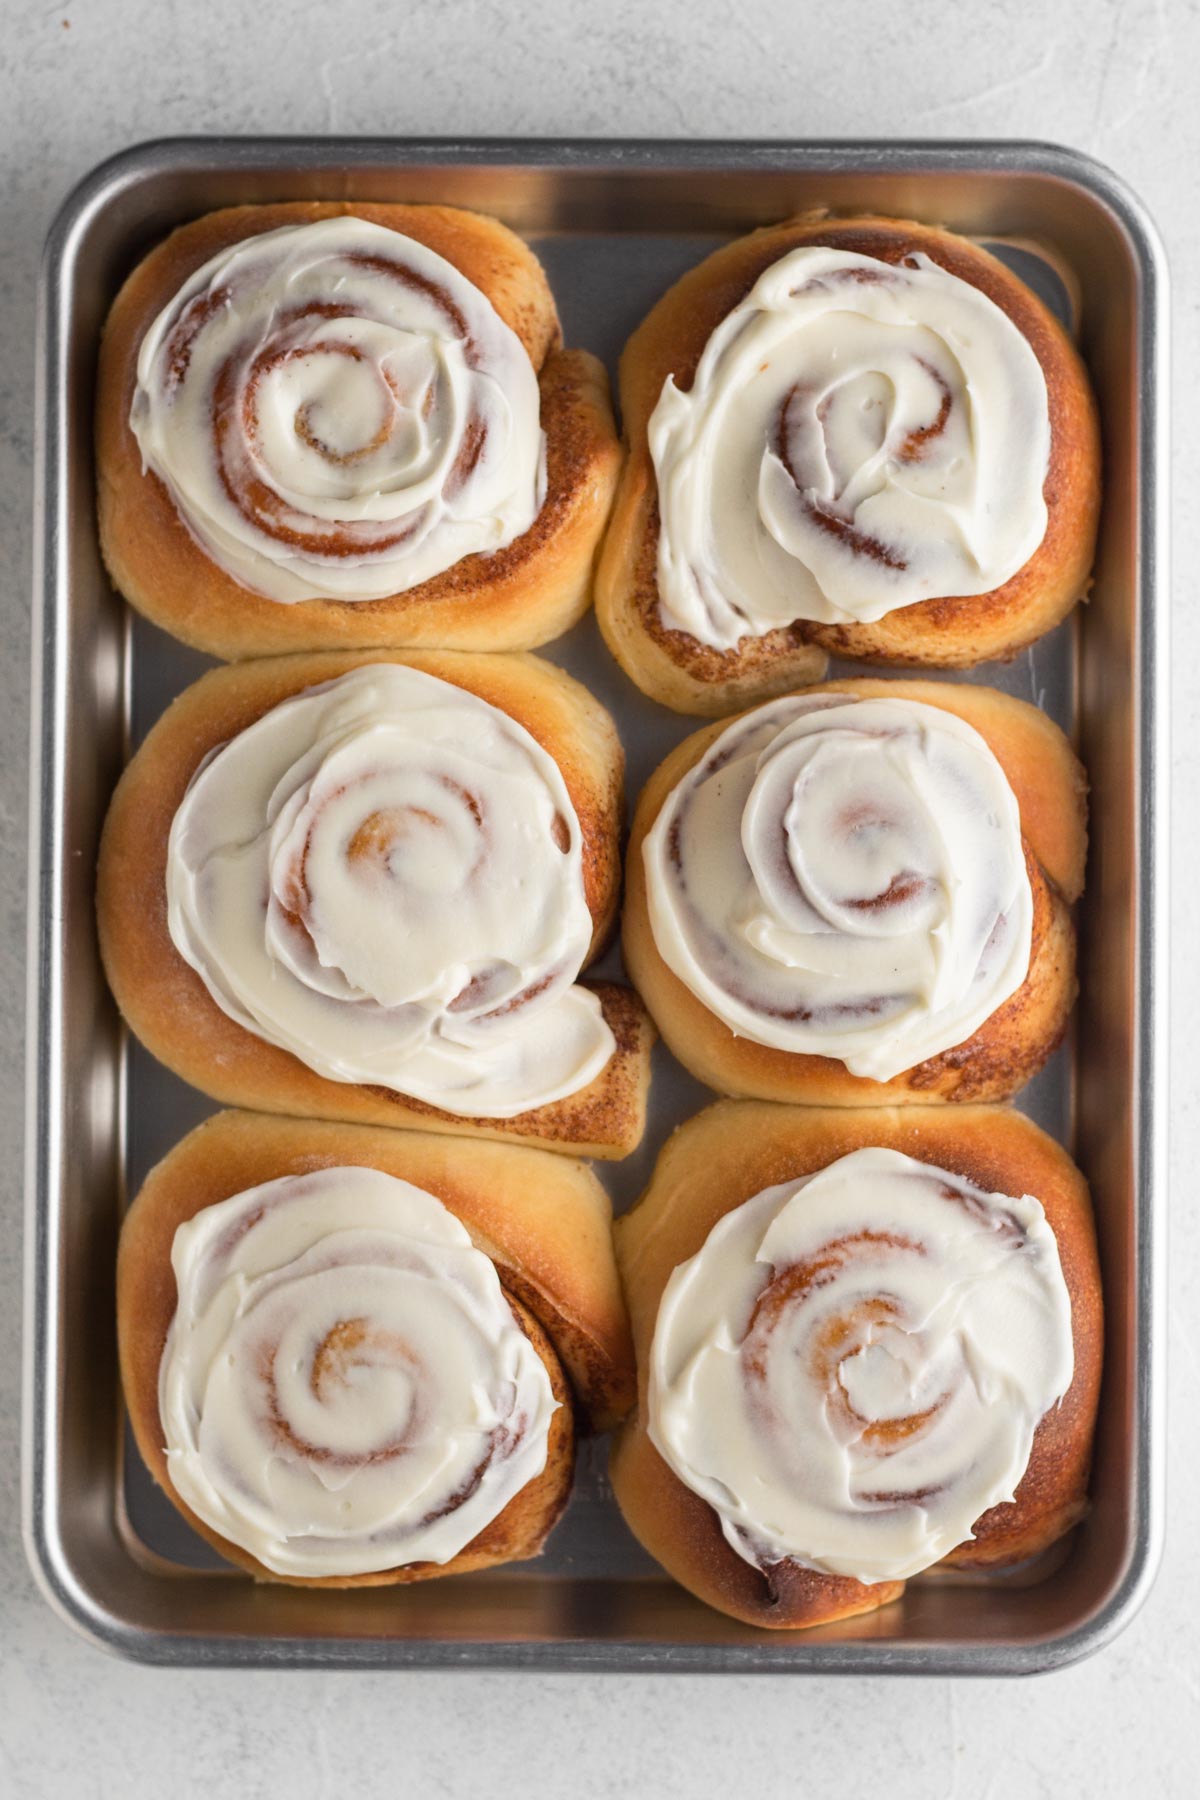
Step 17: Spread the icing over the still warm cinnamon rolls and enjoy!
Best Way to Cut Cinnamon Rolls
If you've made homemade cinnamon rolls before, then you already know that it's easy to squash the rolled up log of dough when cutting it into rolls. Try these ideas instead to avoid flattening your rolls!
Option 1 - Dental Floss
This option is my personal favorite, and I've been using this trick for years since I first learned it on Instagram. Instead of using a knife, use unflavored dental floss to keep the beautiful cinnamon spirals perfectly intact while slicing them. Cut a length of floss approximately a foot long and lay it underneath the rolled up log of cinnamon roll dough where you would like to make your cut. Holding one end of the floss in each hand, bring the floss up over the log of dough, crossing the two ends over one another, and pull them taught until the floss severs the log to create one cinnamon roll. Repeat this process until you have 6 equally-sized cinnamon rolls.
Option 2 - Pizza Cutter
Another option is to cut each cinnamon roll before rolling them up. After spreading the filling over the dough, use a pizza cutter to cut the dough into strips. Then roll up each strip and proceed with the rest of the recipe.
Option 3 - Serrated Knife
If you absolutely must cut your cinnamon rolls with a knife, use a serrated knife in a gently sawing motion to cut the log of rolled up dough without squishing it.
Allison's Top Tips
Be sure to read the recipe all the way through before you begin and allow plenty of time for the dough to rise and chill before the rolls are baked. It's always a good idea to read the recipe through and familiarize yourself before you begin mixing ingredients, but it's especially important with a recipe, like this one, that has several rise and chill times.
Ingredient temperatures are important here, so don't ignore the temperature notes in the ingredient section of the recipe. This recipe calls for several ingredients to be warm or room temperature. Here's why:
- Milk (warm) - The first step in making the cinnamon roll dough is to warm the milk, which is necessary for activating the yeast, which makes the dough rise.
- Egg (room temperature) - A room temperature egg will blend more efficiently into the cinnamon roll dough.
- Cream cheese and butter (room temperature) - Beginning with room temp cream cheese and butter will allow you to blend the cream cheese icing to a much smoother consistency.
Need a warm spot for the dough to rise? Stick it in the oven with just the oven light on! The warmth from the oven light warms the inside of the oven just enough to create a perfect dough proofing box. Just be sure not to accidentally turn on the oven while the dough is proofing inside!
Be careful not to roll the dough too tightly or place them too close together in the pan, since this could cause the rolls not to rise properly and the centers to pop up when the rolls bake. Roll the dough tightly but gently and leave 1 to 2 inches between the rolls when placing them in the pan to rise before baking.
Recipe Variation
Orange Spice Rolls - An orange and spice version of these rolls is truly delicious, and it's especially perfect for the holiday season! Simply add the zest of one orange to the dough, and add a little bit of ground cardamom plus some extra ground cloves to the filling.
Recipe FAQs
Besides using a light and fluffy dough like brioche, the secret to great cinnamon rolls is to pour a bit of heavy cream over the rolls just before baking. As the rolls bake, they'll absorb the cream and become ultra plush and soft.
Yes, you should chill your cinnamon roll dough! Dough that has chilled will be easier to work with. It will be easier to roll out, and it will hold its shape better, making for neater-looking cinnamon rolls. Best of all, chilling the dough means you can do much of the prep work the night before, so you don't have to wake up super early to begin baking a batch.
It's best to fill cinnamon rolls with softened butter rather than melted. Why? Softened butter will stick to both the dough and the cinnamon sugar filling, helping to hold the filling in place when rolling and baking the rolls. Conversely, melted butter is likely to run off of the dough when you're rolling and slicing the rolls, taking the cinnamon sugar filling with it.
Storage Instructions
Cinnamon rolls are best when they're fresh from the oven, which is just one more reason small batch cinnamon rolls are so great! But if you need to store leftovers, here's the best way to do it.
Room Temperature: Any cinnamon rolls that have not yet been iced can be stored in an airtight container at room temperature for up to 3 days. Reheat the cinnamon rolls (see recommendation below) and cover with cream cheese icing before serving. Do not store iced cinnamon rolls at room temperature.
Refrigerator: Leftover cinnamon rolls that have already been iced should be stored in the fridge in an airtight container for up to 3 days. Reheat the cinnamon rolls (see recommendation below) before serving.
How to Reheat: The best way to reheat cinnamon rolls (either iced or not) is in the microwave to preserve the softness of dough. Heat the roll(s) on a plate in the microwave for about 20 seconds on full power. The roll should be warm and soft and the icing slightly melty.
Check out this article for absolutely everything you need to know about storing cinnamon rolls so they stay soft and moist.
More Indulgent Breakfast Recipes

Love this recipe? Please leave a star rating and review on the recipe below! And don't forget to subscribe to Always Eat Dessert for even more easy dessert recipes and helpful baking tips.
Recipe
Brioche Cinnamon Rolls
Special Equipment
- Stand mixer with dough hook attachment
- Unflavored dental floss (or pizza cutter or serrated knife)
- Stand mixer with paddle attachment or electric hand mixer
Ingredients
Brioche Dough:
- ½ cup (122 grams) whole milk
- 1 ¼ teaspoons (15 grams) instant yeast
- 1 large egg, room temperature
- 3 Tablespoons (42 grams) unsalted butter, melted and slightly cooled
- 2 cups (250 grams) all-purpose flour
- ¼ cup (50 grams) granulated sugar
- ½ teaspoon (3 grams) fine sea salt
- ½ cup (119 grams) heavy cream
Cinnamon Filling:
- 3 Tablespoons (36 grams) brown sugar
- 1 Tablespoon (12 grams) granulated sugar
- 1 ½ teaspoons (3 grams) ground cinnamon
- ⅛ teaspoon (0.25 grams) ground nutmeg (optional)
- pinch of ground cloves (optional)
- 2 Tablespoons (28 grams) unsalted butter, softened but not melted
Cream Cheese Icing:
- 4 ounces (113.4 grams) cream cheese, room temperature
- 2 Tablespoons (28 grams) unsalted butter, room temperature
- pinch of salt
- ½ teaspoon (2 grams) vanilla extract
- 1 cup (120 grams) confectioners' sugar
Instructions
Make the brioche dough.
- Warm the milk to between 110ºF and 115ºF either in the microwave or on the stove. Use a thermometer to check the temperature of the milk. It should be warm but not hot to the touch. Pour the warmed milk into the bowl of a stand mixer (or a large mixing bowl) and add the yeast.
- Add the egg, melted butter, flour, sugar, and salt and mix until the ingredients are blended. Let the mixture stand for 5 minutes (to give the flour time to hydrate).
- Using the stand mixer's dough hook attachment, beat on medium speed until a sticky dough forms. Increase speed to medium-high and beat for another 5 minutes, or until the dough is soft and smooth. (NOTE: If not using a stand mixer with a hook attachment, knead the dough by hand for about 10 minutes, or until a soft and smooth dough forms.)
- Knead the dough gently with your hands on a lightly floured surface for 1 minute before gently forming the dough into a ball. Transfer the ball of dough to a lightly greased bowl and cover the bowl with a clean dish towel.
- Place the dough in a warm spot and let it rise until doubled in size, about 45 to 60 minutes.
- Cover the bowl loosely with plastic wrap and refrigerate the dough for at least 1 hour or up to overnight.
- Remove the dough from the fridge and let it sit at room temperature while you prepare the filling. Lightly grease a quarter baking sheet or a 9 inch round metal cake pan and set aside.
Prep the cinnamon filling.
- In a small bowl, whisk together the sugars and spices. Set aside.
Shape the cinnamon rolls.
- Place the dough onto a lightly floured surface and, using a rolling pin, roll the dough into a rectangle that's 9 inches x 12 inches. (TIP: Use a bench scraper to gently nudge the edges of the rolled dough to form a perfect rectangle.)
- Use a small spatula to spread the softened butter over the rectangle of dough. Sprinkle the cinnamon sugar mixture evenly over the butter, covering the dough all the way to the edges.
- Beginning at the short (9 inch) end of the rectangle of dough, roll the dough tightly to form a log that's 9 inches long.
- Slice the log into 6 equal pieces. (TIP: I like to cut cinnamon rolls using unflavored dental floss - wrap it around the log of dough, cross the two ends over each other, and pull taught to slice the dough without squashing it.)
- Place the rolls cut side up onto your baking sheet or pan.
- Cover the pan with a clean dish towel and place it in a warm spot until the rolls have doubled in size, about 20 to 30 minutes.
- While the rolls rise, position the oven rack in the bottom third of the oven and preheat the oven to 375ºF.
Bake the cinnamon rolls.
- Once the rolls have risen, pour heavy cream over them immediately before baking.
- Bake the rolls for 15-20 minutes, or until they're golden brown and a toothpick inserted into the center of a roll comes out clean with no raw dough. (NOTE: If the rolls become golden brown before they're finished baking, carefully place a sheet of aluminum foil over the rolls to keep them from over-browning as they continue to bake.) Remove the baked rolls from the oven, and allow them to cool slightly on a wire rack while you prepare the cream cheese icing.
Make the cream cheese icing.
- Add the cream cheese and butter to a medium bowl or the bowl of a stand mixer. Using an electric hand mixer or stand mixer with a paddle attachment, beat the cream cheese and butter until smooth and combined. Add the salt and vanilla and beat until combined. Add the confectioners' sugar slowly and continue to beat until blended and smooth. Scrape the sides and bottom of the bowl as needed using a rubber spatula while mixing the icing.
- Spread the icing over the still warm cinnamon rolls and enjoy!
Notes
- Room Temperature: Any cinnamon rolls that have not yet been iced can be stored in an airtight container at room temperature for up to 3 days. Reheat the cinnamon rolls (see recommendation below) and cover with cream cheese icing before serving. Do not store iced cinnamon rolls at room temperature.
- Refrigerator: Leftover cinnamon rolls that have already been iced should be stored in the fridge in an airtight container for up to 3 days. Reheat the cinnamon rolls (see recommendation below) before serving.

Rea Richardson says
Sounds wonderful, but not enough time in morning to bring to room temp, roll, fill, cut, rise, bake, cool, frost. That's still a lot to do! Can I refrigerate 6-8 hours just before the second rise?
Allison Ferraro says
Hi Rea! I totally hear you, and I'm actually working on a new post outlining different options for how to divide the work when making cinnamon rolls ahead of time. You can actually assemble the rolls and let them rise before refrigerating, and then just bake them in the morning. Or you can even par bake the rolls, freeze them, then defrost the night before and finish baking in the morning. Stay tuned for lots more info about these different options coming soon!
- Allison
Abby says
Do I have to use the heavy cream to pour over them? I am dairy free and can’t use that? If so should I sub coconut cream? Or vegan butter?
Allison Ferraro says
Hi Abby! You can skip the heavy cream that's poured over the rolls! That's a recent addition to the recipe that makes them ultra soft and gooey, but they're still deliciously soft without it. I have not tested non-dairy substitutes for the heavy cream, but if you do decide to try a substitute I'd love to hear how it turns out.
- Allison
Sara says
These are the fluffiest homemade cinnamon rolls I have ever tasted! I made these dairy free by substituting the milk for water and used margarine instead of butter. For the glaze I mixed confectioners sugar with vanilla extract and water. Thank you for this recipe. A sure keeper!
Allison Ferraro says
Thank you so much for your review, Sara! I'm so glad to hear that you love the recipe and that your dairy substitutes were a success!
- Allison
Abby says
I was actually just going to ask if these could be made dairy free so thank you for sharing 🙂 am going to make them for Easter tomorrow!
Nicole says
These are sooo good! I've made them twice and the dough is so soft and squigy it's fun to roll out. I rolled mine into a skinny long rectangle and made 4 jumbo rolls in an 8x8 pan. My cheat for icing is to just mix spreadable cream cheese and confectioners sugar together (half the weight of sugar to cream cheese).
Allison says
Thank you so so much for this glowing review, Nicole! I'm pretty obsessed with these cinnamon rolls, and I'm glad they were a big hit for you, too!
- Allison
Ava says
Calories please for one roll.
Allison says
Hi Ava! Unfortunately I do not have an accurate way of confirming and providing this information. There are several calorie/nutrition fact calculators available online that provide this information if you input the ingredients; however, I am not able to confirm their accuracy. I wish I could be of more help, and I hope you enjoy this recipe if you give it a try!
- Allison