
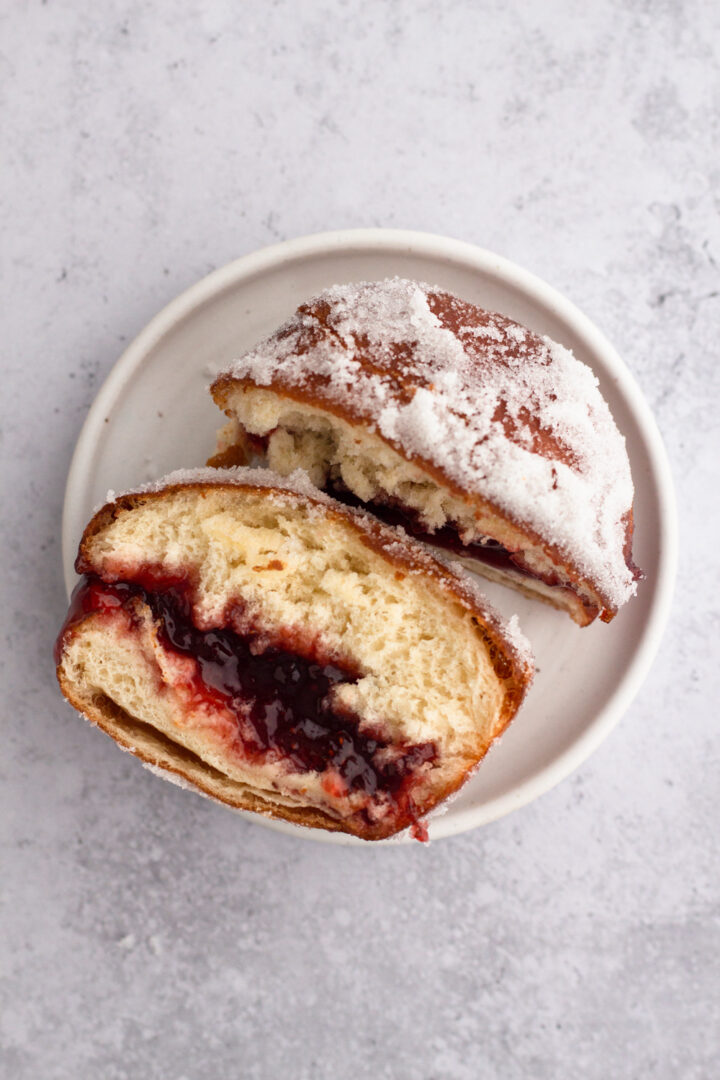
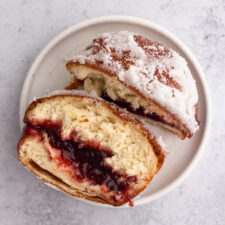
This small batch brioche jelly doughnut recipe makes just 6 perfectly sweet, jam-filled doughnuts. Learn how to make homemade jelly doughnuts from scratch with this easy-to-follow, small batch recipe.

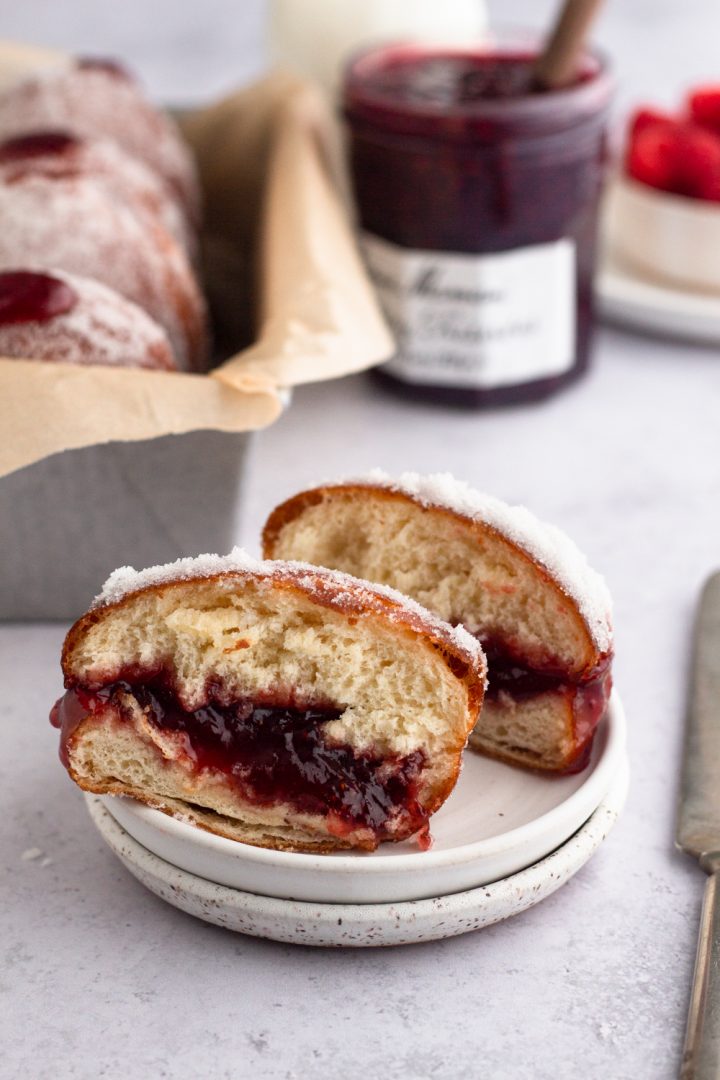
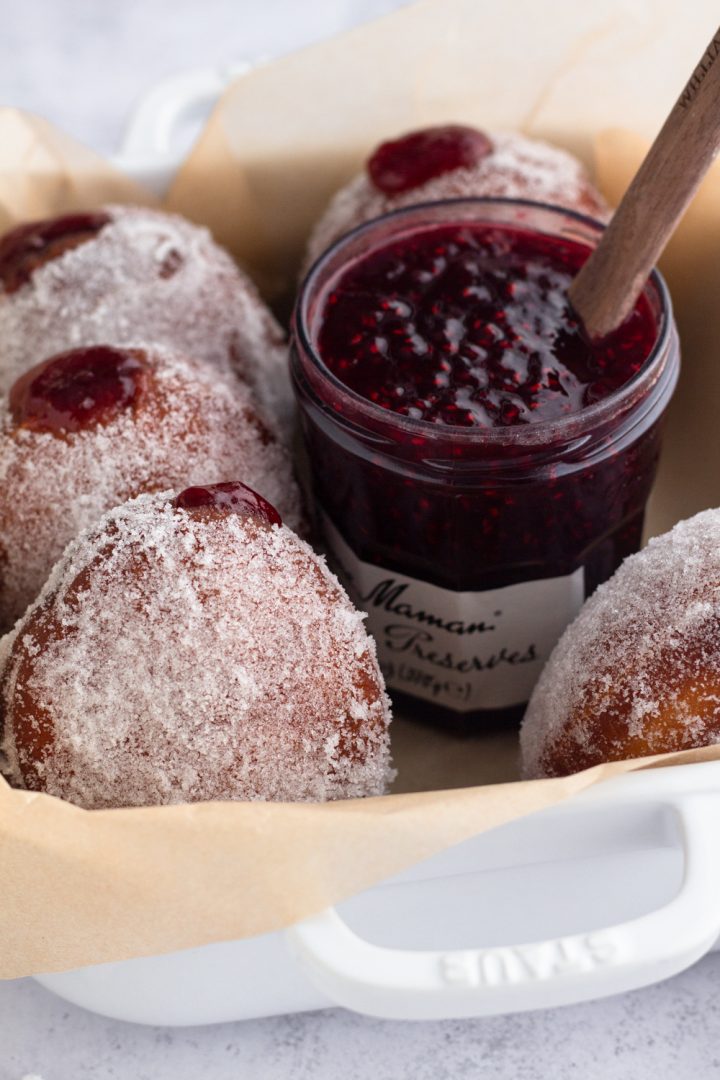
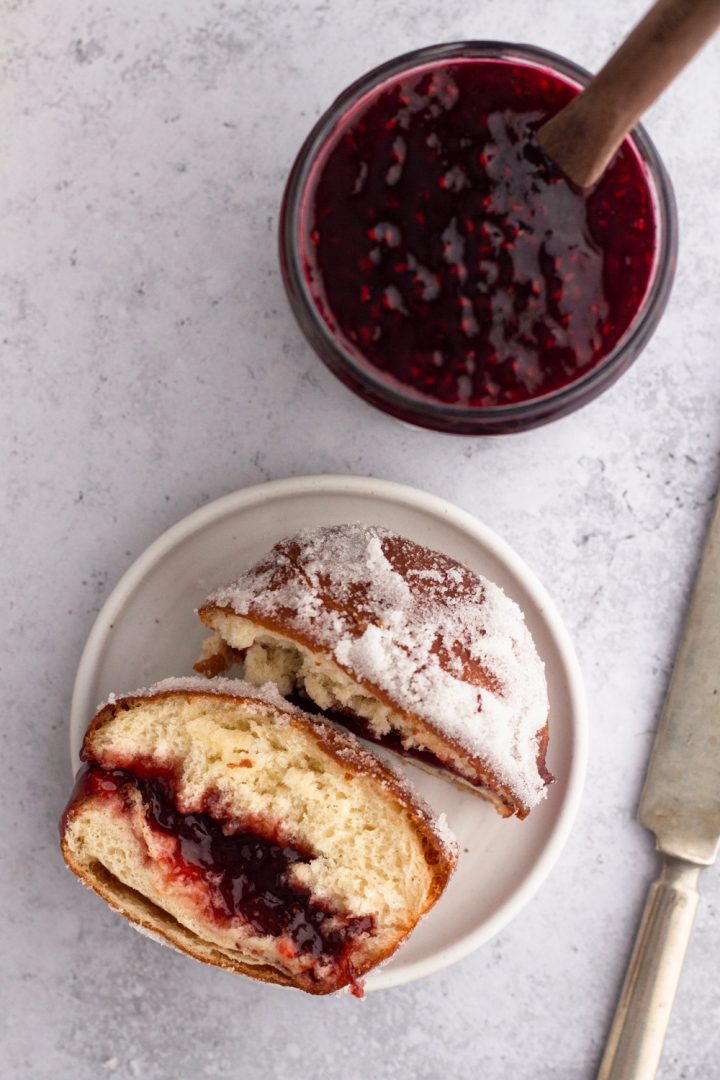
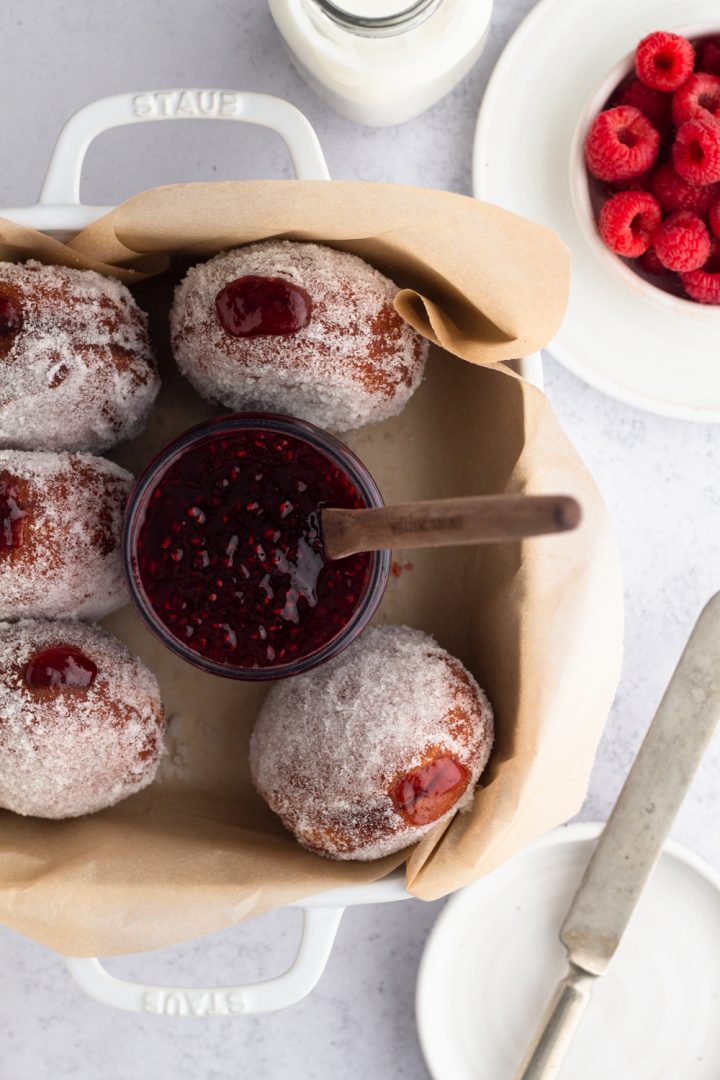
This is not a drill: these small batch jelly doughnuts are my new FAVORITE doughnuts!! The brioche dough is pillowy-soft perfection, and it fries to the most beautiful golden brown. Tossed in sugar and filled with berry jam, these doughnuts are just the right amount of sweet. And since this small batch recipe makes just 6 doughnuts, they're the perfect indulgence for lazy weekend mornings at home.
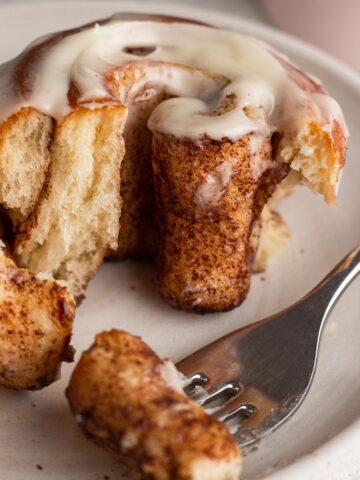
Side note: these brioche jelly doughnuts are made using the same brioche dough that I use to make my favorite small batch overnight cinnamon rolls! If you're a fan of breakfast sweets, you don't want to miss that recipe!
How to Make Jelly Doughnuts from Scratch
Homemade jelly doughnuts are a bit time consuming (requiring about an hour and a half of hands-on time), but the effort will be well worth it when you bite into that still-warm, jelly-stuffed, pillowy soft, homemade brioche doughnut!
Here's an overview of how to make brioche jelly doughnuts:
- Start by making the brioche dough. Add yeast to a bowl with warm milk. Blend in egg, melted butter, flour, sugar, and salt and let the mixture sit for 5 minutes while the flour hydrates.
- Use a stand mixer with a dough hook attachment to beat the mixture until a dough forms and becomes soft and smooth. Knead the dough gently with your hands on a lightly floured surface before gently forming the dough into a ball.
- Transfer the ball of dough to a lightly greased bowl and place it in a warm spot to rise until doubled in size.
- Refrigerate the risen dough for at least 1 hour or overnight.
- After the dough has chilled, roll out the dough so it's ½ inch thick. Use a 3 inch round cutter to cut 6 circles from the dough.
- Place the circles of dough onto a lightly oiled baking sheet and place it in a warm spot to rise until the doughnuts are puffed.
- While the doughnuts rise, add oil to a large, deep pot for frying (a large Dutch oven is perfect for frying). Heat the oil over medium heat until it reaches 355ºF to 360ºF.
- Before you begin frying, prep your fry station. Make sure you'll have all the items you'll need for frying nearby before you begin. Place a cooling rack over a baking sheet next to the stove (this is where you'll place the doughnuts when they come out of the hot oil). Gather a spider skimmer (you can substitute a roux whisk or large metal slotted spoon) to use for taking the doughnuts in and out of the oil. Pour the topping sugar onto a plate. If you choose, you can wear oven gloves while frying to protect your hands.
- When the doughnuts have risen, the oil is heated to the proper temperature, and your fry station is prepped, it's time to start frying! Carefully add 2 doughnuts to the hot oil. Cook the doughnuts, flipping them every 30 seconds, until they are deep golden, about 4 minutes total. Transfer the doughnuts from the hot oil to the prepared cooling rack.
- Let the doughnuts cool for 15 to 30 seconds before carefully tossing them in the sugar. Return the sugared doughnuts to the cooling rack to cool.
- Repeat with the other 4 doughnuts, frying 2 at a time.
- When all of the doughnuts have been fried and are cool enough to handle, it's time to fill them! Keep reading for my tips for filling jelly doughnuts.
What Jelly is Best for Filling Doughnuts
There are several types of fruit spreads - jelly, jam, and preserves - and the best one to use for filling doughnuts comes down to your preferences. Here's a little bit of info about each, along with some pros and cons:
- Jelly - Jelly is made from fruit juice, so it is smooth and does not contain any bits of fruit. It is also the most firm/jelled of these three fruit spreads, which makes it a great choice for filling doughnuts because it won't run too much when piped.
- Jam - In addition to fruit juice, jam is made with mashed or puréed fruit, so it contains small pieces of fruit. In comparison to jelly, jam is not as smooth (because of the small pieces of fruit) and is a bit less firm in consistency. This is a great option for filling doughnuts if you like some fruit pieces in your filling.
- Preserves - Preserves contain the largest pieces (often whole pieces) of fruit, giving them the most chunky texture of these three options. Preserves also have the least firm/jelled consistency of these, which means it will be fairly runny when filling the doughnuts. If you want that perfect dollop of filling just outside of the hole that you pipe the doughnut filling into, opt for jelly instead of preserves.
- Note: If you are using a Bismark piping tip to fill your doughnuts (See "How to Fill Jelly Doughnuts" below) jelly is your best option, since the bits of fruit in jam or preserves may not fit through the long, skinny end of the piping tip.
I opted for preserves when filling these doughnuts because I really love the texture of the fruit pieces in the filling and didn't mind a tiny bit of mess when piping.
Also, since the filling is such an important component, be sure to choose a quality fruit spread whose flavor you love. I used Bonne Maman preserves (not sponsored, just a fan!) to fill the doughnuts you see here, and it did not disappoint!
Want to try a different filling? Chocolate ganache and lemon curd would also be delicious options for filling these homemade doughnuts!
How to Fill Jelly Doughnuts
There are several ways to fill jelly doughnuts. The simplest way is to use a piping bag fitted with a Bismark piping tip, which has an elongated tip that can be stuck into the doughnut for filling.
However, I'm not a big fan of single-purpose kitchen tools that won't get a ton of use, so I do not own a Bismark piping tip. Instead, I used a pastry bag fitted with a large round piping tip (Ateco #809, though other sizes would also work). Here's how I did it:
- Carefully poke a paring knife into the side of each doughnut, pushing it about ⅔ to ¾ of the way through the doughnut. Move the tip of the knife slightly to one side and then to the other to create a larger cavity inside the doughnut without piercing the knife through the other side of the doughnut and without opening the hole that you poked in the one side too much.
- Fit a piping bag with a large, round piping tip and fill the bag with the desired jelly. Because of the jelly's smoother consistency, it's likely to run out of the end of the tip, so I found it helpful to place the bag upright in a tall water glass when filling so that the bottom of the glass would block the opening of the piping tip and keep the jelly inside.
- Stick the piping tip into the hole that you created in the side of the doughnut and gently squeeze the piping bag to pipe the jelly into the doughnut. Continue piping until the doughnut is slightly puffed up from the jelly (about 2 ½ Tablespoons of jelly per doughnut), then remove the tip.
- Repeat this process with the remaining doughnuts.
How to Fill Doughnuts without a Piping Bag
To fill doughnuts without a piping bag, use the same process as above but substitute a plastic freezer bag for the piping bag. Fill the plastic bag with jelly, use scissors to snip a small corner off of the bottom of the bag, and stick that corner into the hole in your doughnut to fill it.
More Sweet Breakfast Recipes

Love this recipe? Please leave a star rating and review on the recipe below! And don't forget to subscribe to Always Eat Dessert for even more easy dessert recipes and helpful baking tips.
Recipe
Small Batch Brioche Jelly Doughnuts
Special Equipment
- Stand mixer with dough hook attachment (optional but very helpful)
- Plastic wrap
- Rolling Pin
- 3 inch round biscuit/cookie cutter
- Large, deep pot (I recommend a 5-6 quart Dutch oven)
- Spider skimmer (can substitute a roux whisk or large metal slotted spoon)
- Bismarck or large round piping tip
Ingredients
Brioche Dough:
- ½ cup (122 grams) whole milk
- 1 ¼ teaspoons (4 grams) instant yeast
- 1 large egg, room temperature
- 3 Tablespoons (42 grams) unsalted butter, melted and slightly cooled
- 2 cups (250 grams) all-purpose flour
- ¼ cup (50 grams) granulated sugar
- ½ teaspoon (3 grams) fine sea salt
Frying:
- vegetable oil or canola oil, enough to fill about 2 inches in your pot (approx. 1.5 quarts)
Filling and Topping:
- ½ cup (100 grams) granulated sugar
- 1 cup (340 grams) fruit jelly, jam, or preserves
Instructions
Make the brioche dough.
- Warm the milk to between 110ºF and 115ºF (43ºC and 46ºC ) either in the microwave or on the stove. Use a thermometer to check the temperature of the milk. It should be warm but not hot to the touch. Pour the warmed milk into the bowl of a stand mixer (or a large mixing bowl) and add the yeast.
- Add the egg, melted butter, flour, sugar, and salt and mix until the ingredients are blended. Let the mixture stand for 5 minutes (to give the flour time to hydrate).
- Using the stand mixer's dough hook attachment, beat on medium speed until a sticky dough forms. Increase speed to medium-high and beat for another 5 minutes, or until the dough is soft and smooth. (NOTE: If not using a stand mixer with a hook attachment, knead the dough by hand for about 10 minutes, or until a soft and smooth dough forms.) Transfer the dough to a lightly floured surface and knead it gently with your hands for 1 minute before gently forming the dough into a ball.
- Transfer the ball of dough to a lightly greased bowl and cover the bowl with a clean dish towel. Place the dough in a warm spot and let it rise until doubled in size, about 45 to 60 minutes.
- Cover the bowl loosely with plastic wrap and refrigerate the dough for at least 1 hour or overnight.
- Remove the dough from the fridge and let it sit at room temperature for about 10 minutes before rolling out the dough.
Cut the doughnuts.
- Place the dough onto a lightly floured surface and, using a rolling pin, roll the dough until it's ½ inch thick. Use a 3 inch round cutter to cut 6 circles from the dough.
- Place the circles of dough onto a lightly oiled baking sheet. Cover the baking sheet with a clean dish towel and place it in a warm spot until the doughnuts are puffed, about 30 minutes.
Prepare the fry oil.
- While the doughnuts rise, prepare the fry oil. Add oil to a large, deep pot (I used a 5.5 quart Dutch oven) so that the oil is about 2 inches deep. Heat the oil over medium heat until it reaches 355ºF to 360ºF (179ºC to 182ºC). Use a candy thermometer or instant read thermometer to monitor the oil's temperature.
Prep your fry station.
- Make sure you'll have all the items you'll need for frying nearby before you begin. Place a cooling rack over a baking sheet next to the stove (this is where you'll place the doughnuts when they come out of the hot oil). Gather a spider skimmer (you can substitute a roux whisk or large metal slotted spoon) to use for taking the doughnuts in and out of the oil. Pour the topping sugar onto a plate. If you choose, you can wear oven gloves while frying to protect your hands.
Fry the doughnuts.
- Using a spider skimmer (or a similar tool), carefully add 2 of the cut circles of dough to the hot oil. (I like to place one dough circle onto the skimmer, lower the skimmer into the oil so that the doughnuts floats off of it into the oil, then remove the skimmer and repeat with the second doughnut.) Use the spider skimmer to carefully flip the cooking doughnuts every 30 seconds so that they brown on each side. Continue to cook the doughnuts until they are deep golden, about 4 minutes total (2 minutes total per side). Use the spider skimmer to lift the doughnuts from the hot oil, one at a time, and transfer them to the prepared cooling rack.
- Let the doughnuts cool for 15 to 30 seconds before carefully tossing them in the sugar. Return the sugared doughnuts to the cooling rack to cool.
- Repeat with the other 4 dough circles, frying 2 at a time.
Fill the doughnuts.
- When all of the doughnuts have been fried and are cool enough to handle, it's time to fill them! Fit a pastry bag with a Bismark or large round piping tip, fill the bag with jelly, and pipe into doughnuts. If you're using a Bismark piping tip, you can simply poke it into the side of each doughnut to fill them. If you're using a pastry bag with a large round piping tip like I did, or if you're simply using a large freezer bag, here's how to fill the doughnuts:- Carefully poke a paring knife into the side of each doughnut, pushing it about ⅔ to ¾ of the way through the doughnut. Move the tip of the knife slightly to one side and then to the other to create a larger cavity inside the doughnut without piercing the knife through the other side of the doughnut and without opening the hole that you poked in the one side too much.- Fit a piping bag with a large, round piping tip and fill the bag with the desired jelly. Because of the jelly's smoother consistency, it's likely to run out of the end of the tip, so I found it helpful to place the bag upright in a tall water glass when filling so that the bottom of the glass would block the opening of the piping tip and keep the jelly inside.- Stick the piping tip into the hole that you created in the side of the doughnut and gently squeeze the piping bag to pipe the jelly into the doughnut. Continue piping until the doughnut is slightly puffed up from the jelly (about 2 ½ Tablespoons of jelly per doughnut), then remove the tip.To fill doughnuts without a piping bag, use the same process as above but substitute a plastic freezer bag for the piping bag. Fill the plastic bag with jelly, use scissors to snip a small corner off of the bottom of the bag, and stick that corner into the hole in your doughnut to fill it.
- Repeat this process with the remaining doughnuts.

Tan says
Hi!!. Im so glad I found this small batch recipe. I m going to try this tonight. I noticed the method you used for incorporated the butter is different from other brioche recipes. Does it make a difference between your method and the method of adding the butter at room temperature a bit at a time while the dough is being mixed/kneaded?
Thanks!
Allison Ferraro says
Hi Tan! Brioche is traditionally made by adding softened butter a bit at a time while the dough is mixing, and this method for instead adding melted butter along with the other ingredients before kneading is sometimes called "quick brioche". I don't notice a difference in texture though I've heard some say that the melted butter creates a slightly softer dough. I find this method to be a bit quicker and easier, which is a plus in my book! If you did give this recipe a try I'd love to hear your thoughts.
- Allison
Lyla says
I took your advice and made the cinnamon rolls. They were wonderful, pillows soft and oh so yummy! I have made a second batch of the dough and divided it in thirds and put it in my freezer, ready for my next craving!
Lyla says
This brioche dough is so simple to make and it is fantastic! I cook for only myself and my husband so I cut the dough into three portions. I made apple fritters with one portion and the raspberry filled doughnuts with another and the third is still in the freezer waiting for me to decide.
I was extremely pleased with how quickly and easily this dough came together and its versatility. Also, thank you, on behalf of all of us who cook small batches, for giving us such a great recipe. There are never enough small batch recipes of this caliber.
Allison Ferraro says
Thank you so much for your thoughtful and detailed review, Lyla! I’m so glad you love this dough as much as I do! I use this brioche dough in my overnight cinnamon rolls as well, which would be another great way to use the rest of your dough. 😉
- Allison