
Understanding the stages of meringue - from soft peaks to stiff peaks - is the key to getting the perfect texture for your whipped cream and meringue every time. It's actually really simple, and once you know what to look for you'll feel confident tackling recipes that call for whipping cream or beating egg whites. This article includes descriptions and photos for each stage of meringue.

The recipe says to "whip until stiff peaks" but, um... what does that mean? How do I know when the whipped cream (or egg white) has reached stiff peaks?
Maybe you're whipping heavy cream for homemade whipped cream. Or maybe you're whipping egg whites to make meringues or chocolate mousse. Either way, the stages of meringue (aka "peaks") are the same for whipped cream and whipped egg whites.
The photos and descriptions below will help you learn exactly what to look for the next time you need to whip cream or beat egg whites to stiff peaks.
The 3 Stages ("Peaks")
When you first begin beating heavy cream or egg whites, the mixture will be foamy. Keep beating on medium-high speed until you reach your desired texture.
The photos below show whipped cream, but whipped egg whites will appear very similar.

Soft Peaks - If you lift your beaters straight up from the bowl (be sure to turn them off first!) and see small, undefined peaks, you have soft peaks. Stop whipping at this stage if you like whipped cream with a softer texture.
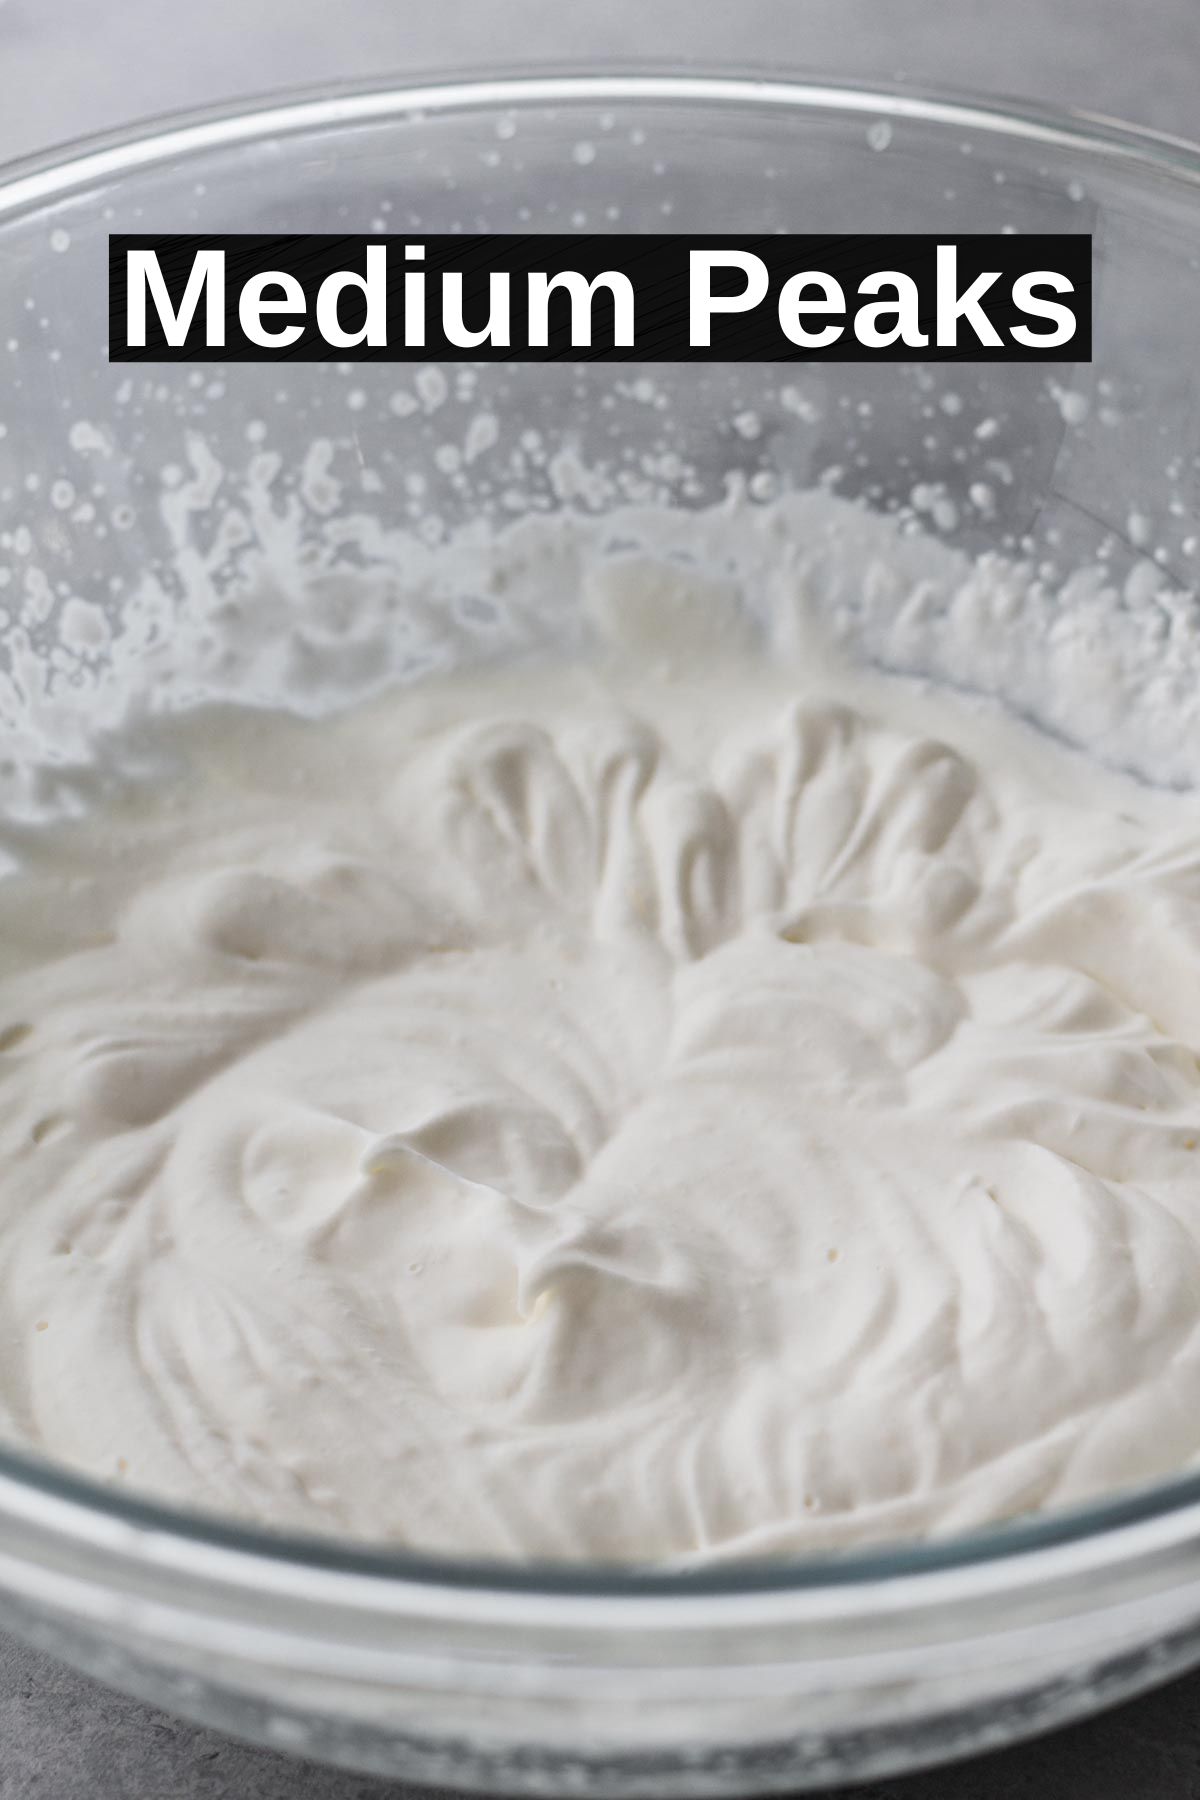
Medium (or Firm) Peaks - If you lift your beaters straight up from the bowl and see formed peaks with tips that bend over, you have medium peaks. This is the most common/popular stage of whipped cream, and it's ideal for use as a topping on treats like ice cream and strawberry shortcake.

Stiff Peaks: If you lift your beaters straight up from the bowl and see formed peaks with tips that remain upright, you have stiff peaks. This type of whipped cream is ideal for use in layered desserts where a little more structure is needed, like icebox cake or cream pie.
Over-beaten - If you continue to beat past the point of stiff peaks, the mixture will be over-beaten and become grainy. Whipped cream will separate and eventually become butter! So be sure to stop whipping when you reach the stiff peaks stage.
FAQs and Troubleshooting
The exact length of time it takes to reach stiff peaks will vary based on how many eggs you're whipping as well as the freshness and temperature of your eggs. It will take several minutes to reach stiff peaks, but typically happens pretty quickly after you've reached medium peaks.
For egg whites, the most important thing is to keep fat away from the egg whites in order for them to whip properly. Be careful when cracking and separating the eggs to ensure that none of the yolk ends up with the white. And be sure that your bowl and beater is clean and free of any grease or fat. A glass or metal bowl works best, since plastic bowls are difficult to de-grease completely.
For whipped cream, cream will whip best when it's well chilled. You can even chill your bowl and beaters to ensure that the cream stays cold while you're whipping it. It's also important to use a cream with a high enough fat content (36%) to whip properly. Look for cream that's labeled "heavy cream" or "heavy whipping cream". Cream labeled "whipping cream" contains just 30% milk fat and is not ideal for making whipped cream.
The answer: maybe. If your egg whites have just started to become grainy, you may be able to save them by adding another egg white and whipping on medium speed just until the mixture reaches stiff peaks. This will change the measurement of eggs, so if you're using the whipped egg whites in a recipe it may be easier to start over to ensure you end up with the correct amount.
You might be able to save over-whipped cream! Add a small amount of additional heavy cream to the bowl and mix it on medium speed until it's blended and the mixture reaches stiff peaks. However, this will change the measurement of cream used, so if you need a precise amount of whipped cream for a recipe it may be easier to start over to ensure you end up with the correct amount.
Love this baking tutorial? Be sure to check out my other helpful baking tips! And don't forget to subscribe to Always Eat Dessert for even more baking tips and easy scratch-made dessert recipes.

Comments
No Comments