
These soft and spooky black cocoa cookies are made from scratch with black Dutch cocoa powder for delicate chocolate flavor and intense black color (without food coloring). This quick and easy Halloween cookie recipe includes decorating instructions for creating a white chocolate mummy or spiderweb design.

Jump to:
Both kids and adults will love baking AND eating these simple and delicious Halloween cookies! I created these cookies with kids in mind, but I have to say that they've been a huge hit with adults as well. The cookies are soft with a smooth and delicate chocolate flavor, and the Halloween designs are seriously so simple to pipe by hand.
This recipe uses the same base cookie dough as my Bailey's Cheesecake Stuffed Chocolate Cookies. I simply removed the cheesecake filling, substituted black cocoa powder for ultra-spooky black chocolate cookies (more on this below), and topped the cookies with white chocolate designs for a fun and easy Halloween cookie treat! Of course you can decorate these cookies however you like (or even skip the white chocolate decorations altogether) and serve them for any holiday you like or any time of year.
Ingredient Notes & Substitutions
Black Cocoa Powder - This cookie recipe calls for black cocoa powder, which creates an intensely black cookie without food coloring. Black cocoa powder is an ultra-dutched (aka alkalized or neutralized) Dutch cocoa powder, so it adds a delicate, non-bitter chocolate flavor to these cookies. I recommend King Arthur Baking black cocoa powder, which is available online.
See the Recipe FAQs section below for more information about black cocoa powder, including recommended substitutions.
Light Brown Sugar - Brown sugar adds extra flavor and a bit of moisture to these cookies. Plus, we're counting on the brown sugar to activate our baking soda. I find light brown sugar to add just the right hint of molasses flavor, but you can use dark brown sugar if that's what you have on hand.
White Chocolate Melting Wafers - These will be melted and used to decorate our cookies. I recommend Ghirardelli brand; they're my go-to for melting and drizzling white chocolate.
Candy Eyeballs - Candy eyeballs are perfect for decorating these spooky mummy cookies! I found candy eyeballs near the sprinkles in the baking aisle at my local grocery store, but they're also readily available online.
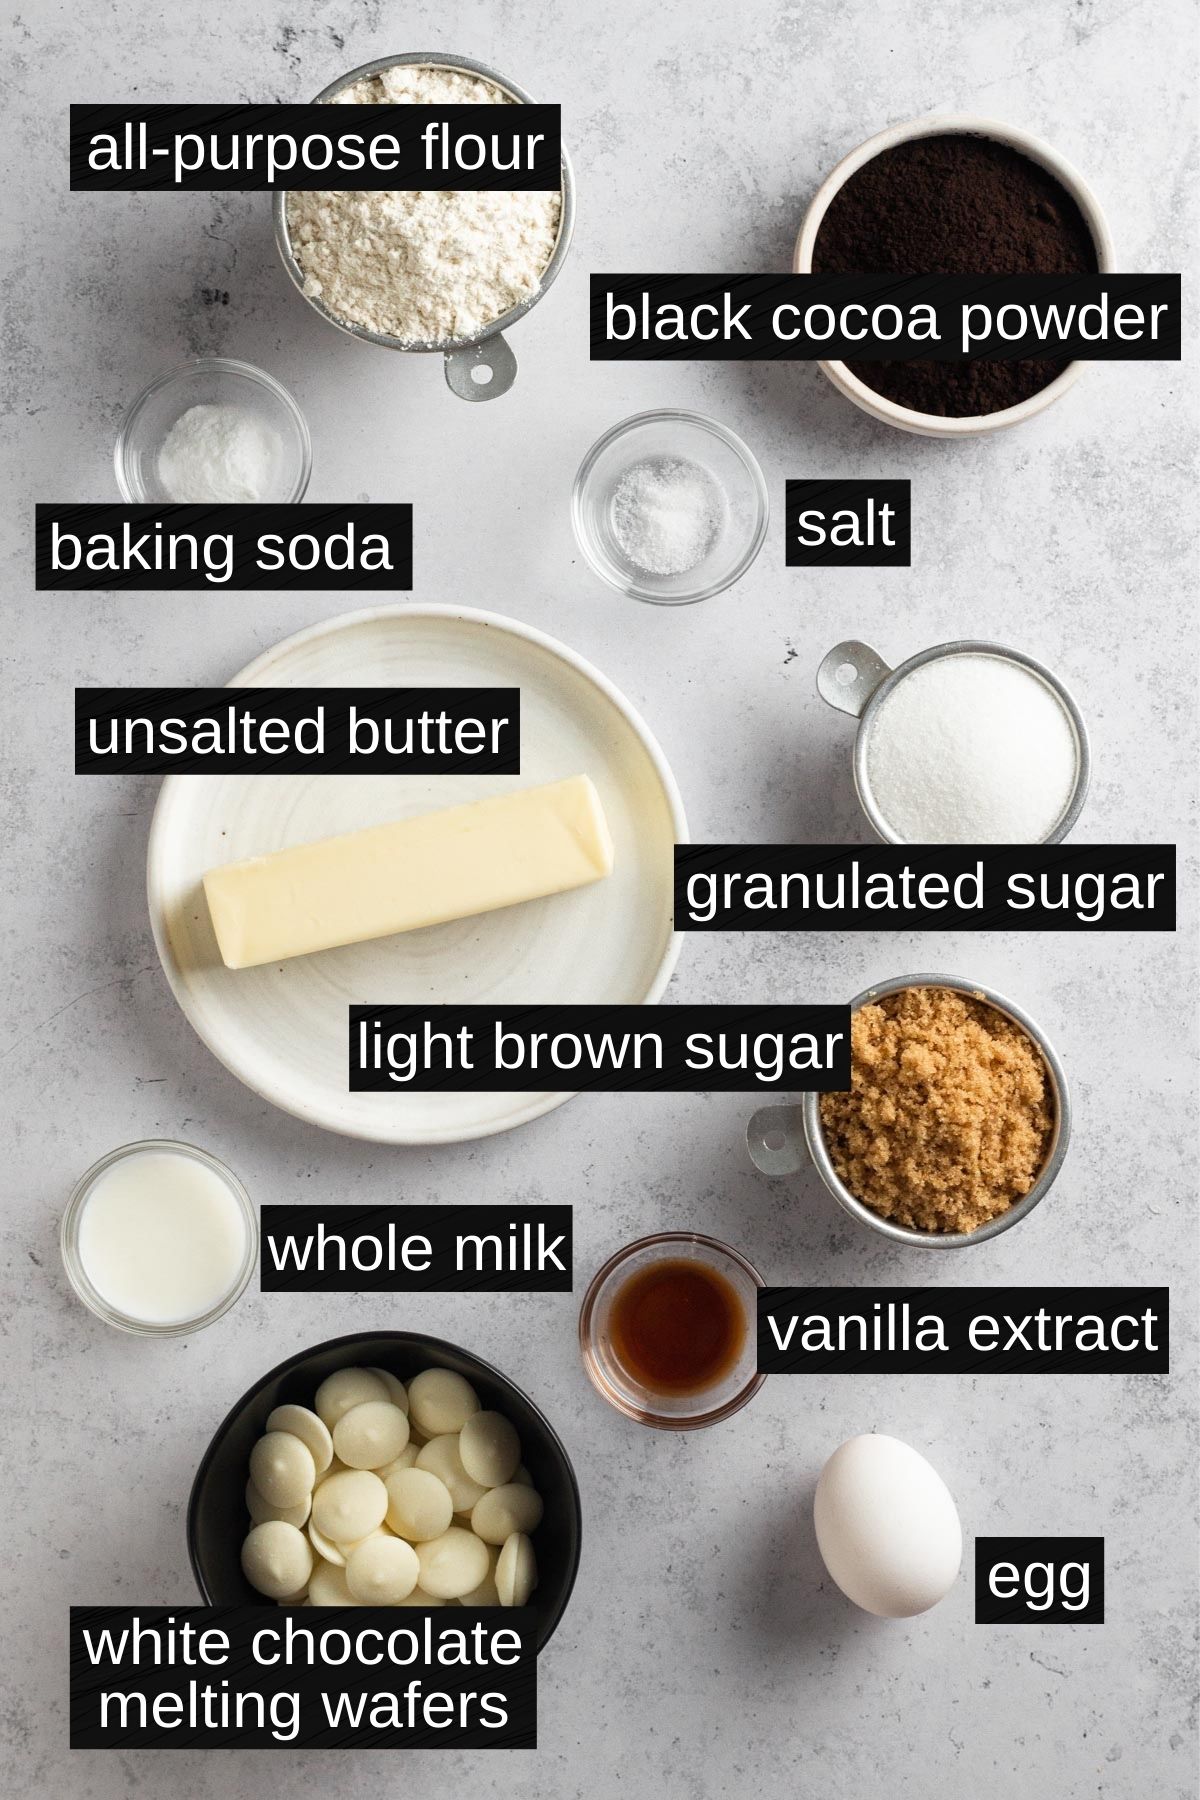
See recipe card at the bottom of this post for full ingredient list and measurements.
Step-By-Step Recipe Instructions
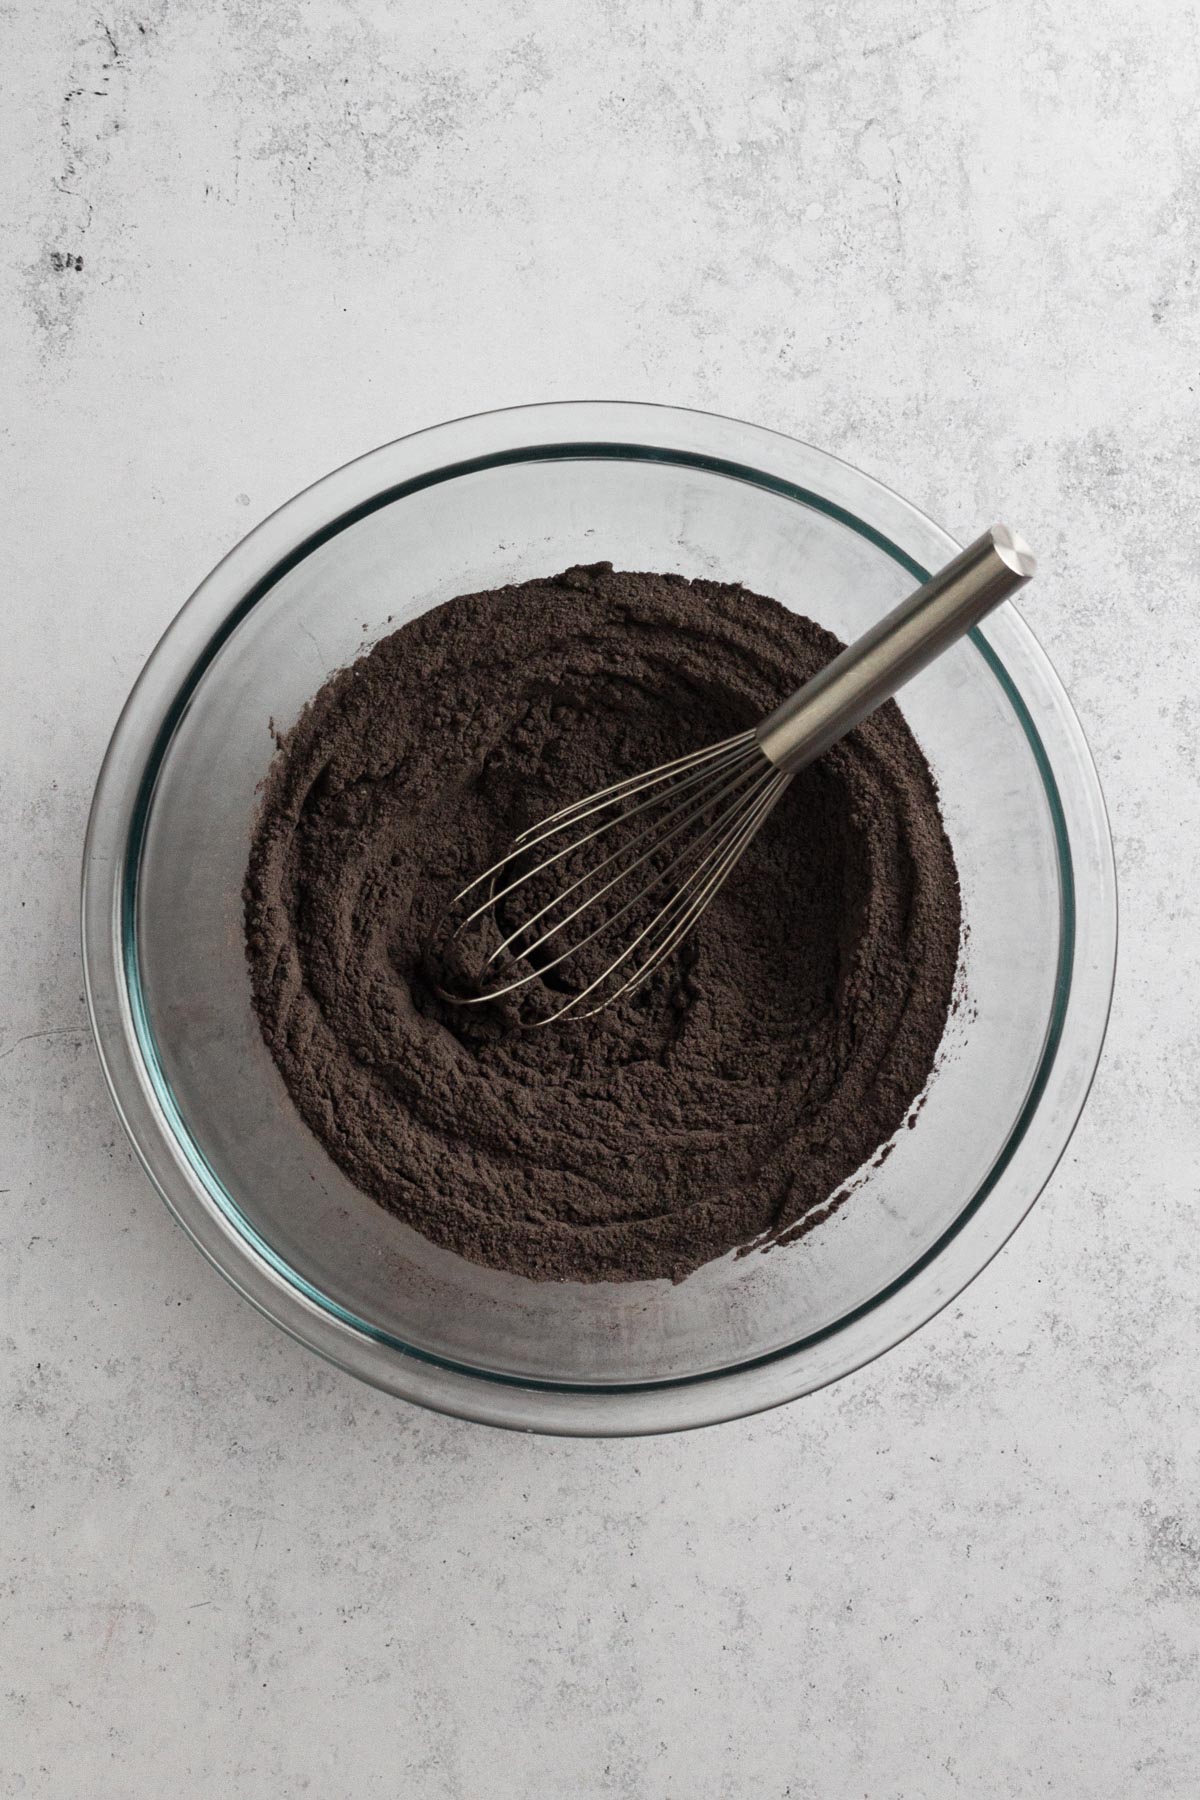
Step 1: Make the cookie dough. In a medium bowl, add flour, cocoa powder, baking soda, and salt and whisk to combine. Set aside.
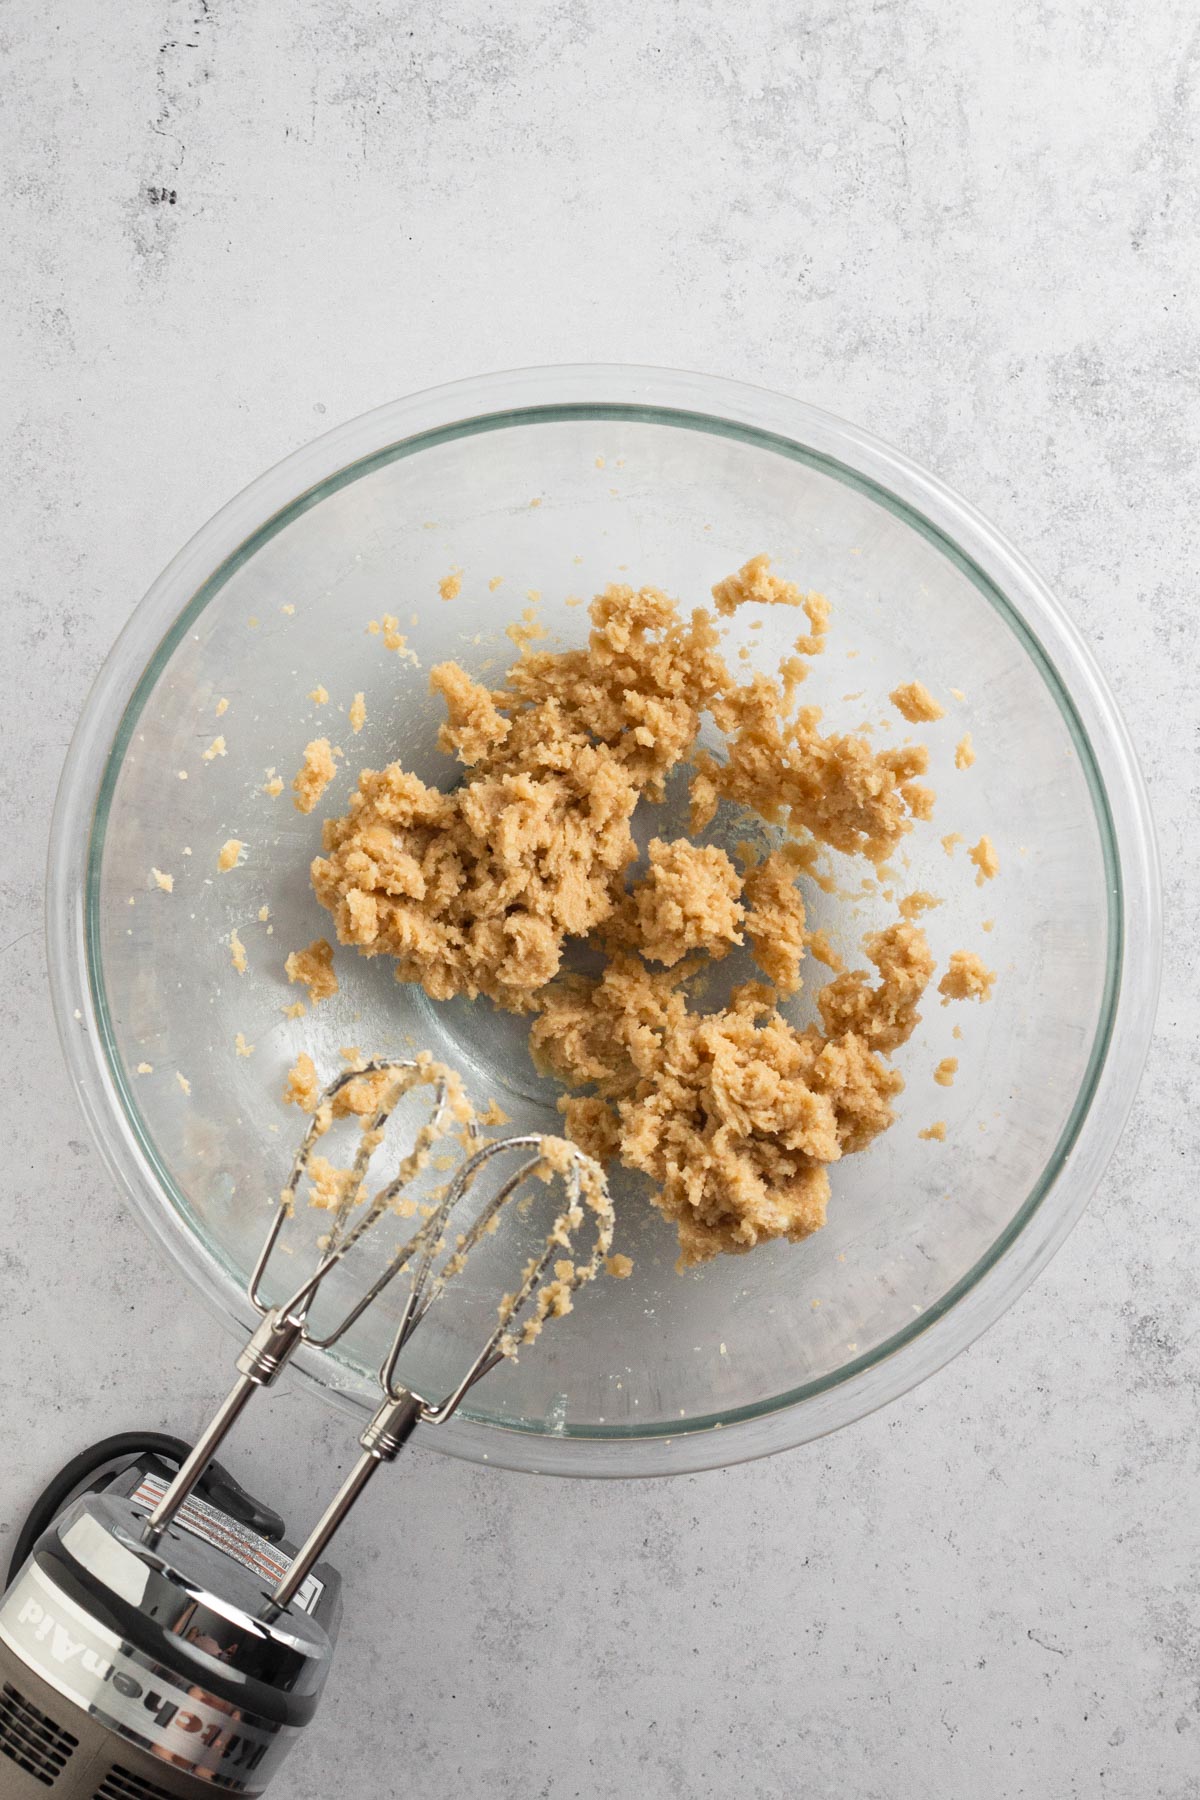
Step 2: In the bowl of a stand mixer (or in a large bowl using a handheld electric mixer), cream the butter and both sugars until light and fluffy.
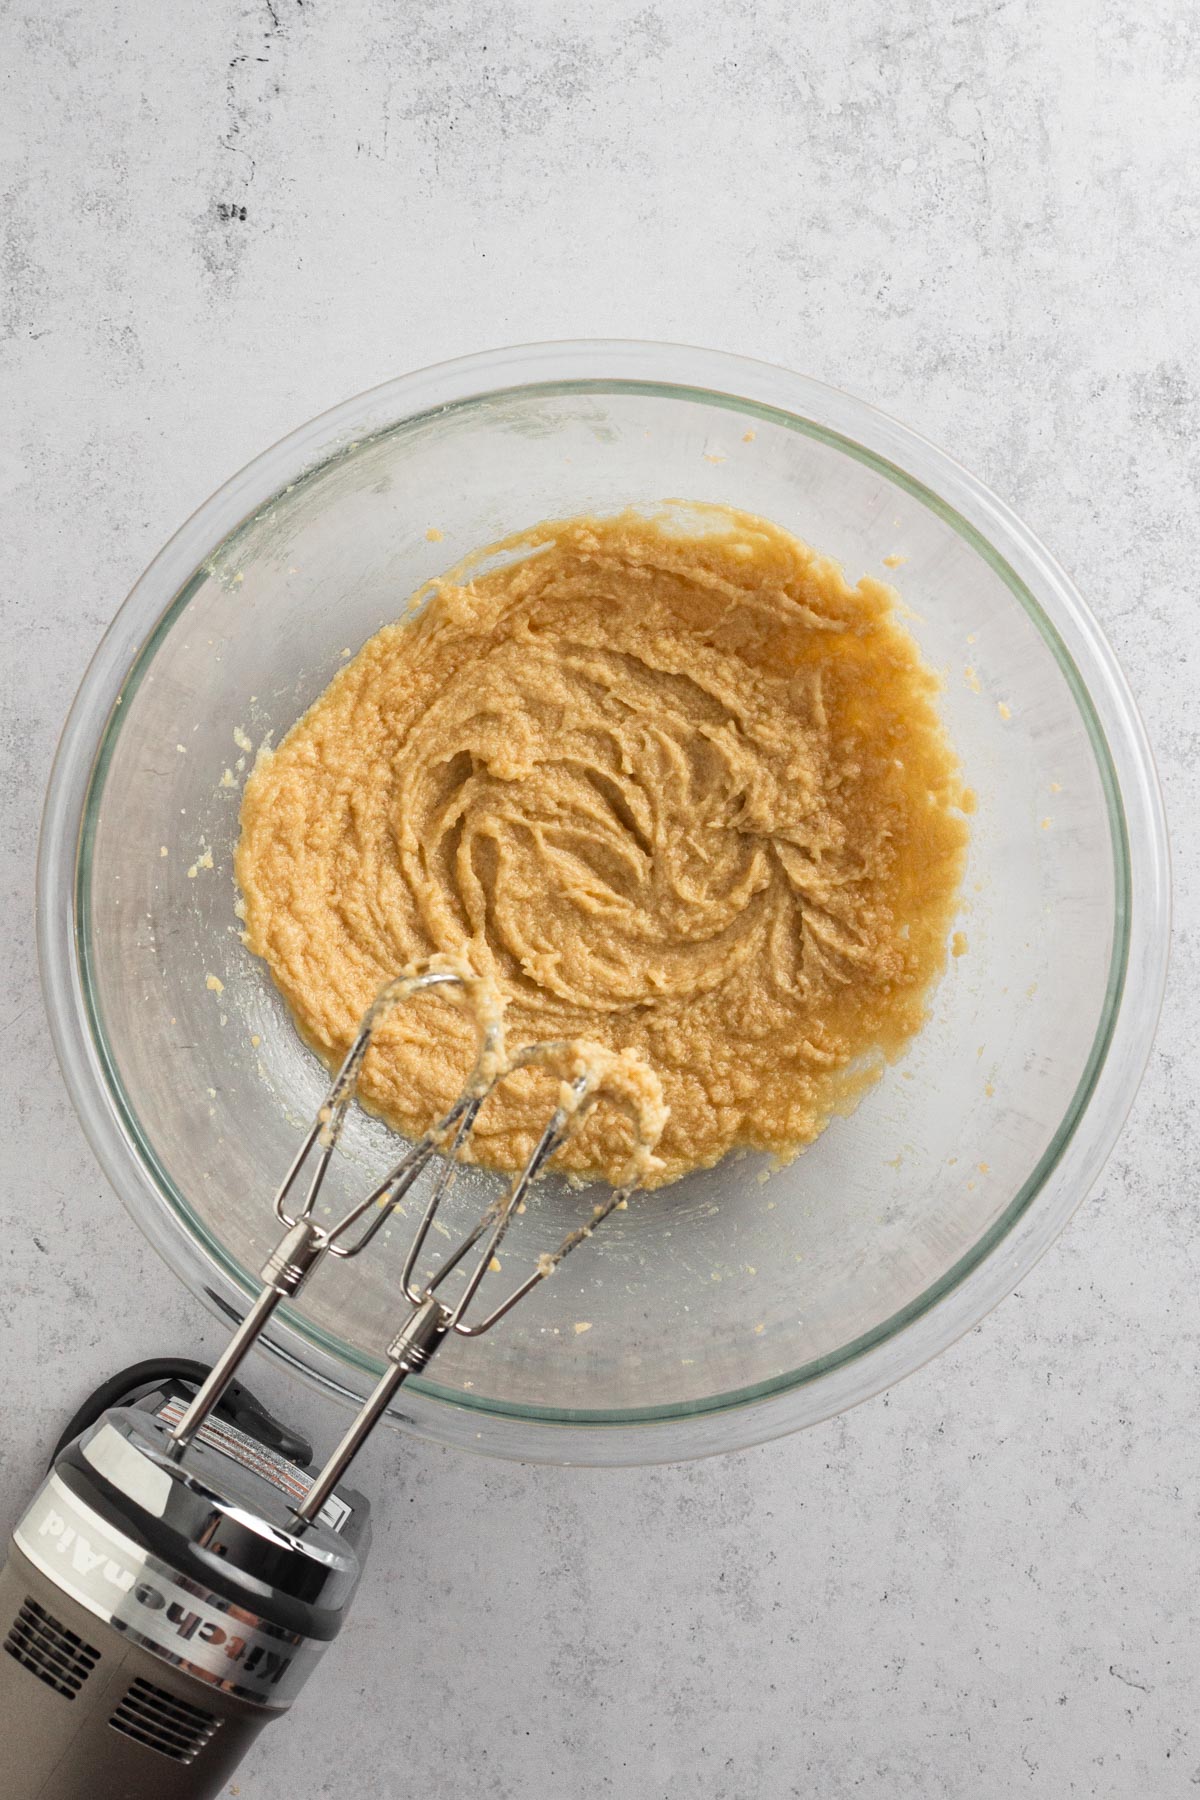
Step 3: Add egg, milk, and vanilla to the butter mixture and beat to combine.
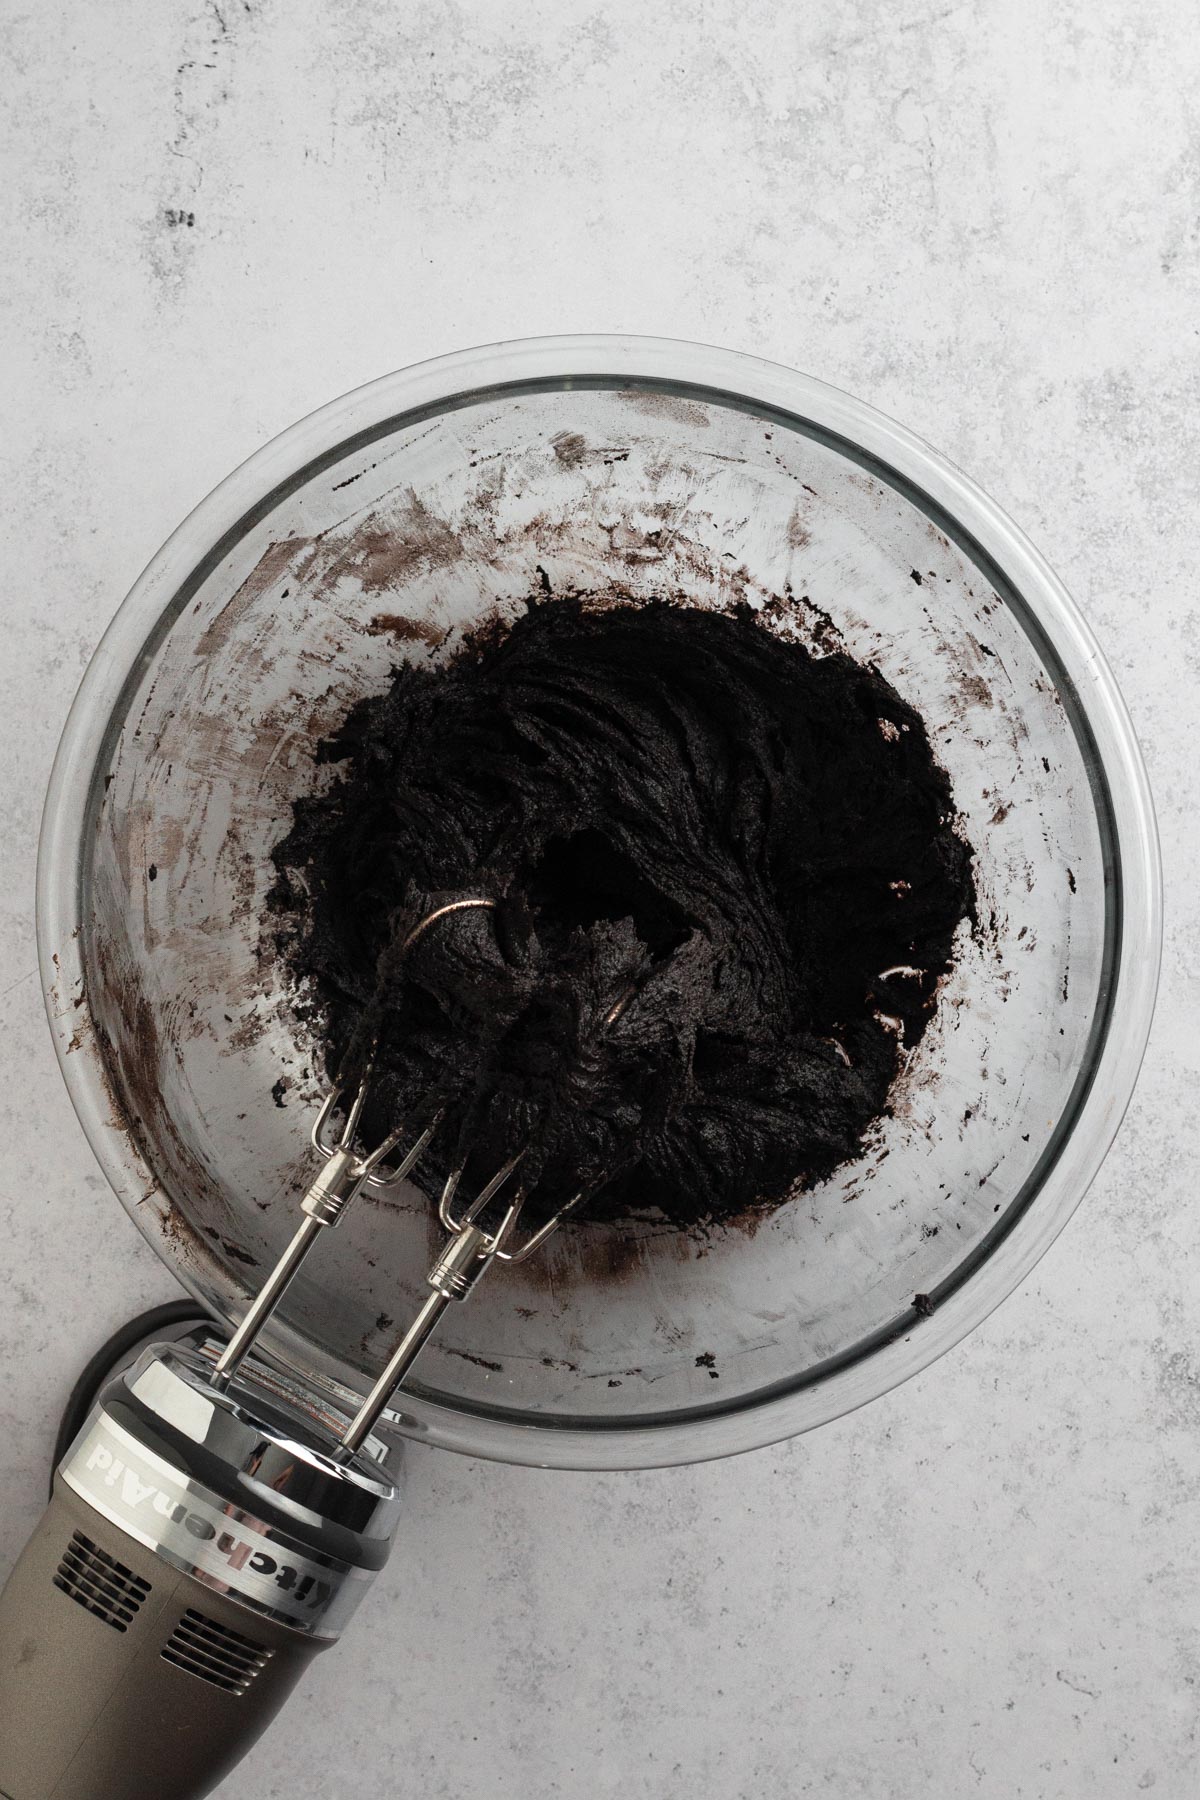
Step 4: With the mixer running on low speed, slowly add the flour mixture to the butter mixture blending until combined and stopping to scrape the bowl as needed.
Step 5: Cover the bowl with plastic wrap and place the cookie dough in the fridge to chill for 30 minutes.
Step 6: Preheat the oven to 350°F (177°C). Line cookie sheets with parchment paper and set aside.
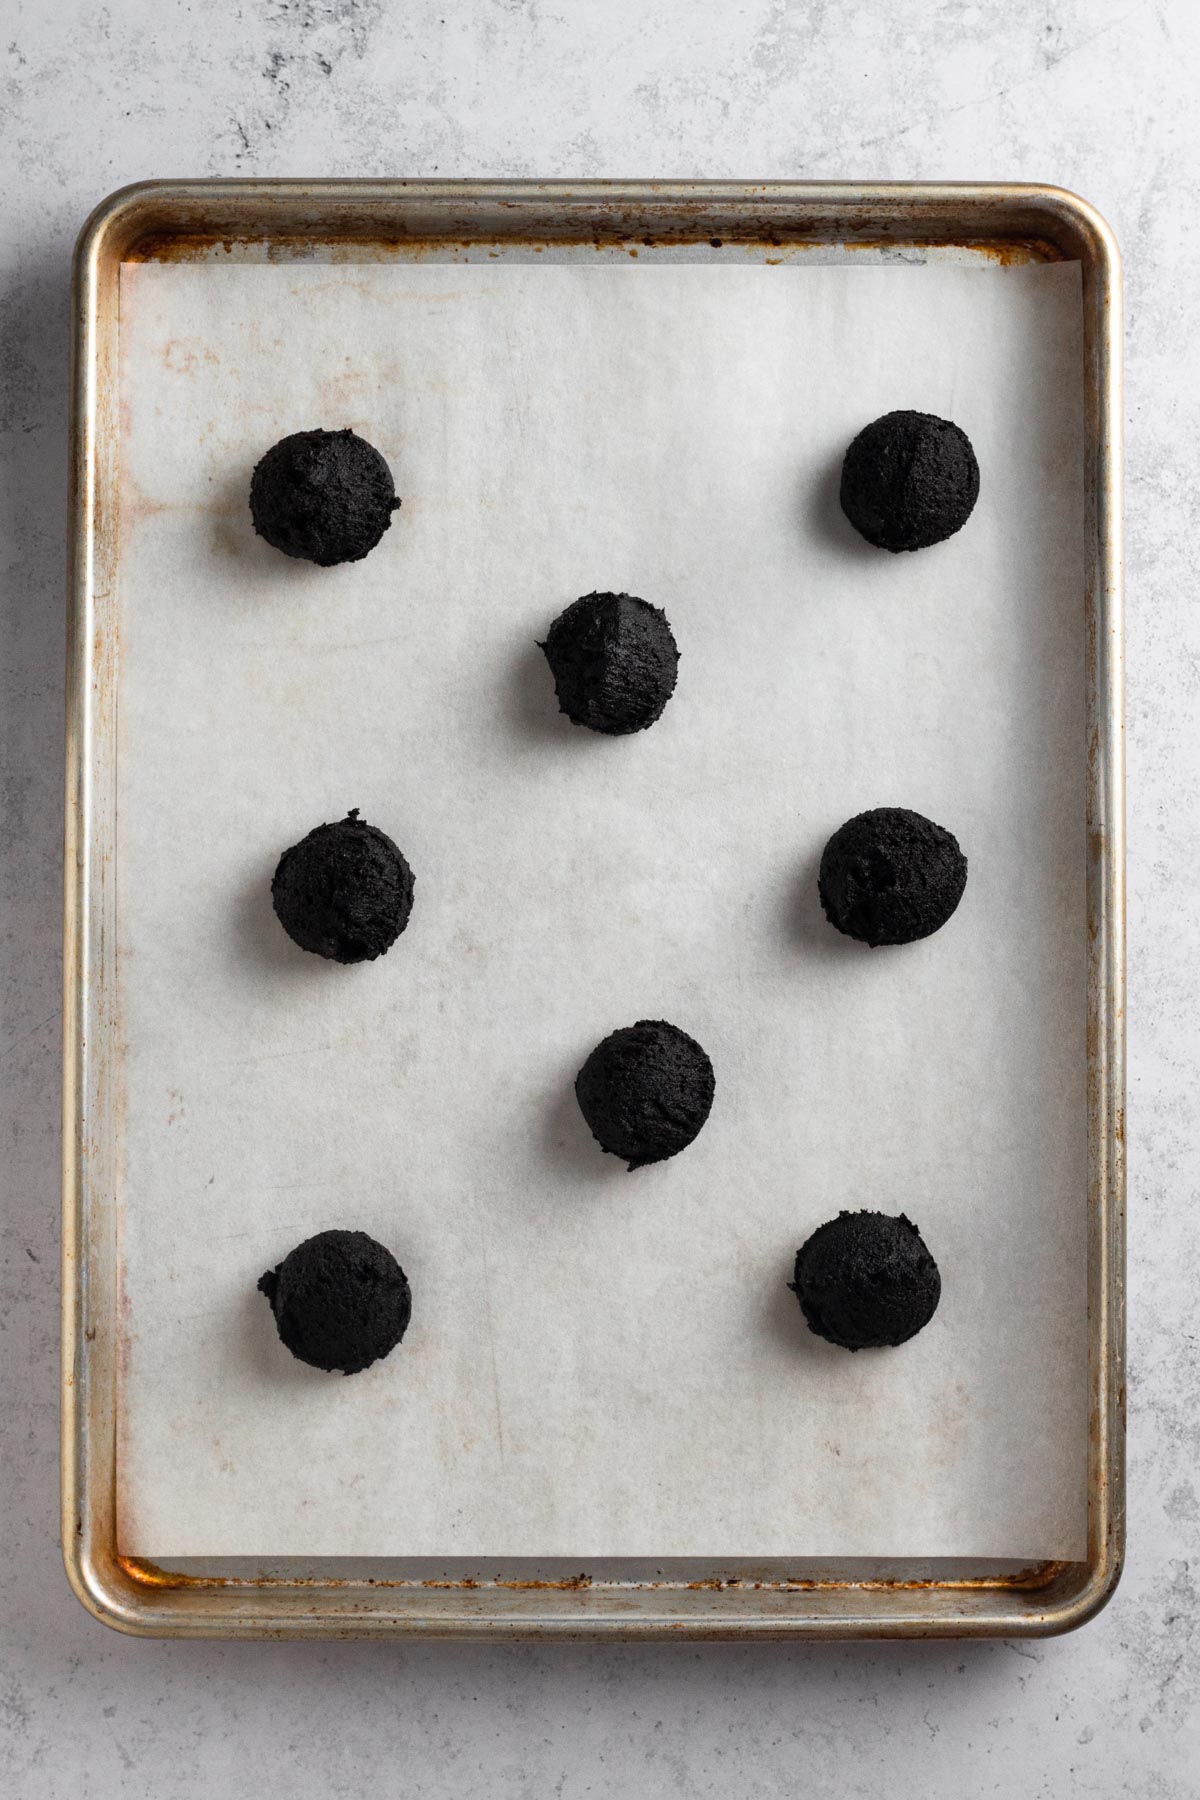
Step 7: Use a 1 ½ Tablespoon cookie scoop or measuring spoons to scoop 1 ½ Tablespoon balls of cookie dough. Place cookie dough balls onto the prepared baking sheets at least 2 inches apart..

Step 8: Bake the cookies, one tray at a time, for 10 minutes or until the cookies are flattened with slightly puffed centers. Let the cookies cool on the baking sheet for 5 minutes before transferring to a wire rack to cool completely.
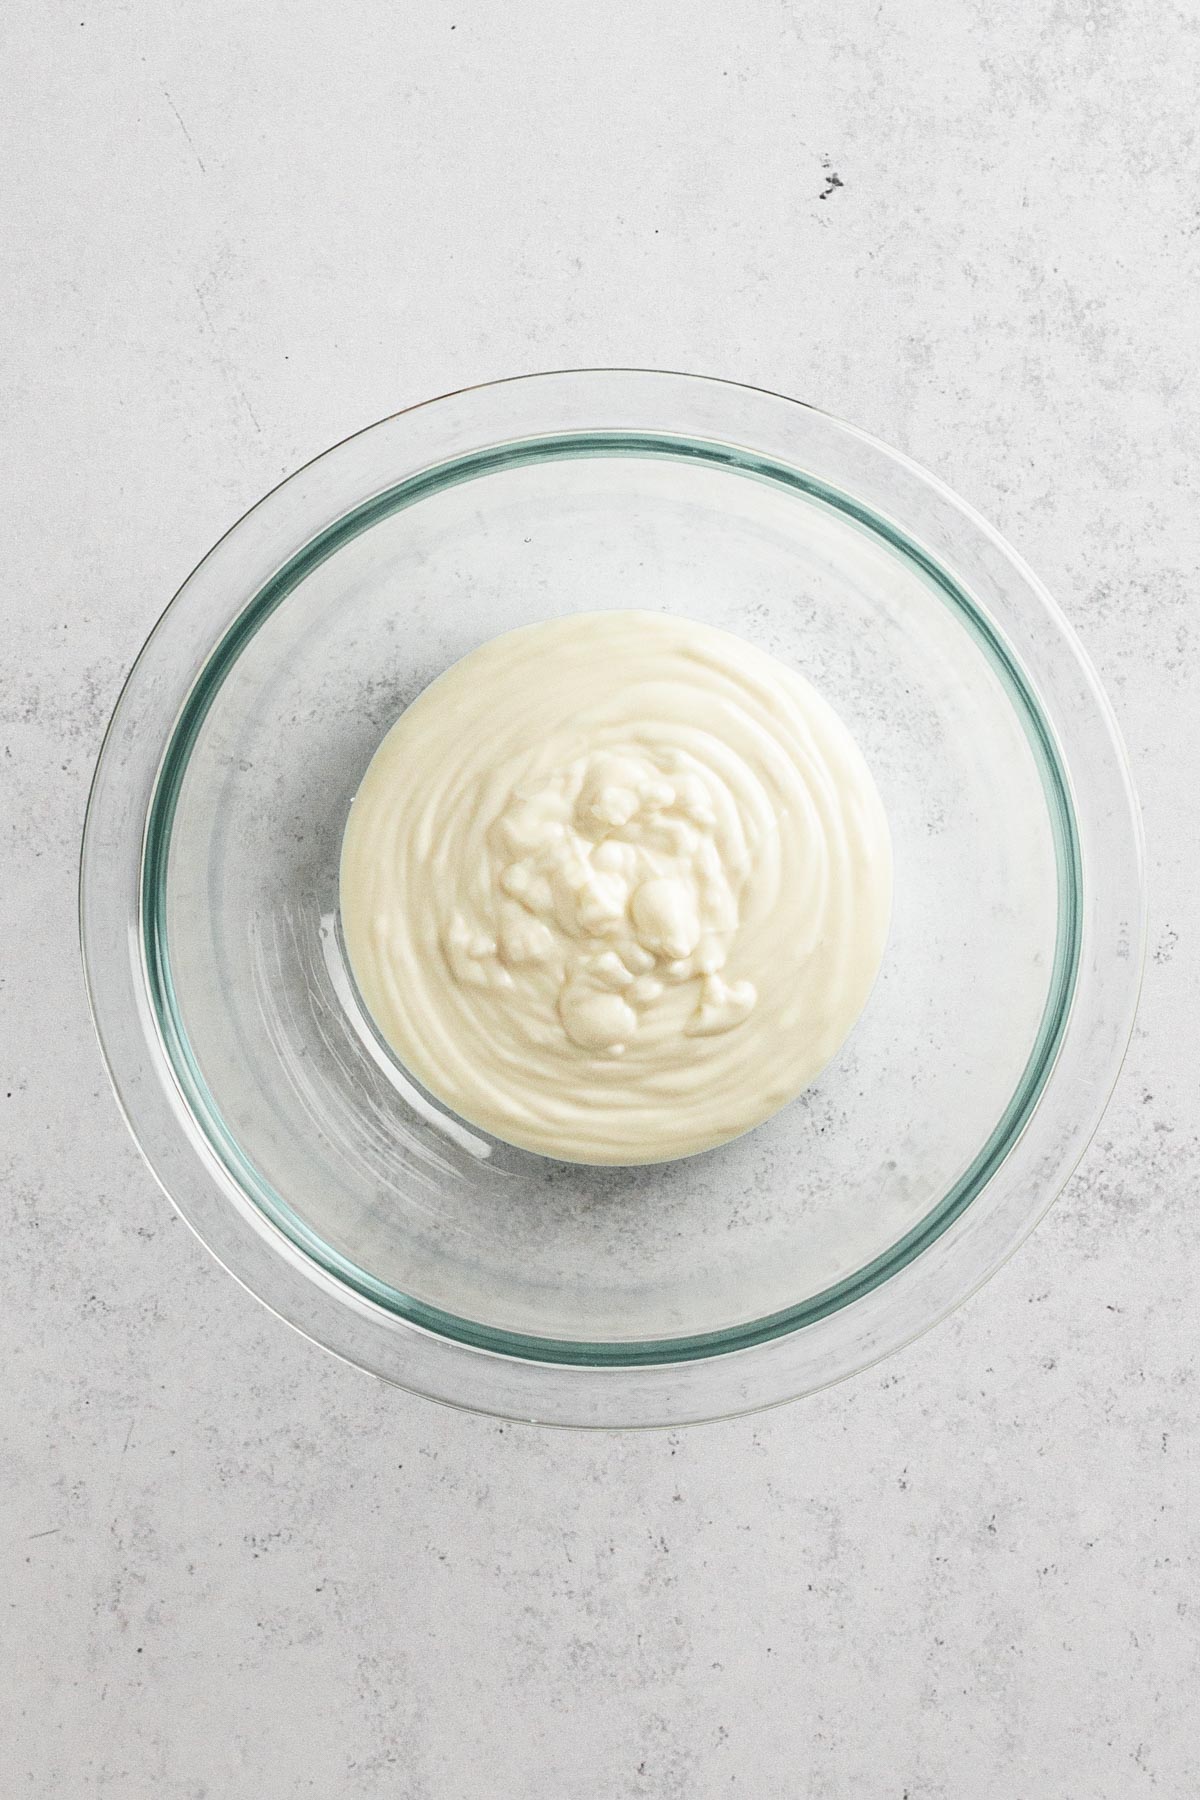
Step 9: When the cookies are completely cooled, melt the white chocolate wafers in a small bowl in the microwave on 50% power in 30 second increments, stirring until completely melted and smooth.

Step 10: Decorate the cookies. Add the melted chocolate to a piping bag fitted with a small round piping tip (or simply use a large plastic food storage bag with one corner snipped off). Working quickly (since the chocolate will firm up as it cools), decorate the cookies. See instructions below for making mummy or spiderweb designs.
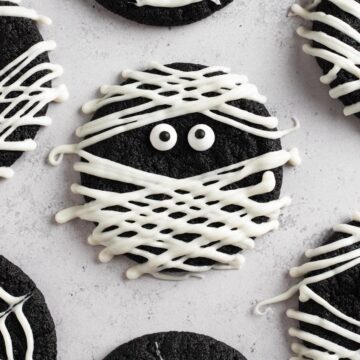
How to Decorate Mummy Cookies
To decorate mummy cookies, pipe a small drop of melted white chocolate onto the backs of two candy eyeballs. Affix the eyeballs just above the center of a cookie. Then pipe lines of chocolate back and forth across each of the 4 "corners" of the cookie to create the mummy's wrapping.
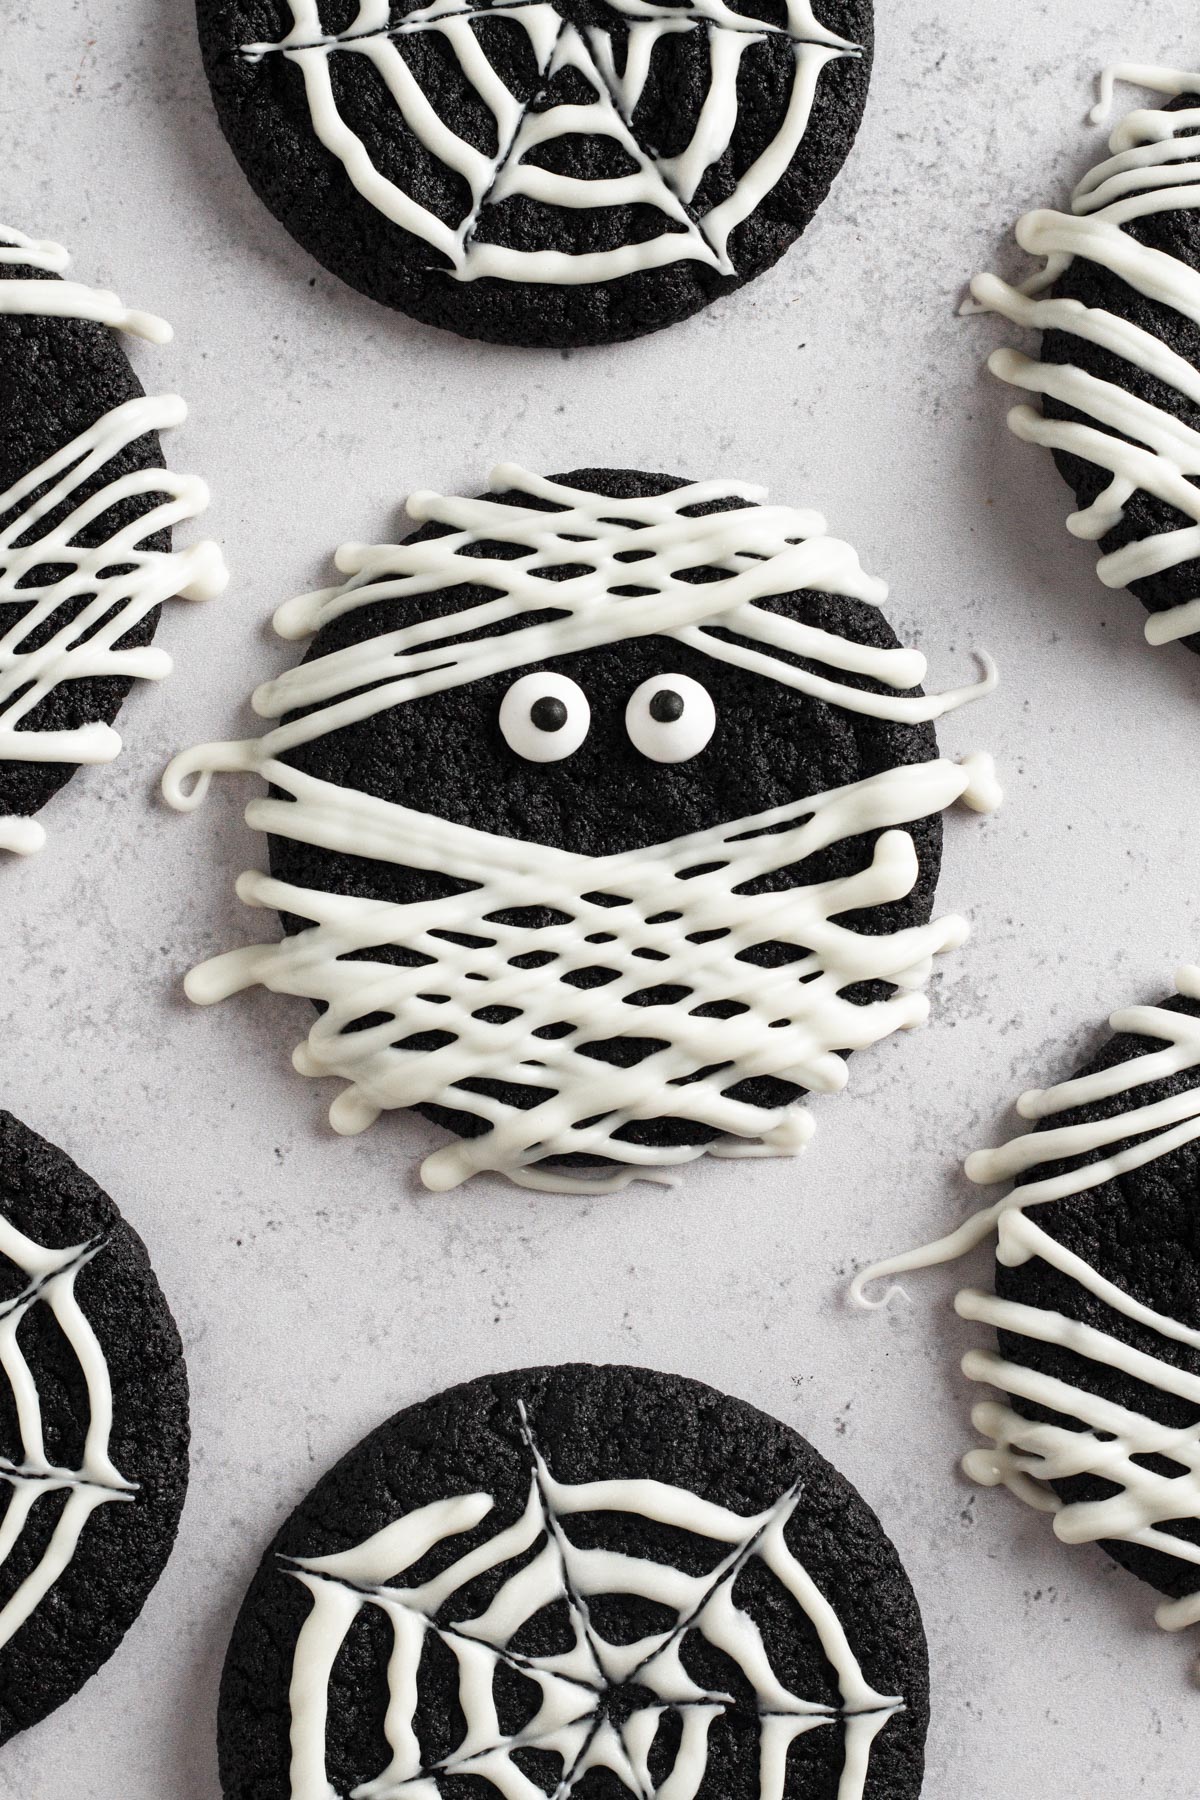
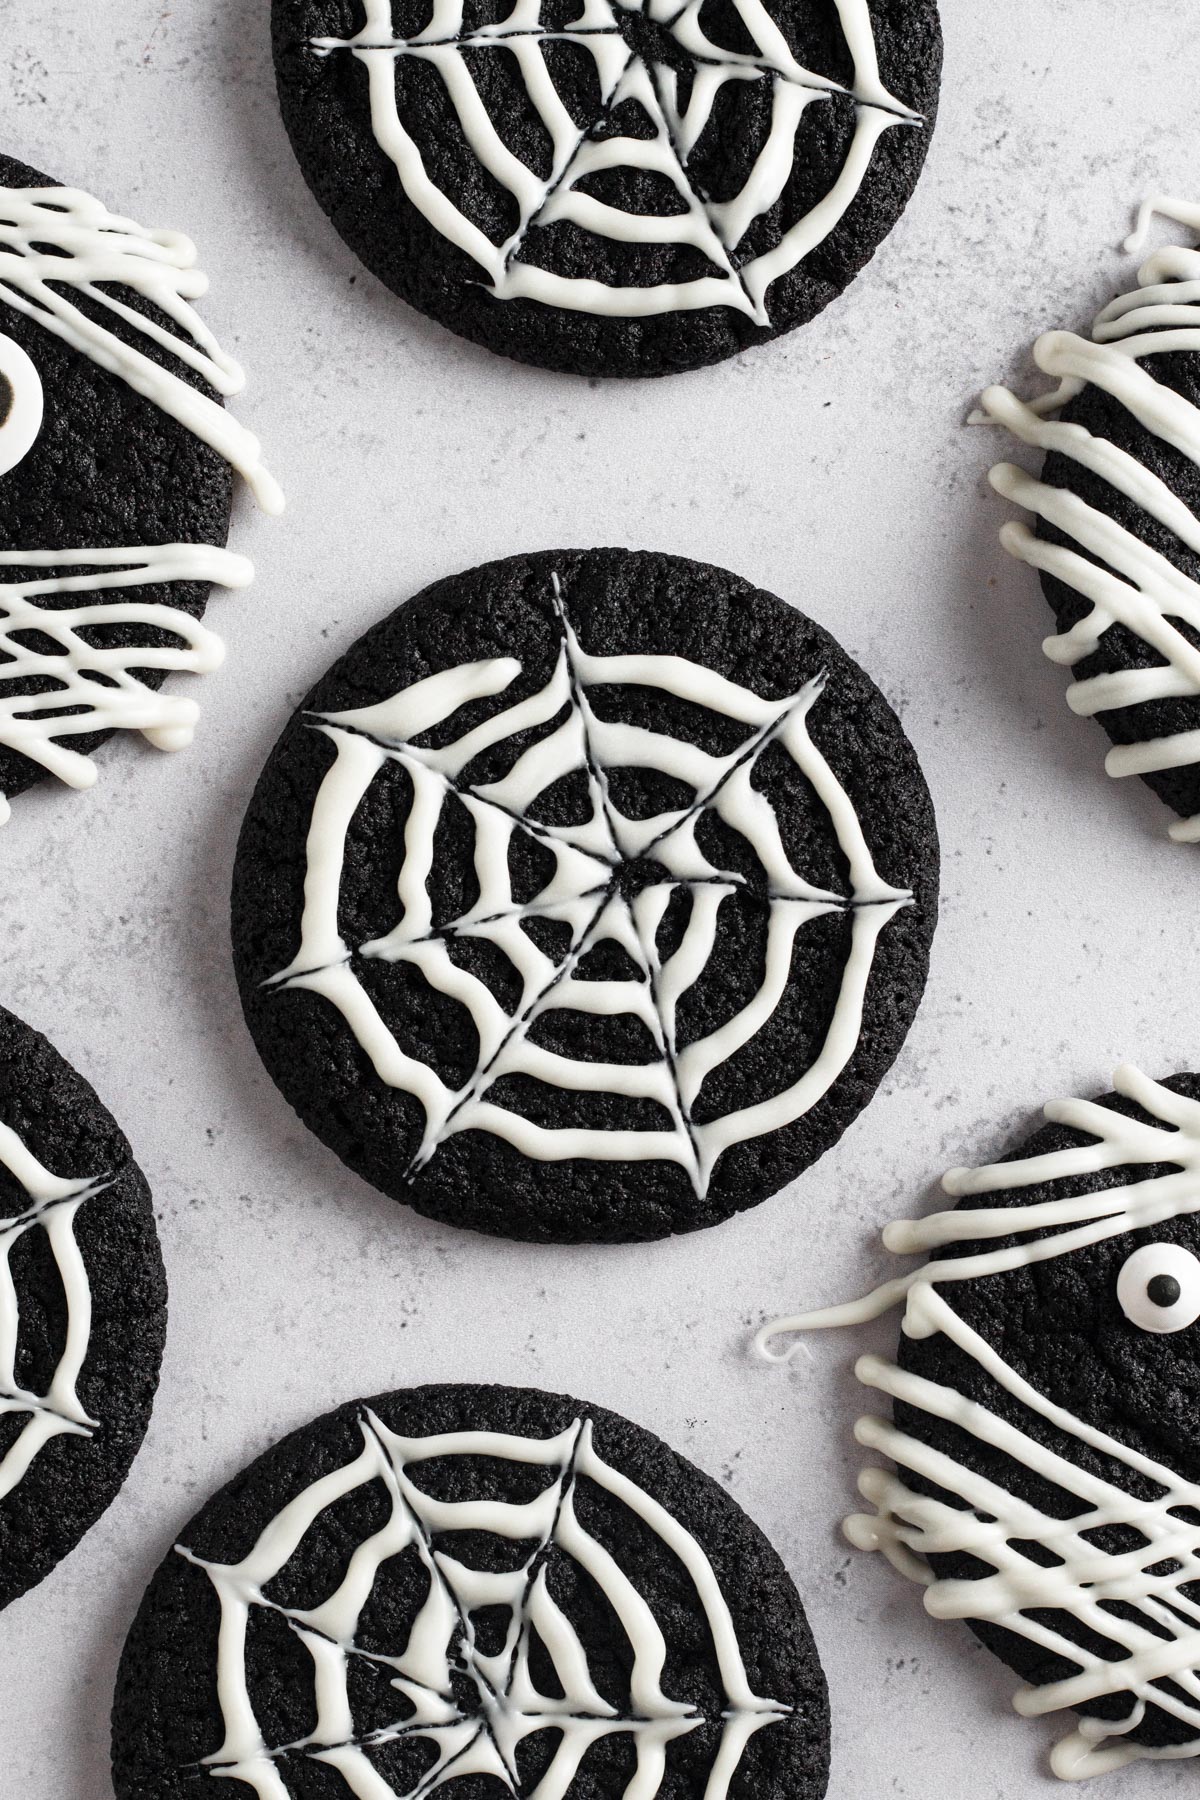
How to Decorate Spiderweb Cookies
To decorate spiderweb cookies, pipe a spiral of melted white chocolate onto a cookie. Using a toothpick, drag lines from the center of the cookie outward to create the spiderweb pattern.
Allison's Top Tips
For the best cookie texture, be sure to properly cream your butter and sugar.
For perfectly round cookies, place a round cookie cutter over each cookie on the baking tray and swirl them around inside it immediately after baking, when they're still hot from the oven.
Recipe FAQs
Black cocoa powder is a Dutch-processed cocoa powder that has been heavily alkalized. While all Dutch cocoa powder has been alkalized to neutralize its acidity - resulting in a mild chocolate flavor and deep brown color - black cocoa powder is ultra-alkalized to create an intense black color and non-bitter chocolate flavor. It's ideal for coloring baked goods and frostings without the use of food coloring.
It's important to note that, because it lacks acidity, Dutch cocoa powder (including black cocoa powder) will not react with baking soda. Therefore, it should be used in recipes that call for baking powder as the leavening agent or in recipes that contain another acidic ingredient which will activate the baking soda.
Yes! Oreos' dark color and mild chocolate flavor comes from black cocoa powder, so you will likely find its flavor to be recognizable.
Dutch-processed cocoa powder can be substituted for black cocoa powder in this recipe, though the resulting cookies will be a dark brown color rather than deep black. Dutch cocoa powder can be found in the baking aisle at well-stocked grocery stores, at specialty grocery stores, and online. Hershey's Special Dark cocoa powder will likely be the easiest Dutch cocoa powder to find in stores.
Storage Instructions
Room Temperature: Store cookies in an airtight container at room temperature for up to 4 days.
Refrigerator: Do not refrigerate these cookies, since it will cause them to become stale more quickly.
Freezing: These cookies can be frozen in an airtight container for up to 3 months. For best results, freeze the cookies without decorations, then defrost and decorate before serving.
More Chocolate Cookie Recipes


Love this recipe? Please leave a star rating and review on the recipe below! And don't forget to subscribe to Always Eat Dessert for even more easy dessert recipes and helpful baking tips.
Recipe
Black Cocoa Cookies
Special Equipment
- Stand mixer or electric hand mixer
Ingredients
- 1 cup (125 grams) all-purpose flour
- ½ cup (43 grams) black cocoa powder*
- ½ teaspoon (2 grams) baking soda
- ¼ teaspoon (1.5 grams) salt
- ½ cup (114 grams) unsalted butter, room temperature
- ½ cup (110 grams) light brown sugar
- ¼ cup (50 grams) granulated sugar
- 1 large egg
- 1 Tablespoon (15 grams) whole milk
- 1 teaspoon (4 grams) vanilla extract
- ½ cup (118 grams) white chocolate melting wafers
- Candy eyeballs, optional
Instructions
Make the cookie dough
- In a medium bowl, add flour, cocoa powder, baking soda, and salt and whisk to combine. Set aside.
- In the bowl of a stand mixer (or in a large bowl using a handheld electric mixer), cream the butter and both sugars until light and fluffy.
- Add egg, milk, and vanilla to the butter mixture and beat to combine.
- With the mixer running on low speed, slowly add the flour mixture to the butter mixture blending until combined and stopping to scrape the bowl as needed.
- Cover the bowl with plastic wrap and place the cookie dough in the fridge to chill for 30 minutes.
- Preheat the oven to 350°F (177°C). Line cookie sheets with parchment paper and set aside.
- Use a 1 ½ Tablespoon cookie scoop or measuring spoons to scoop 1 ½ Tablespoon balls of cookie dough. Place cookie dough balls onto the prepared baking sheets at least 2 inches apart.
Bake the cookies.
- Bake the cookies, one tray at a time, for 10 minutes or until the cookies are flattened with slightly puffed centers. Let the cookies cool on the baking sheet for 5 minutes before transferring to a wire rack to cool completely.
Melt the white chocolate.
- When the cookies are completely cooled, melt the white chocolate wafers in a small bowl in the microwave on 50% power in 30 second increments, stirring until completely melted and smooth.
Decorate the cookies.
- Add the melted chocolate to a piping bag fitted with a small round piping tip (or simply use a large plastic food storage bag with one corner snipped off). Working quickly (since the chocolate will firm up as it cools), decorate the cookies.
- To decorate mummy cookies, pipe a small drop of melted chocolate onto the back of two candy eyeballs. Affix the eyeballs just above the center of a cookie. Pipe lines of chocolate back and forth, covering each corner of the cookie, to create the mummy's wrapping.
- To decorate spiderweb cookies, pipe a spiral of melted white chocolate onto a cookie. Using a toothpick, drag lines from the center of the cookie outward to create the spiderweb pattern.


sv says
Noticed "It's important to note that, because it lacks acidity, Dutch cocoa powder (including black cocoa powder) will not react with baking soda. Therefore, it should be used in recipes that call for baking powder as the leavening agent or in recipes that contain another acidic ingredient which will activate the baking soda." ....but this recipe has baking soda, not powder, was one a typo?? still seemed to come out good though!
Allison Ferraro says
Hi. Great question! No, not a typo. This recipe is an example of "recipes that contain another acidic ingredient which will activate the baking soda". We cannot rely on Dutch processed cocoa powder, like black cocoa, to activate the baking soda, but in this particular recipe the brown sugar is activating the baking soda. It's fine to use black cocoa in recipes with baking soda so long as there is also an acidic ingredient in the recipe to activate the leavener.
- Allison