
These Halloween Dirt Cups put a spooky spin on nostalgic dirt dessert pudding cups! Made with homemade chocolate pudding and crushed Oreo cookies - and topped with creepy crawly M&M bugs - kids of all ages are going to love these individually-portioned Halloween treats.

Jump to:
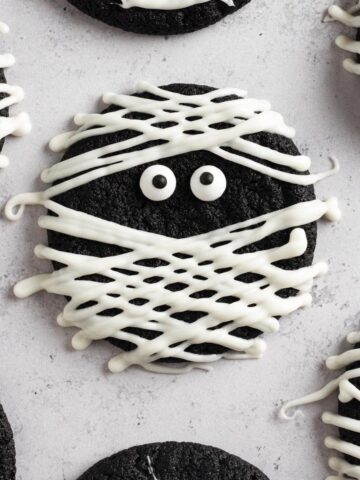
With two toddlers under age 5 in the house, I feel like I've reached peak toddler-mom status. While the version of me before kids got excited about slightly sophisticated fall treats (like fig cupcakes and chai snickerdoodles), me-as-a-mom is busy making mummy cookies, pumpkin cookies, and these creepy crawly Halloween dirt cups. And, truth be told, I love these treats just as much as my kids do!
I think it's safe to say that most millennials love a good, nostalgic pudding cup, and this Halloween-themed version does not disappoint! This simple and easy-to-follow recipe for perfectly smooth homemade chocolate pudding gets individually portioned into small jars or ramekins and topped with crushed cookies and creepy crawly bugs.
Below I show you exactly how to make the pudding cups and also how to create the caterpillar and spiderweb decorations using melted chocolate and M&M candies.
Ingredient Notes & Substitutions
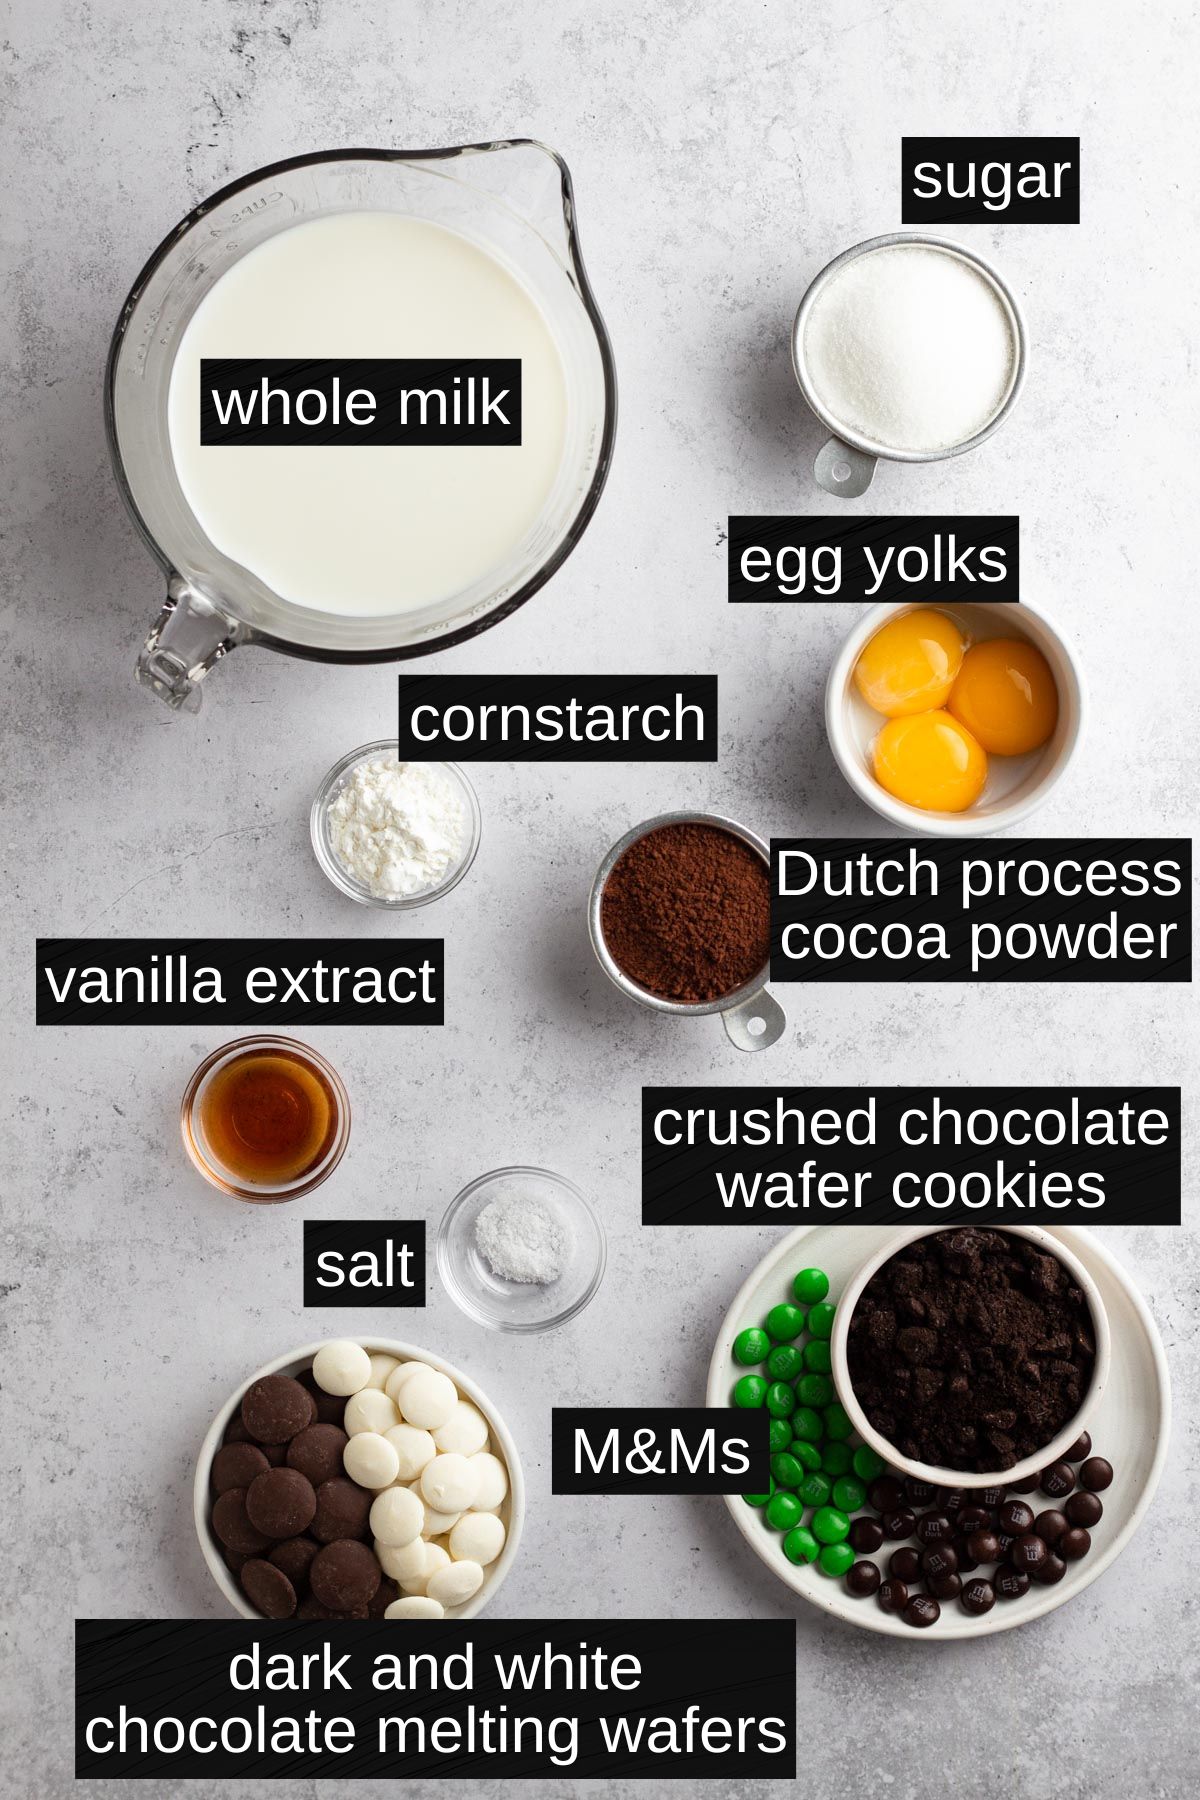
Whole Milk - Milk is a key ingredient in pudding, and the fat content in whole milk makes it the best choice for baking. I have not tested this recipe with non-dairy milks.
Dutch Process Cocoa Powder - Dutched cocoa powder has a rich and smooth chocolate flavor, producing a perfectly indulgent chocolate pudding. I used Hershey's Special Dark for this recipe, which is easy to find in grocery stores, but any Dutch process cocoa powder will do.
Cornstarch - Cornstarch works to thicken the pudding along with the egg yolks, so it's key to achieving the proper pudding texture.
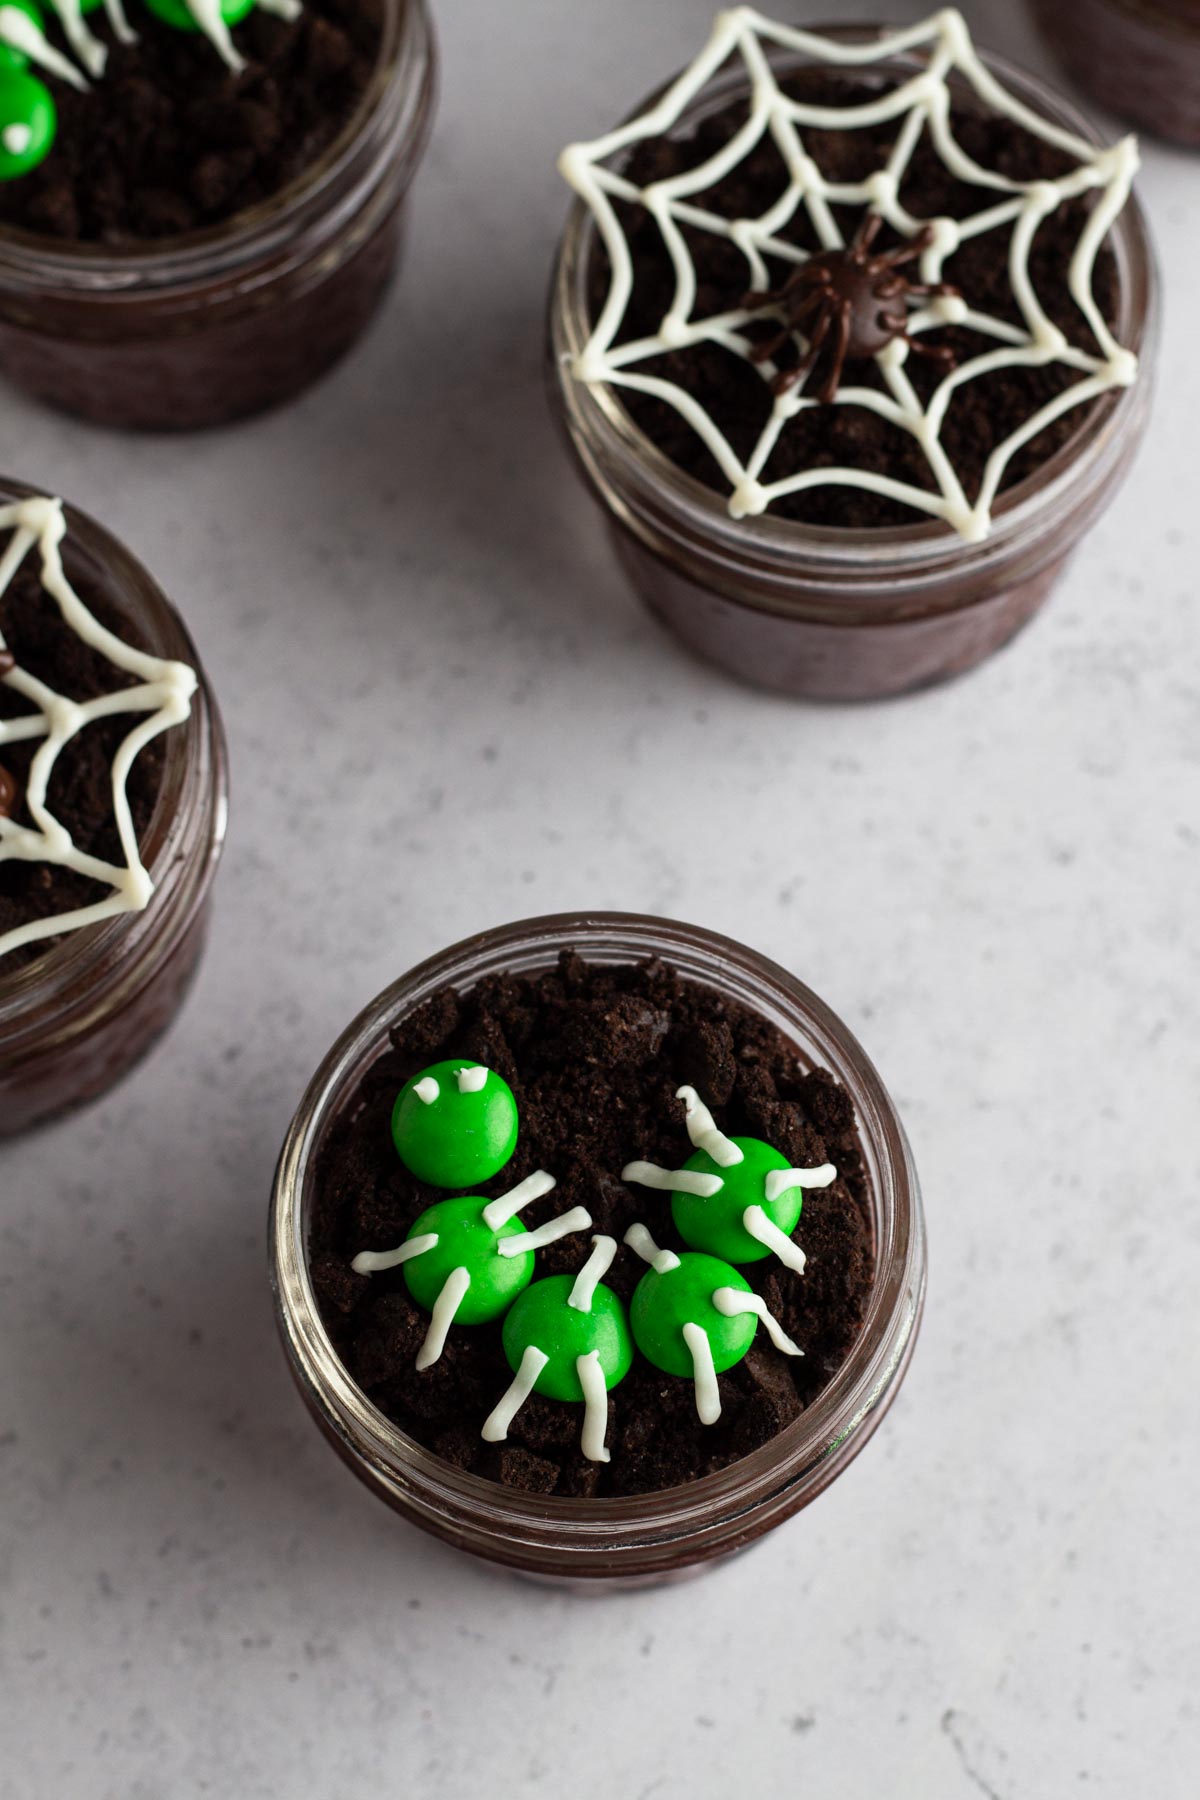
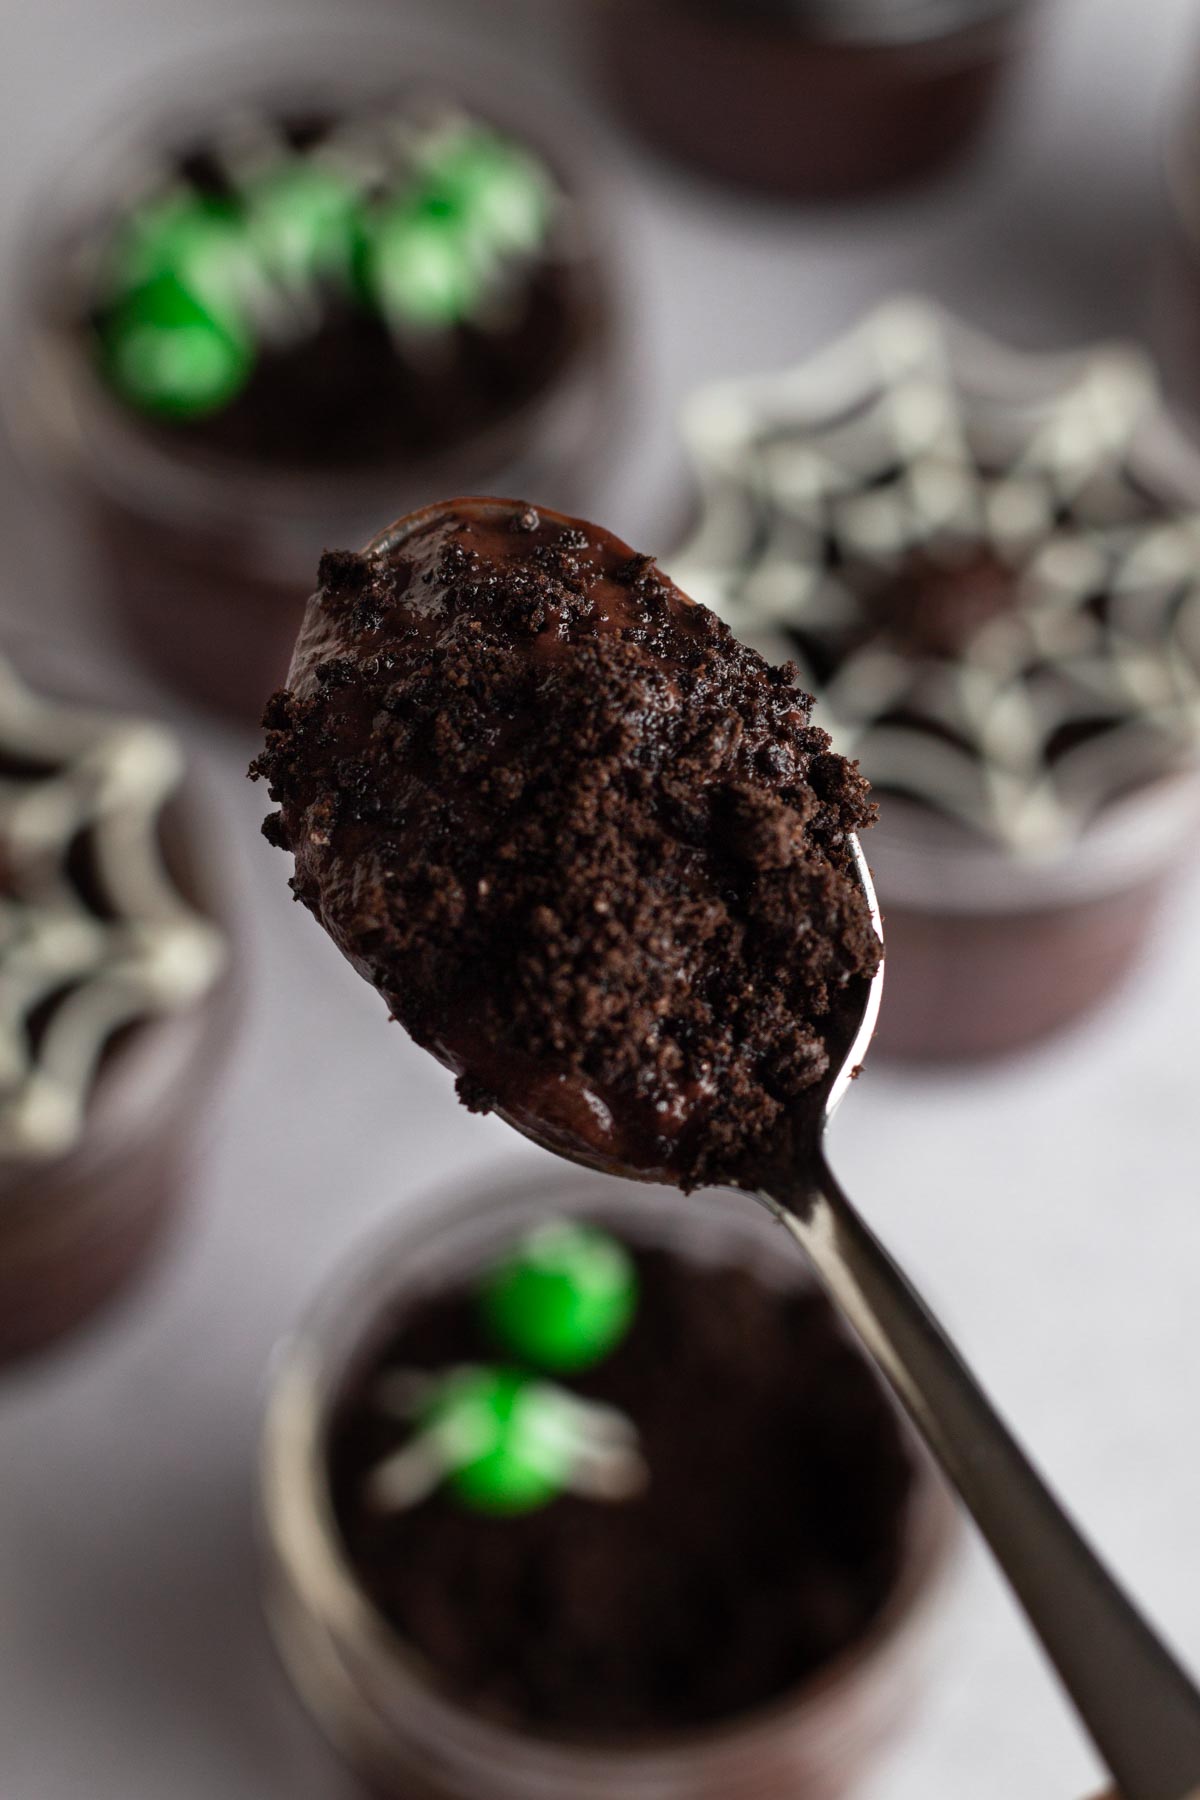
Crushed Chocolate Wafer Cookies - A topping of crushed cookies atop pudding is what makes dirt dessert a classic. I used 8 Oreos (with the cream filling removed) but you could also use about 16 chocolate wafer cookies (like Nabisco Famous Chocolate Wafers). To crush the cookies, I seal them inside a plastic bag and roll over the bag with a rolling pin until the cookies break into very small pieces.
See recipe card at the bottom of this post for full ingredient list and measurements.
Special Equipment
In addition to essential baking equipment (like a whisk and spatula), I recommend some special tools for making this recipe.
- A medium saucepan for cooking the pudding.
- A medium-sized heat-proof mixing bowl for mixing and tempering the eggs.
- Six 4-ounce canning jars or similarly sized ramekins for portioning and serving the dirt cups.
- Plastic wrap for covering the pudding as it chills and sets.
- Two pastry bags for piping chocolate spiderwebs and legs.
- Wax paper for piping chocolate spiderwebs.
Step-By-Step Recipe Instructions
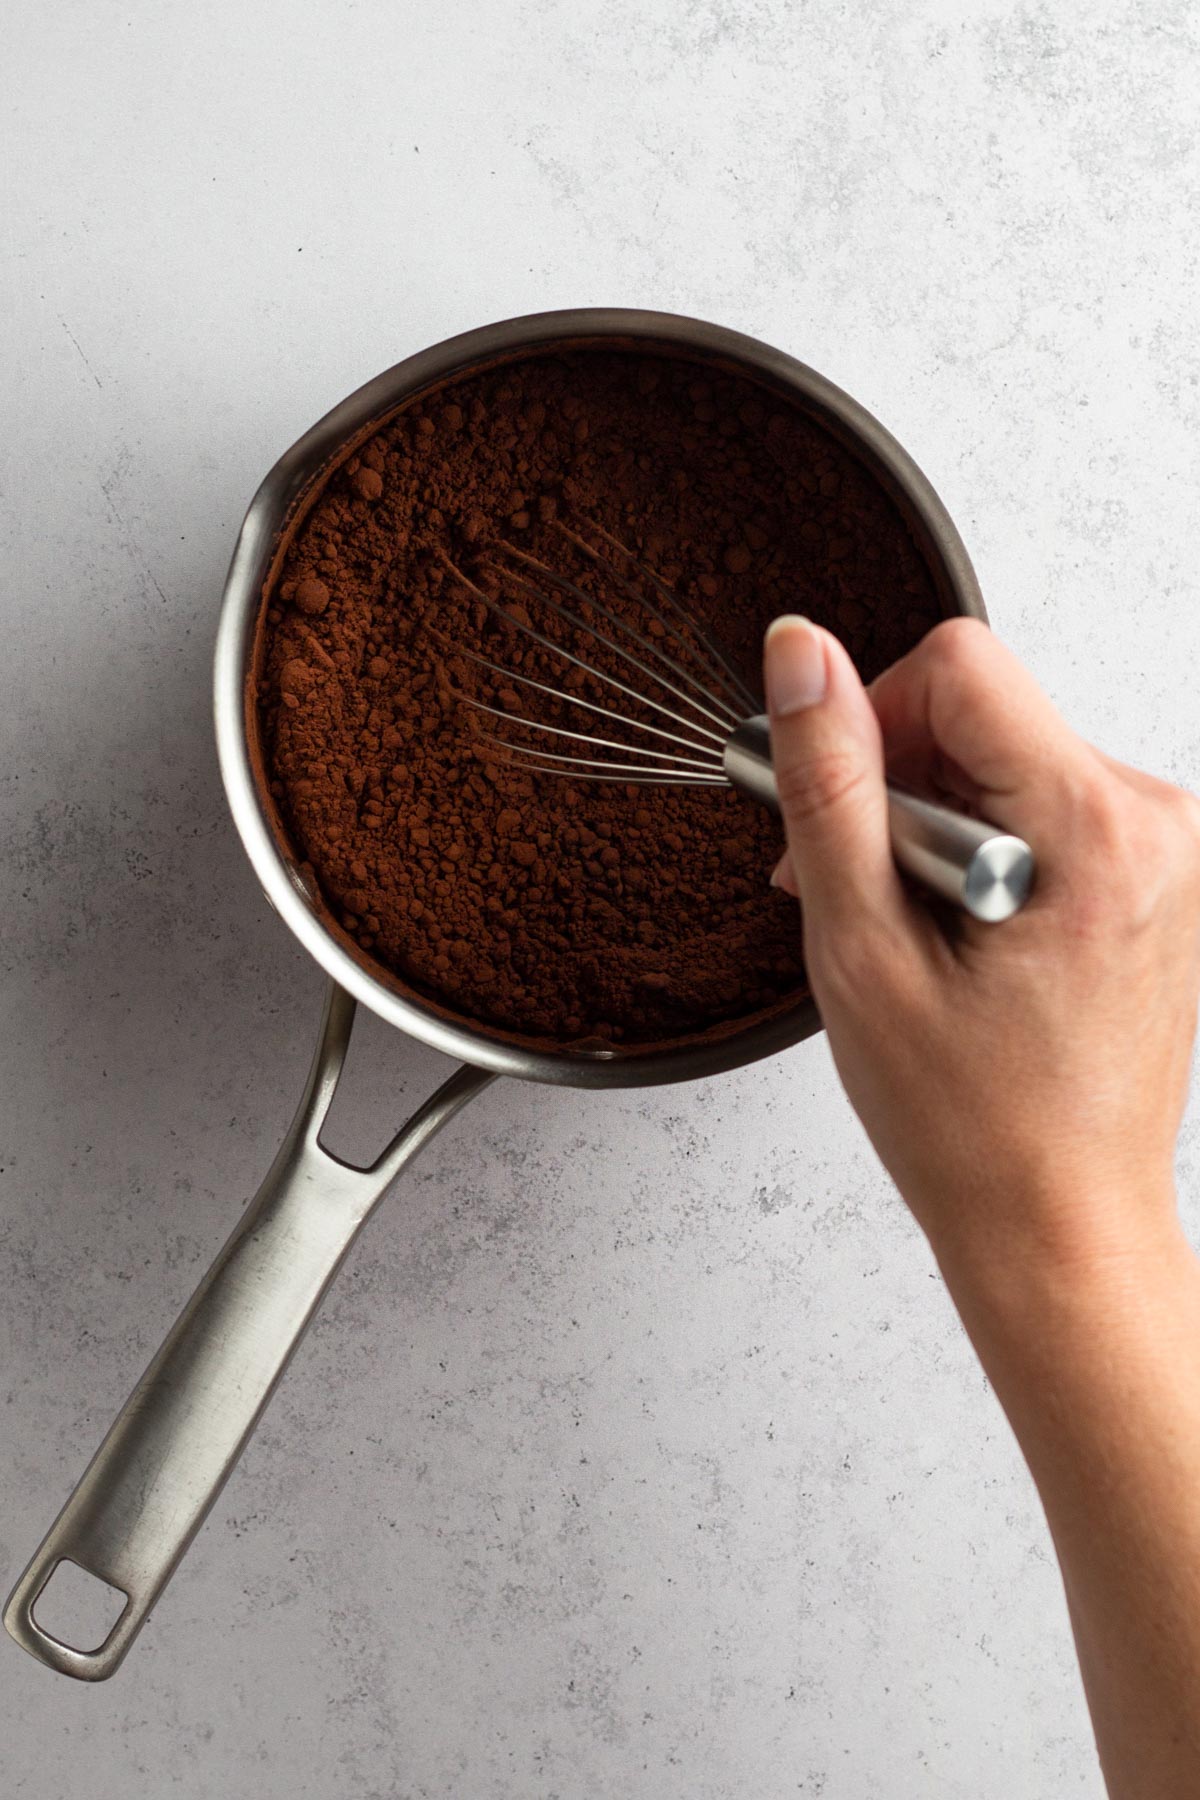
Step 1: Combine milk, sugar, and cocoa powder in a saucepan over medium heat until steaming and warm.
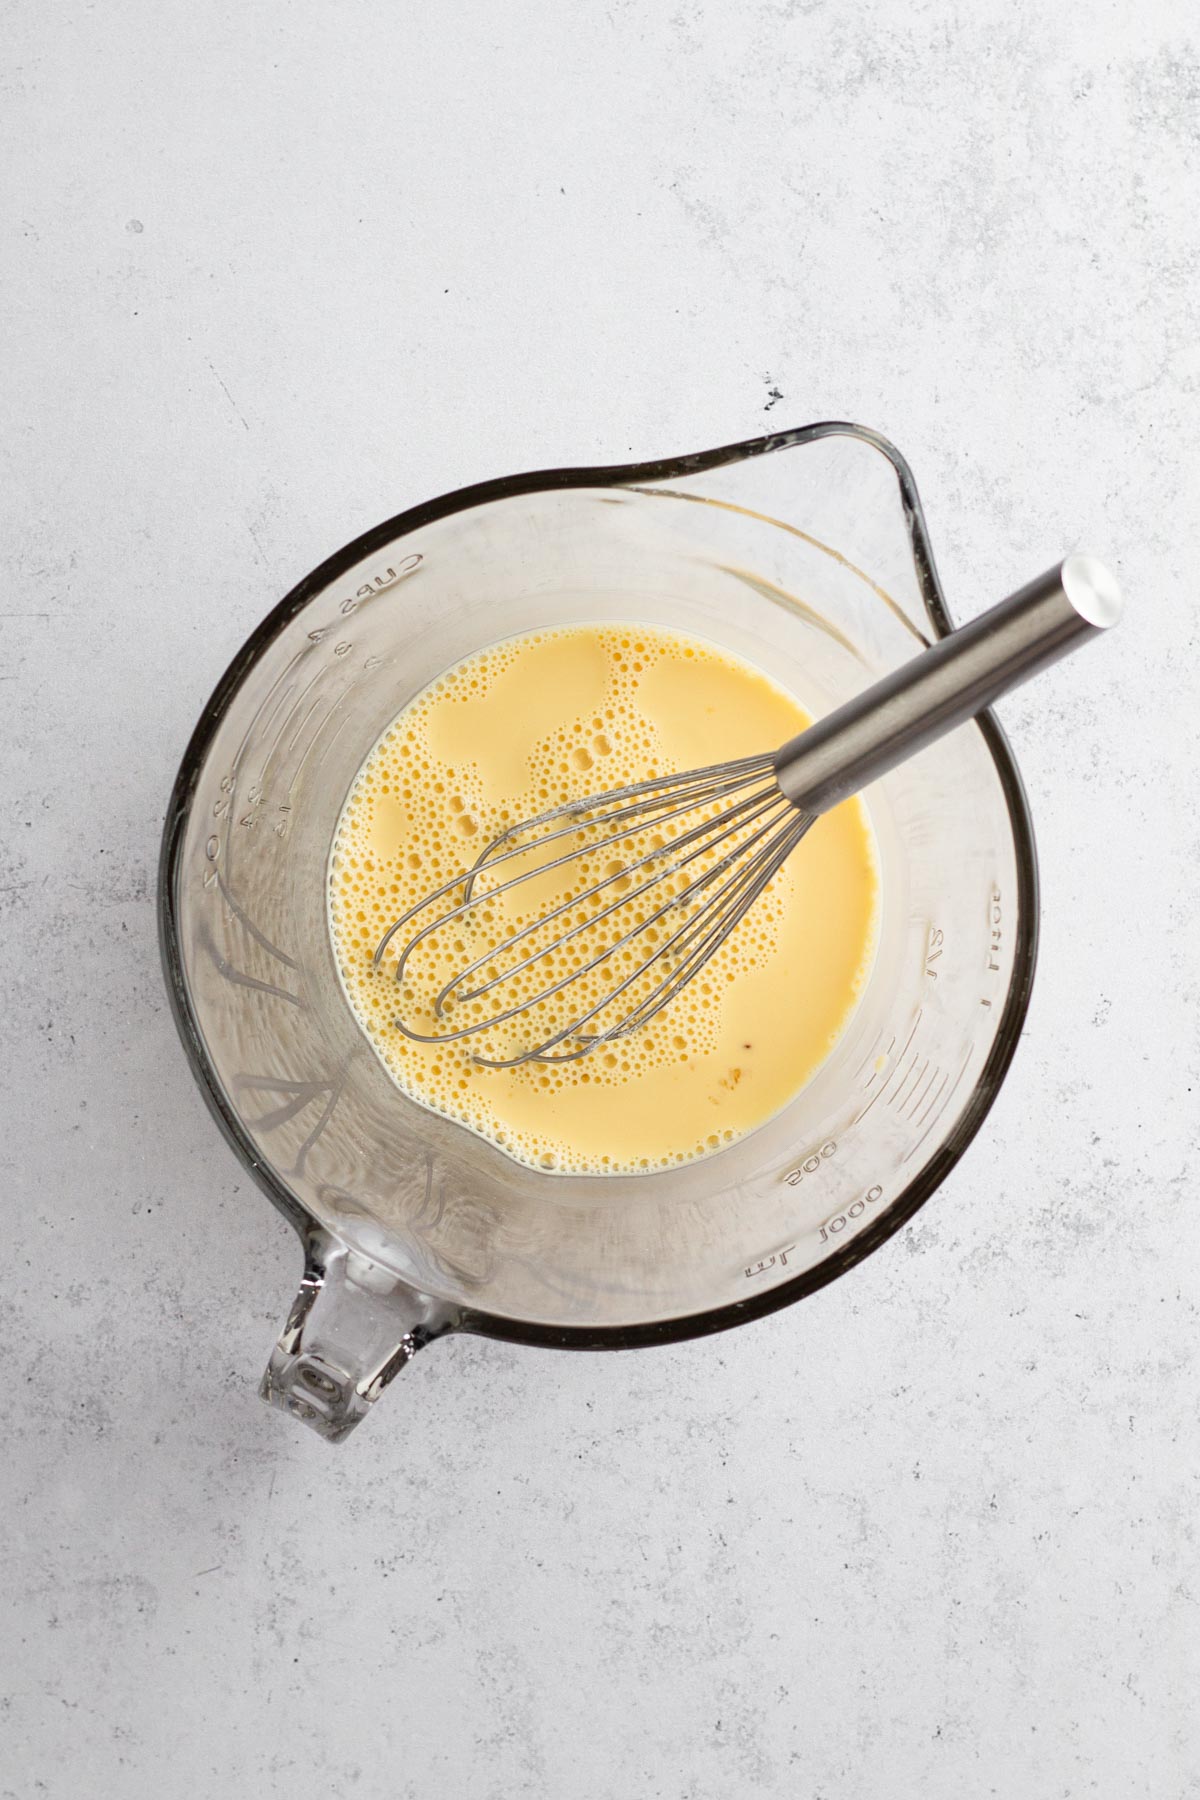
Step 2: In a heat-proof bowl, whisk together remaining milk, cornstarch, salt, egg yolks, and vanilla extract.
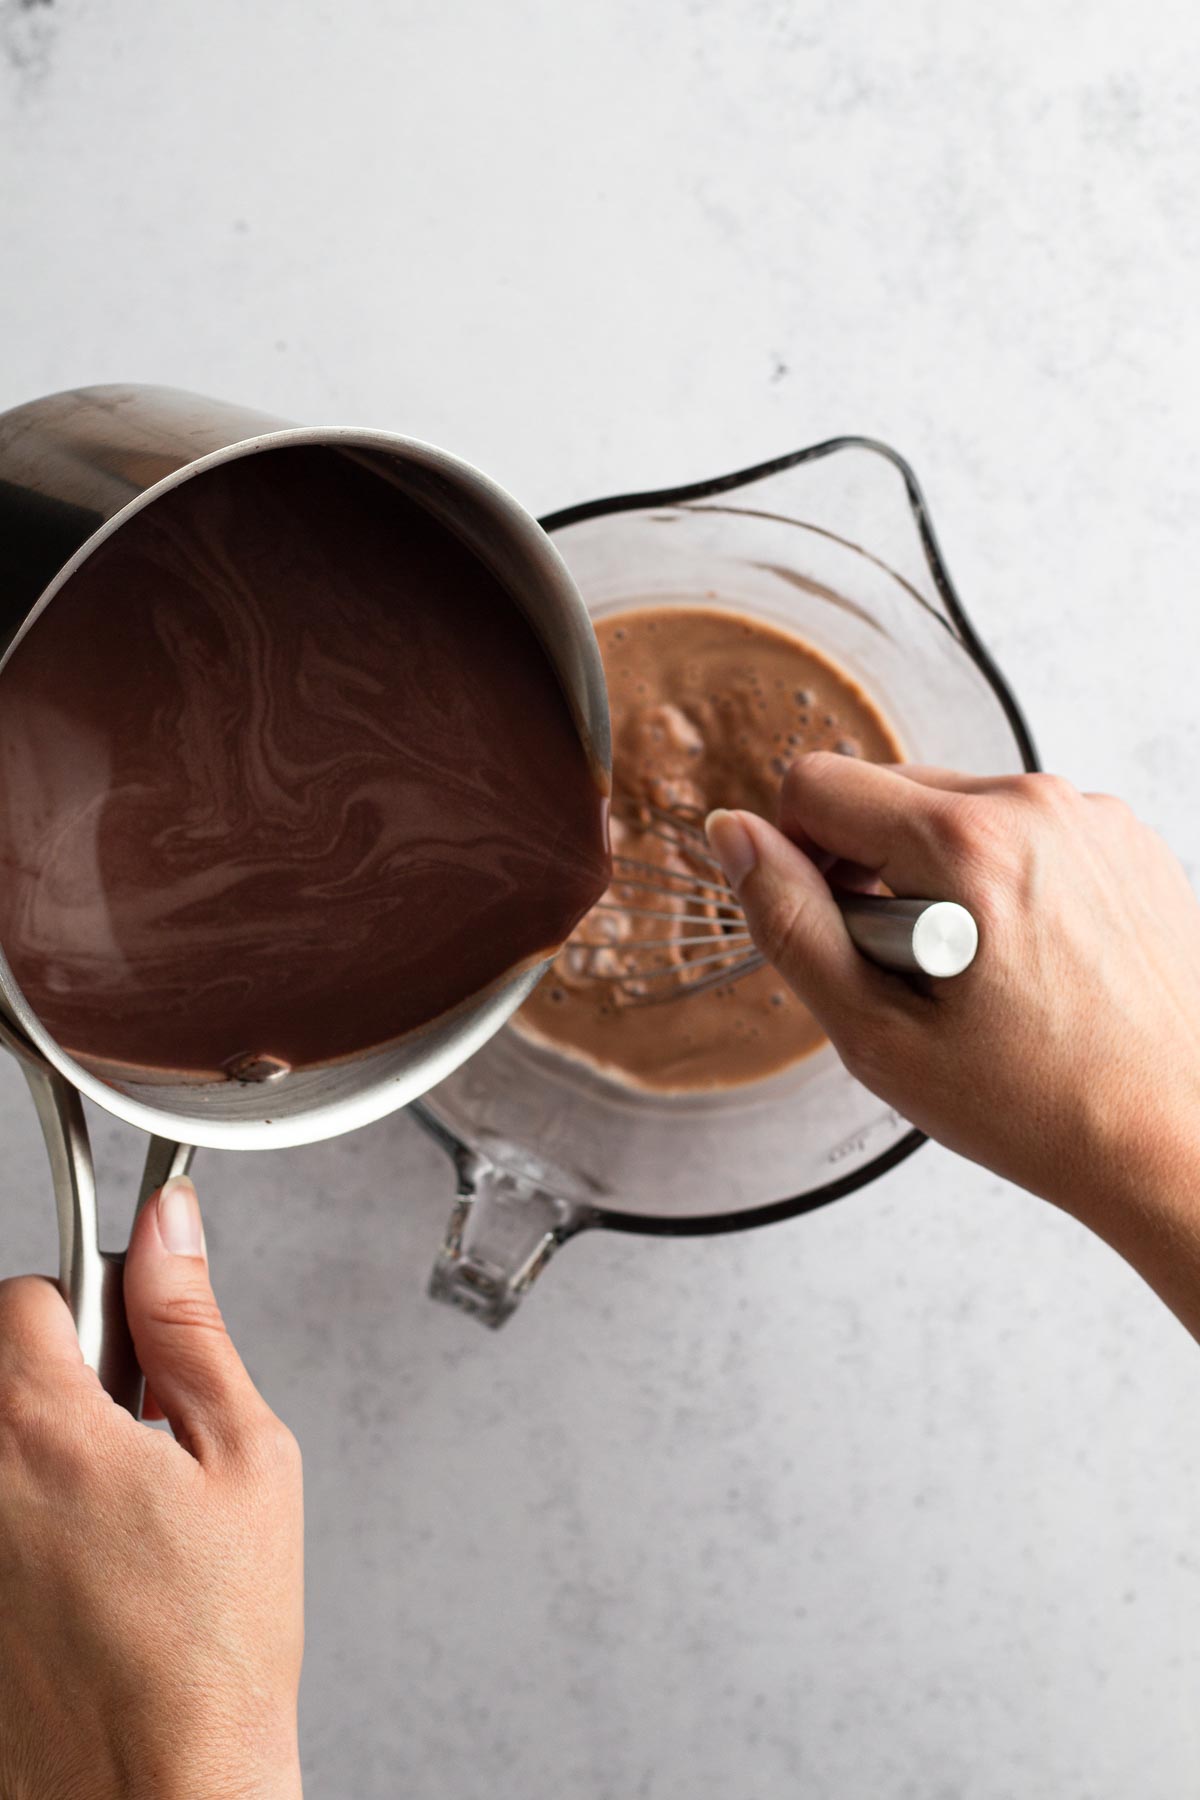
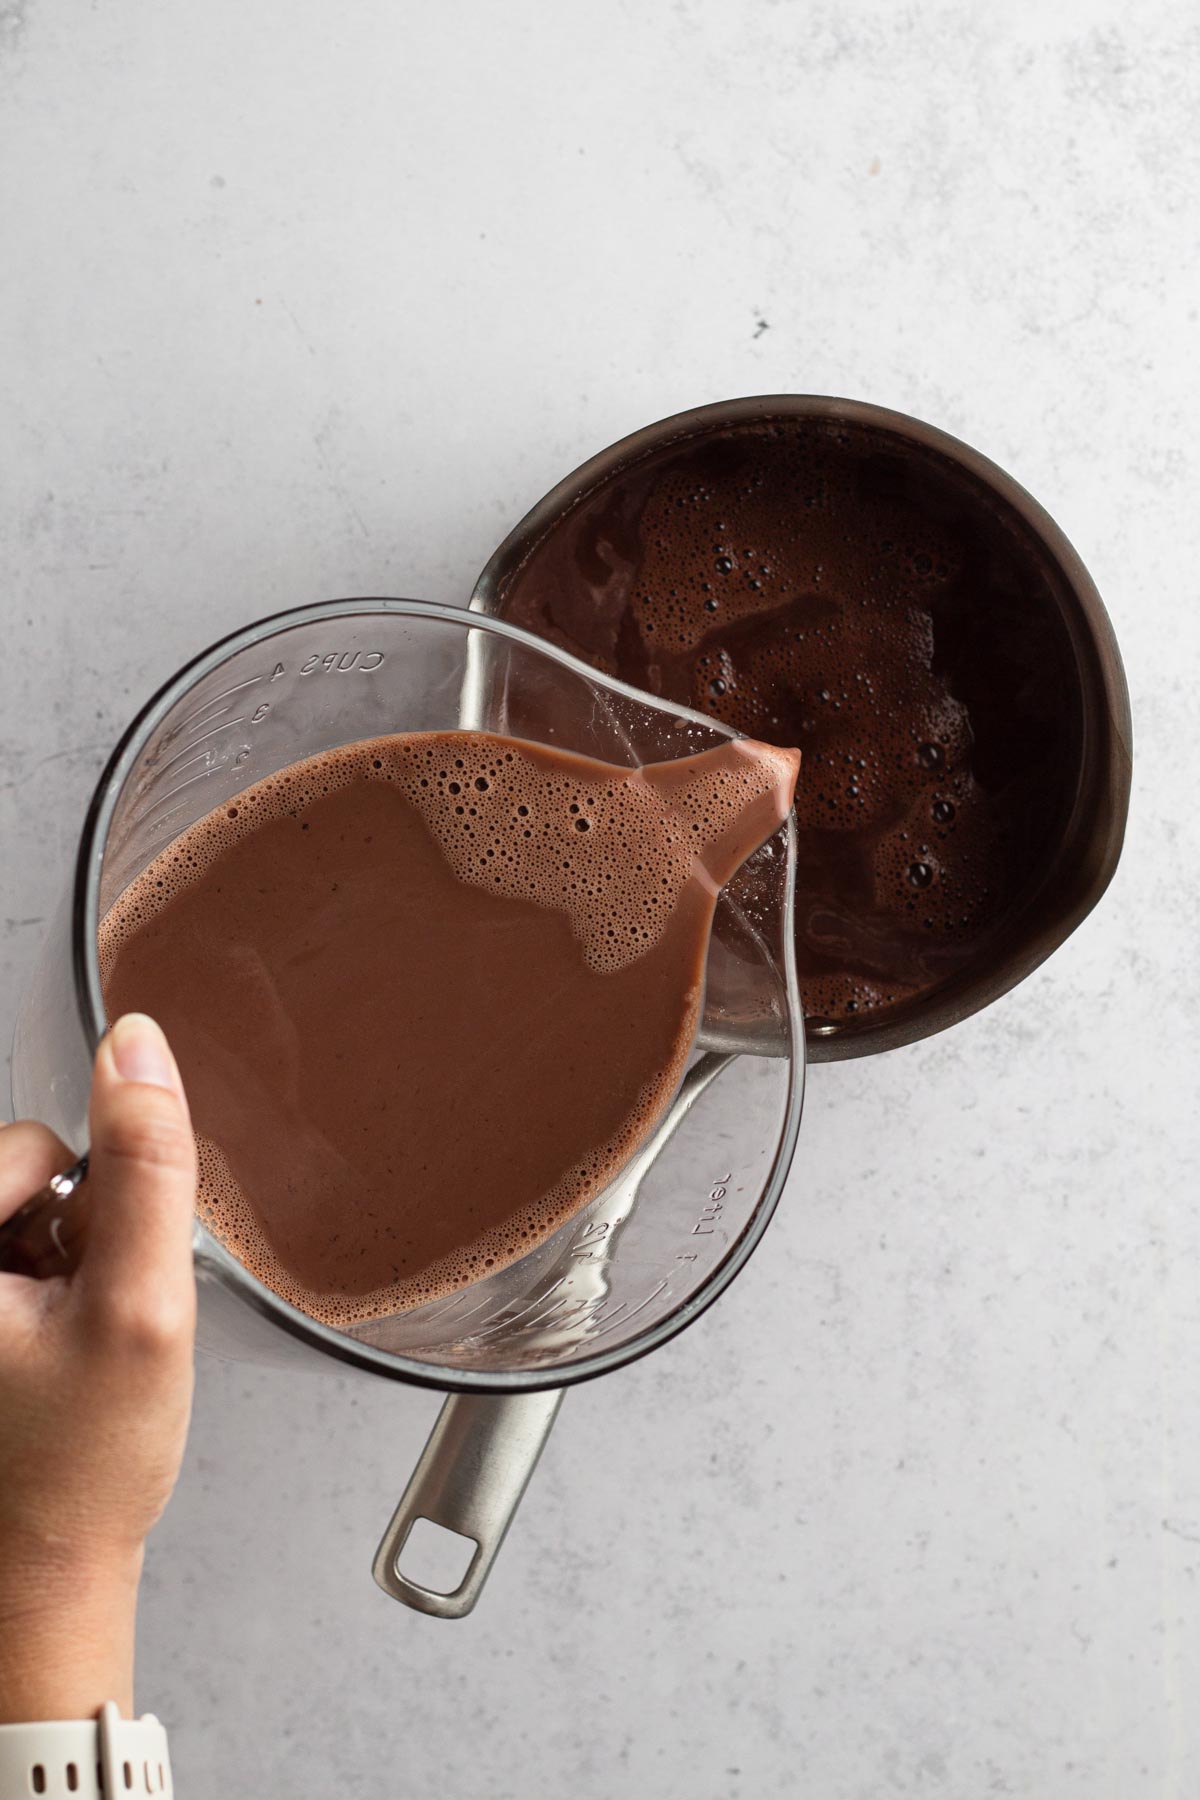
Step 3: Temper the eggs by slowly pouring about half of the steaming chocolate milk into the egg mixture, whisking constantly.
Step 4: Add the egg mixture back to the saucepan and heat the entire mixture over medium heat, whisking constantly.
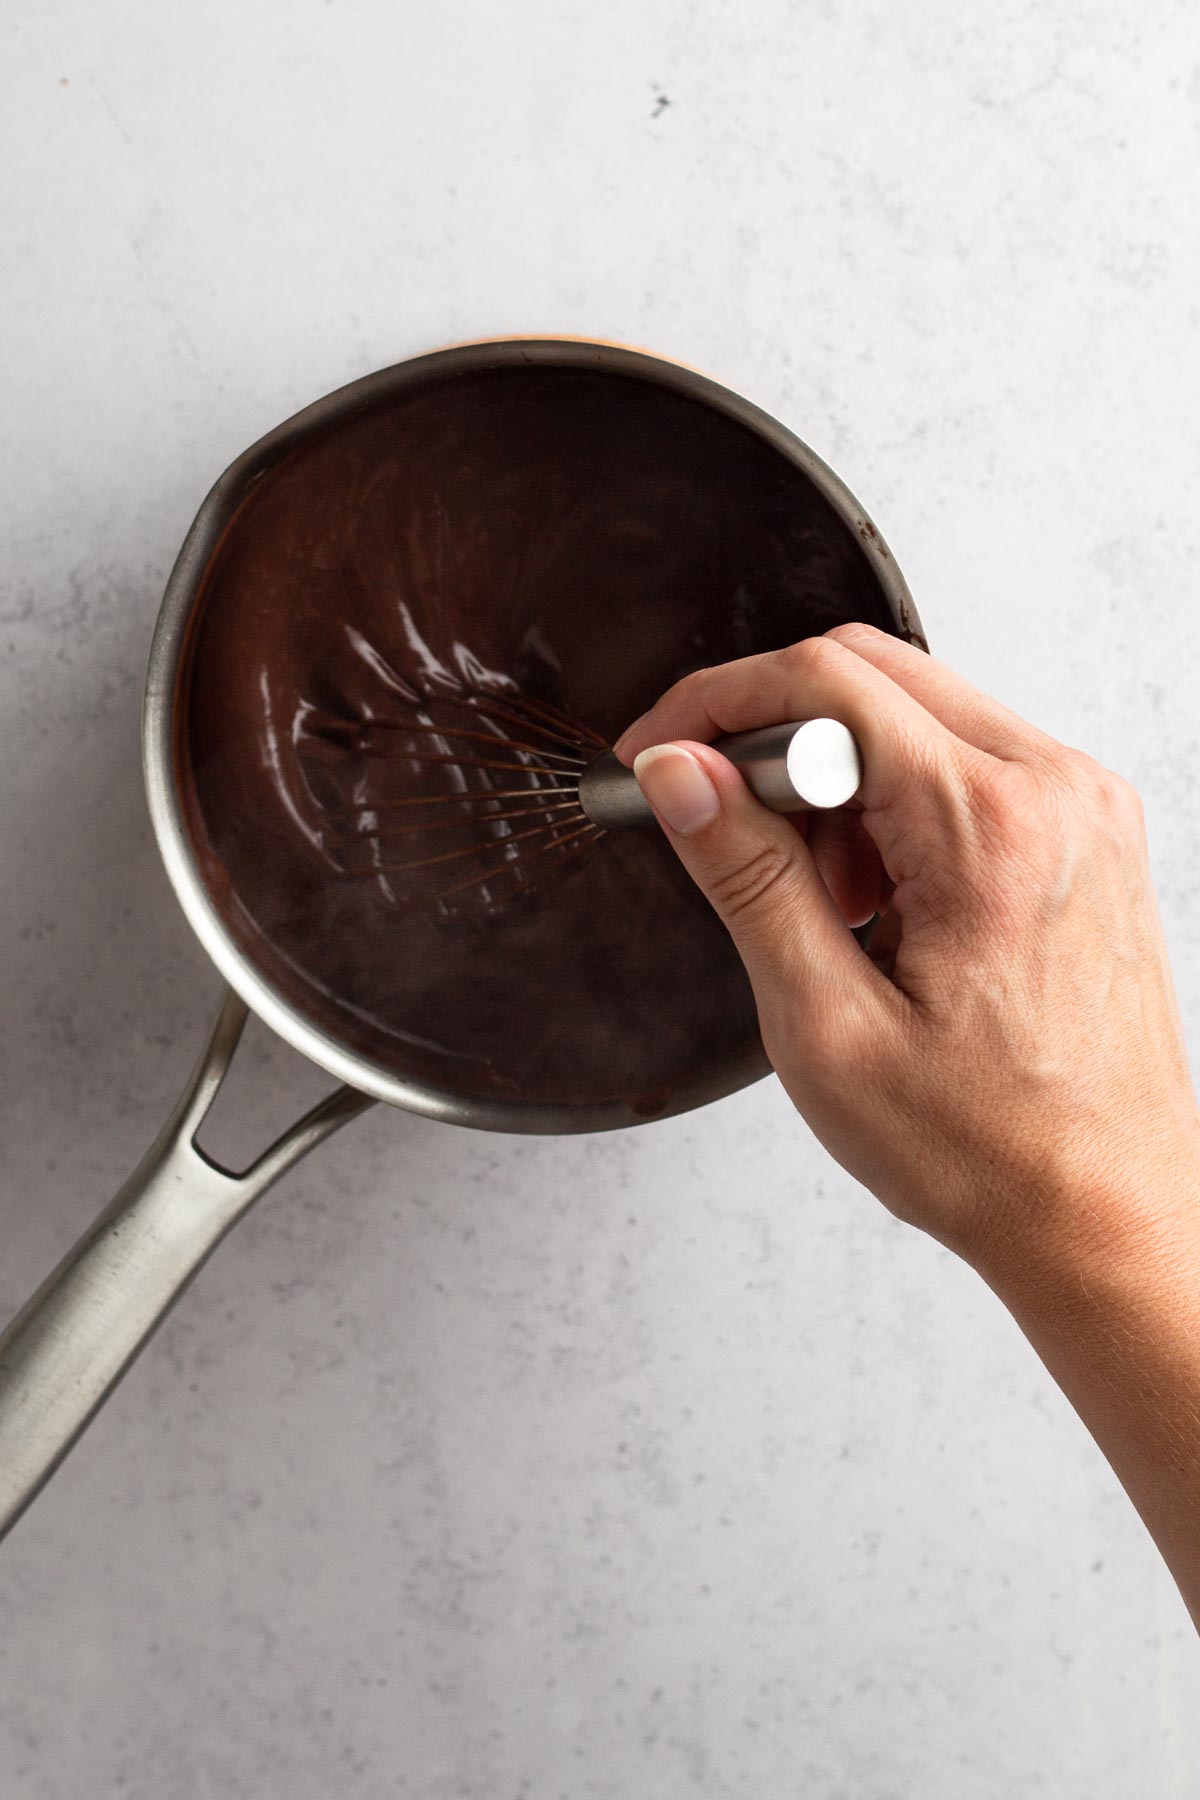
Step 5: When pudding comes to a rolling boil, continue to whisk and boil for another 2 to 3 minutes as pudding thickens.
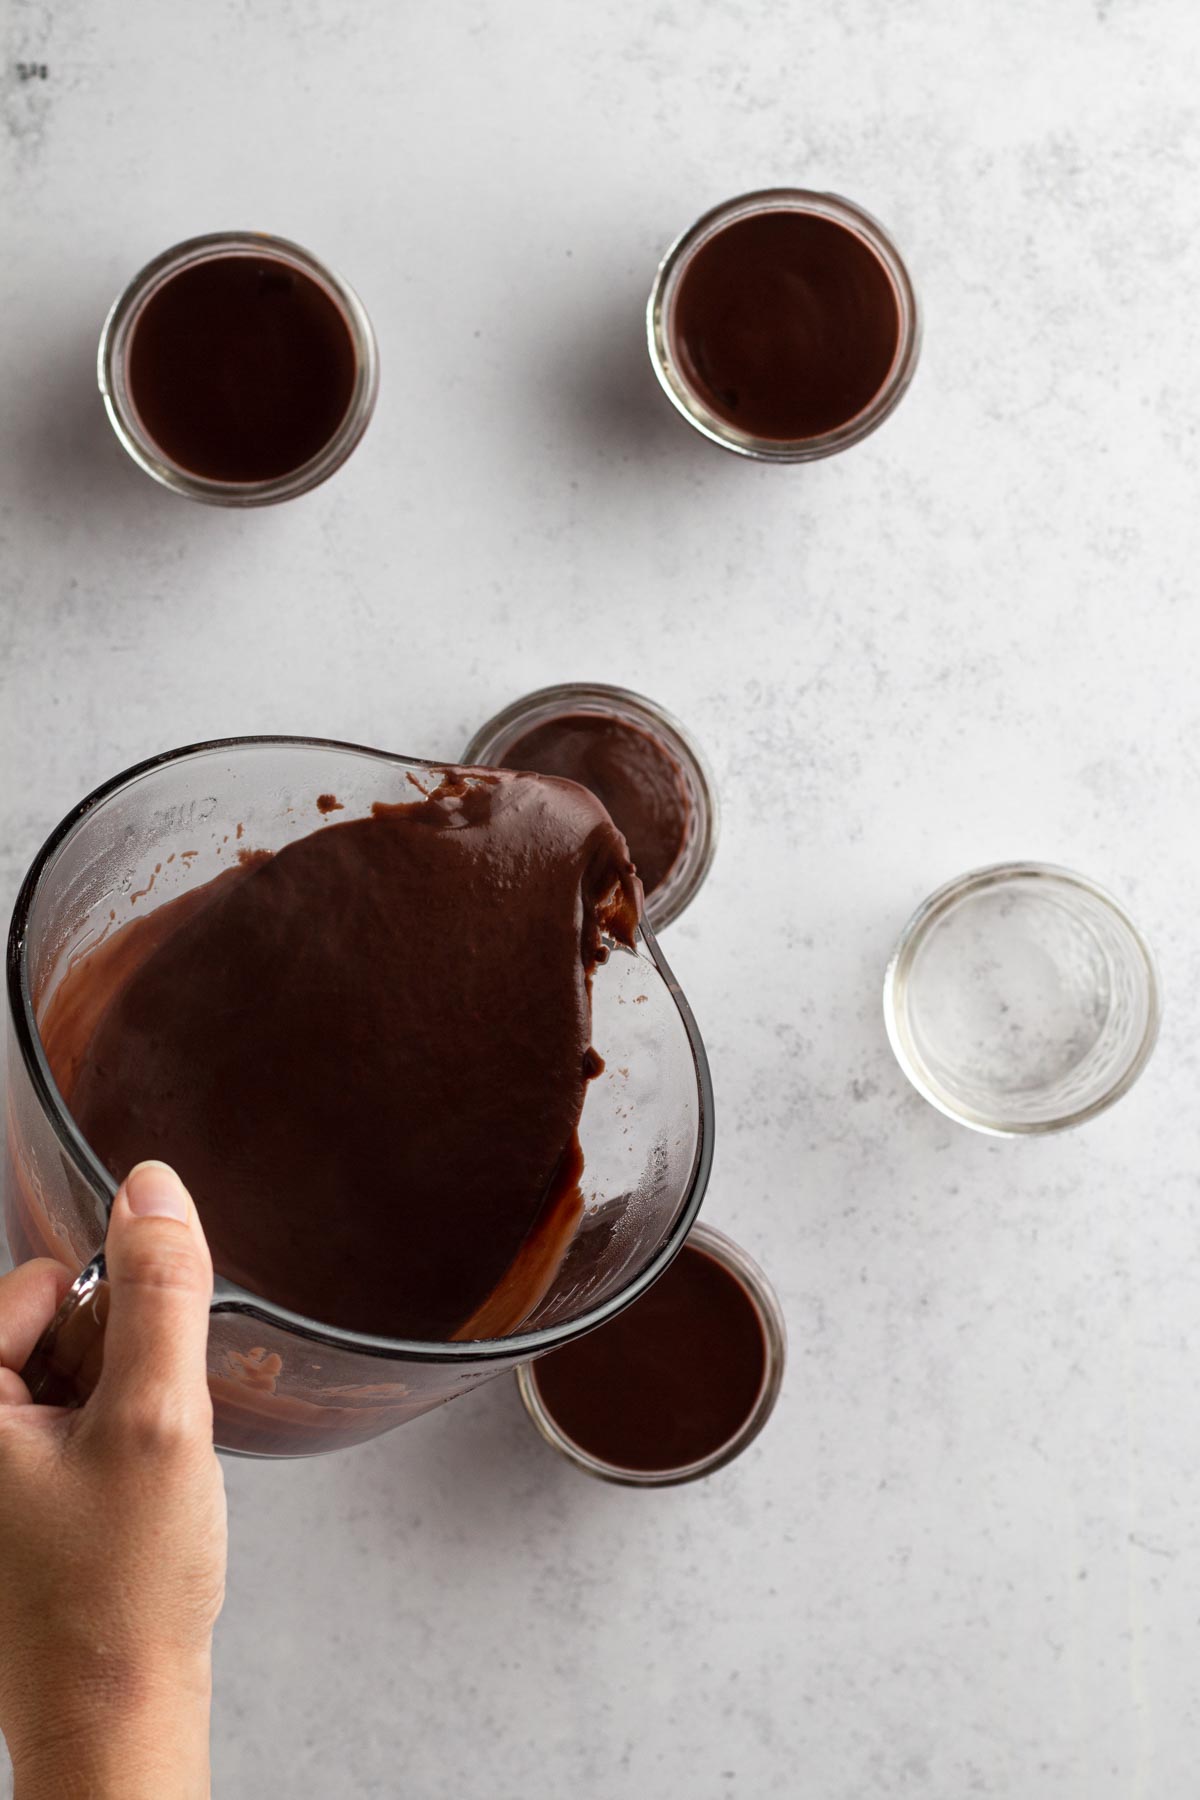
Step 6: Remove pudding from heat and pour or spoon into jars or ramekins.
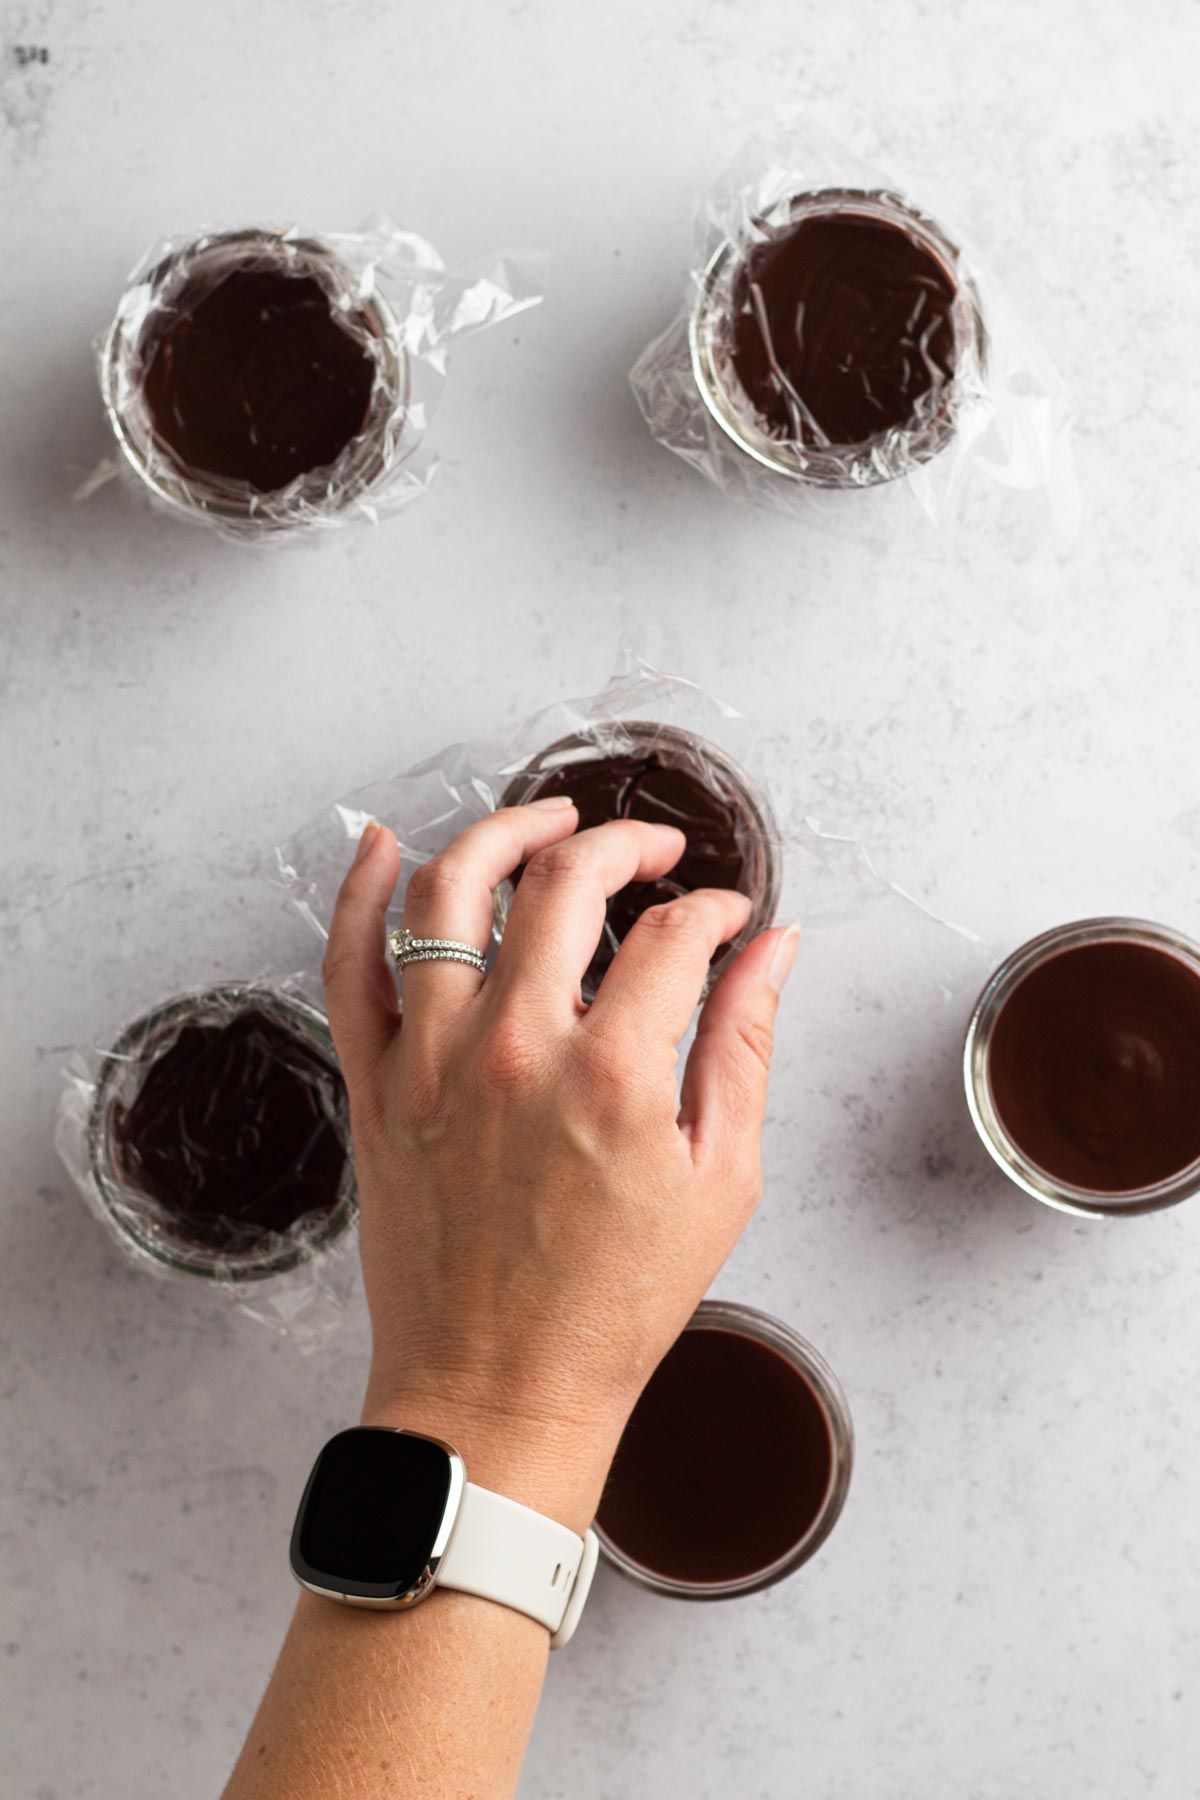
Step 7: Cover each jar with plastic wrap so it's touching the top of the pudding. Refrigerate the pudding for at least 4 hours.
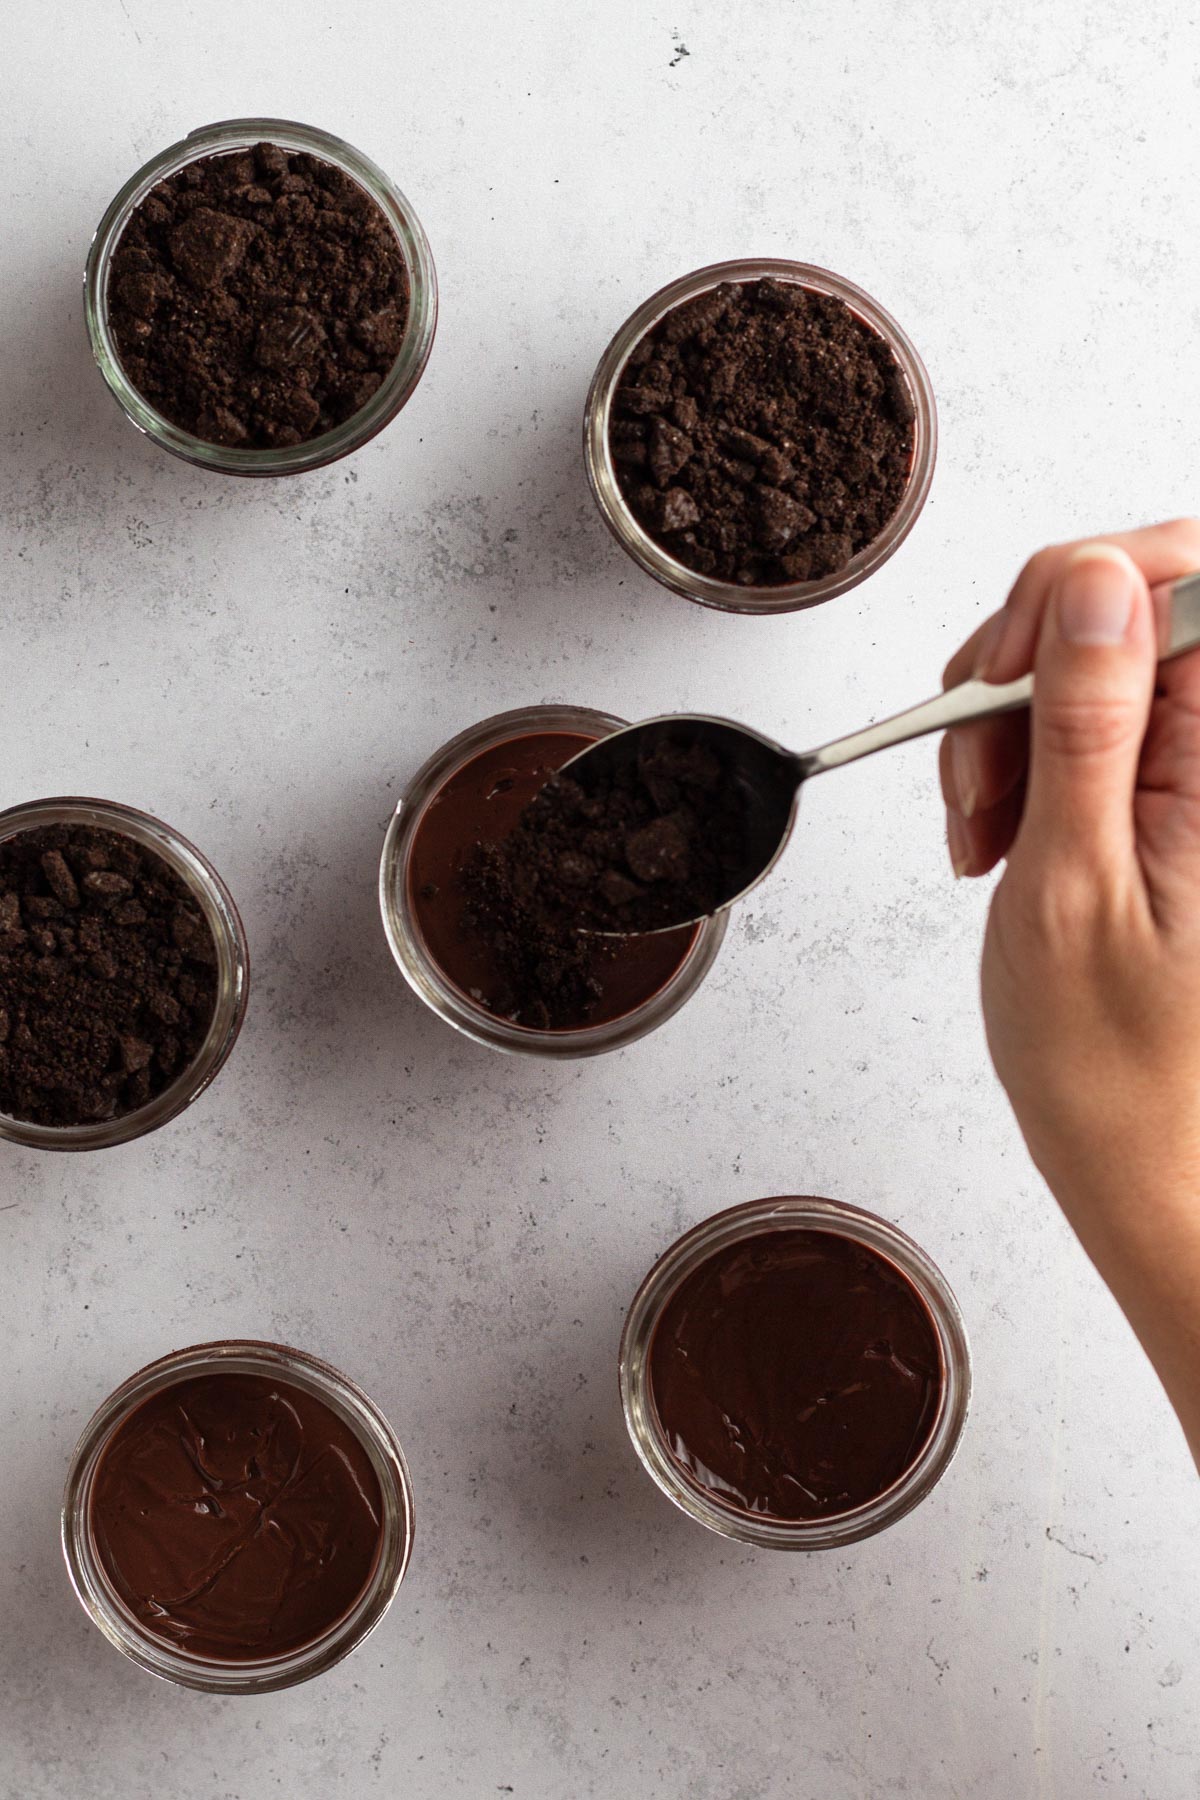
Step 8: When the pudding has set, remove the jars from the fridge and remove the plastic wrap. Top each pudding cup with the crushed chocolate wafer cookie crumbs.
See below for step-by-step decorating instructions.
How to Make White Chocolate Spiderwebs
Step 1: Trace the size of your pudding jars onto a piece of wax paper using a marker and set aside.
Step 2: Melt white chocolate wafers in the microwave or on the stove. Then add the melted white chocolate to a pastry bag and use scissors to cut just a tiny bit off of the end to create a small hole for piping.
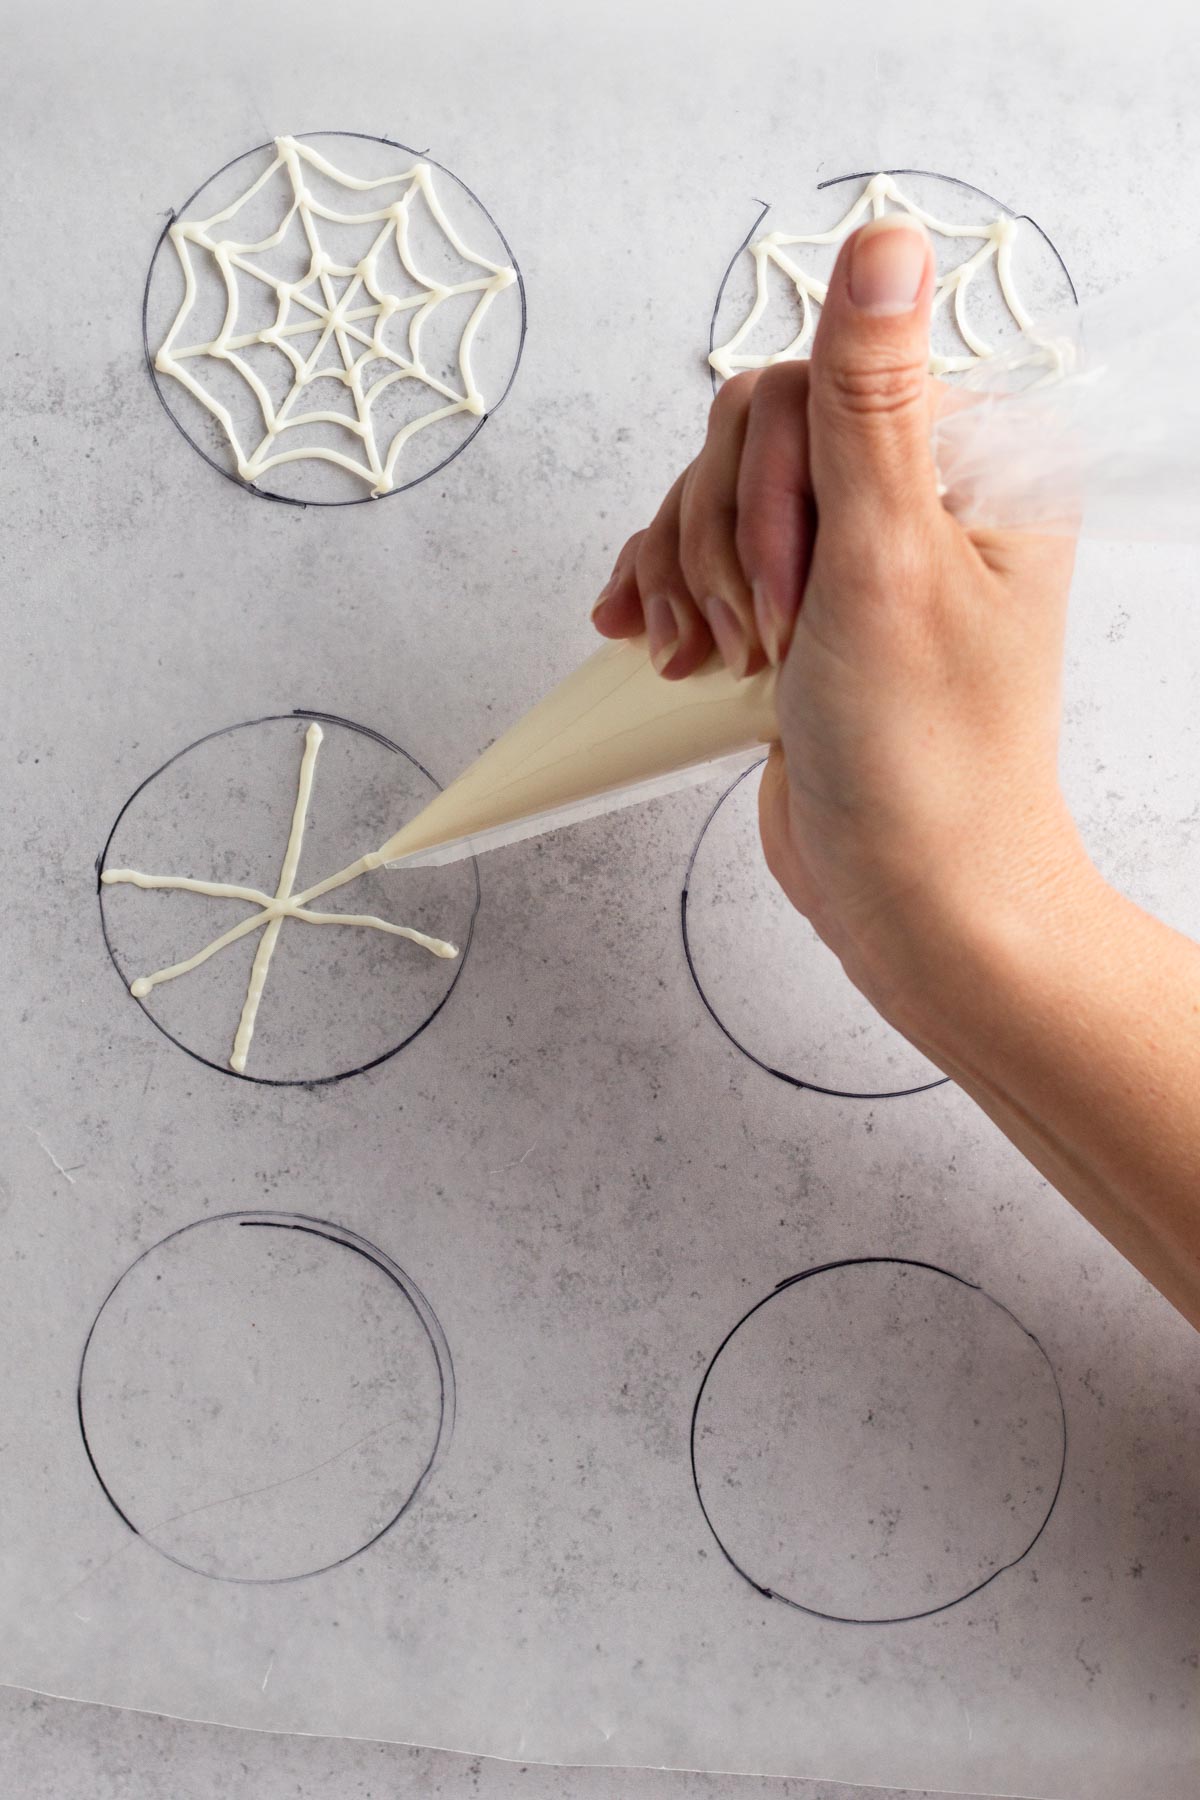
Step 3: Using the circles as a guide, pipe 4 intersecting lines inside of one circle.
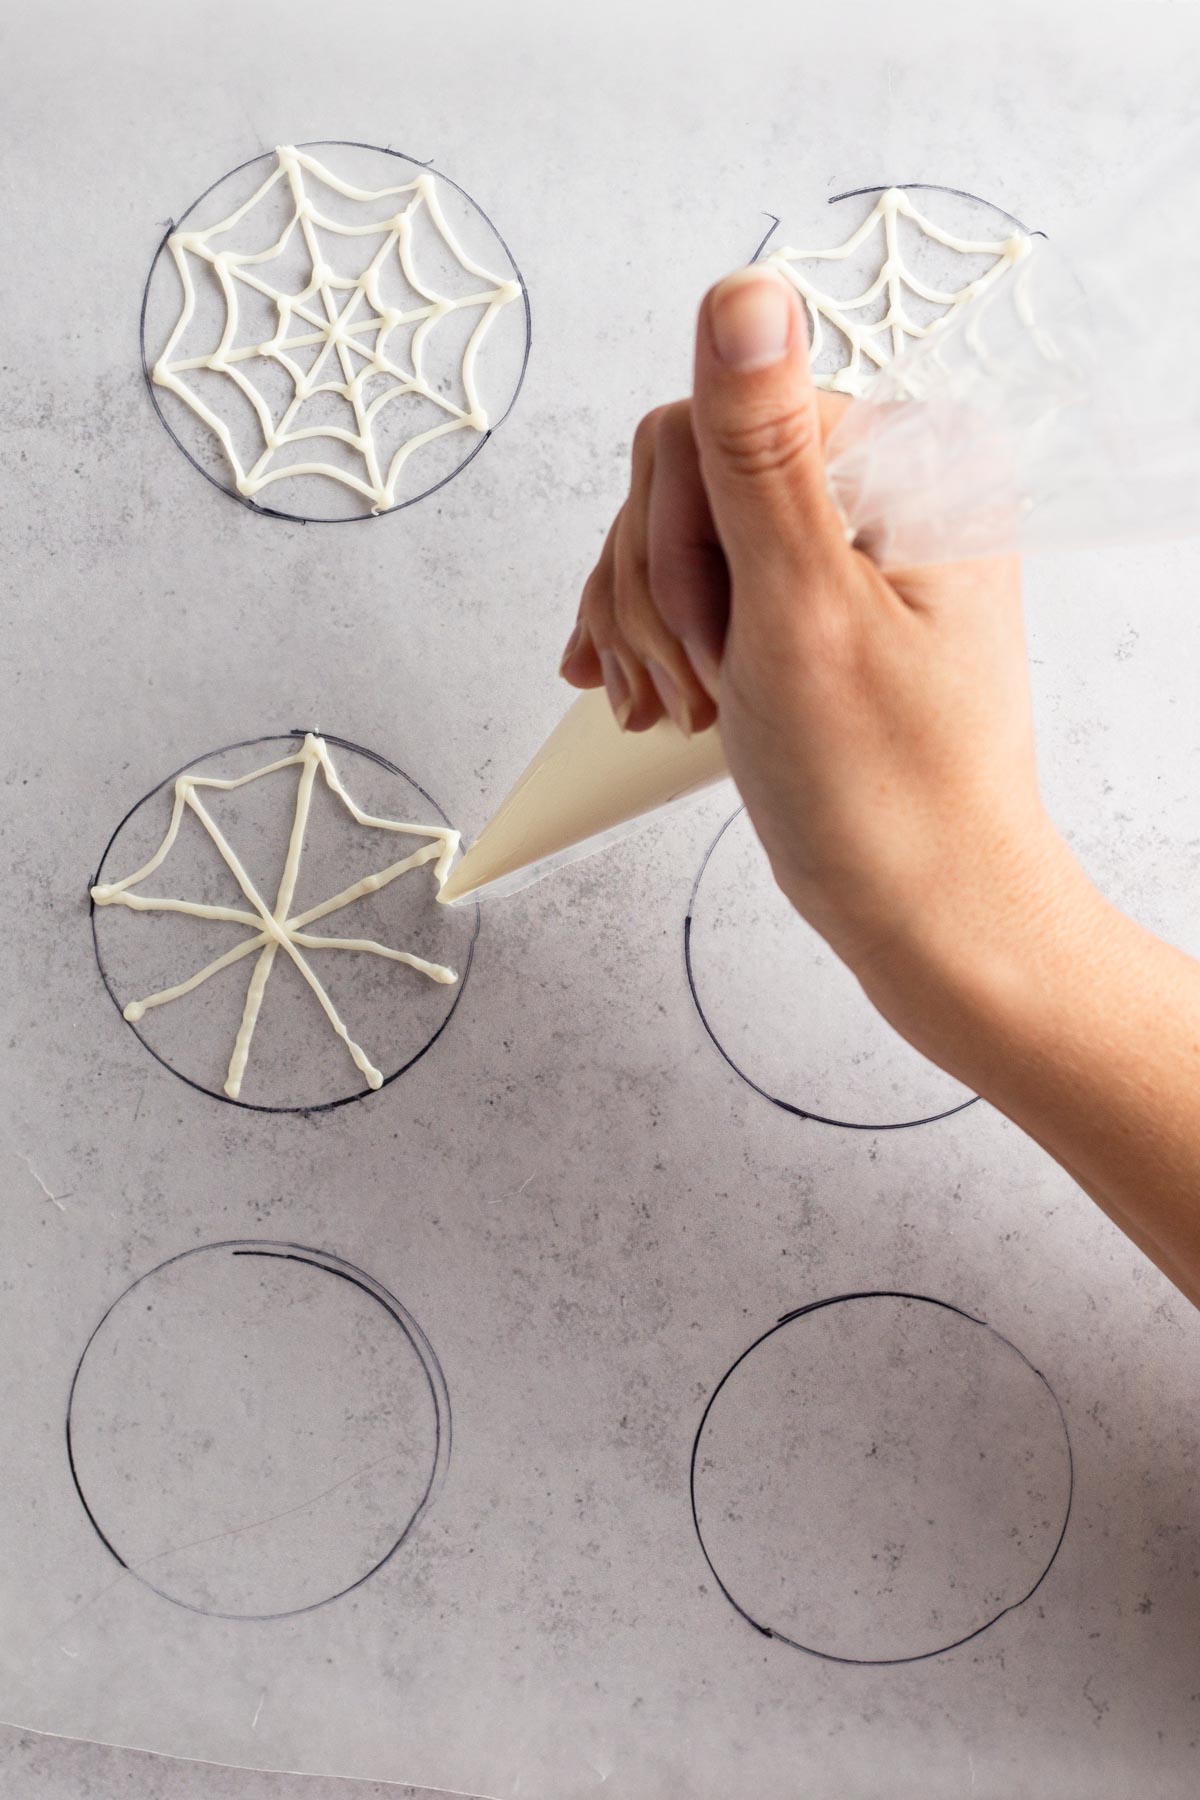
Step 4: Pipe a swooped line from the end of one line to the next. Continue this around the entire circle.
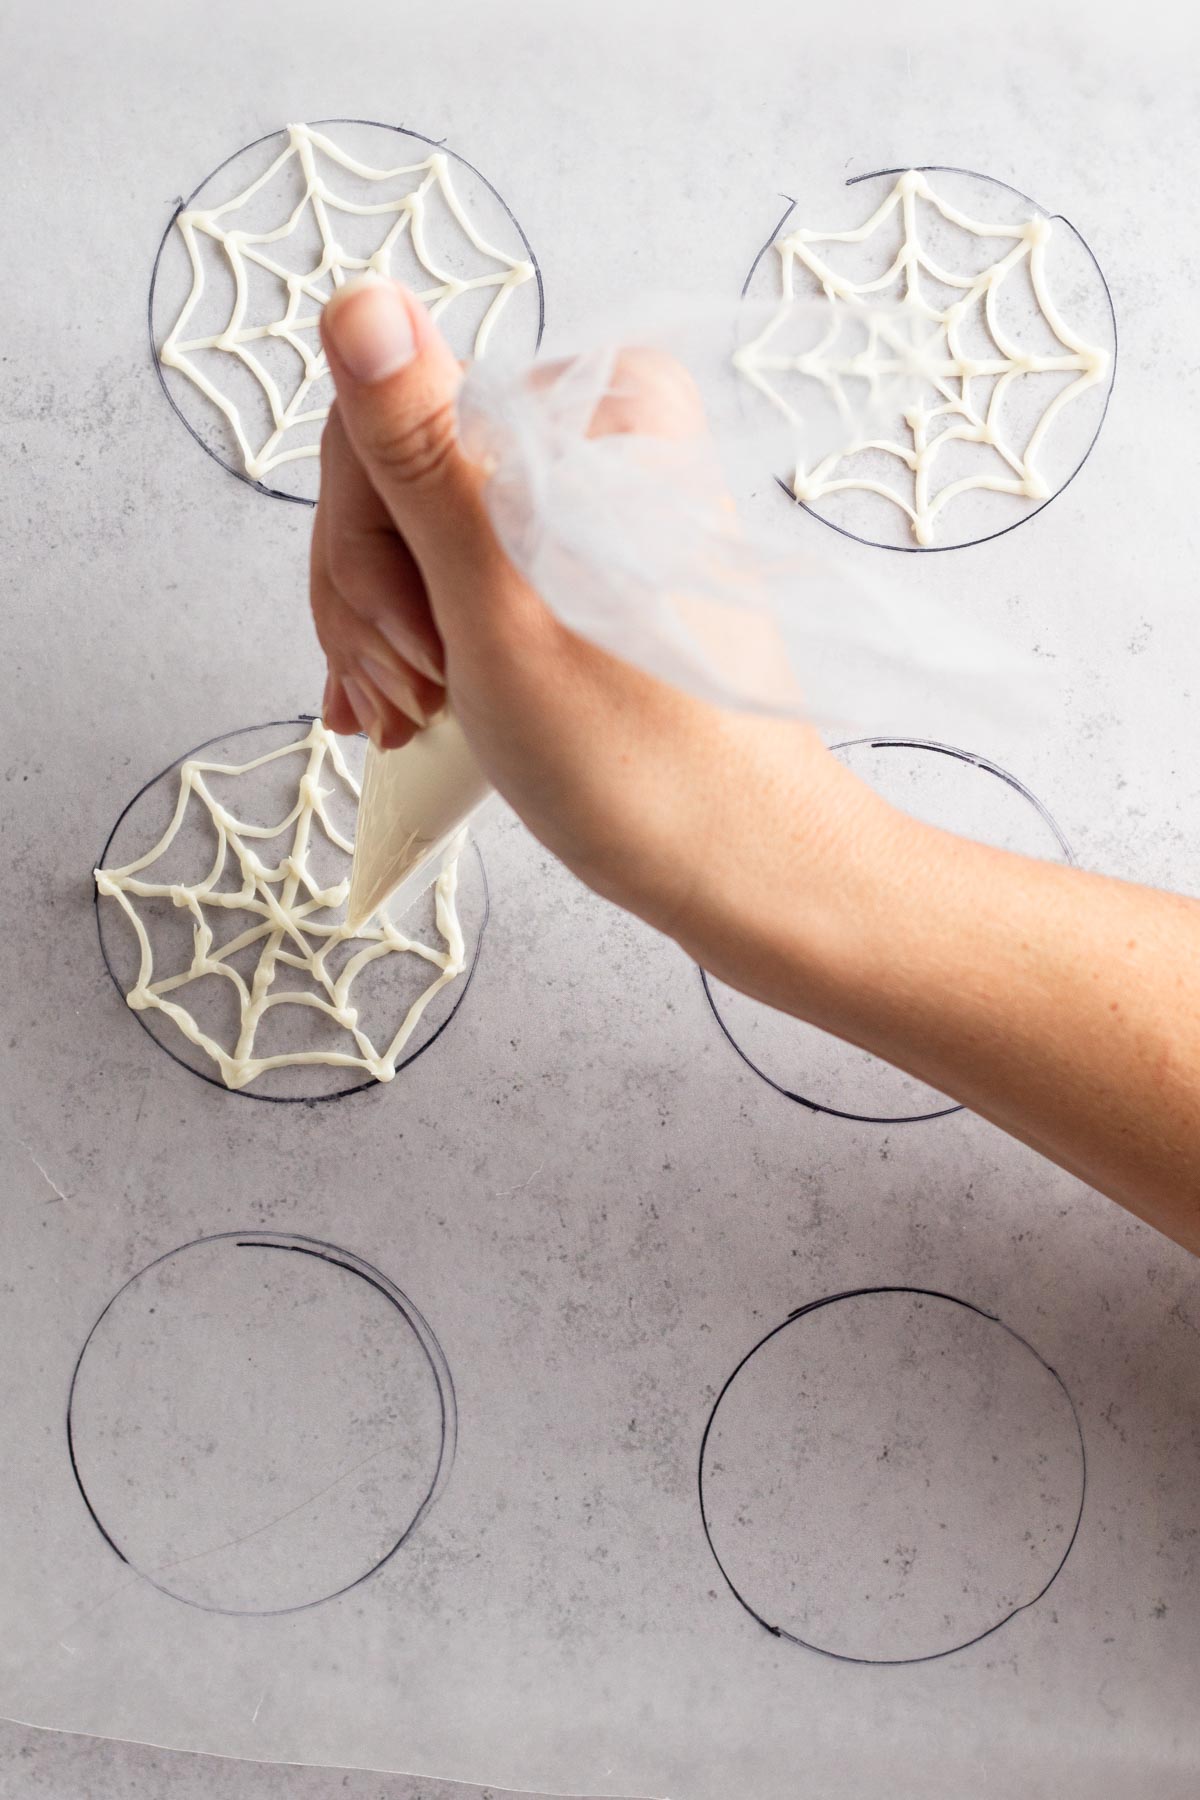
Step 5: Repeat the swooped line pattern two more times, working down toward the center where the straight lines intersect, to create a spiderweb pattern.
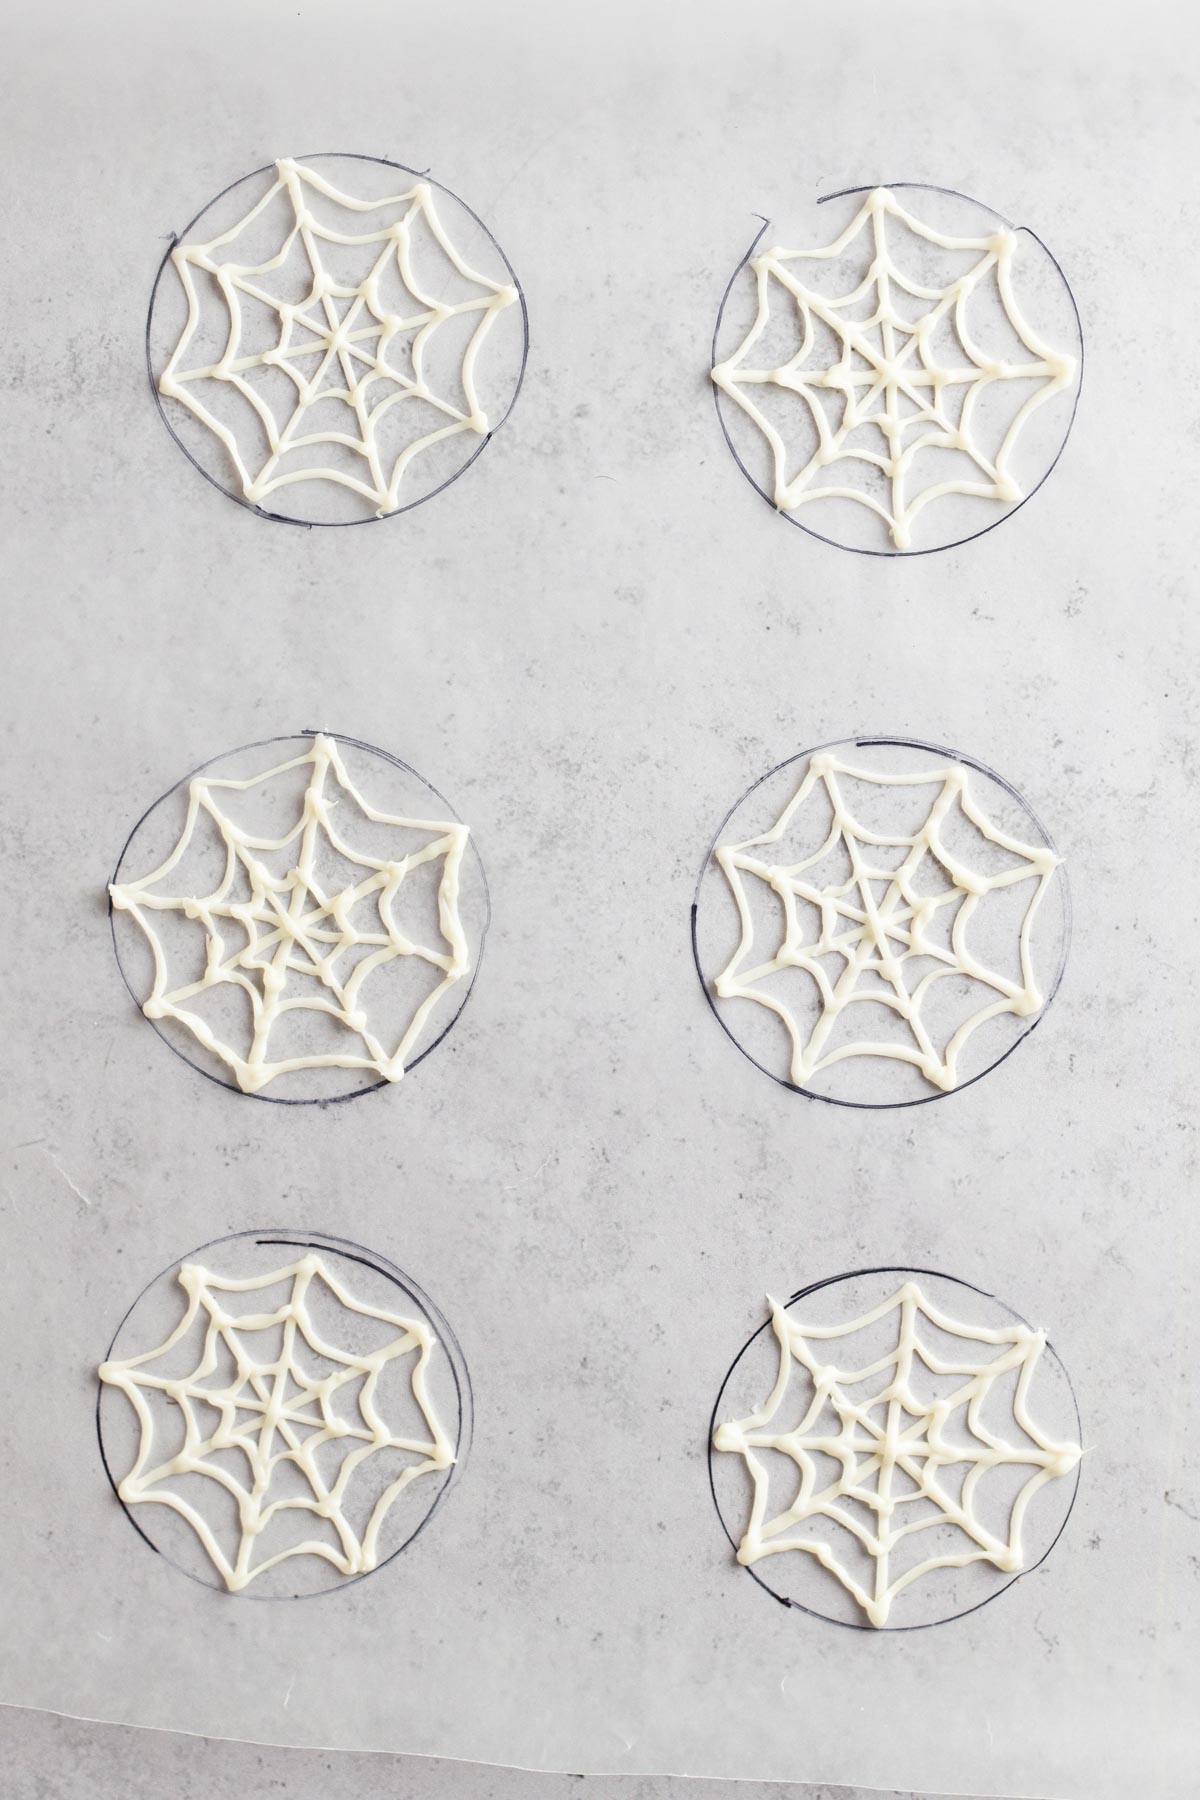
Step 6: Repeat to create more white chocolate spiderwebs then let the chocolate set at room temperature or in the fridge.
How to Decorate Halloween Dirt Pudding Cups
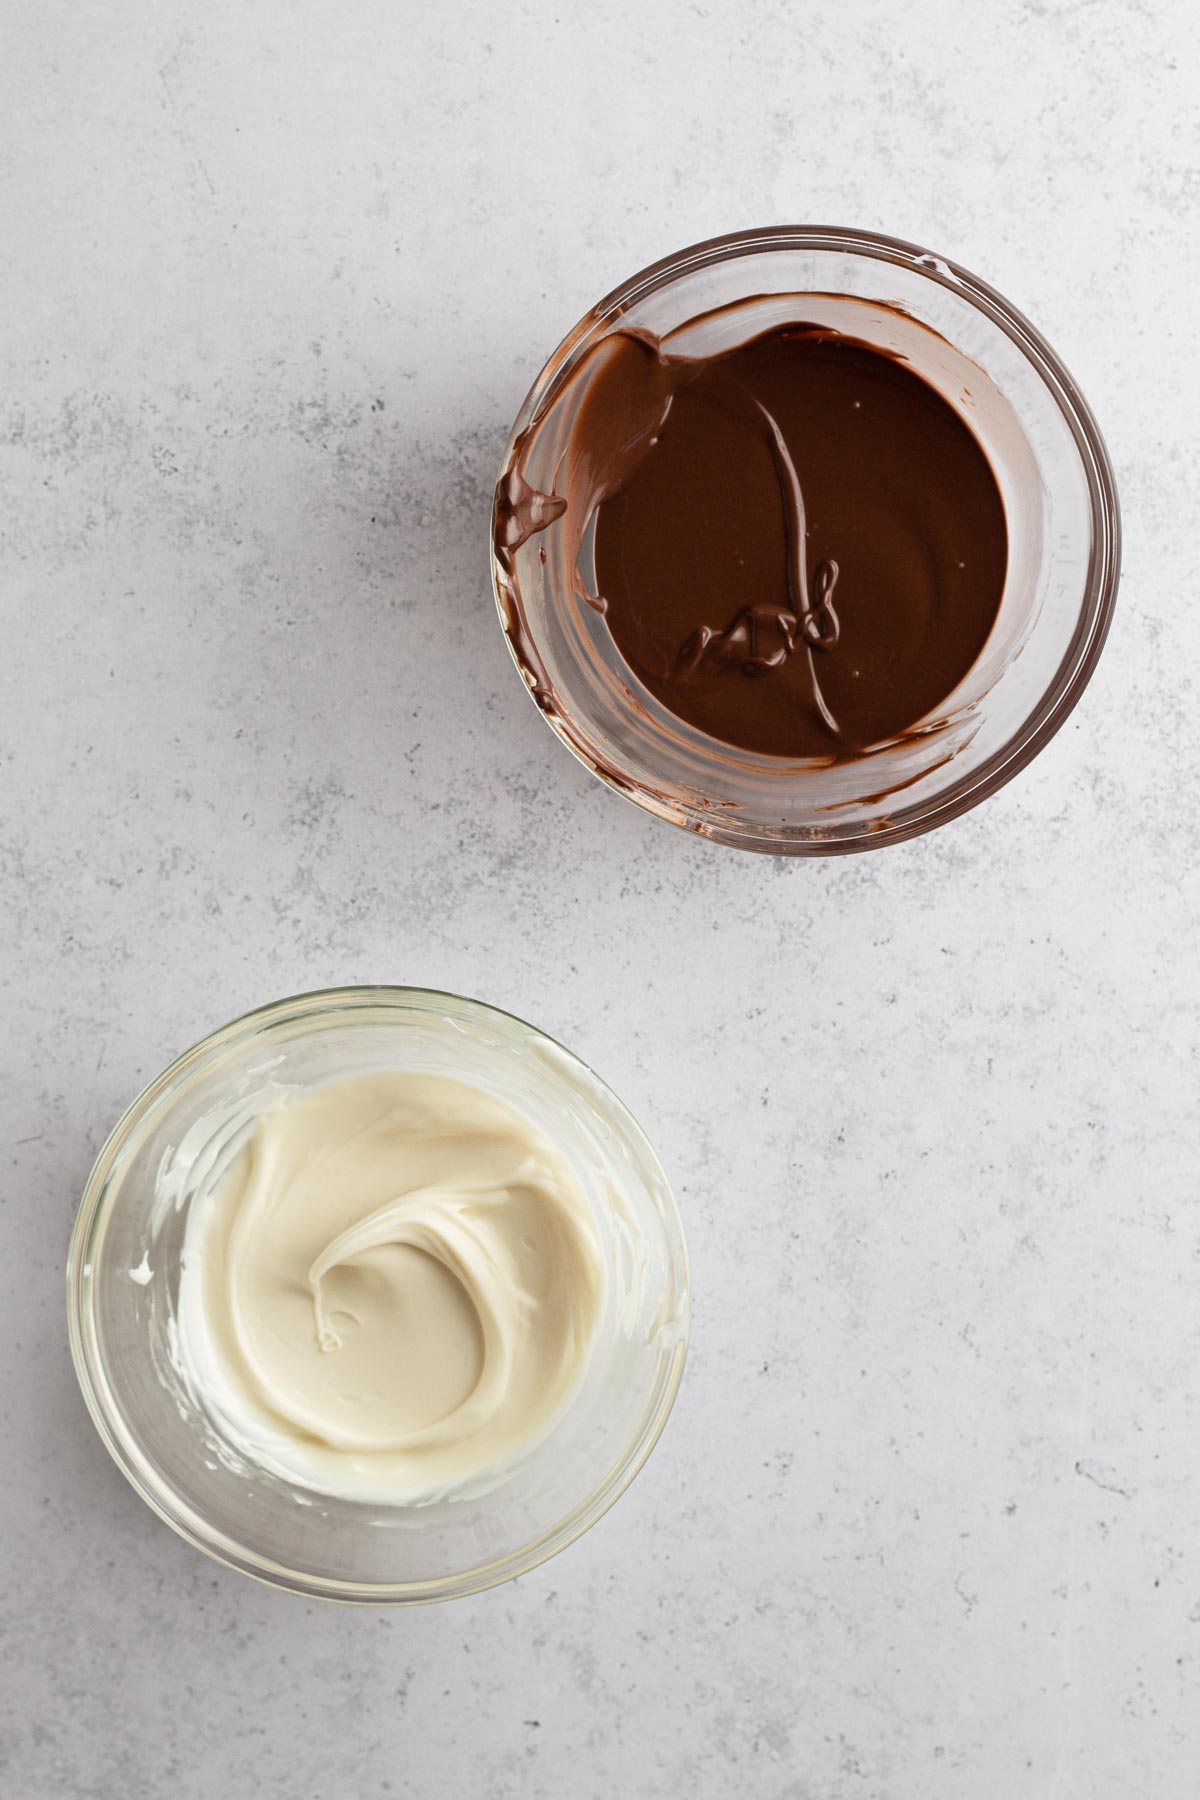
Step 1: Melt chocolate wafers in the microwave or on the stove. Add the melted chocolate to a pastry bag and use scissors to cut just a tiny bit off of the end to create a small hole for piping. Remelt white chocolate wafers for piping.

Step 2: Carefully pull the wax paper away from the white chocolate spiderwebs and then place them atop half of the jars.
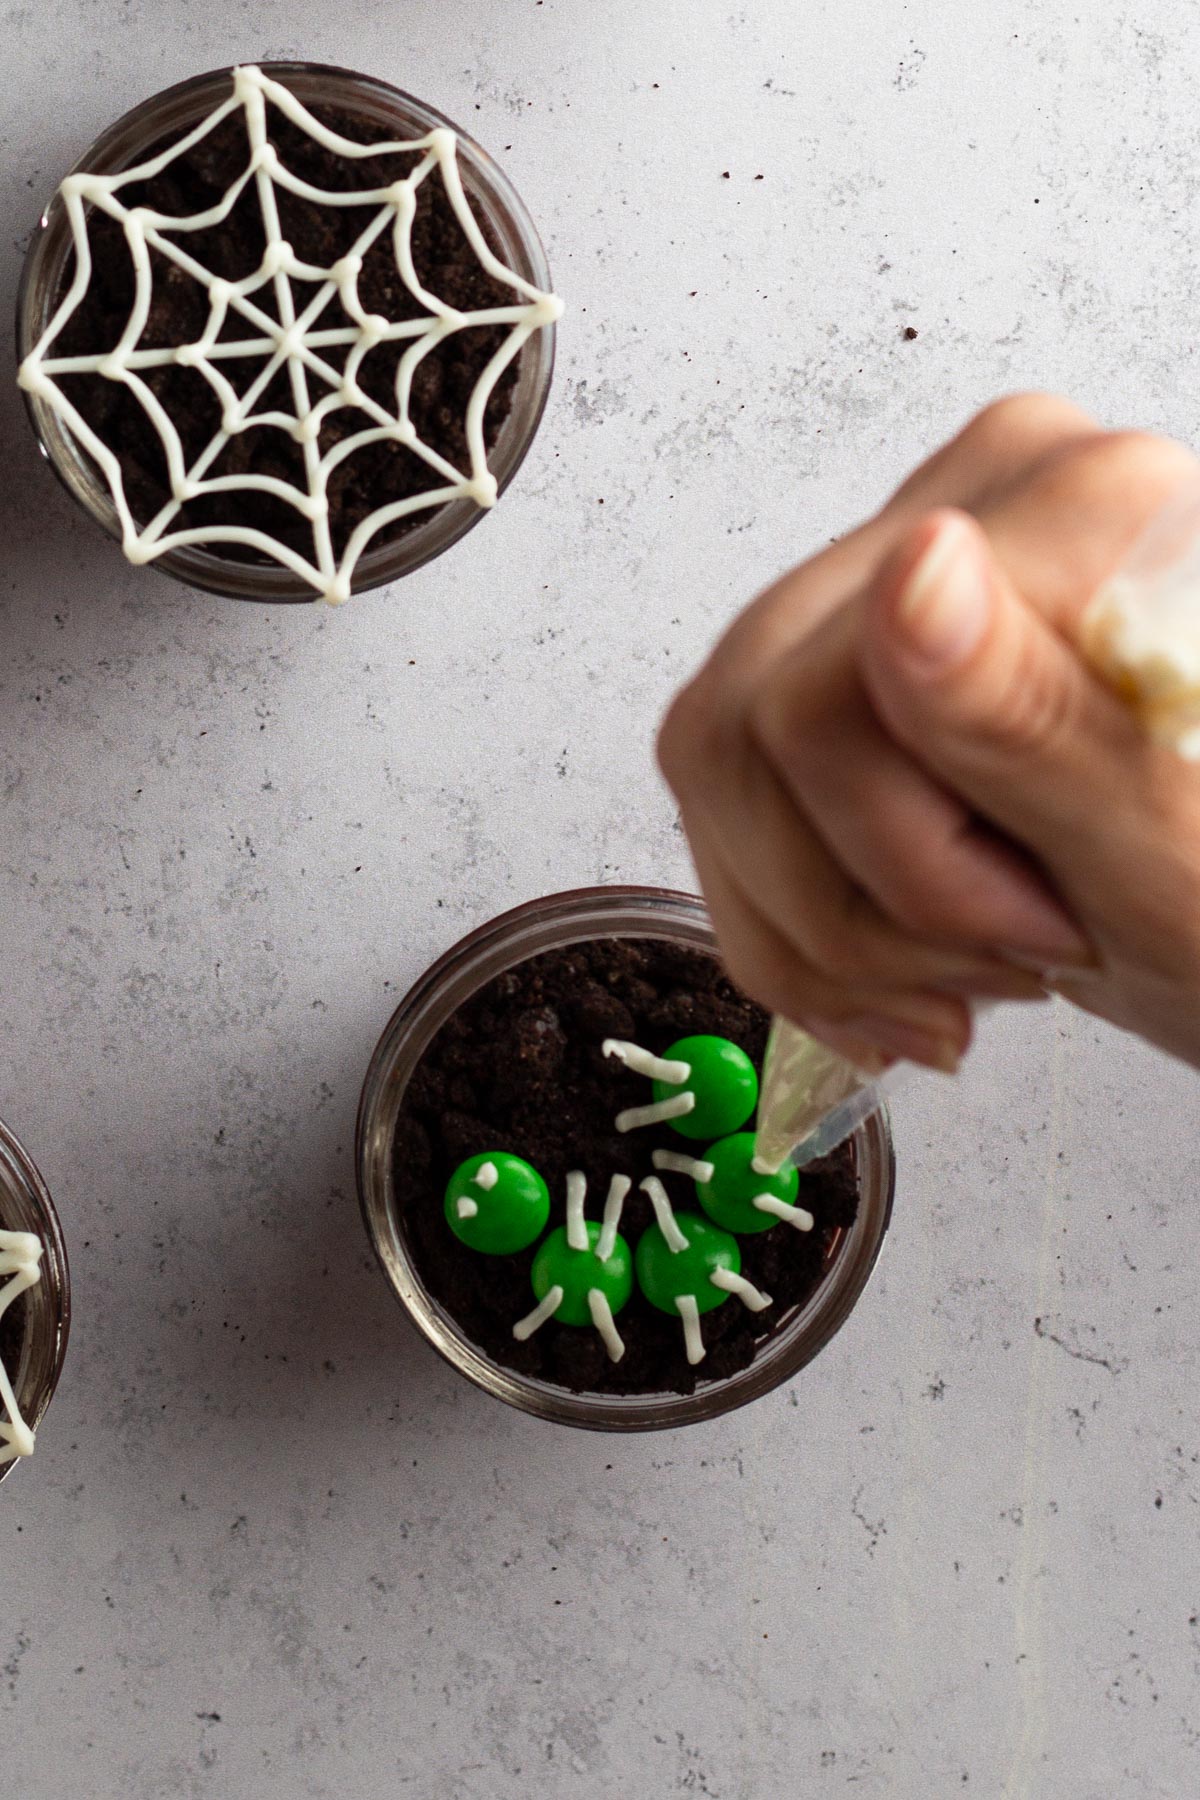
Step 3: Place green M&Ms into a caterpillar shape on the remaining jars. Pipe two dots of white chocolate for eyes onto each caterpillars' head, and then pipe little lines for legs up from the "dirt" to the other M&Ms to create caterpillars.
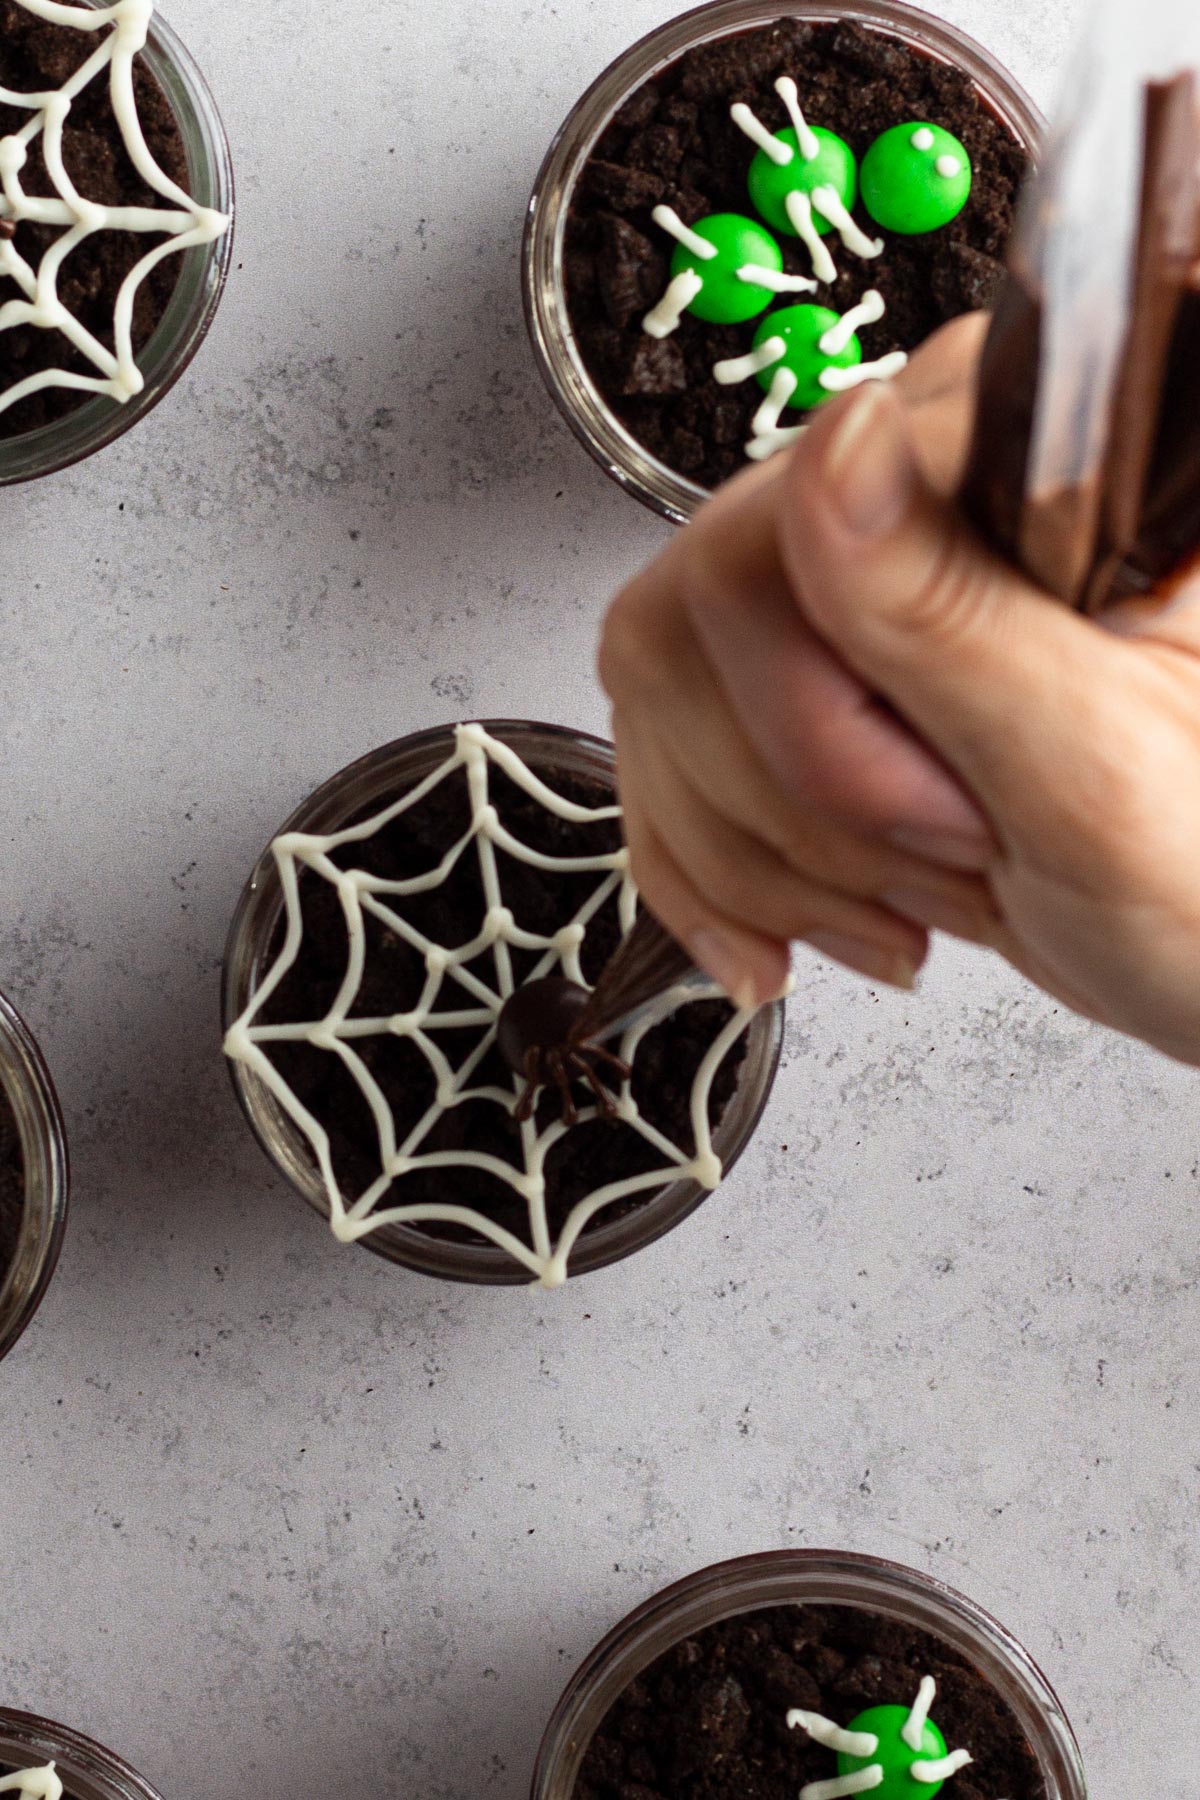
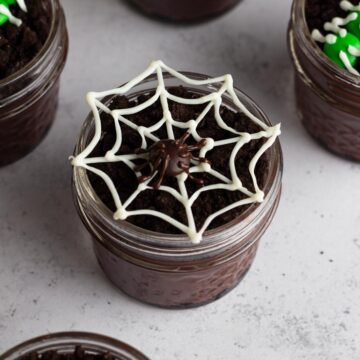
Step 4: Place one brown M&M onto each spiderweb. Create spiders' legs by piping chocolate up from the spiderwebs to the brown M&Ms.
Allison's Top Tips
This recipe requires tempering the eggs, which involves slowly adding some hot liquid to the egg mixture to heat up the eggs slowly before blending all of the mixture together. By heating the eggs slowly rather than suddenly you avoid ending up with scrambled eggs in your pudding.
Pudding will form a filmy skin on top if it's exposed to air while it sets, so be sure to cover each pudding cup with a layer of plastic wrap directly on top of the pudding so that to avoid the skin forming.
Skip piping tips and use just a pastry bag with a tiny bit of the end cut off to pipe the melted chocolate. This will allow you to remelt the chocolate in bag in the microwave if needed.
When piping legs onto the caterpillars and spiders, I found it much easier to pipe upwards from the dirt or spiderweb onto the M&M rather than down from the M&M.
Recipe FAQs
Dirt cups combine chocolate pudding, crushed chocolate cookies, and a bug-themed topping for a fun and kid-friendly layered dessert. The typical topping choice is gummy worms, but this recipe uses white chocolate spiderwebs with Mu0026M spiders and caterpillars for a fun twist.
To be on the safe side, plan to store your homemade chocolate pudding in the fridge for up to 3 days.
I do not recommend freezing dirt pudding cups, since a stint in the freezer can alter the texture of the pudding once thawed. I doubt these dirt cups will last long enough to freeze anyway!
There are a few ways to thicken homemade pudding, including the use of egg yolks, cornstarch, or gelatin. This recipe uses egg yolks and a bit of cornstarch to achieve a perfectly thick but still soft texture (unlike pudding made with gelatin, which will be more firm). Also be sure to cook the pudding long enough, since undercooked pudding will not thicken and set properly.
Storage Instructions
These homemade chocolate pudding cups should be refrigerated, and they can be stored in the fridge in an airtight container for up to 3 days. Note that the crushed cookie crumbs may become soggy after they're in the fridge for a couple of days, so for the best results I recommend storing the pudding by itself and topping it just before serving.
More Festive Fall Recipes


Love this recipe? Please leave a star rating and review on the recipe below! And don't forget to subscribe to Always Eat Dessert for even more easy dessert recipes and helpful baking tips.
Recipe
Halloween Dirt Cups
Special Equipment
- 1 Medium saucepan
- 1 Medium heat-proof bowl
- 6 4-ounce canning jars (or ramekins)
- Plastic wrap
- Wax Paper
Ingredients
Pudding Cups:
- 2 ½ cups (610 grams) whole milk, divided
- ½ cup (100 grams) granulated sugar
- ⅓ cup (29 grams) Dutch-processed cocoa powder
- 4 teaspoons (8 grams) cornstarch
- ¼ teaspoon (1.5 grams) salt
- 3 large egg yolks
- 1 Tablespoon (13 grams) vanilla extract
- 2 ounces (57 grams) chocolate wafer cookies, crushed (8 Oreo cookies with filling removed)
Decorations:
- ⅓ cup (79 grams) chocolate melting wafers
- ⅓ cup (79 grams) white chocolate melting wafers
- M&Ms
Instructions
Make the chocolate pudding.
- Place 2 cups (488 grams) of the milk in a medium saucepan with sugar and cocoa powder over medium heat until steaming and warm. Whisk the mixture gently while it's heating up.
- In a medium, heat-proof bowl, whisk together remaining ½ cup (122 grams) milk, cornstarch, salt, egg yolks, and vanilla extract.
- Temper the eggs by slowly pouring about half of the steaming chocolate milk into the egg mixture, whisking constantly to blend.
- Add the egg mixture back to the saucepan and heat the entire mixture over medium heat, whisking constantly. Be sure to scrape the corners of the pan so that the pudding doesn't overcook around the sides.
- When pudding comes to a rolling boil, continue to whisk and boil for another 2 to 3 minutes as pudding thickens.
- Remove pudding from heat and pour or spoon into jars or ramekins.
- Cover each jar with plastic wrap so it's touching the top of the pudding. Refrigerate the pudding for at least 4 hours before serving.
Make the white chocolate spiderwebs.
- While the pudding chills, make the white chocolate spiderwebs. Trace the size of your pudding jars onto a piece of wax paper using a marker and set aside.
- Melt white chocolate wafers in the microwave or on the stove. Then add the melted white chocolate to a pastry bag and use scissors to cut just a tiny bit off of the end to create a small hole for piping.
- Using the circles as a guide, pipe 4 intersecting lines inside of one circle.
- Next, pipe a swooped line from the end of one line to the next. Continue this around the circle until the ends of each line is connected by a swooped line.
- Repeat the swooped line pattern two more times, working down toward the center where the straight lines intersect, to create a spiderweb pattern. Let the chocolate set at room temperature or in the fridge.
Decorate the pudding cups.
- When the pudding has set and you're nearly ready to serve, remove the jars from the fridge and remove the plastic wrap from each.
- Top each pudding cup with the crushed chocolate wafer cookie crumbs.
- Carefully pull the wax paper away from the white chocolate spiderwebs and then place them atop half of the jars.
- Place one brown M&M onto each spiderweb, and place green M&Ms into a caterpillar shape on the remaining jars.
- Reheat the white chocolate in the pastry bag in the microwave so that it's once again pipe-able. Pipe two dots for eyes onto each caterpillars' head, and then pipe little lines for legs up from the "dirt" to the other M&Ms.
- Melt chocolate wafers in the microwave or on the stove. Then add the melted chocolate to a pastry bag and use scissors to cut just a tiny bit off of the end to create a small hole for piping.
- Create spiders' legs by piping chocolate up from the spiderwebs to the brown M&Ms.
- Serve and enjoy!


Comments
No Comments