• Skip to primary navigation
  • Skip to main content
  • Skip to primary sidebar
Always Eat Dessert
  • Recipes
  • Baking Tips
  • About
  • Subscribe
menu icon
go to homepage
  • Recipes
  • Baking Tips
  • About
  • Subscribe
  • Contact
subscribe
search icon
Homepage link
  • Recipes
  • Baking Tips
  • About
  • Subscribe
  • Contact
×
Home » Baking Tips & Tricks

How to Brown Butter

Published: May 8, 2019 by Allison Ferraro · Modified: Apr 1, 2025 · This post may contain affiliate links · Leave a Comment

Jump to Recipe Pin Recipe

Add an extra dose of nutty, caramelized flavor to your recipes with brown butter! Learn how to easily brown butter with these detailed step-by-step instructions, tips, and video!

Browned butter in a blue-handled skillet on a white surface. this Recipe

Brown butter is the one-ingredient secret sauce that can elevate the flavor of cookies, cakes, and so many more recipes!

Jump to:
  • What is brown butter?
  • Equipment & Ingredients
  • Step-By-Step Recipe Instructions
  • Recipe Tips
  • Recipe FAQs
  • Uses for Brown Butter
  • Storage Instructions
  • Recipes Made with Brown Butter
  • Recipe
  • Comments

What is brown butter?

Brown butter (or browned butter) is butter that has been cooked beyond its melting point, until the water in the butter evaporates and the milk solids in the butter become toasted and browned. This process of cooking the butter alters its flavor, adding a toasty, nutty, caramelized taste.

Learn how to easily brown butter by following these detailed and step-by-step directions.

Equipment & Ingredients

Recipe ingredients and equipment with labels on a white surface.

Butter - Cut the butter into cubes to help it melt evenly and more quickly. Since the butter can spit a bit as it browns, don't try to brown more than 1 cup of butter at a time.

Light-colored skillet - A light-colored skillet (or sauté pan) has lots of surface area for toasting the milk solids, and you'll be able to easily see the color changing. Avoid coated or cast iron pans, since their dark color makes it hard to monitor the browning of your butter. A saucepan can work in a pinch, but it's not ideal because of its smaller surface area.

Rubber spatula - You'll need a heat-safe rubber spatula for stirring the butter as it browns. A wooden spoon or silicone whisk works as well.

Heat-safe bowl - Have a heat-safe bowl ready before you begin so that you can immediately stop the cooking process by transferring the butter to the bowl when it reaches the proper toastiness.

Step-By-Step Recipe Instructions

See recipe card at the bottom of this post for detailed recipe instructions.

Cubes of butter melting in a pan.

Step 1: Melt the butter over medium heat.

Melted butter bubbling in a pan.

Step 2: As you continue to cook the butter, it will begin to bubble and the butter will become bright yellow.

Melted butter foaming and milk solids toasting in a pan.

Step 3: The bubbles will turn to foam, and the milk solids will begin to toast.

Brown butter in a pan.

Step 4: The butter is perfectly browned when the milk solids are a light amber color and the butter begins to turn from yellow to golden.

Step 5: Immediately (but carefully) pour the browned butter into the heat-safe bowl to stop it from cooking further. Be sure to scrape all of the browned bits from the bottom of the pan into the bowl with the butter. Let the browned butter cool slightly before using.

Recipe Tips

Do not look away from the pan. This is my number one tip for browning butter. The transformation happens quickly, especially once the butter begins to foam, so avoid any distractions and resist the urge to look away or you'll risk burning the butter.

Stir the butter or gently swirl the pan as the butter cooks. This helps to keep the milk solids from sticking to the pan and helps you to see what's happening under the bubbles or foam on top.

Don't leave browned bits in pan! These toasted milk solids hold most of the flavor of browned butter, so be sure to scrape them into the bowl with the butter.

To keep butter from burning, be sure to transfer the brown butter to a bowl as soon as it's perfectly browned, or it will continue to cook in the hot pan. If you're nervous about burning the butter, you can even remove the pan from the heat when it's getting close and let the residual heat from the pan finish the browning process.

Brown butter in a glass jar.

Recipe FAQs

What does perfectly browned butter look like?

Perfectly browned butter will be a warm golden color with amber colored milk solids and will have a rich, nutty, and beautifully caramelized flavor. Butter that's still yellow with light brown milk solids is under-browned and will have a lightly nutty flavor. If the butter begins to turn brown with deep brown milk solids, the butter has burned and will have a bitter flavor.

How long does it take to brown butter?

The amount of time needed to brown butter will depend on the amount of butter you're browning and the type of pan used. If you're browning ½ cup of butter that's been cut into cubes in a large skillet over medium heat, the whole process should take about 10 minutes.

Can brown butter be used instead of melted butter in recipes?

Yes, but with one caveat. Since the water is cooked out of the butter as it browns, some volume will be lost and you will be left with less liquid than if you had melted the butter. Therefore you will want to brown slightly more butter than the recipe calls for so that you end up with the correct amount. For example, if the recipe calls for "½ cup butter, melted", you'll want to brown an extra ½ to 1 Tablespoons of butter and measure your butter after browning it to ensure you still have a full ½ cup of butter.

Uses for Brown Butter

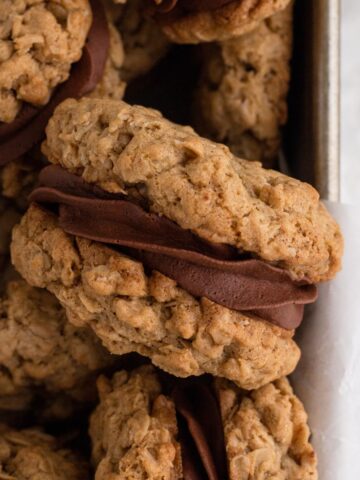
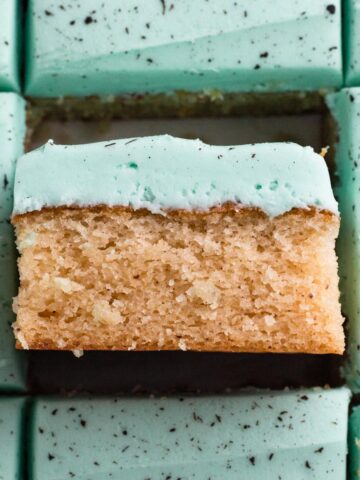
  • Use it in cookies or cakes. Be sure to let it cool to room temperature first if the recipe calls for room temperature instead of melted butter.
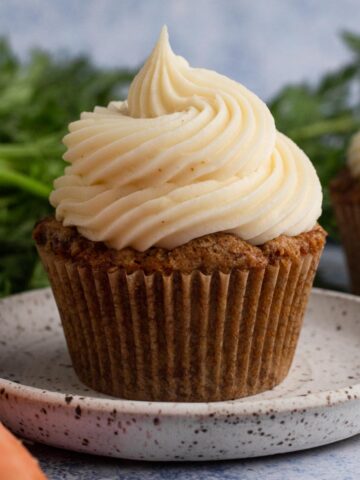
  • Use it in buttercream or cream cheese frosting. I recommend only browning about a third of the butter needed so that the flavor doesn't overpower. Remember to let the browned butter cool to room temperature before mixing or your frosting will melt!
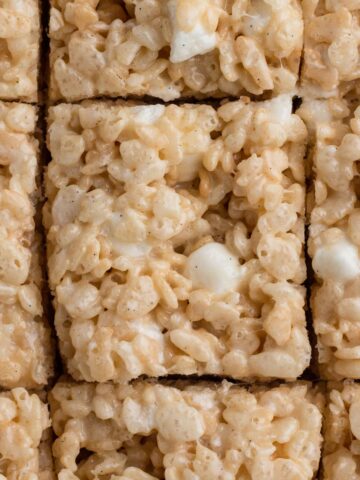
  • Spread it on bread.
  • Use it in savory dishes like pasta, potatoes, or veggies with herbs such as sage or thyme.

Storage Instructions

Let brown butter cool completely before sealing in an airtight container and storing.

Refrigerator: Store in the fridge for up to a week.

Freezing: Store in a freezer-safe container for up to 2 months.

Recipes Made with Brown Butter

  • Close-up view of oatmeal sandwich cookies stacked in a loaf pan.
    Brown Butter Oatmeal Sandwich Cookies with Chocolate Ganache
  • Overhead view of sliced Rice Krispie treats.
    Brown Butter Bourbon Rice Krispie Treats
  • Close up view of a carrot cake cupcake topped with a swirl of cream cheese frosting on a speckled plate surrounded by carrots.
    Small Batch Carrot Cake Cupcakes with Brown Butter Cream Cheese Frosting
  • Close-up side view of a square slice of vanilla cake with speckled blue frosting.
    Robin Egg Snack Cake with Speckled Frosting

Love this recipe? Please leave a star rating and review on the recipe below! And don't forget to subscribe to Always Eat Dessert for even more simple recipes, baking tips, and inspiration.

Recipe

Close up view of brown butter in a blue-handled skillet.

Brown Butter

Add an extra dose of nutty, caramelized flavor to your recipes with brown butter! Learn how to easily brown butter with these detailed step-by-step instructions and tips.
No ratings yet
Print Pin Rate
Cuisine: French
Cook Time: 10 minutes minutes
Total Time: 10 minutes minutes
Yield: about ¾ cup
Author: Allison Ferraro
Prevent your screen from going dark

Special Equipment

  • Light-colored skillet or sauté pan
  • rubber spatula
  • Heat-safe bowl

Ingredients

  • ½ cup (114 grams) butter cut into cubes (or whatever amount of butter your recipe calls for)

Instructions

  • Place butter in a light-colored skillet over medium heat and melt the butter.
  • As you continue to cook the butter after it's melted, it will begin to bubble as the water cooks out of the butter, and the butter will become bright yellow. Stir the butter occasionally during this phase, and be careful of any splatter.
  • The bubbles will turn to foam, and the milk solids will begin to toast. Stir the butter more frequently during this step and keep a very close eye on the color of the milk solids and butter.
  • When the milk solids are a light amber color and the butter begins to turn from yellow to golden in color, remove the pan from the heat and immediately (but carefully) pour the browned butter into the heat-safe bowl to stop it from cooking further. Be sure to scrape all of the browned bits from the bottom of the pan into the bowl with the butter.
  • Let the browned butter cool slightly (5-10 minutes) before using so it's not too hot when mixed with the other recipe ingredients, or let it cool completely before storing.

Video

Notes

Storage: Let brown butter cool completely before sealing in an airtight container and storing. It can be stored in the fridge for up to a week or in the freezer for up to 2 months.
Perfectly browned butter will be a warm golden color with amber colored milk solids and will have a rich, nutty, and beautifully caramelized flavor. Butter that's still yellow with light brown milk solids is under-browned and will have a lightly nutty flavor. If the butter begins to turn brown with deep brown milk solids, the butter has burned and will have a bitter flavor.
Do not look away from the pan. This is my number one tip for browning butter. The transformation happens quickly, especially once the butter begins to foam, so avoid any distractions and resist the urge to look away or you'll risk burning the butter.
Stir the butter or gently swirl the pan as the butter cooks. This helps to keep the milk solids from sticking to the pan and helps you to see what's happening under the bubbles or foam on top.
Don't leave browned bits in pan! These toasted milk solids hold most of the flavor of browned butter, so be sure to scrape them into the bowl with the butter.
To keep butter from burning, be sure to transfer the brown butter to a bowl as soon as it's perfectly browned, or it will continue to cook in the hot pan. If you're nervous about burning the butter, you can even remove the pan from the heat when it's getting close and let the residual heat from the pan finish the browning process.

More Baking Tips & Tricks

  • Six recipe images with a text overlay that reads "What to Bake with Leftover Egg Yolks & Egg Whites".
    What to Bake with Leftover Egg Yolks and Egg Whites
  • A hand holding an icing spatula and spreading chocolate frosting onto a round chocolate cake.
    How Much Frosting for Cakes & Cupcakes
  • Close up view of cream cheese frosting in a glass mixing bowl with electric beaters.
    How to Thicken Frosting
  • Overhead view of a sliced loaf of banana bread on a cutting board.
    How to Store Banana Bread & Other Quick Breads

Reader Interactions

Comments

No Comments

Leave a Comment Cancel reply

Your email address will not be published. Required fields are marked *

Recipe Rating


Primary Sidebar

Allison leaning over the kitchen counter piping frosting onto a cake.

Hi there!

I'm Allison, the cookie-obsessed baker, recipe creator, and food photographer behind Always Eat Dessert.

Here you’ll find made-from-scratch recipes designed for busy people who love to bake. From cookies to quick breads, you'll discover detailed, easy-to-follow recipes for everyday life along with practical baking tips to help you whip up indulgent treats from scratch with confidence.

Get to know Allison →

Summer Dessert Recipes

  • Fork with a bite of cake along with a slice of cake on a white plate.
    Strawberry Vanilla Cake
  • A slice of blueberry pie with a lattice crust on a white plate.
    Classic Blueberry Pie with Frozen Blueberries
  • Close-up view of grilled strawberry shortcake on a white plate.
    Grilled Strawberry Shortcake
  • Close-up view of stack of 3 s'mores ice cream sandwiches.
    Frozen S'mores

Reader Favorites

  • Close up view of a square of moist chocolate cake topped with chocolate frosting on a crumbled piece of parchment paper.
    Moist & Fudgy Chocolate Cake
  • Close up view of a partially-eaten slice of two-layer vanilla cake with vanilla frosting on a white plate with a fork.
    Moist & Fluffy Vanilla Cake
  • Mini brownie bites topped with piped whipped ganache on a white surface.
    Brownie Bites with Whipped Chocolate Ganache
  • Overhead view of dark chocolate frosting spread on a sheet cake.
    Chocolate Ganache Buttercream Frosting
logos of media outlets featuring Always Eat Dessert recipes

Top Baking Tips

  • Box grater and peeled carrot on a wooden cutting board.
    How to Grate Carrots for Carrot Cake
  • Melted white chocolate in a double boiler.
    How to Melt White Chocolate in the Microwave or on the Stove
  • Close-up overhead view of an unbaked cinnamon roll on a white surface.
    How to Store & Reheat Cinnamon Rolls
  • Close up view of cream cheese frosting in a glass mixing bowl with electric beaters.
    How to Thicken Frosting

Footer

↑ back to top

About

  • About
  • Portfolio
  • Work with Me

Policies

  • Privacy Policy
  • Terms of Use
  • Website Disclaimer
  • Accessibility Policy

Contact

  • Contact
  • Subscribe

As an Amazon Associate I earn from qualifying purchases.

COPYRIGHT © 2025 ALWAYS EAT DESSERT, LLC | ALL RIGHTS RESERVED

Browned butter in a blue-handled skillet with a text overlay.

Rate This Recipe

Your vote:


A rating is required
A name is required
An email is required