
The next time you're searching for a bite-sized dessert recipe that's both delectable and dainty, look no further than this homemade petit fours recipe. These tiny cakes are as flavorful as they are elegant, and they're the perfect addition to your next bridal or baby shower, tea party, or Mother's Day soirée.

Jump to:
What Are Petit Fours?
Petit four (pronounced 'peh-tea four') is French for "small oven" and refers to bite-sized sweet or savory bites which were historically baked in large brick ovens at a lower temperature while the oven cooled after baking bread. There are several types of petit fours, including petit four glacé (glazed petit fours such as éclairs), petit four sec (dry petit fours such as meringues and macarons), and petit four salé (salted or savory bite-sized appetizers).
Here in the United States, when we hear "petit four" we immediately think of these tiny decorated tea cakes, a version of petit four glacé made with delicate cake, layered with filling, and topped with glaze. Traditionally these fancy little cakes are made with sponge cake topped with fondant and edible decorations.
Why This Recipe Works
So (so so so) much testing went into this recipe. Petit fours have a reputation for being fussy, so I made it my mission to uncomplicate them. Just like with all of the recipes you'll find here, my goal is to create something that is delicious, simple to make, and good looking (in that order). These petit fours are not exactly traditional, but they're truly tasty and simple enough for bakers of all skill levels. Plus they're really pretty!
Here's why they work so well:
- Cream Cheese Pound Cake - Pound cake creates a nice and sturdy base for the cakes. The cream cheese pound cake used here is moist and flavorful. It's delicious all on its own, but it's truly exquisite when paired with the fruity filling.
- Fruity Filling - This combination of blackberry jam and tangy lemon curd is a match made in heaven. But of course, you can customize the filling to feature whatever flavor(s) you like! See some suggested filling options below.
- Simple Vanilla Glaze - I tested not one, not two, but seven glazes for these petit fours. The most popular glaze among petit four recipes by far is a white chocolate fondant, but they often taste overly sweet and can be thick and tricky to work with. Others that I tested included a pourable buttercream, modified cream cheese glaze (I was really rooting for this one!), and several versions of a vanilla glaze. The glaze had to solidify without absorbing into the cake or running off, look nice, be easy to use without tons of practice, and enhance the overall flavor of the cakes. I ultimately decided on a drizzled rather than coated look, because achieving a smooth glaze on all sides of the cakes is really challenging, and we're aiming for success and not frustration here. I actually love the drippy glaze look because it feels less stuffy and also highlights the fillings between the cake layers.
Ingredient Notes & Substitutions
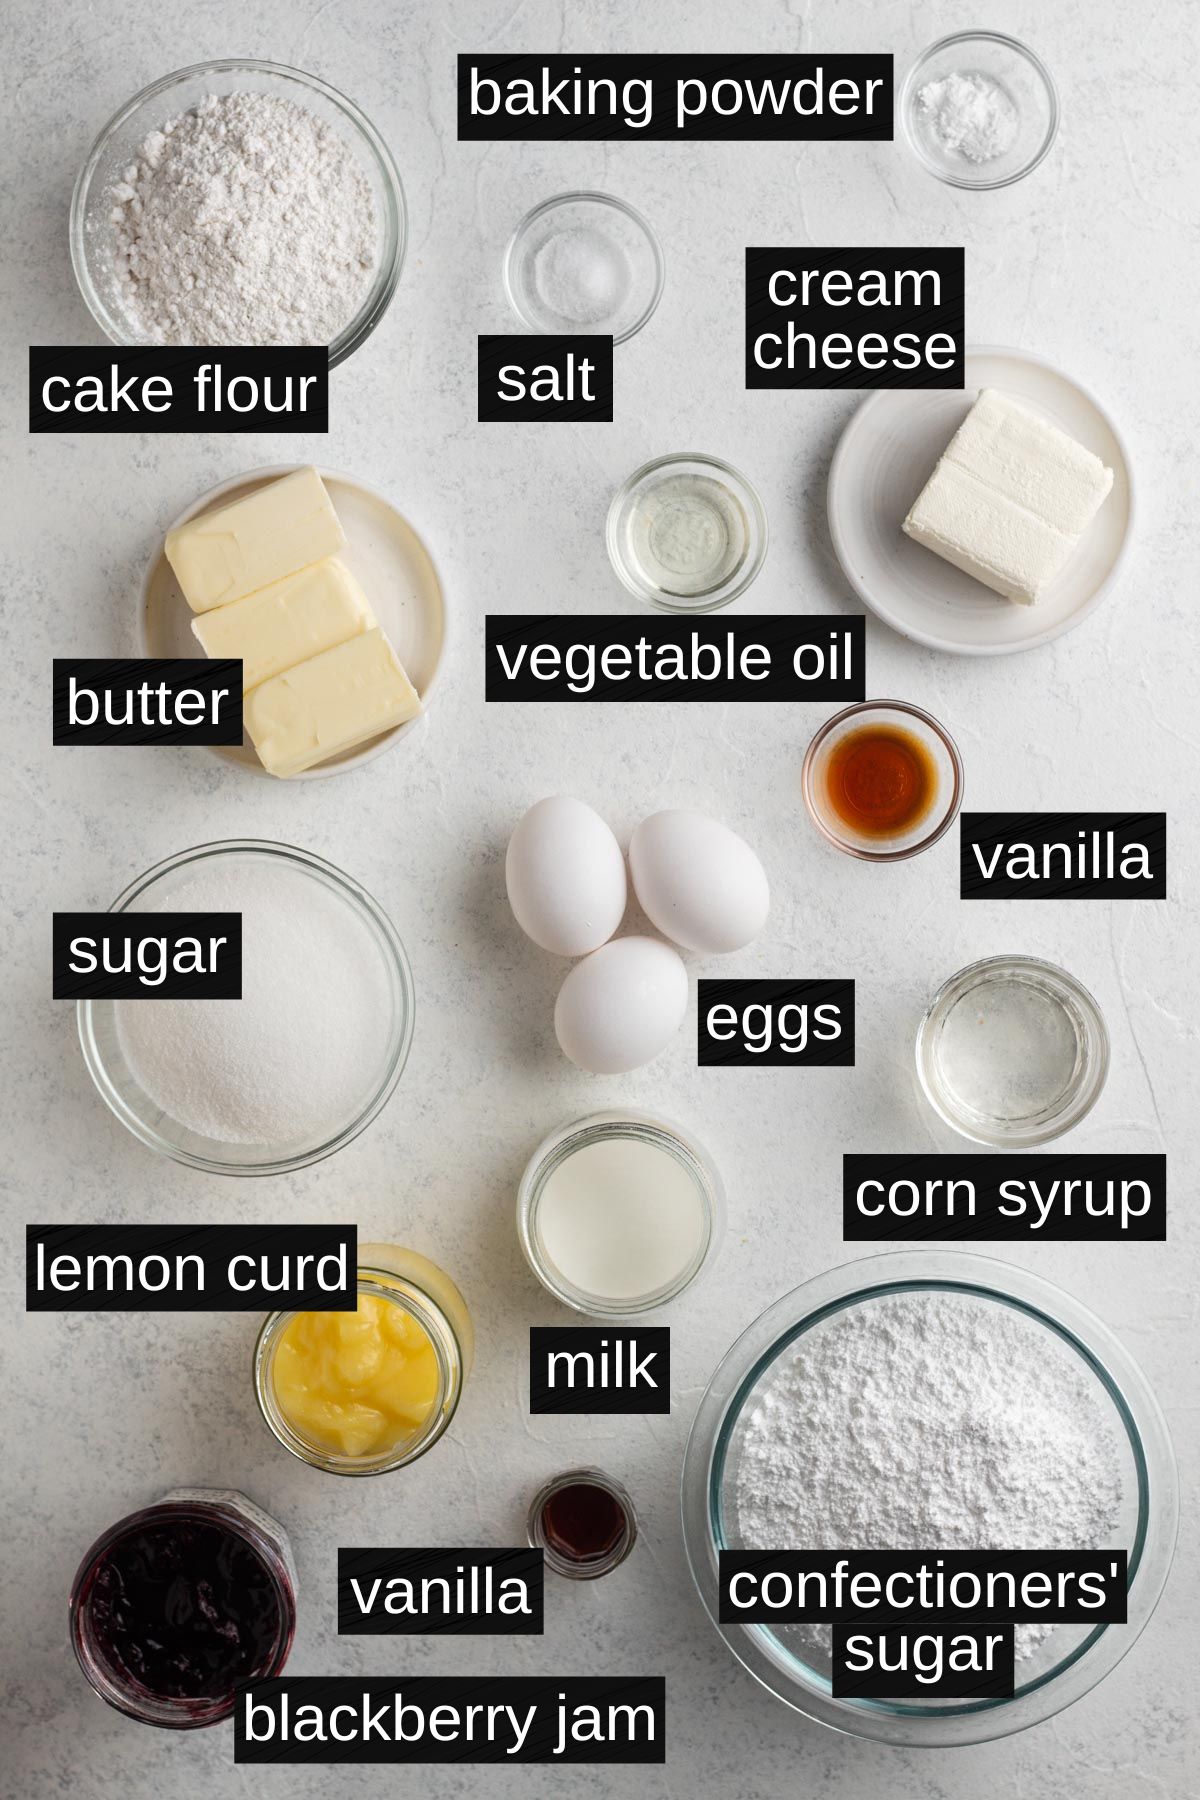
Cake Flour - With its lower protein content compared to all-purpose flour, cake flour helps to create a cake that's soft and slightly tender.
Cream Cheese - Cream cheese adds an extra dose of moisture and flavor to the pound cake. As always, use full-fat block style cream cheese for the best texture.
Vegetable Oil - Vegetable oil adds a bit of extra moisture and tenderness to the cake. Canola oil can be substituted.
Lemon Curd - Lemon curd adds a deliciously tangy hit of citrus to the filling and pairs beautifully with berry jams, like the blackberry jam used here. Use homemade lemon curd or store-bought.
Light Corn Syrup - Corn syrup helps to create a thick and soft glaze with a just right texture that drips down the sides of the tea cakes before setting.
See recipe card at the bottom of this post for full ingredient list and measurements.
Special Equipment
In addition to essential baking equipment (like a mixing bowl and spatula), I recommend some special tools for making this recipe.
- Stand mixer or electric hand mixer, for mixing the cake batter.
- Parchment paper, for keeping the cake from sticking to the pan.
- 9x13 metal pan, for baking the cake.
- Serrated knife, for cutting the cake.
- Small icing spatula, for spreading the filling on the cake.
- Double boiler, for heating the glaze before topping the cakes. Check out this post for more information about double boilers, including how to DIY a double boiler using kitchen tools you already own.
Step-By-Step Recipe Instructions
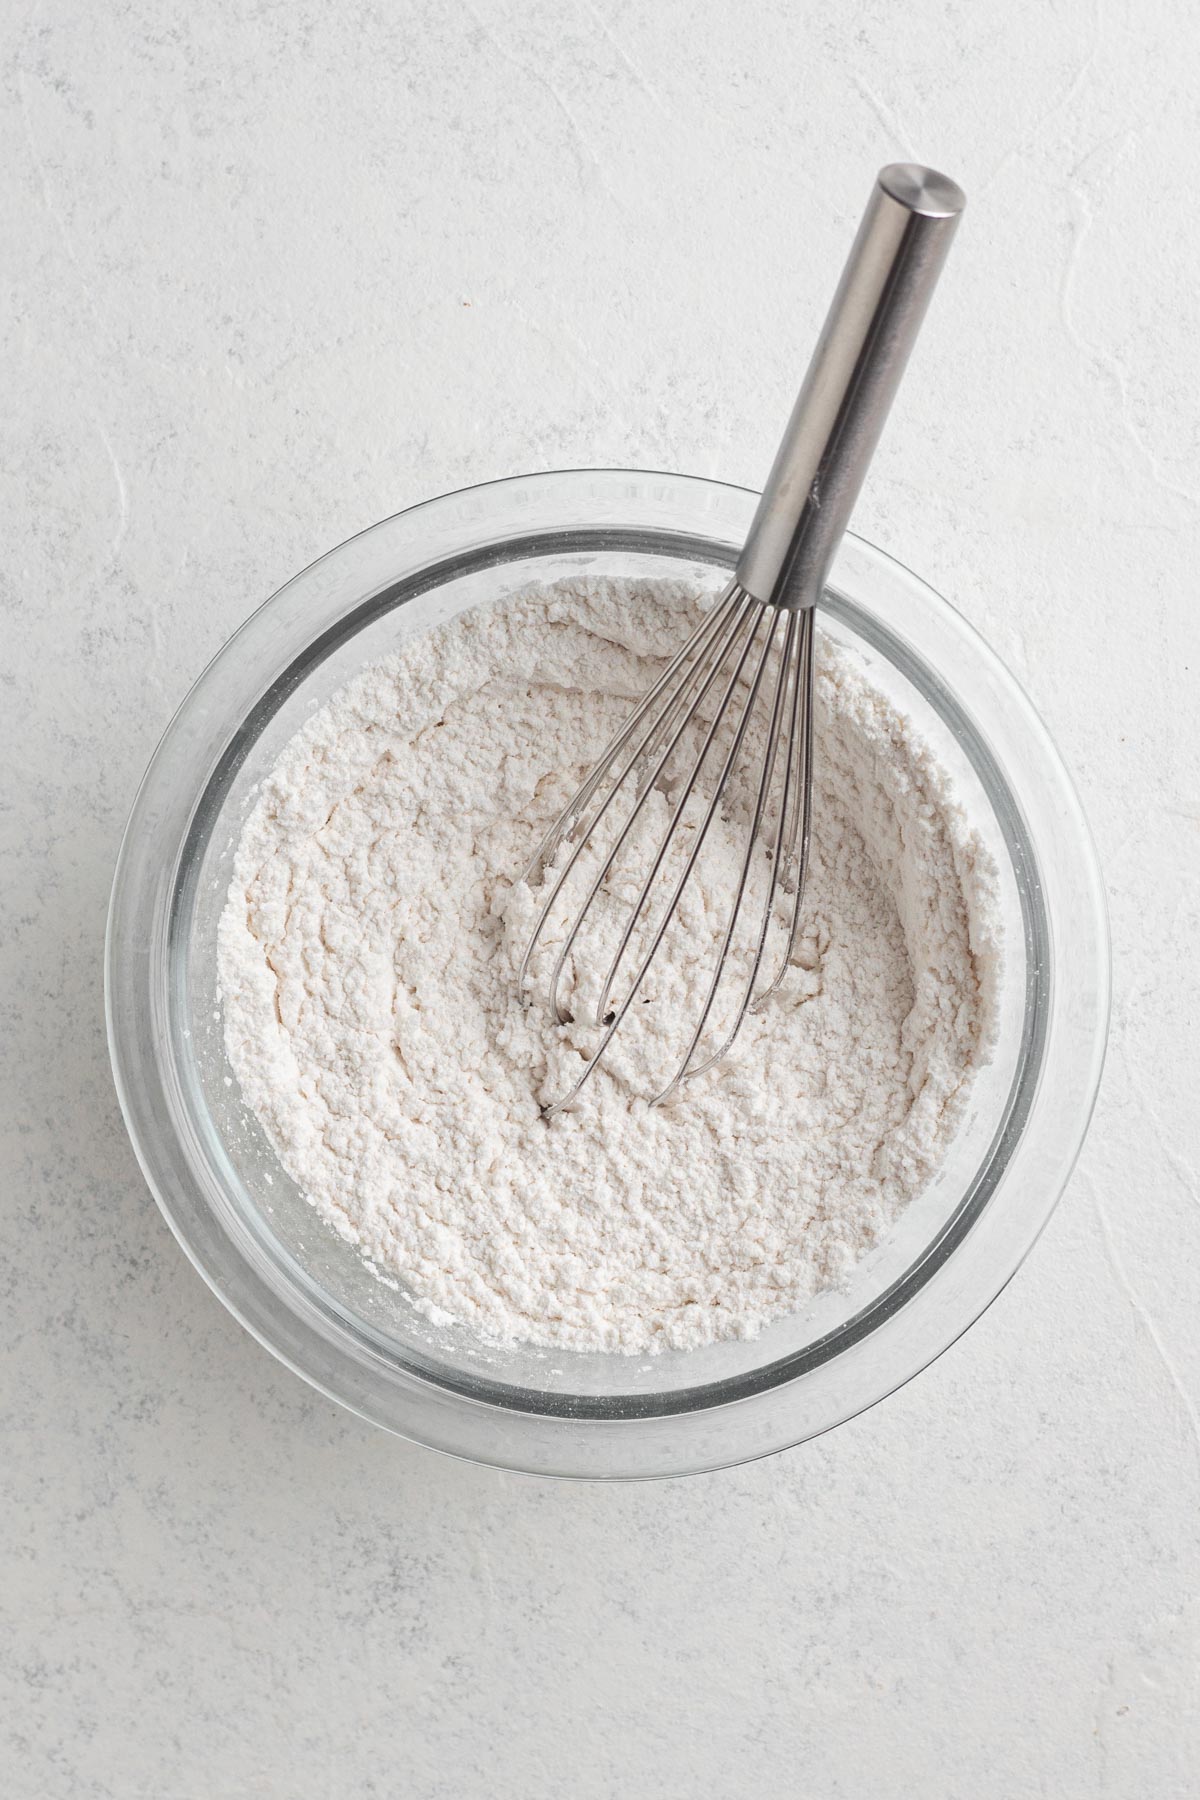
Step 1: Make the cake. Whisk together cake flour, baking powder, and salt. Set aside.
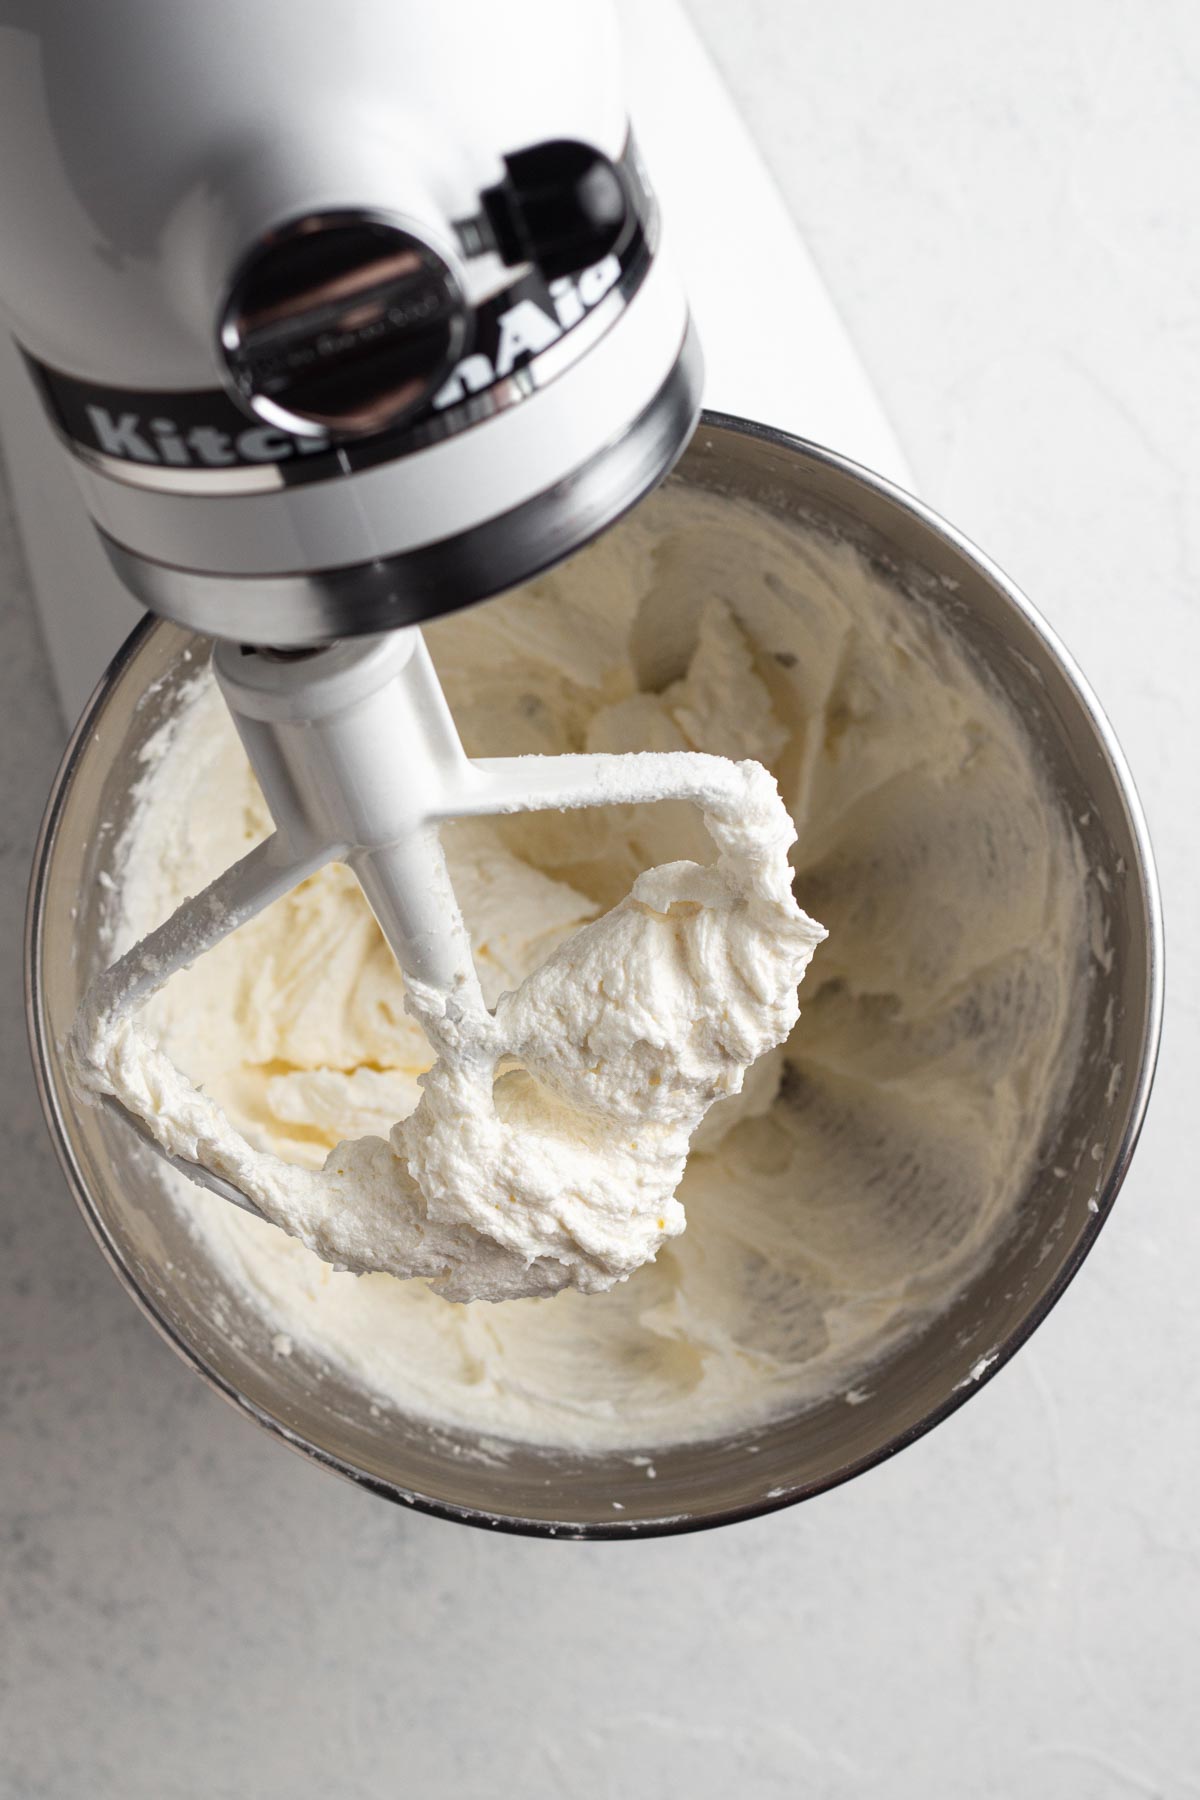
Step 2: Beat butter, cream cheese, and oil on high speed for 2 minutes. Add sugar and continue to beat on high speed for 5 minutes, until pale and fluffy.
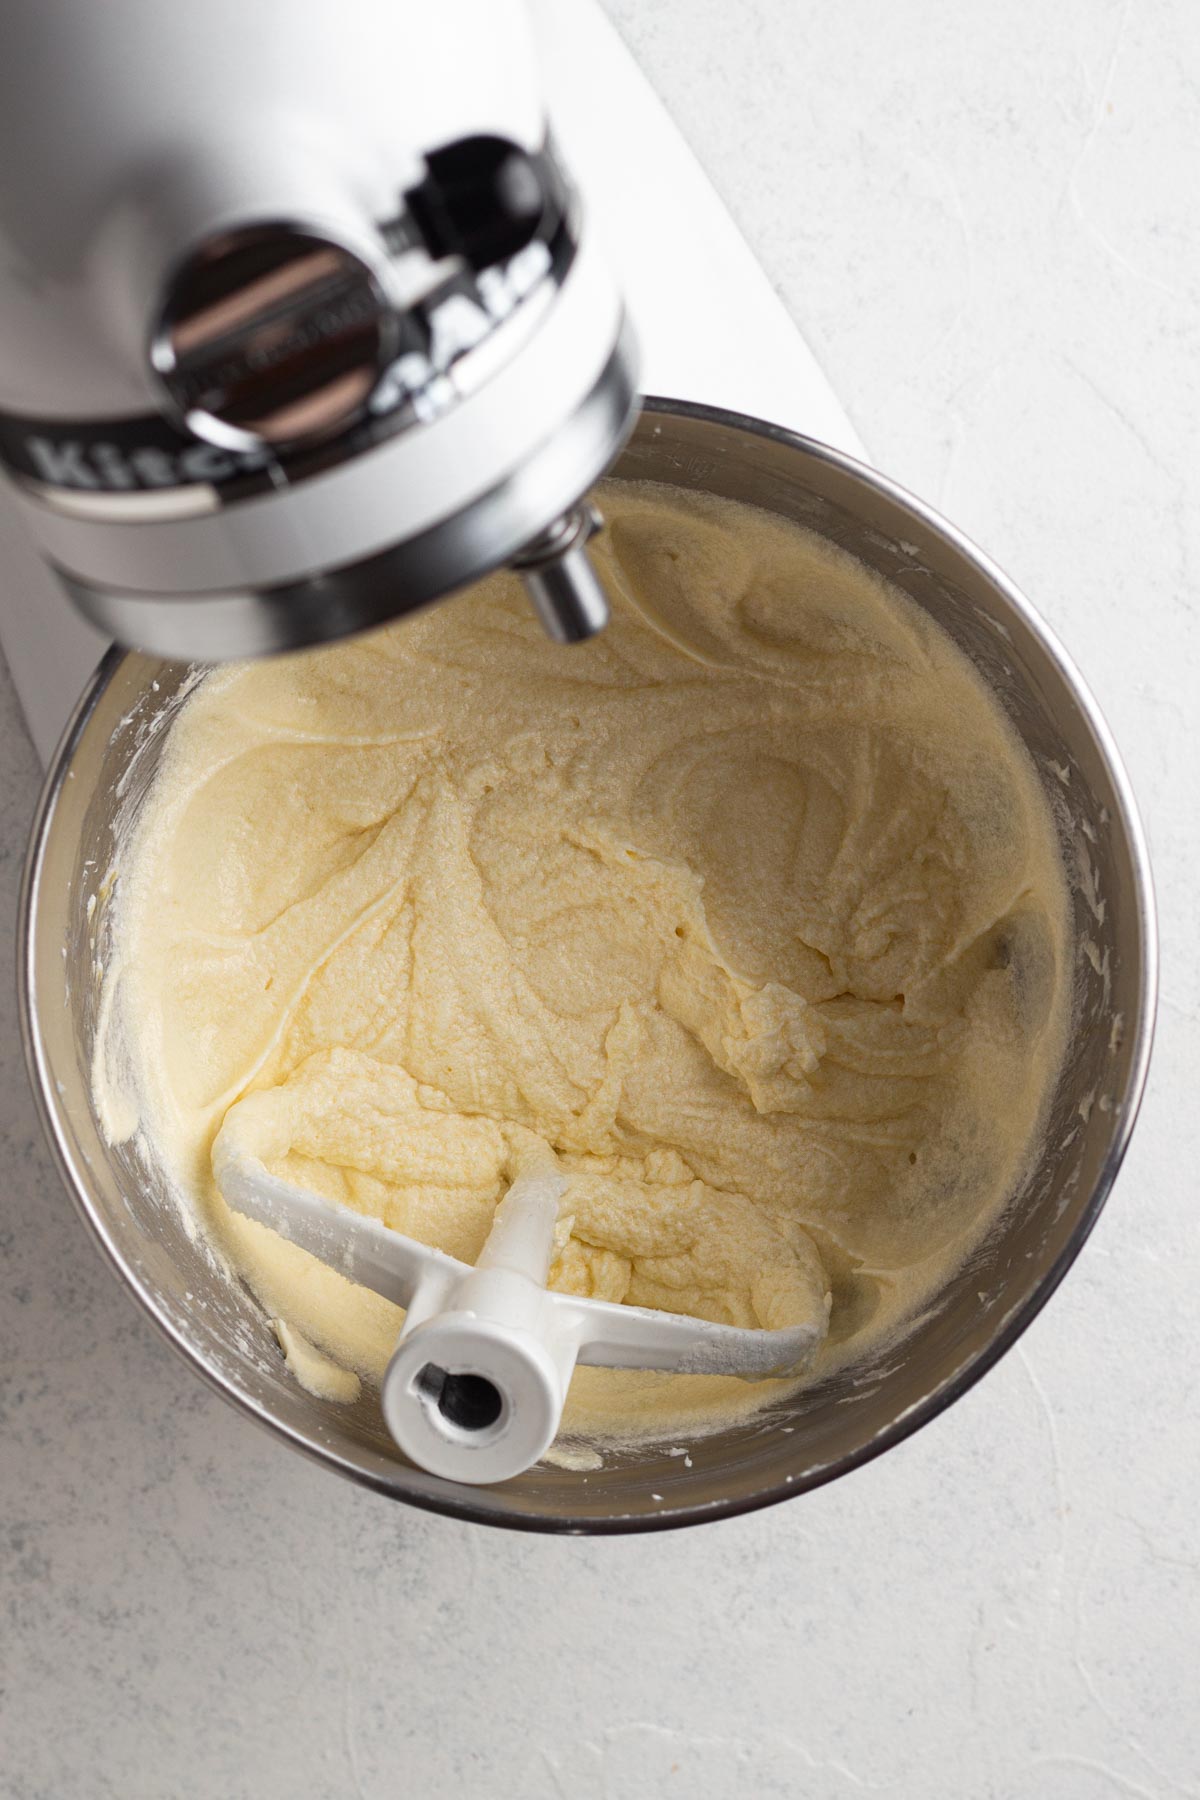
Step 3: Add eggs and vanilla and beat on high speed until well blended.
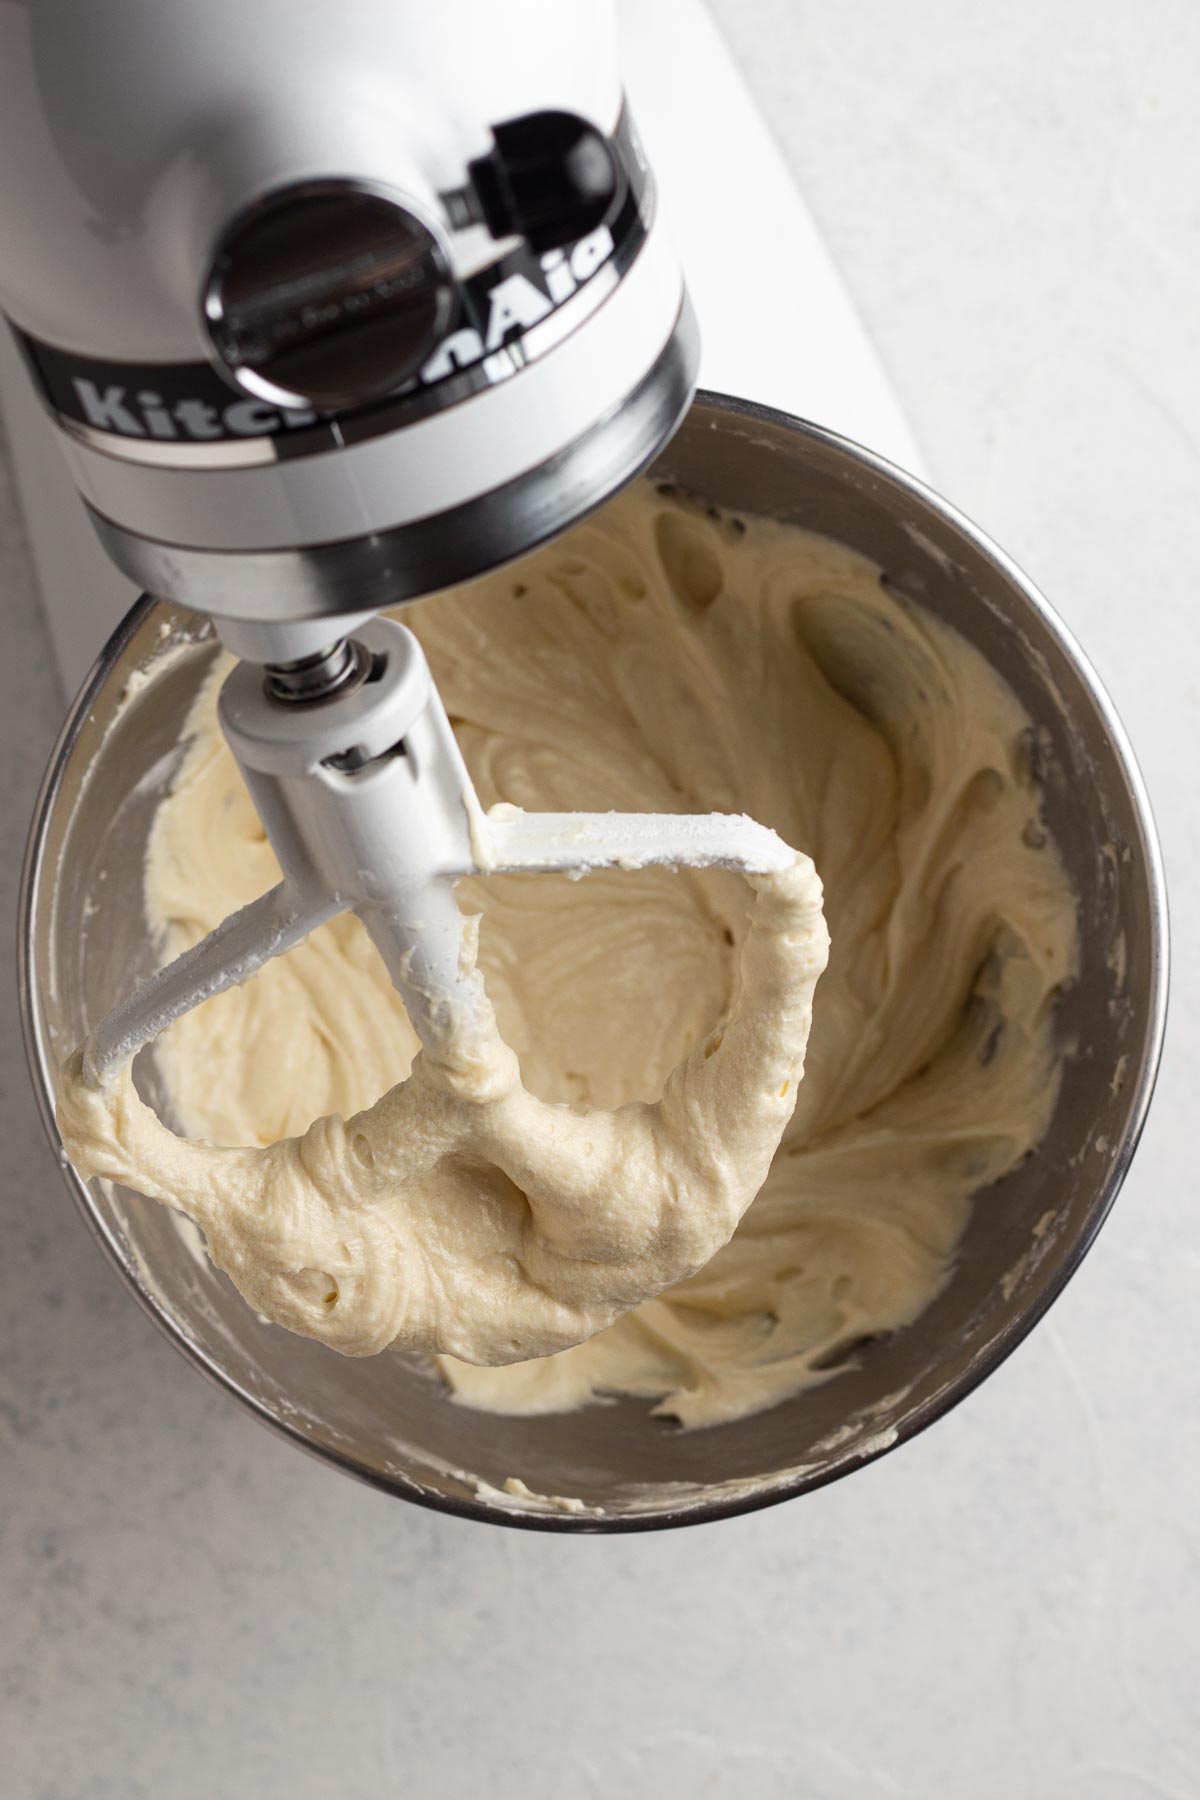
Step 4: Slowly add the dry ingredients, mixing just until combined.
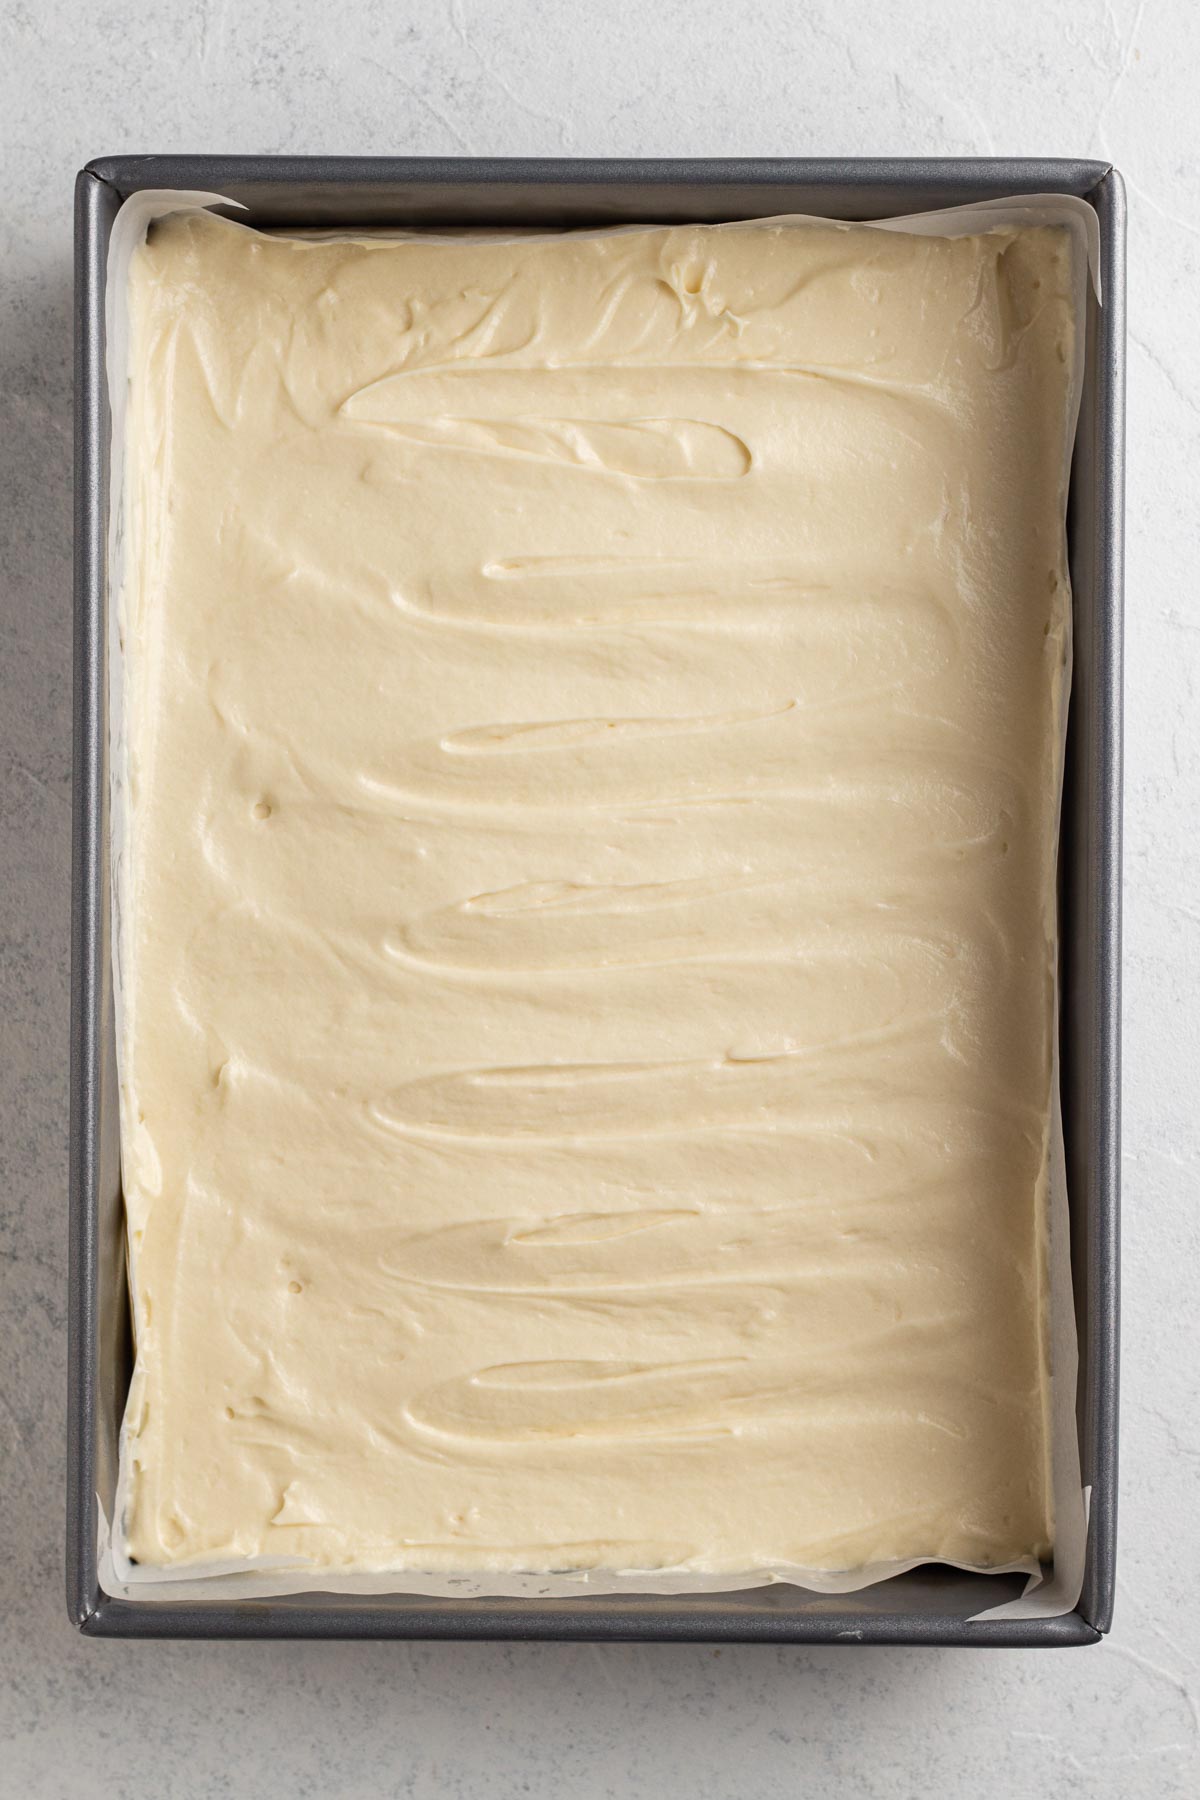
Step 5: Spread the batter evenly into a metal 9x13 pan lined with parchment paper.
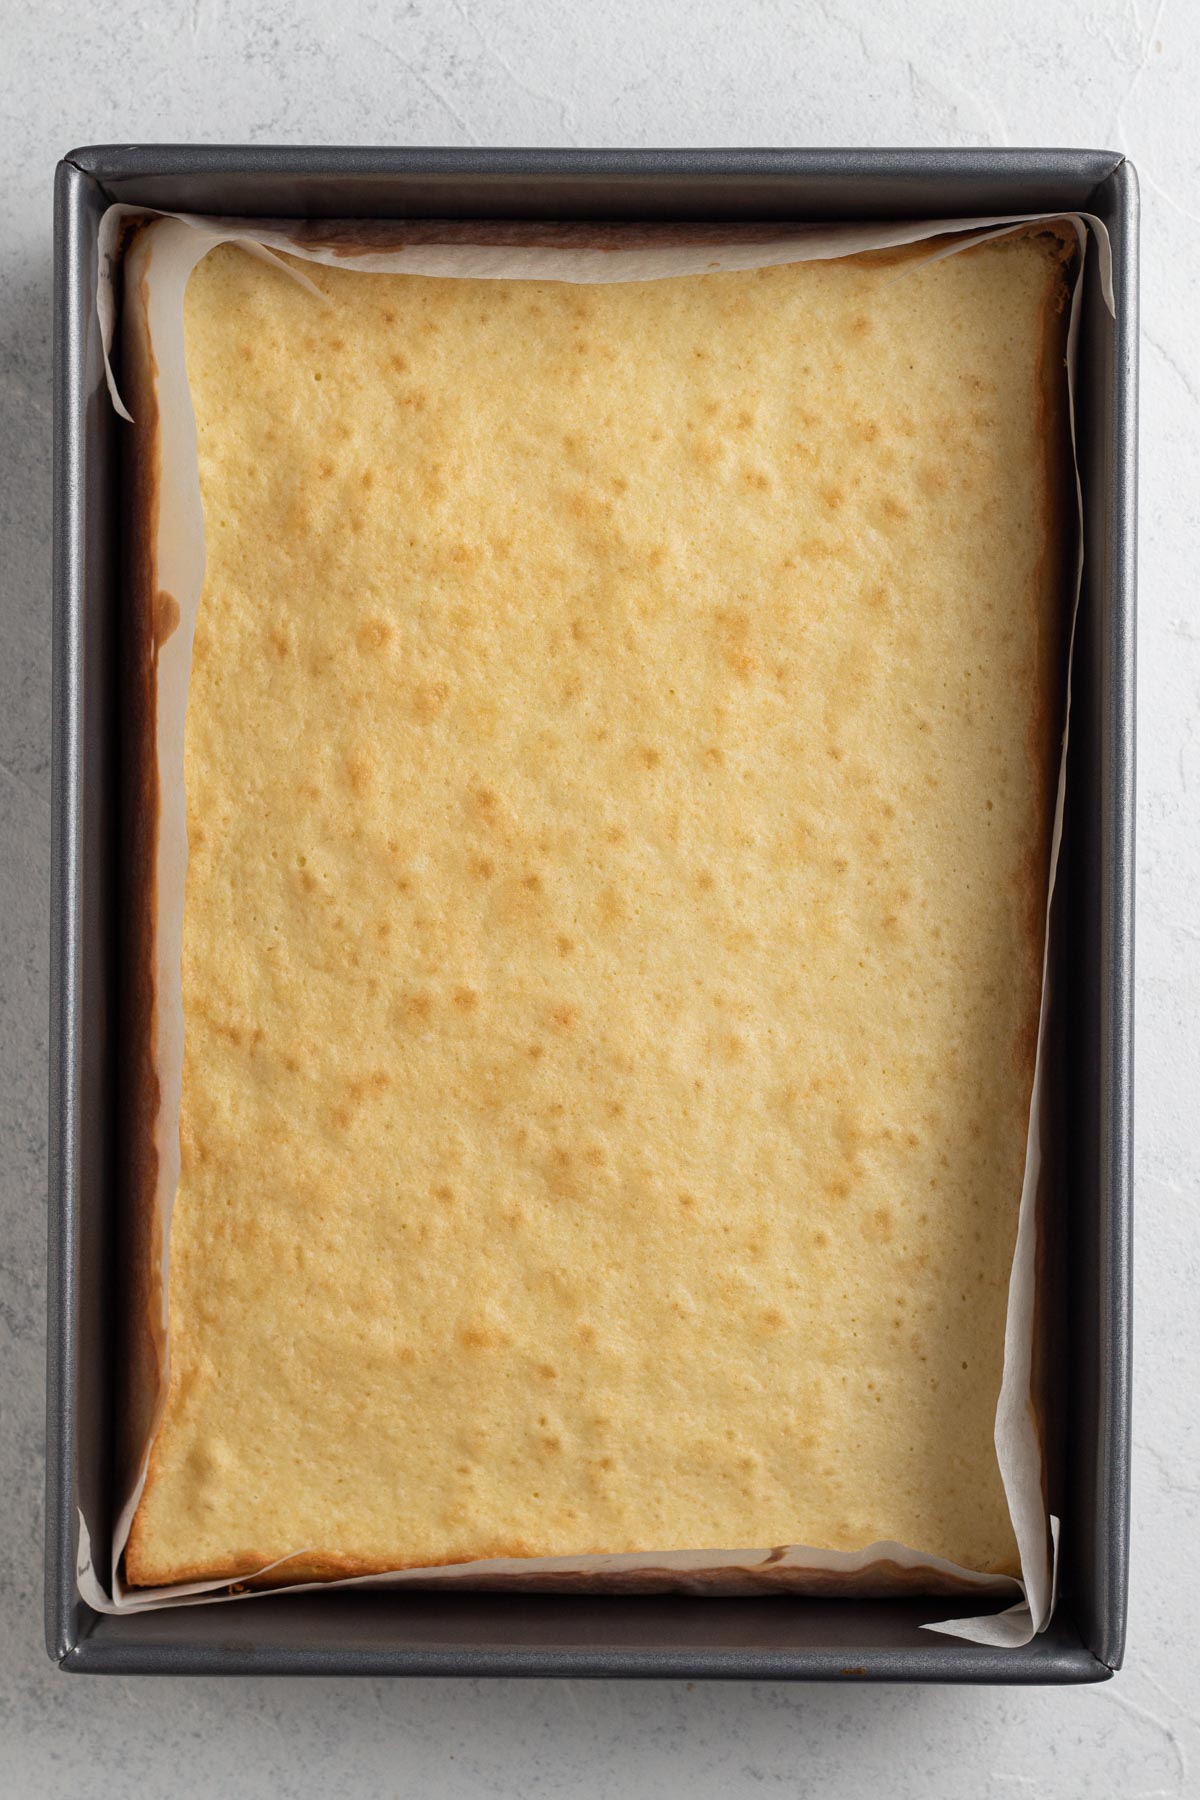
Step 6: Bake at 325°F for 25-30 minutes, or until edges just begin to turn golden. Allow the cake to cool completely, then chill in the fridge for 30 minutes.
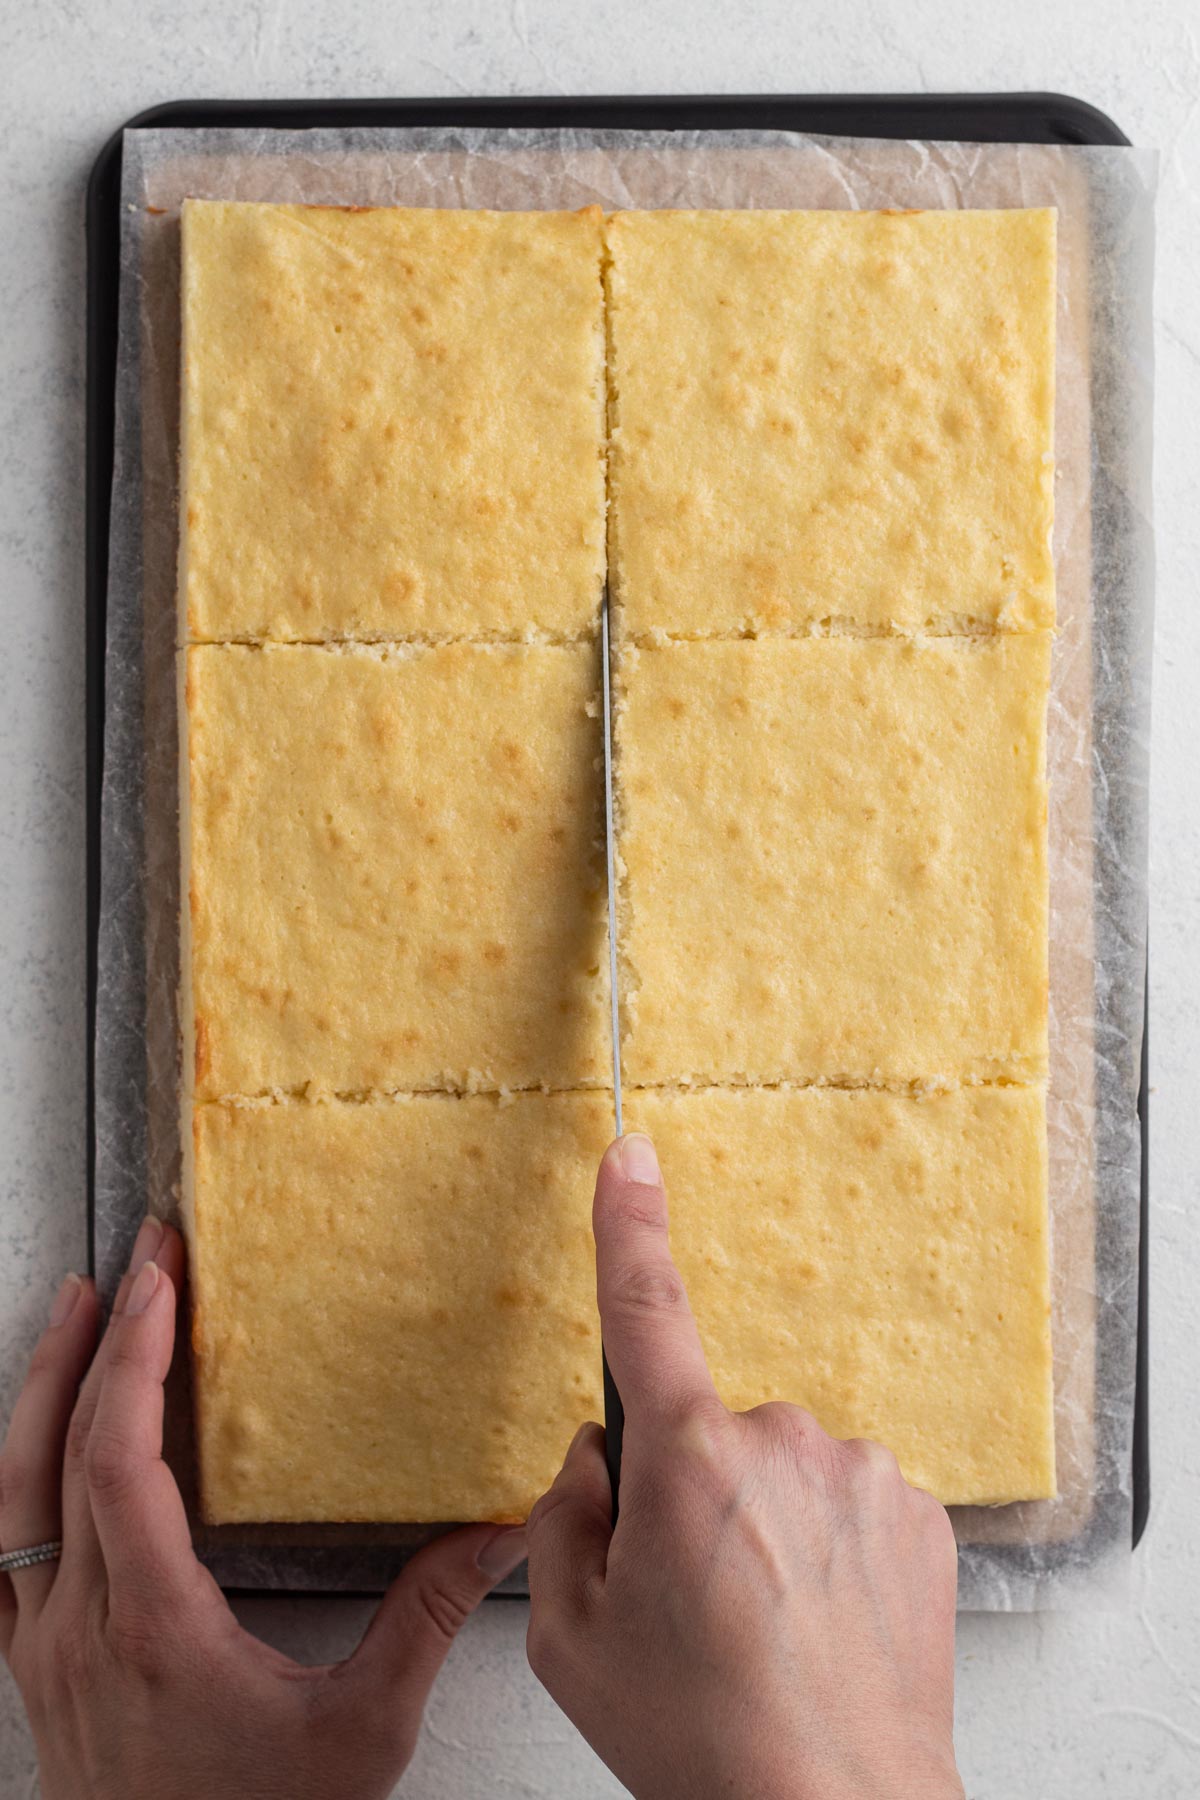
Step 7: Trim the edges off of the cake, then cut the cake into thirds widthwise and in half lengthwise. You should now have 6 smaller squares of cake.
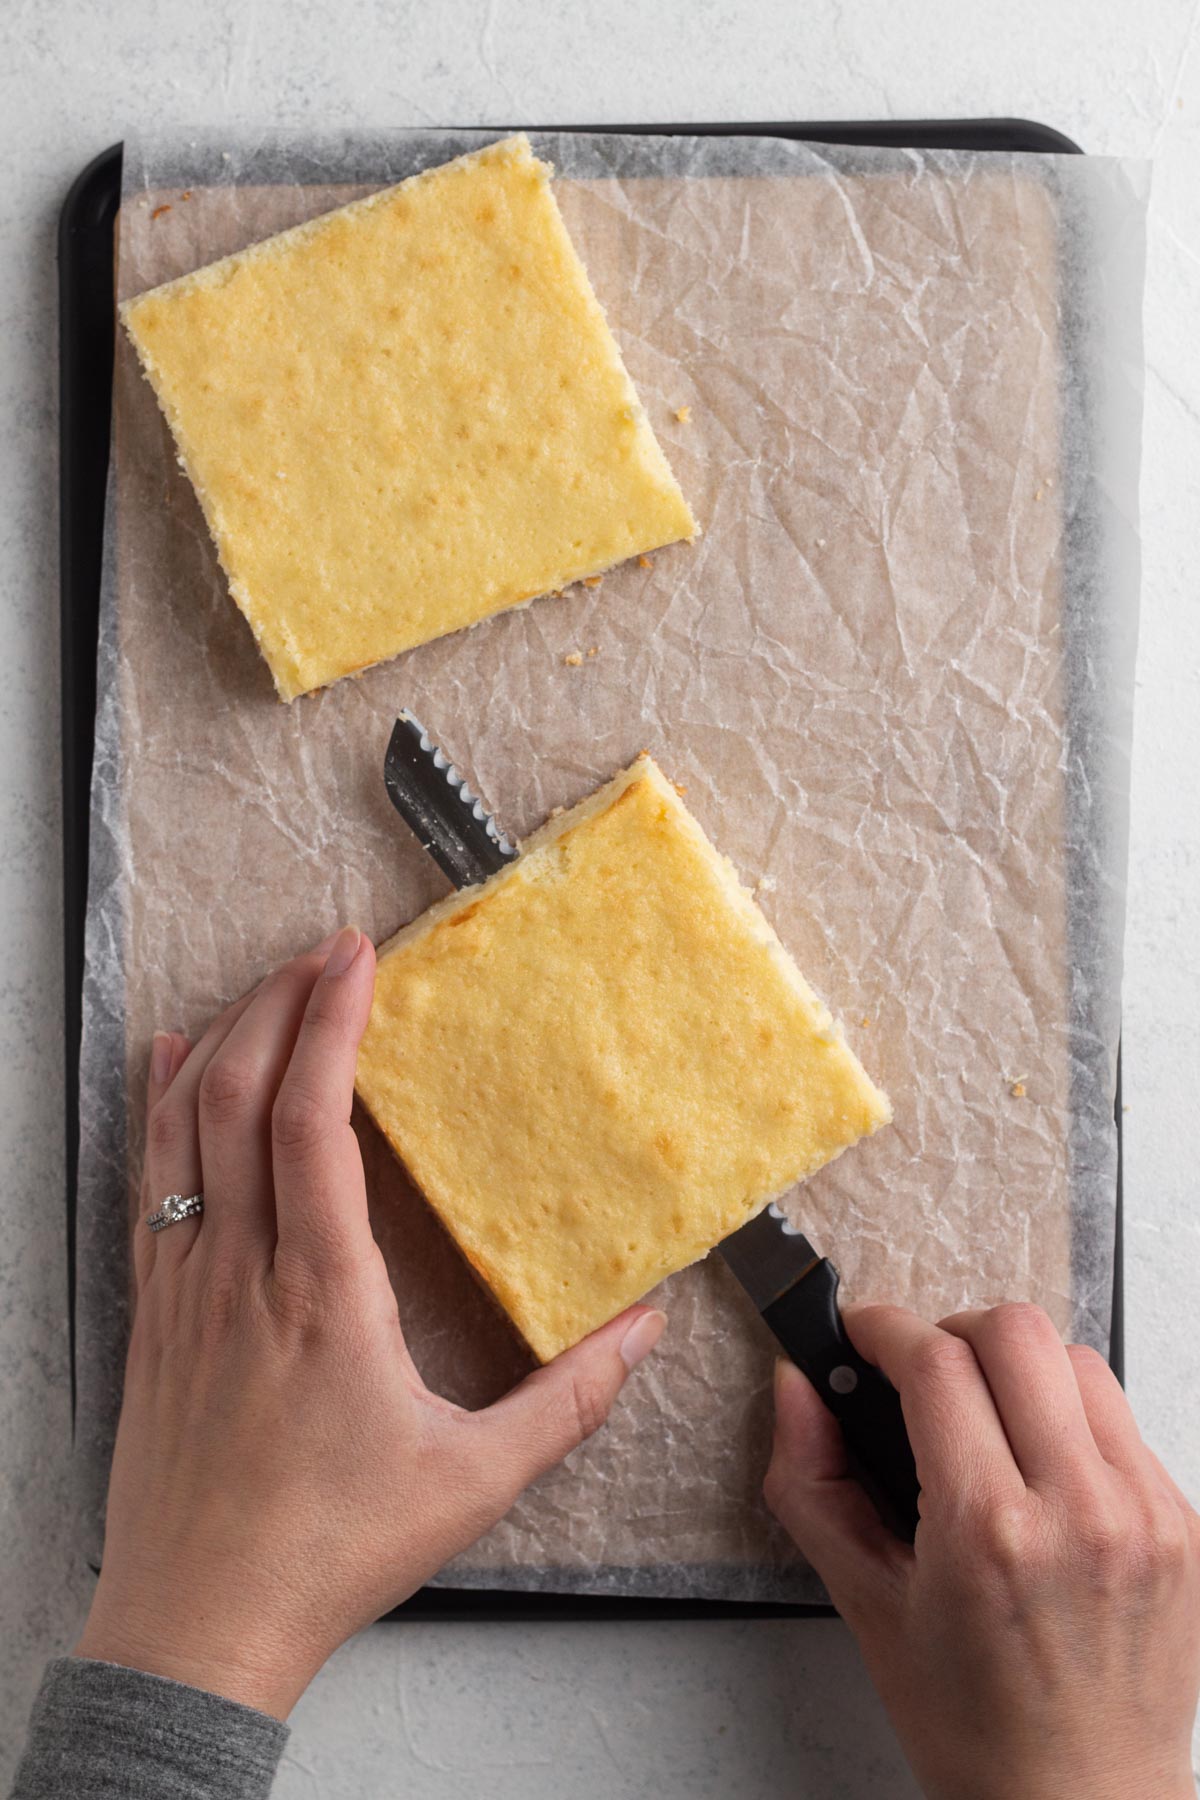
Step 8: Carefully slice each square of cake in half horizontally to create two equal and thinner squares of cake. You should now have 12 thin squares of cake.
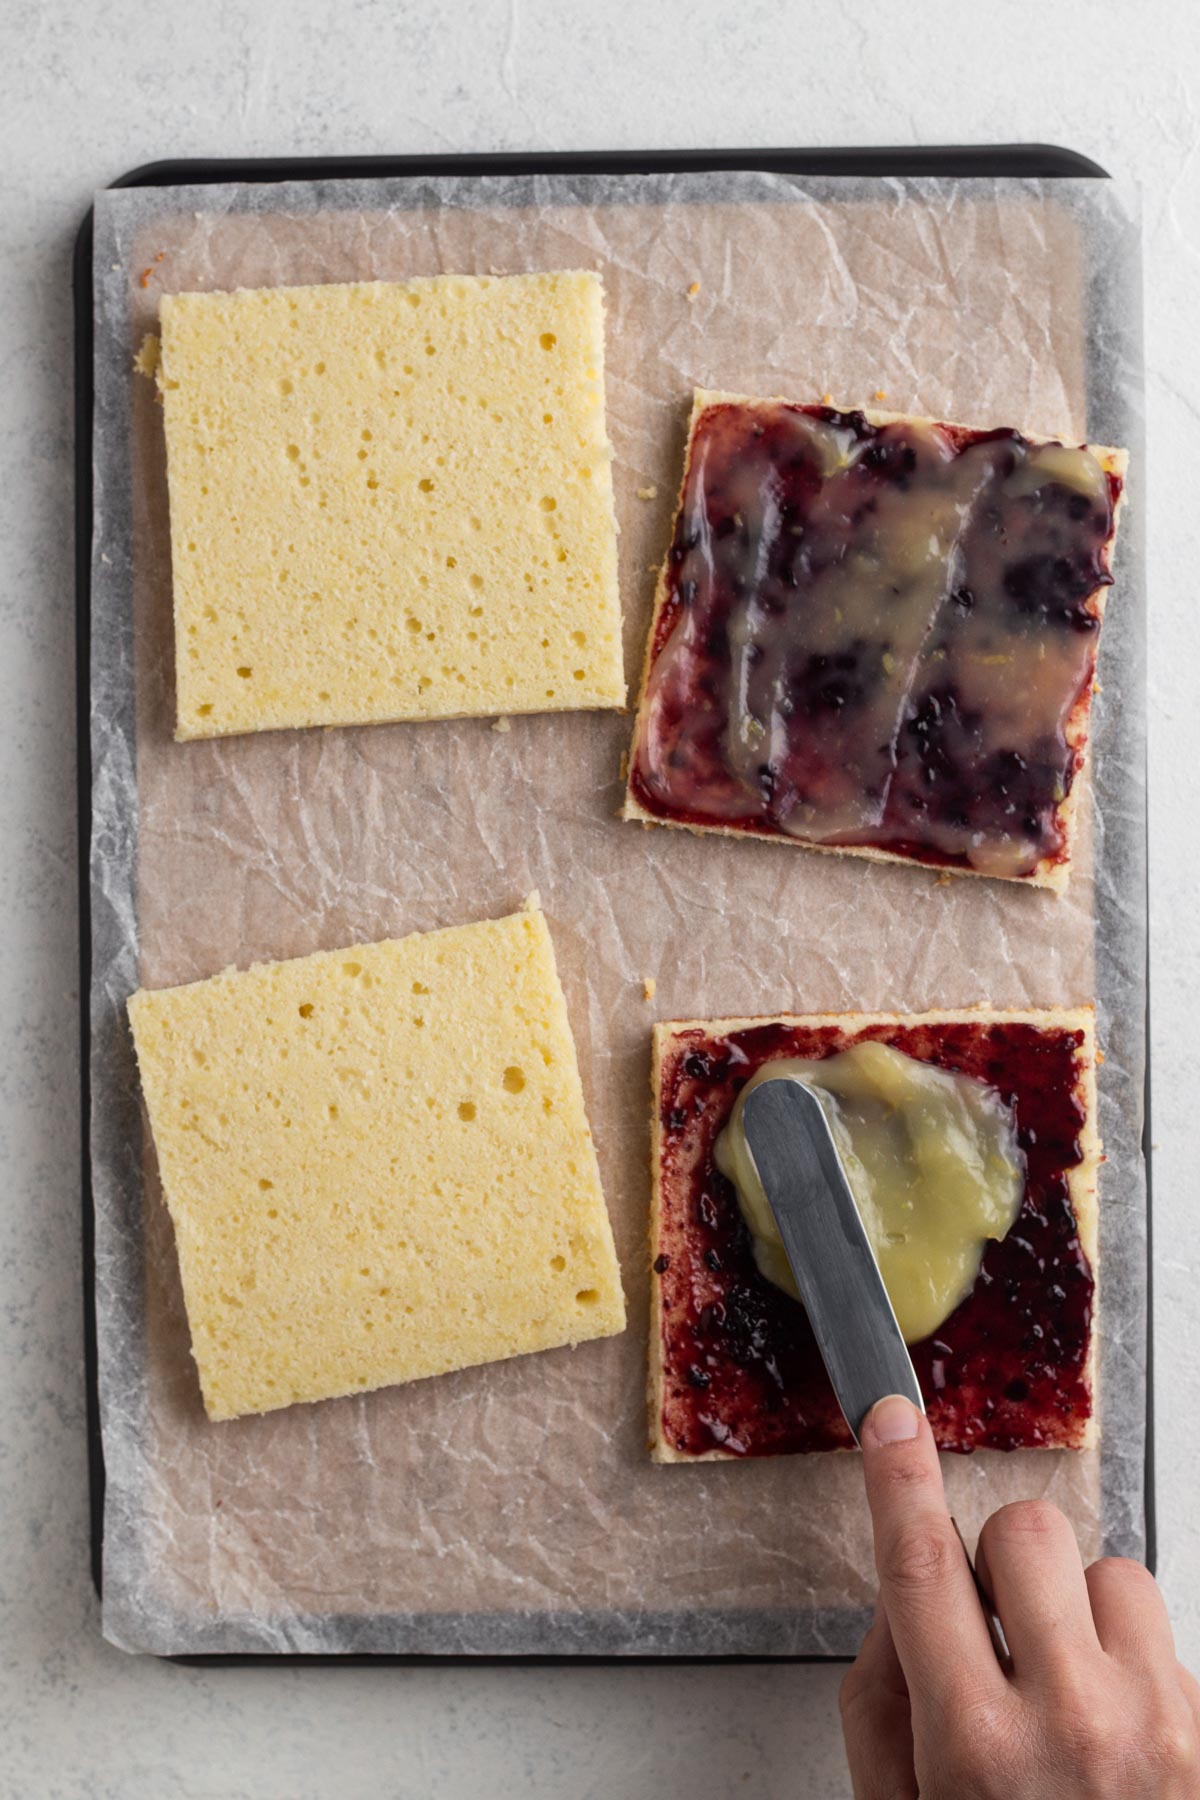
Step 9: Spread a very thin layer of blackberry jam onto 8 of the cake squares. Spread a very thin layer of lemon curd on top of the blackberry jam on the same 8 cake squares.
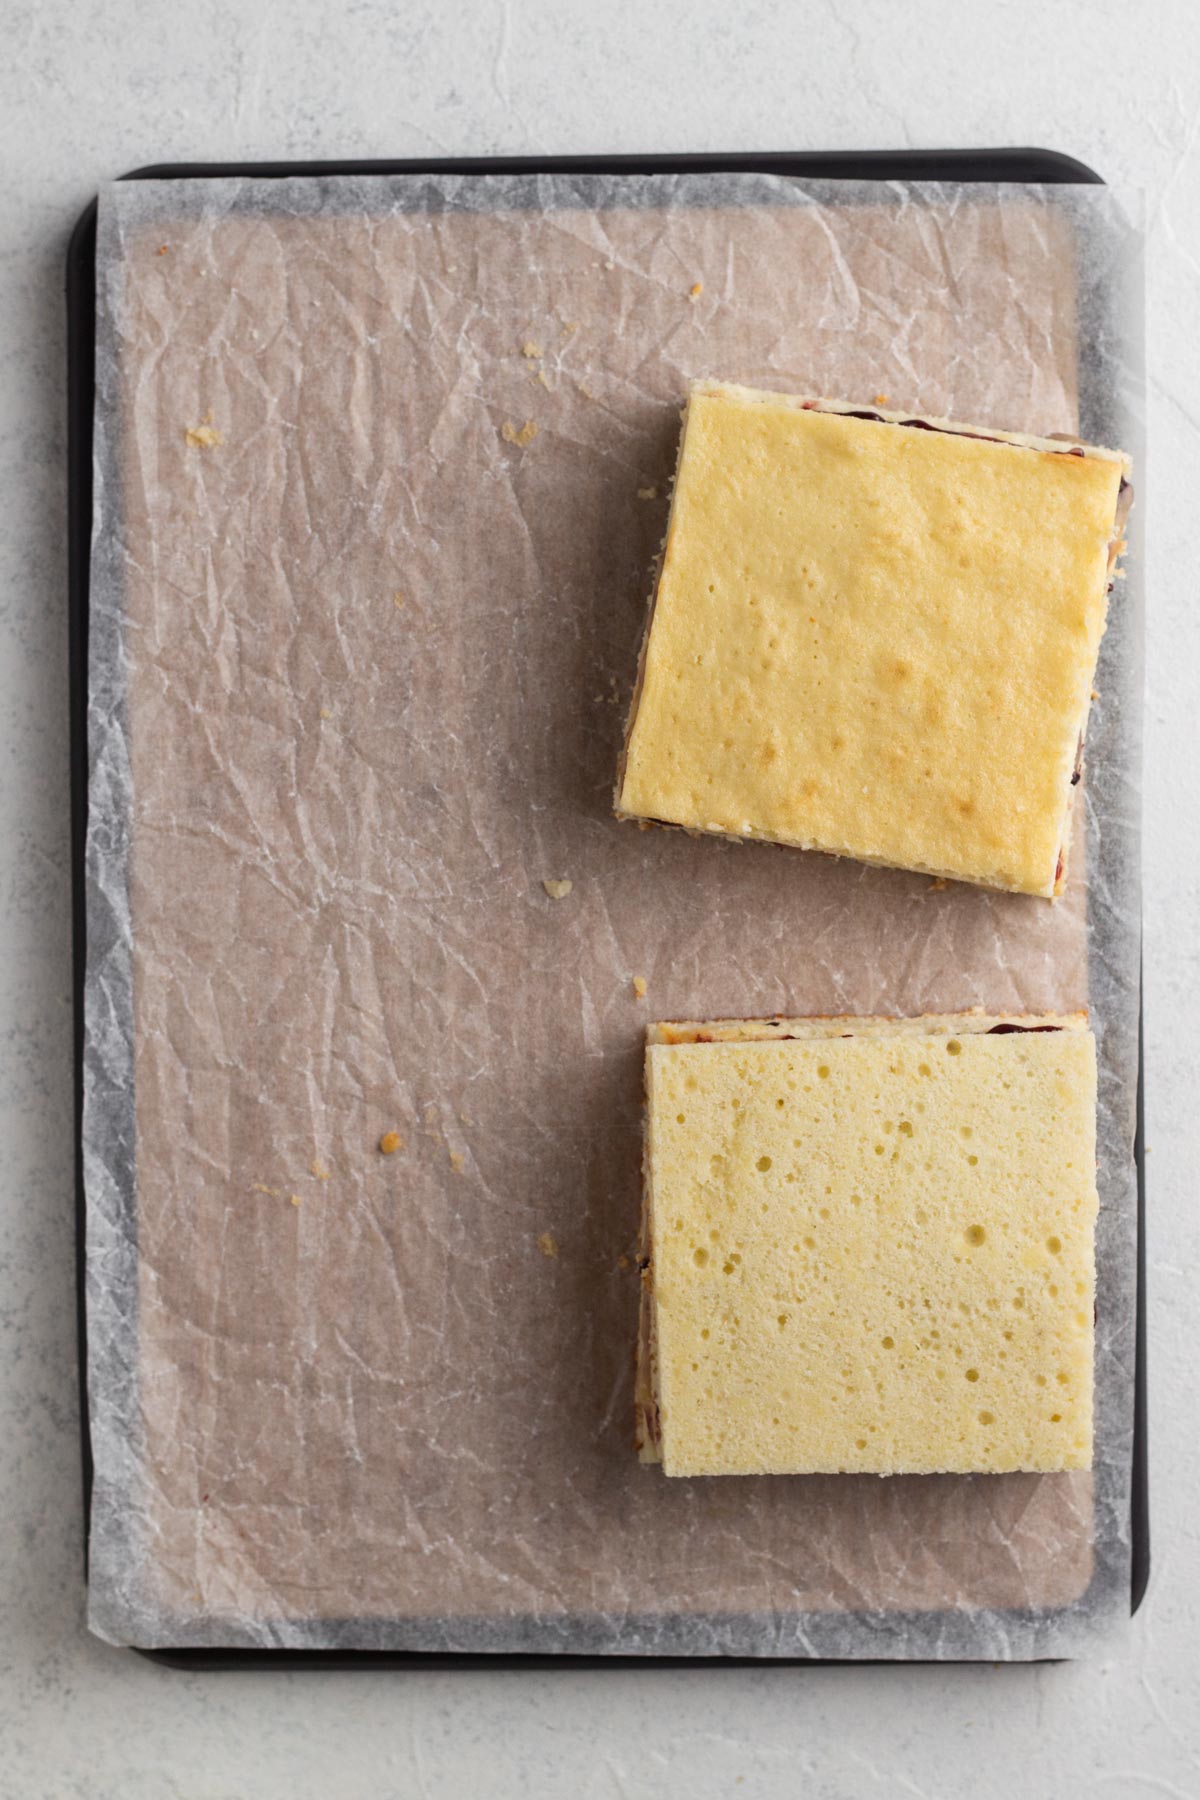
Step 10: Place 4 of the jam and curd topped cake squares on top of the other 4 topped cake squares. Then place the 4 remaining plain cake squares on top of each. You should now have 4 squares of cake, each with 3 layers of cake and two layers of filling. Refrigerate the cakes for 30 minutes.
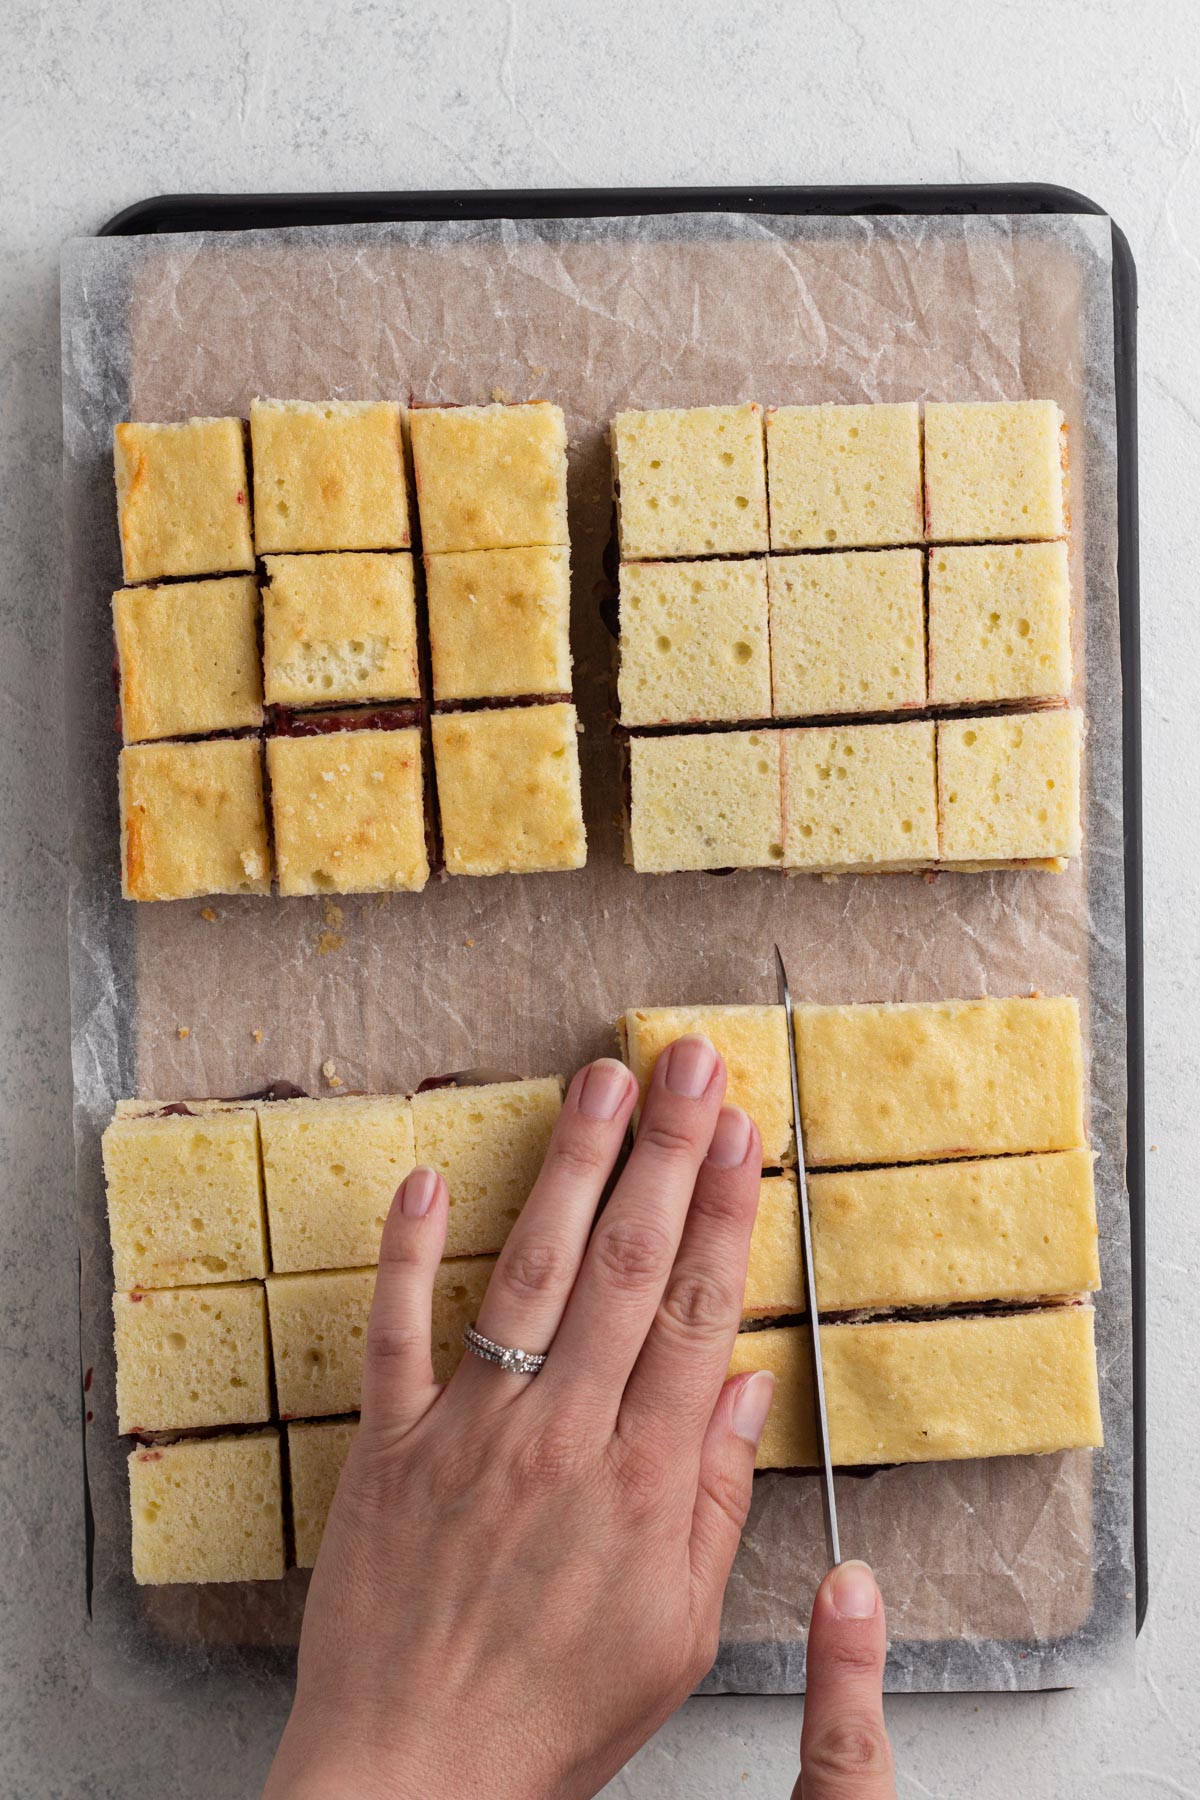
Step 11: Cut each of the chilled cakes in thirds lengthwise and again in thirds widthwise. Each square will be cut into 9 smaller squares for a total of 36 tea cakes. Freeze the tea cakes for 30 minutes.
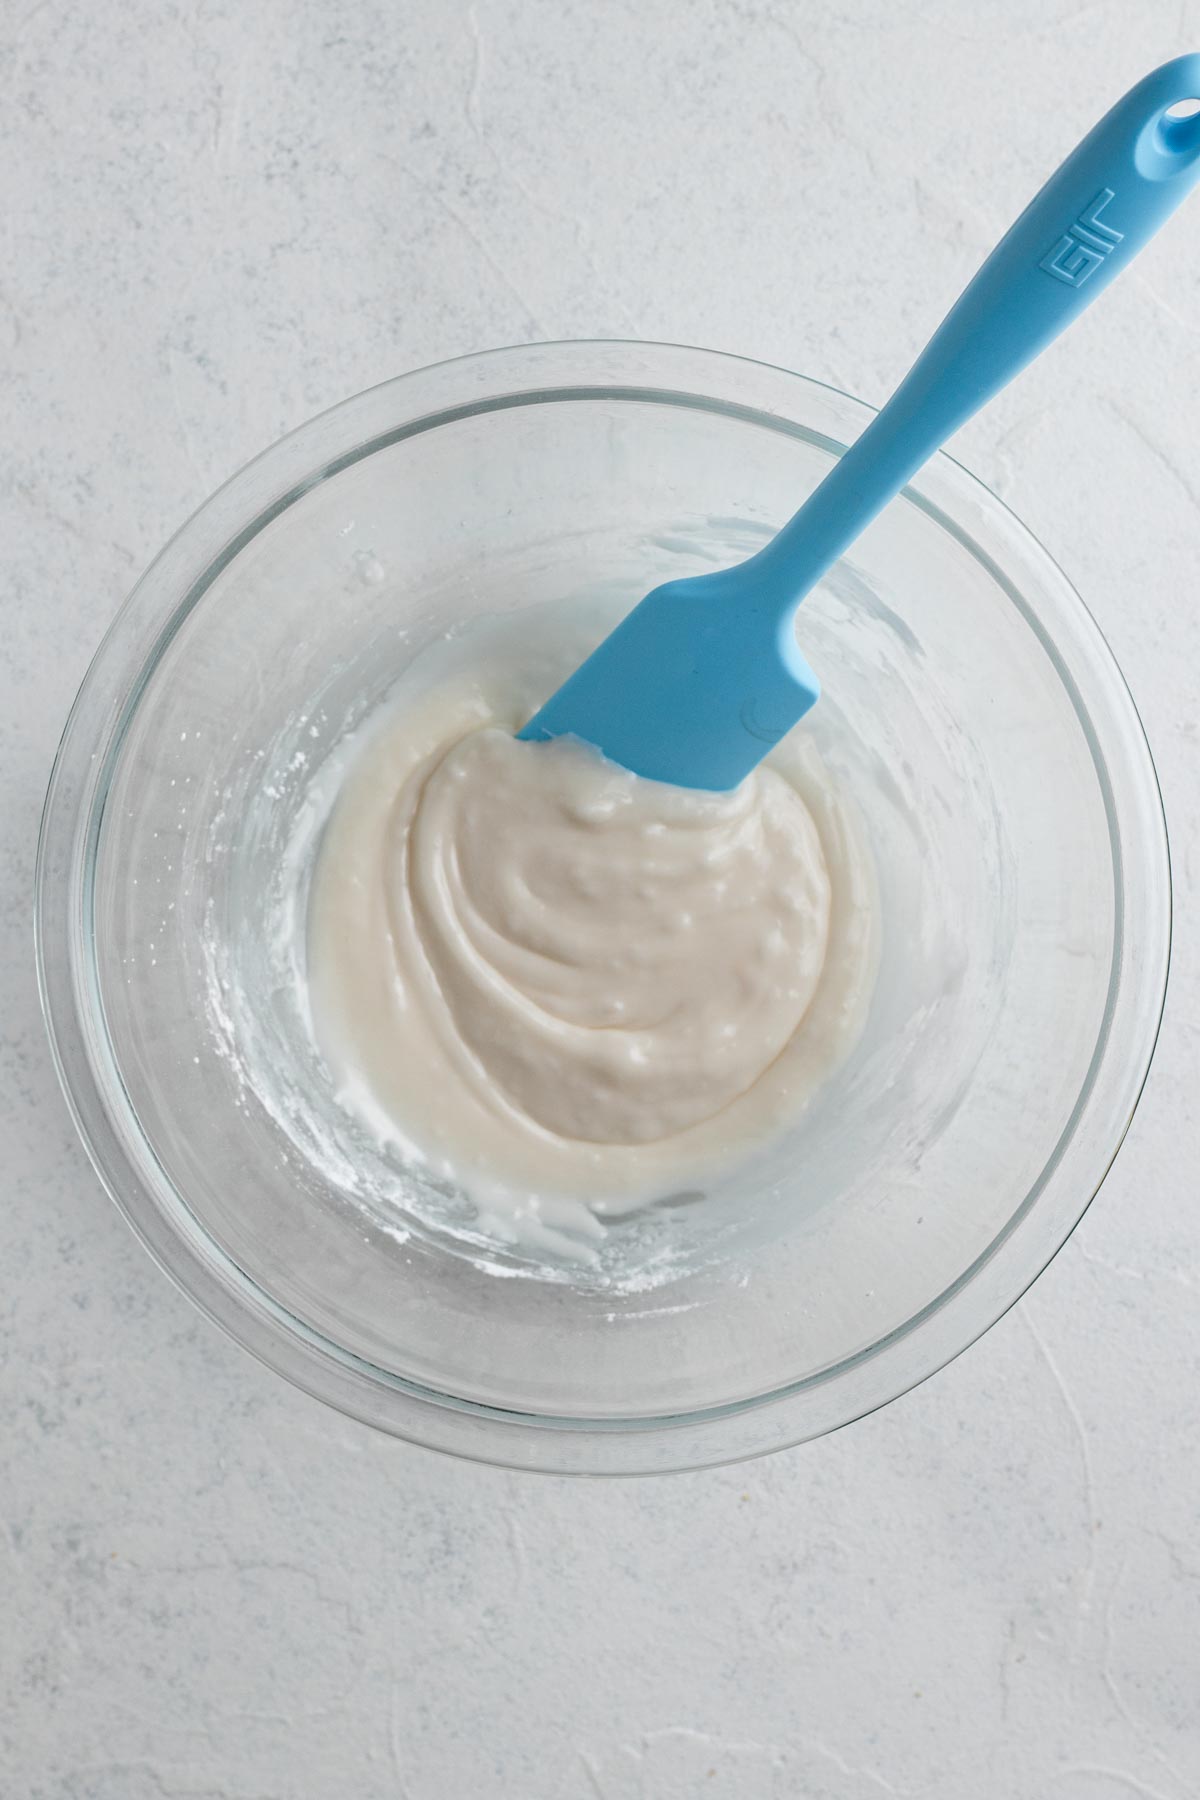
Step 12: Whisk to combine confectioners' sugar, milk, corn syrup, and vanilla.
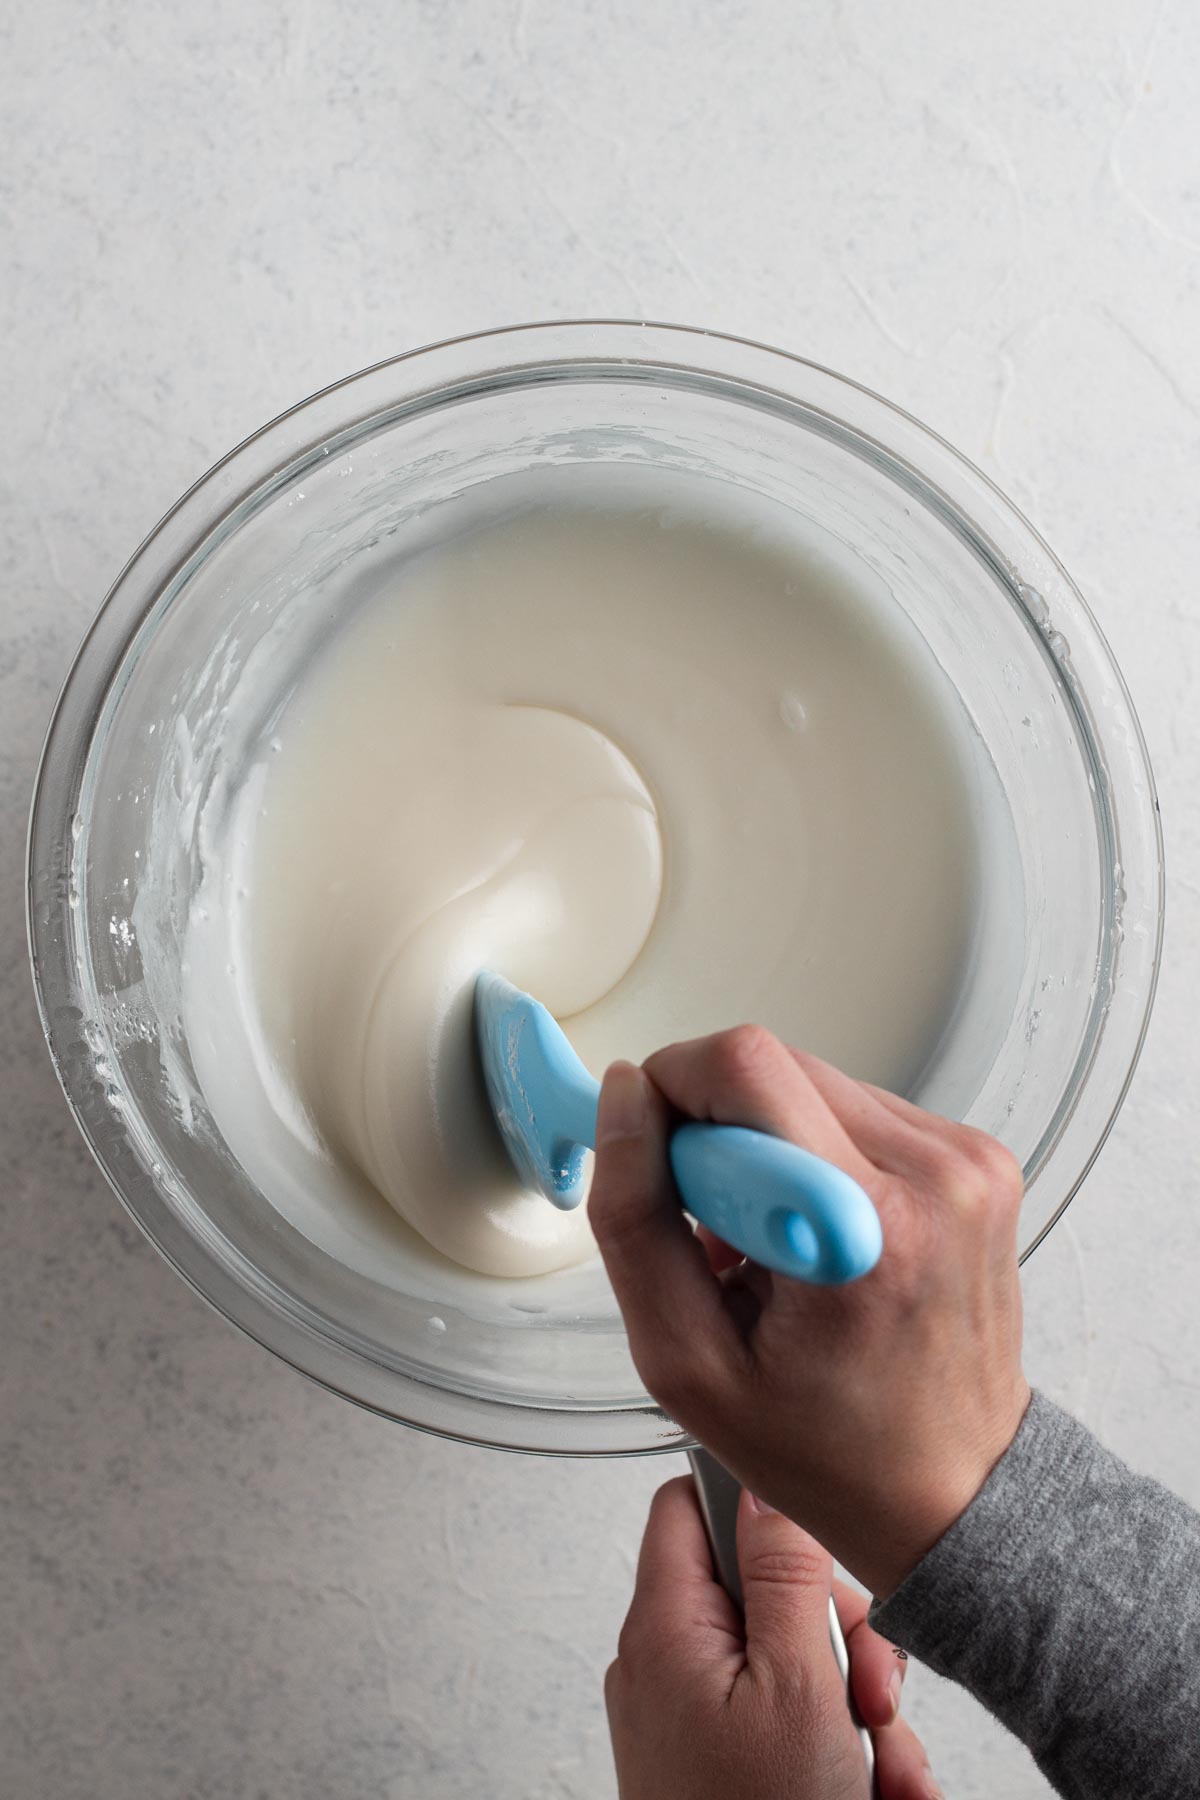
Step 13: Heat the glaze in a double boiler, stirring until smooth and pourable.
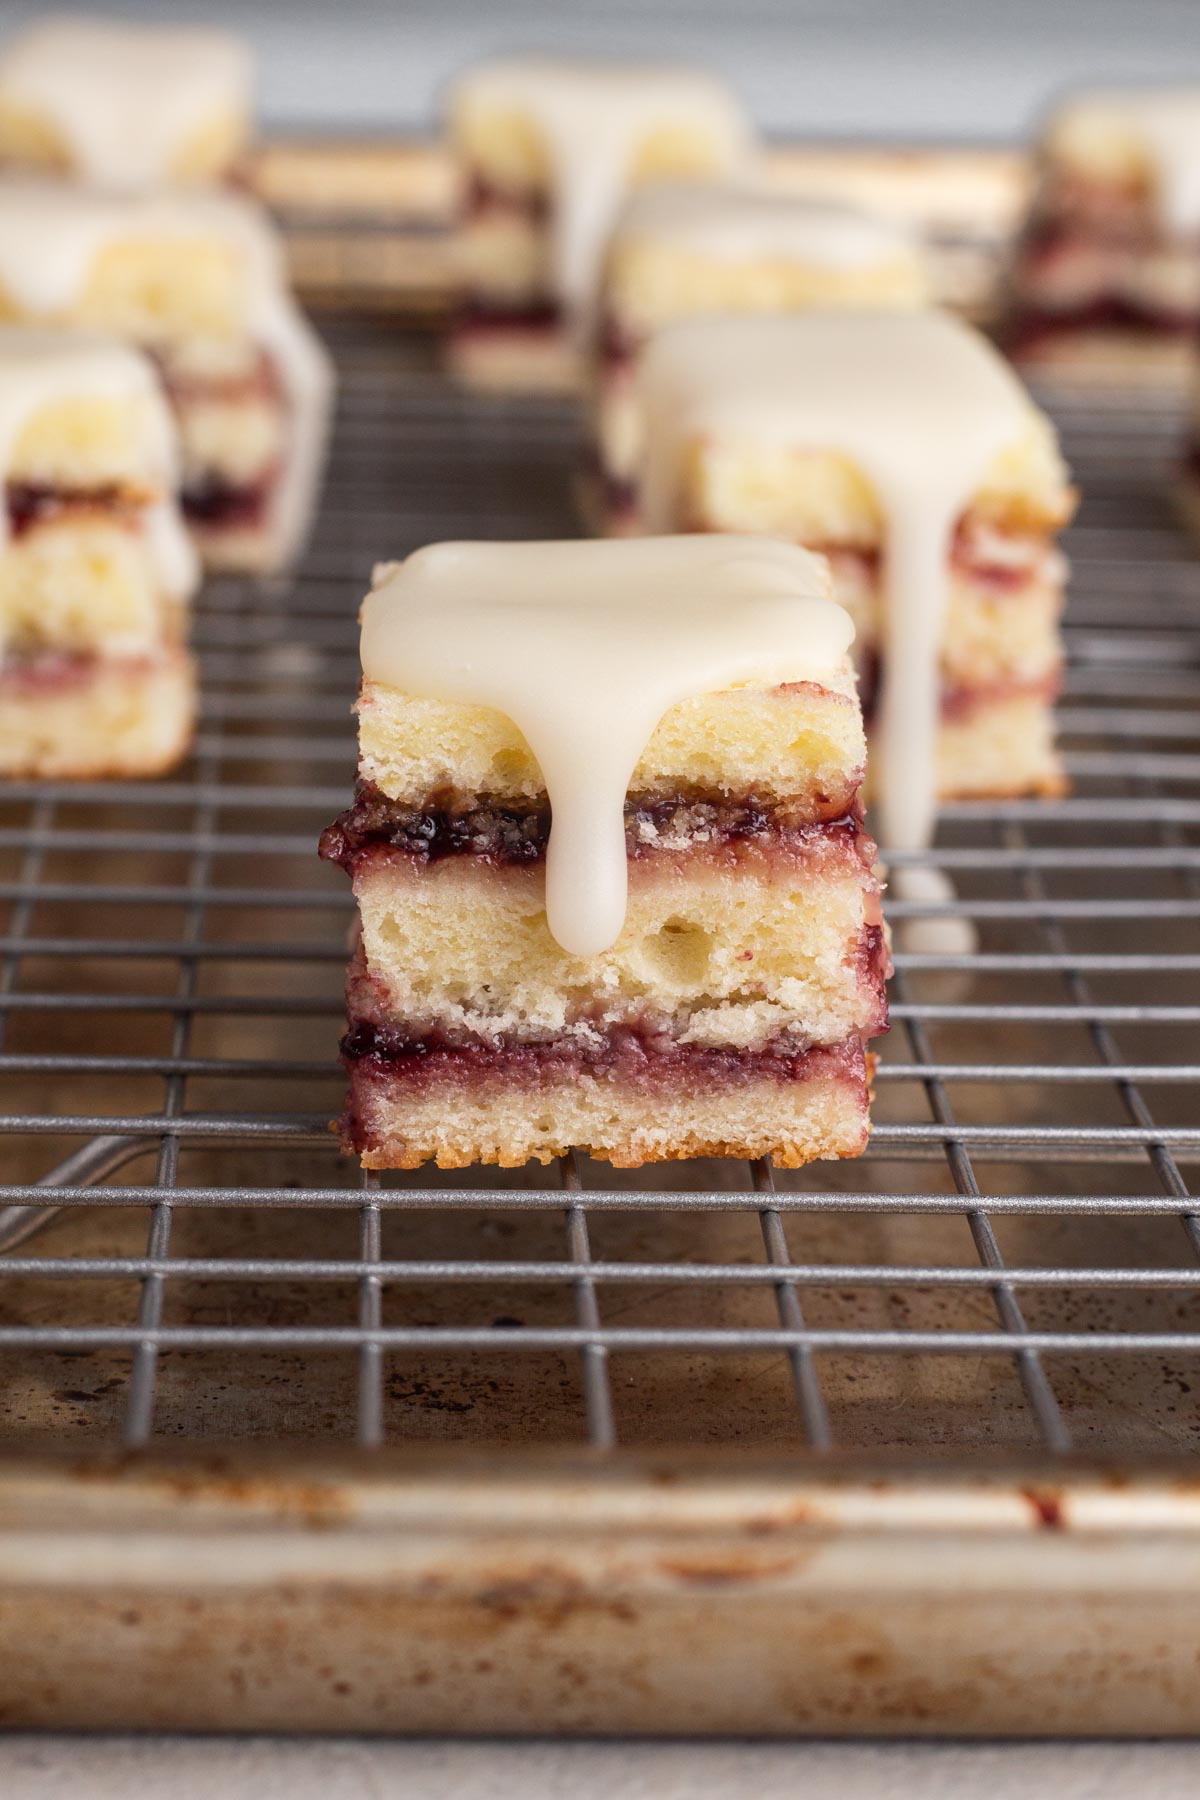
Step 14: Spoon a bit of glaze over each petit four so that the top of the cake is covered and just a bit of glaze drips down the sides. Allow the glaze to set.
See recipe card at the bottom of this post for detailed recipe instructions.
Allison's Top Tips
Don't skip lightly spraying the baking pan with cooking spray before lining it with parchment paper. The cooking spray will keep the parchment paper in place so that it won't slip around inside the pan when you spread the cake batter into the pan.
Chilling the cake before slicing helps to create clean cuts, so don't skip the chilling steps.
Be sure to spread the filling in a very thin layer. A filling that's too thick will cause the cake layers to slide around when the cake is stacked.
Petit Four Filling Ideas
Any of these fillings would make for delicious petit fours:
- Fruit jam
- Lemon curd
- Buttercream frosting
- Chocolate ganache
- Nutella

Recipe FAQs
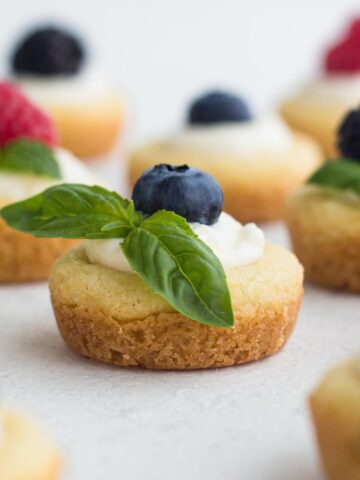
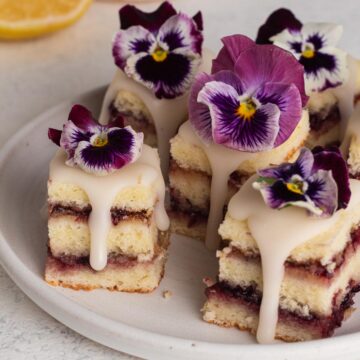
Classic petit fours are made with sponge cake topped with fondant then decorated with elegant and edible toppings (most often tiny edible flowers made of frosting). These untraditional but ultra-delicious and achievable petit fours are made with cream cheese pound cake, blackberry jam and lemon curd filling, a simple vanilla glaze, and edible flower decoration.
Nope! These little cakes can be devoured in just 1-2 bites and definitely qualify as finger food!
For party planning purposes, assuming other small bites will also be served, allowing 2-3 petit fours per person should be perfect.
Storage Instructions
Room Temperature: Seal in an airtight container and store at room temperature for up to 2 days. Do not store at room temperature if you've chosen a filling that requires refrigeration.
Refrigerator: Store petit fours for up to 5 days in the fridge sealed in an airtight container.
Freezing: Store petit fours in the freezer for up to 2 months sealed in an airtight container. Allow petit fours to thaw in the fridge overnight before serving.
More Bite-Sized Dessert Recipes
Love this recipe? Please leave a star rating and review on the recipe below! And don't forget to subscribe to Always Eat Dessert for even more easy dessert recipes and helpful baking tips.
Recipe
Easy Homemade Petit Fours
Special Equipment
- Parchment paper
- 9x13 metal pan
- Stand mixer or electric hand mixer
- serrated knife
- double boiler
Ingredients
Cream Cheese Pound Cake:
- 1 ½ cups (155 grams) sifted cake flour
- ¼ teaspoon (1 grams) baking powder
- ¼ teaspoon (1.5 grams) fine sea salt
- ¾ cup (170 grams) unsalted butter, room temperature
- 4 ounces (113 grams) full-fat block cream cheese, room temperature
- 1 Tablespoon (14 grams) vegetable or canola oil
- 1 ¼ cup (250 grams) granulated sugar
- 3 large eggs, room temperature
- 1 teaspoon (4 grams) vanilla extract
Fillings:
- ½ cup (170 grams) blackberry preserves
- ½ cup (113 grams) lemon curd, homemade or store bought
Vanilla Glaze:
- 3 ⅜ cups (405 grams) confectioners' sugar
- 4 ½ Tablespoons (68 grams) whole milk
- 1 ½ Tablespoons (33 grams) light corn syrup
- 1 ½ teaspoon (6 grams) vanilla extract
Optional Topping:
- edible flowers (such as pansies or violas)
Instructions
Make the cake.
- Preheat oven to 325°F. Lightly spray a 9x13 metal pan with cooking spray before lining with parchment paper. Set aside.
- In a small mixing bowl, whisk to combine cake flour, baking powder, and salt. Set aside.
- In the bowl of a stand mixer fitted with the paddle attachment (or in a large mixing bowl using an electric hand mixer), beat butter, cream cheese, and oil on high speed for 2 minutes.
- Add sugar and continue to beat on high speed for 5 minutes, stopping to scrape the bowl as needed. The mixture should be pale and fluffy.
- Add eggs and vanilla and beat on high speed until well blended.
- With the mixer running on low, slowly add the dry ingredients to the bowl and mix just until combined.
- Scoop the batter into the prepared pan and gently spread it evenly around the pan.
- Bake for 25-30 minutes, or until edges just begin to turn golden and your finger does not leave an indent when very gently pressed into the center. Allow the cake to cool completely, then chill in the fridge for 30 minutes.
Slice and assemble the cakes.
- Using a serrated knife, trim the edges off of the cake. Then cut the cake into thirds widthwise and in half lengthwise. You should now have 6 smaller squares of cake.
- Carefully slice each square of cake in half horizontally to create two equal and thinner squares of cake. You should now have 12 thin squares of cake.
- Spread a very thin layer of blackberry jam onto 8 of the cake squares (about 1 scant Tablespoon of jam per square). Spread a very thin layer of lemon curd on top of the blackberry jam on the same 8 cake squares (about 1 scant Tablespoon of curd per square).
- Place 4 of the jam and curd topped cake squares on top of the other 4 topped cake squares. Then place the 4 remaining plain cake squares on top of each. You should now have 4 squares of cake, each with 3 layers of cake and two layers of filling.
- Refrigerate the cakes for 30 minutes.
- Cut each of the chilled cakes in thirds lengthwise and again in thirds widthwise. Each square will be cut into 9 smaller squares for a total of 36 tea cakes.
- Freeze the tea cakes for 30 minutes.
Glaze the cakes.
- In the bowl of a double boiler, whisk to combine confectioners' sugar, milk, corn syrup, and vanilla.
- Heat water in the bottom of the double boiler over medium heat, stirring the glaze periodically as it heats. Continue heating until the glaze is smooth and pourable. The glaze should run easily off of a spoon while still coating the spoon.
- Place a cooling rack into a rimmed baking sheet. Place the frozen cakes onto the cooling rack.
- Keeping the glaze over the heat of the double boiler, carefully spoon a bit of glaze over each petit four so that the top of the cake is covered and just a bit of glaze drips down the sides.
- Allow the glaze to set, then top with edible flowers (if using).
Comments
No Comments