
Mini egg cheesecakes blend crushed Cadbury mini eggs with creamy vanilla bean cheesecake atop a graham cracker crust and garnished with rich chocolate "nests" for a cupcake-sized Easter dessert that's as indulgent as it is adorable.

What do you get when you combine rich and creamy cheesecake, chocolate ganache, and Cadbury mini eggs? Easter egg cheesecakes! These mini egg cheesecakes just may be the cutest little springtime desserts you didn't know you needed (but won't be able to live without)!
I've become mildly obsessed with making mini cheesecakes (aka cheesecake cupcakes) in my muffin pan. They're just as delicious as a full-sized cheesecake baked in a springform pan, but they're so much easier to make. We're going to
✔️ Skip the water bath,
✔️ Skip wrapping the pan with foil so it doesn't leak,
✔️ And skip stressing about cracks in our cheesecake!
The simplified method that you'll find here for mixing and baking cheesecake is beginner-friendly and yields a beautifully smooth cheesecake without cracks. And if you make a mistake and do end up with a few cracks, we're going to cover them up with ganache anyway, so no one will ever know.
And before someone asks, even though the recipe is easy, no we are not taking any shortcuts on creamy texture and rich flavor!
We're simply popping some muffin liners into the pan, filling them with graham cracker crust and vanilla bean cheesecake batter, baking the cakes, cooling them gradually, and chilling them before decorating and serving.
So without further ado, say hello to your new favorite Easter dessert!
Jump to:
Ingredient Notes & Substitutions
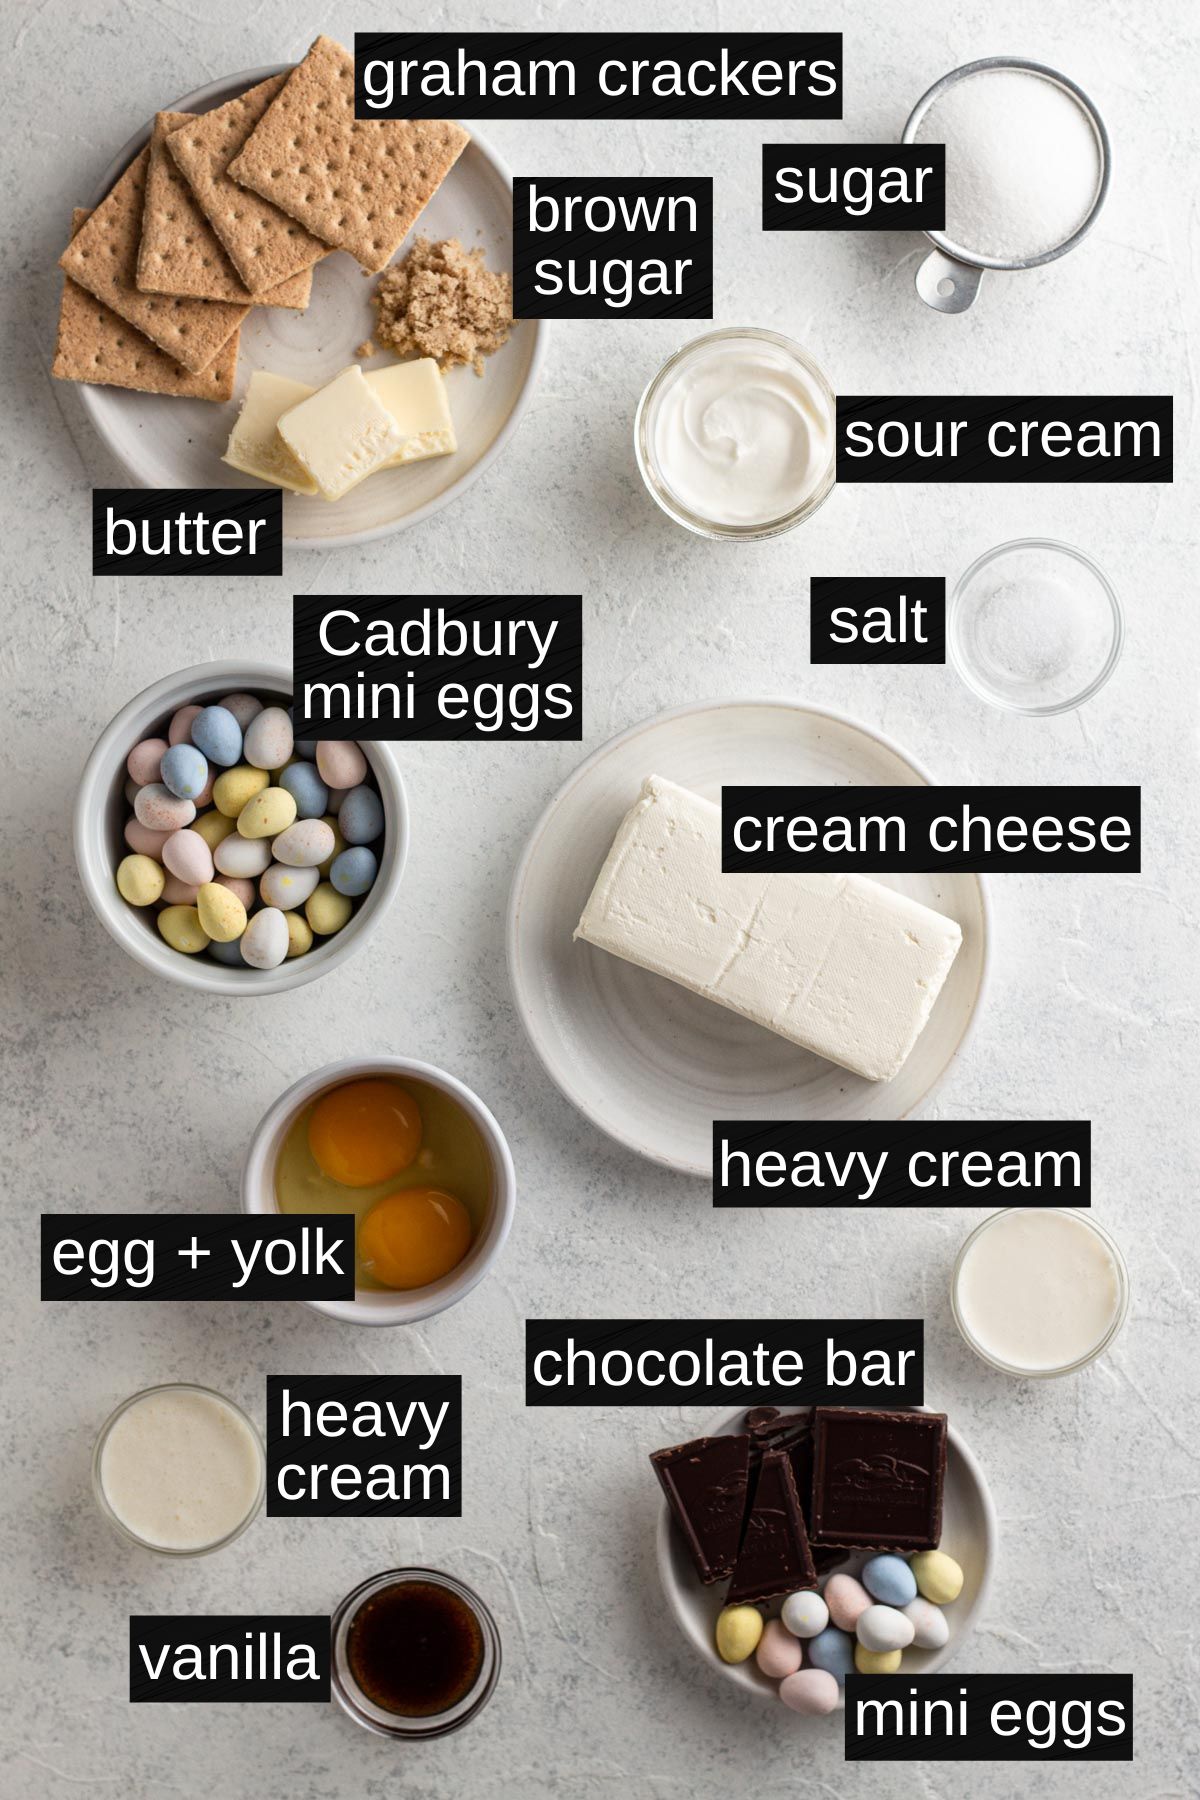
Graham Crackers - A classic cheesecake comes with a graham cracker crust. A food processor makes it easy to grind the cookies and mix the crust. You can substitute an equal measure (by weight) of other cookies like Nilla Wafers or Oreos if you prefer.
Cream Cheese - The key ingredient! Opt for full-fat block cream cheese that's room temperature. And while this is less important when making flavored cheesecake (like Biscoff or gingerbread), I recommend using high quality cream cheese for a vanilla cheesecake such as this, since its flavor will be more apparent in the final dessert. I love Philadelphia brand for both its flavor and texture.
Sour Cream & Heavy Cream - These two ingredients work to lighten the cream cheese while adding an extra hit of tangy flavor and richness, respectively. The heavy cream is also used to make the chocolate ganache for topping the cheesecakes.
Cadbury Mini Eggs - The star ingredient and one of the best Easter candies around! These candy-coated chocolate eggs are crushed and mixed into the batter and used to decorate the tops of the cheesecakes. You can substitute other candy-coated chocolate candies like M&Ms or Reese's Pieces.
Chocolate Baking Bar - A chocolate baking bar will be used to make both the chocolate ganache and chocolate shavings for decorating the tops of the cheesecakes. Do not use chocolate chips, as they contain stabilizers and will not yield the proper texture for ganache.
Vanilla Bean Paste (or Extract) - Vanilla provides essential flavoring for these mini cheesecakes. I really love to use vanilla bean paste, since it's a relatively affordable way to add those beautiful vanilla bean specks to the cheesecake, but pure vanilla extract works perfectly well, too.
See recipe card at the bottom of this post for full ingredient list and measurements.
Special Equipment
In addition to essential baking equipment (like a mixing bowl and spatula), I recommend some special tools for making this recipe.
- A standard muffin pan for baking the cheesecakes.
- 12 muffin liners for lining the muffin pan.
- A food processor for blending the crust. If you don't have a food processor you could use a knife to finely chop the ingredients before mixing together in a bowl, but a food processor will make this step much easier.
- A rolling pin or mallet for crushing the mini eggs.
- An electric hand mixer for mixing the cheesecake. A stand mixer with the paddle attachment can be used instead.
Step-By-Step Recipe Instructions
Step 1: Preheat oven to 375°F. Place 12 muffin liners into a standard muffin pan and set aside.
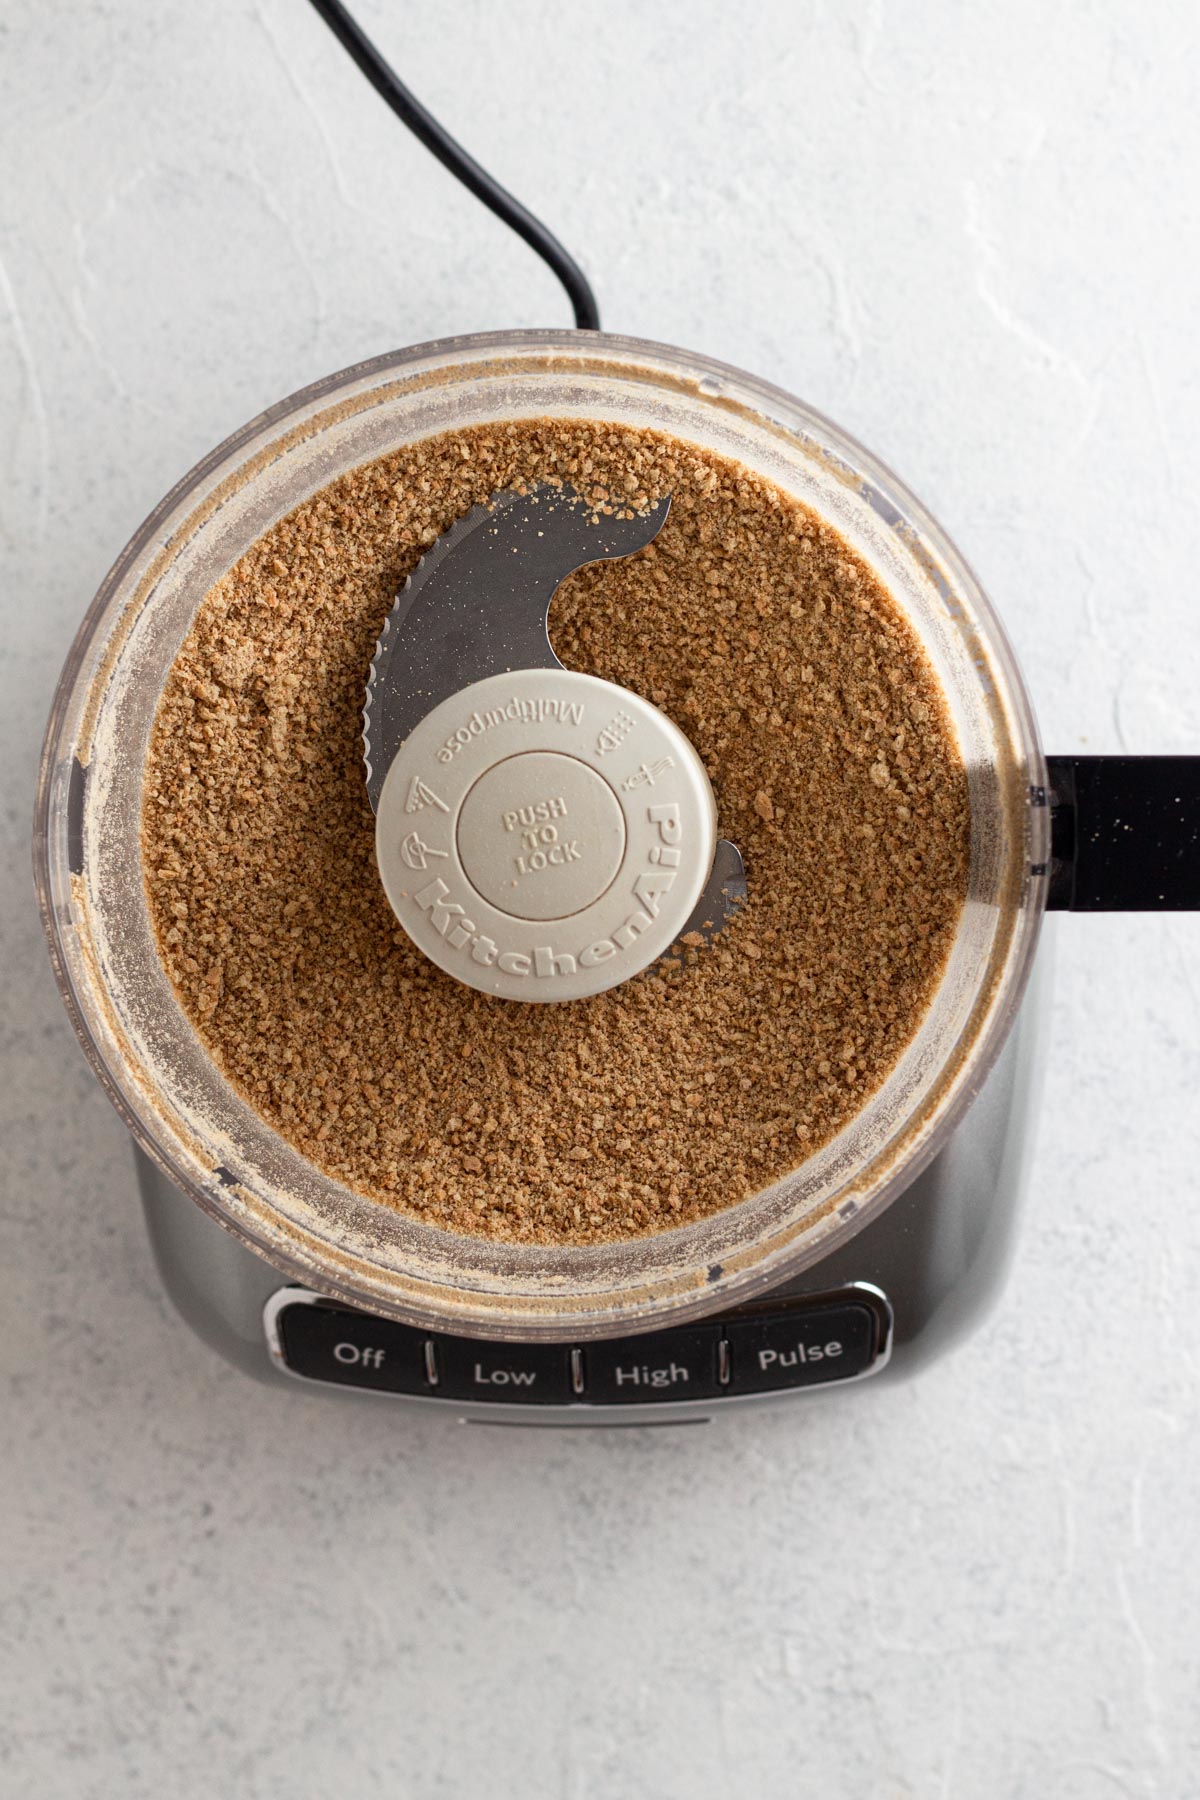
Step 2: Make the crust. Pulse graham crackers and brown sugar in the bowl of a food processor until there are fine crumbs with no large chunks.

Step 3: Add melted butter and blend until combined and the crumbs begin to stick together.

Step 4: Divide the crust among the 12 muffin liners and press the crumbs into a solid crust using the back of a spoon.
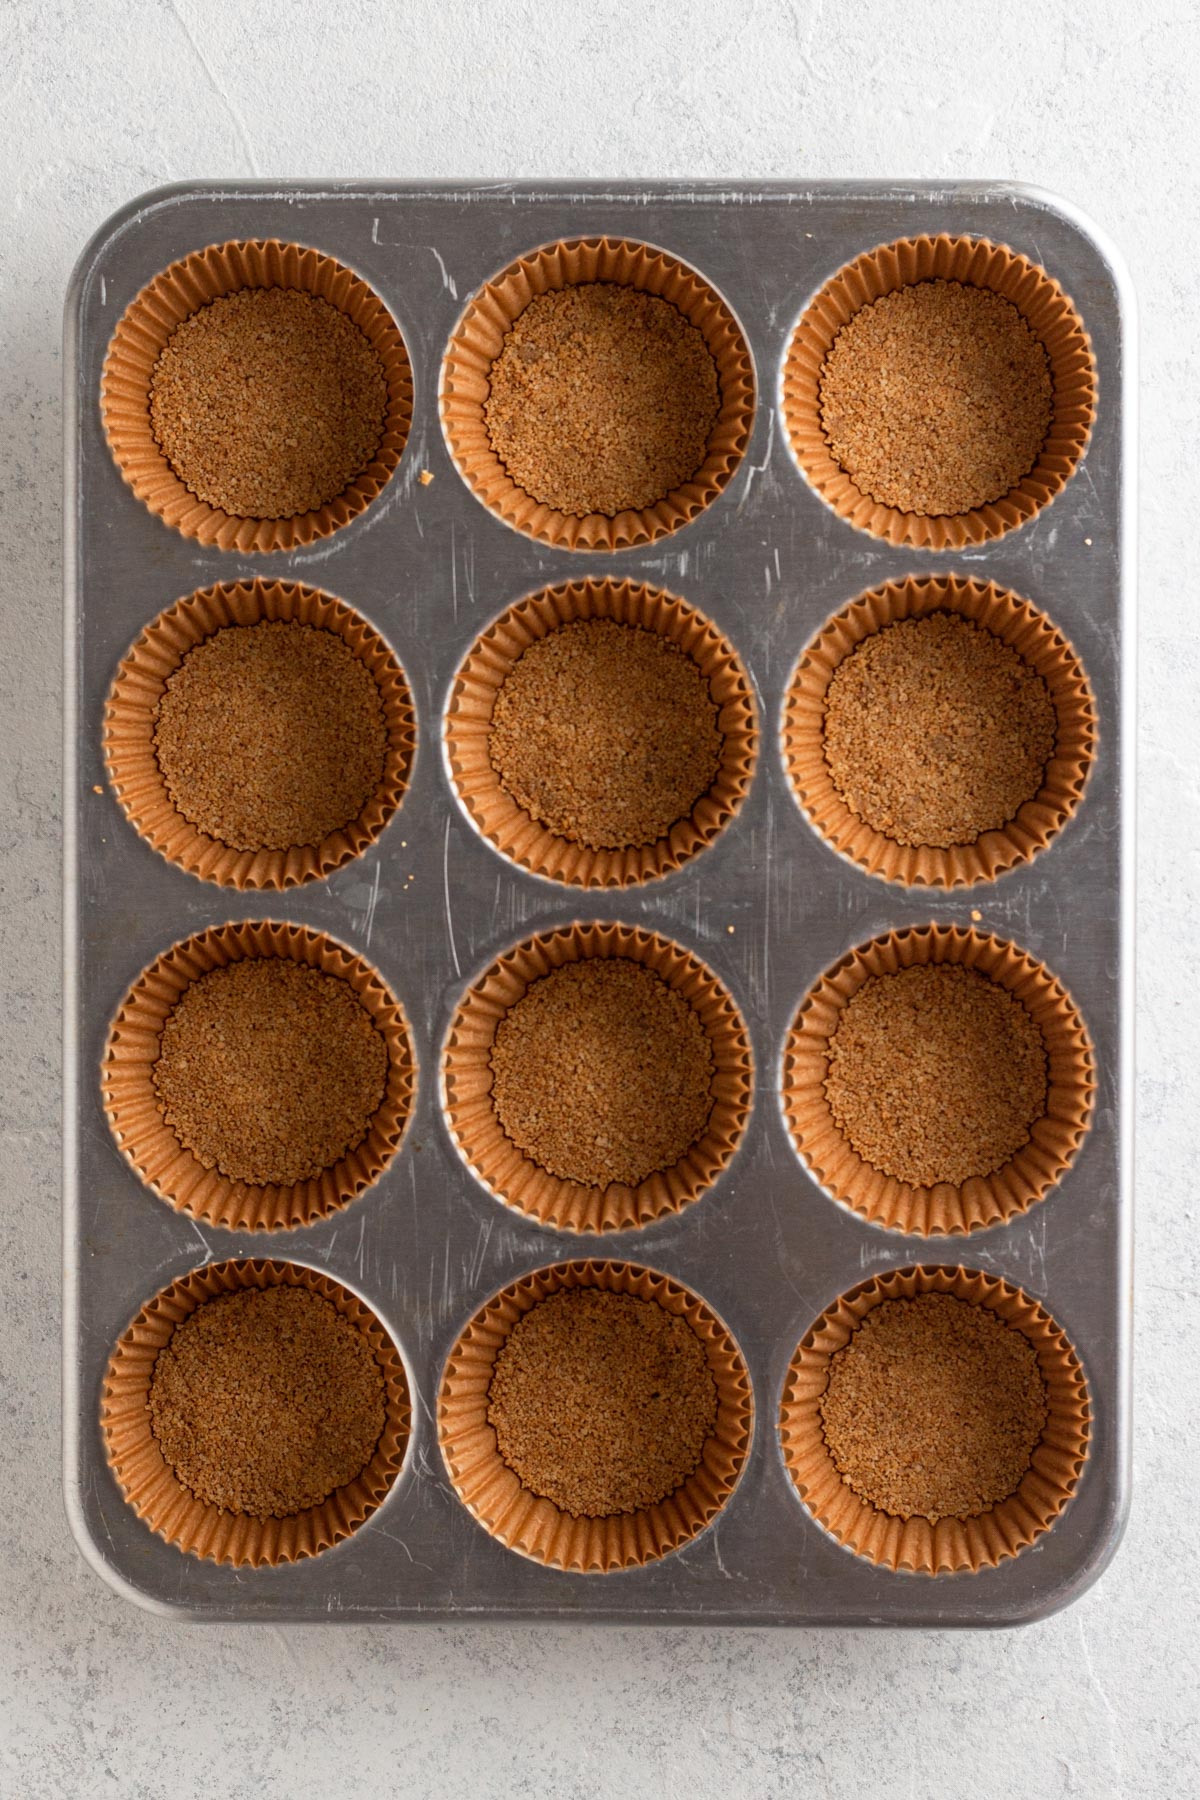
Step 5: Bake the crusts for 5 minutes, then remove the pan from the oven and turn the oven down to 325°F. Let the crusts cool slightly.

Step 6: Place the mini eggs into a plastic food storage bag and seal the bag. Use a rolling pin to smash the candies. Set aside.
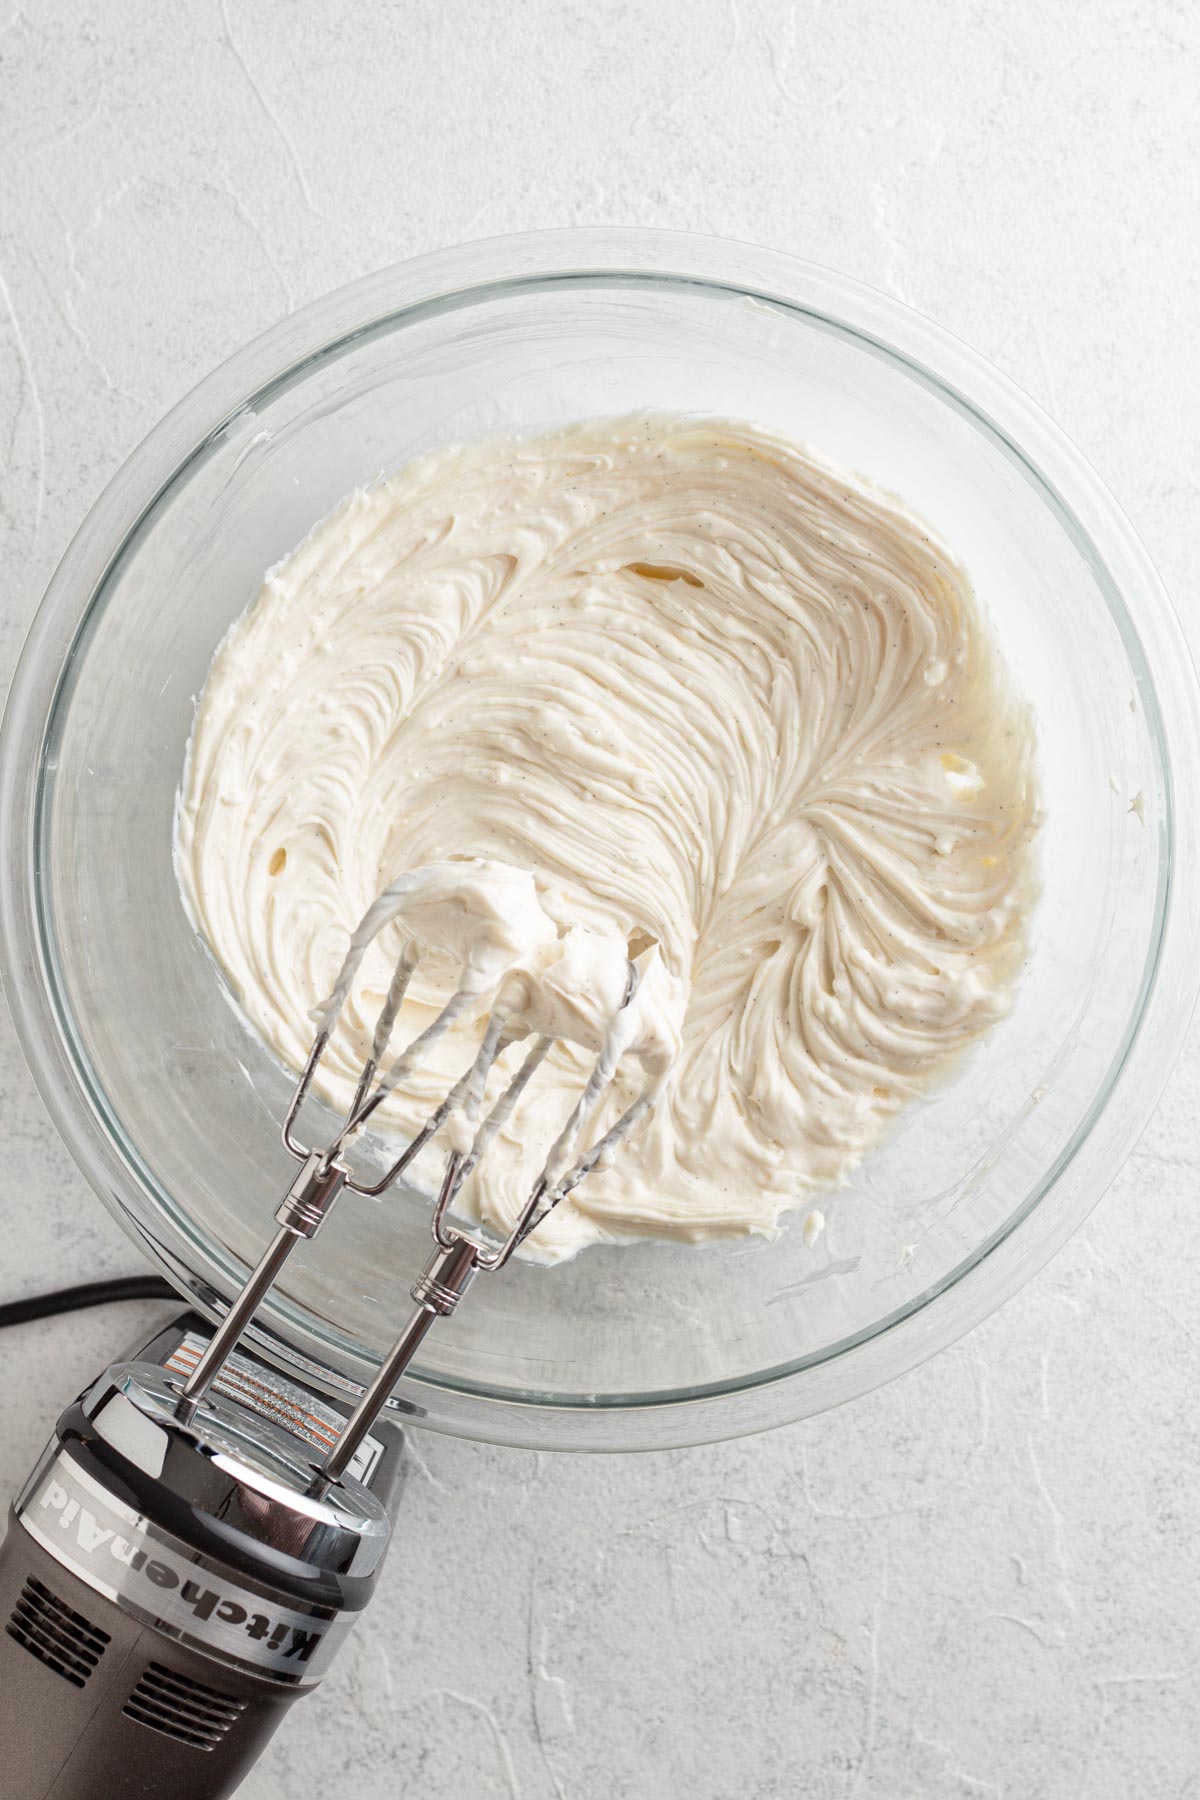
Step 7: Make the cheesecake batter. Mix cream cheese, sugar, sour cream, heavy cream, vanilla, and salt, beating well on medium speed until smooth.

Step 8: Add egg and yolk and beat on low speed just until combined.
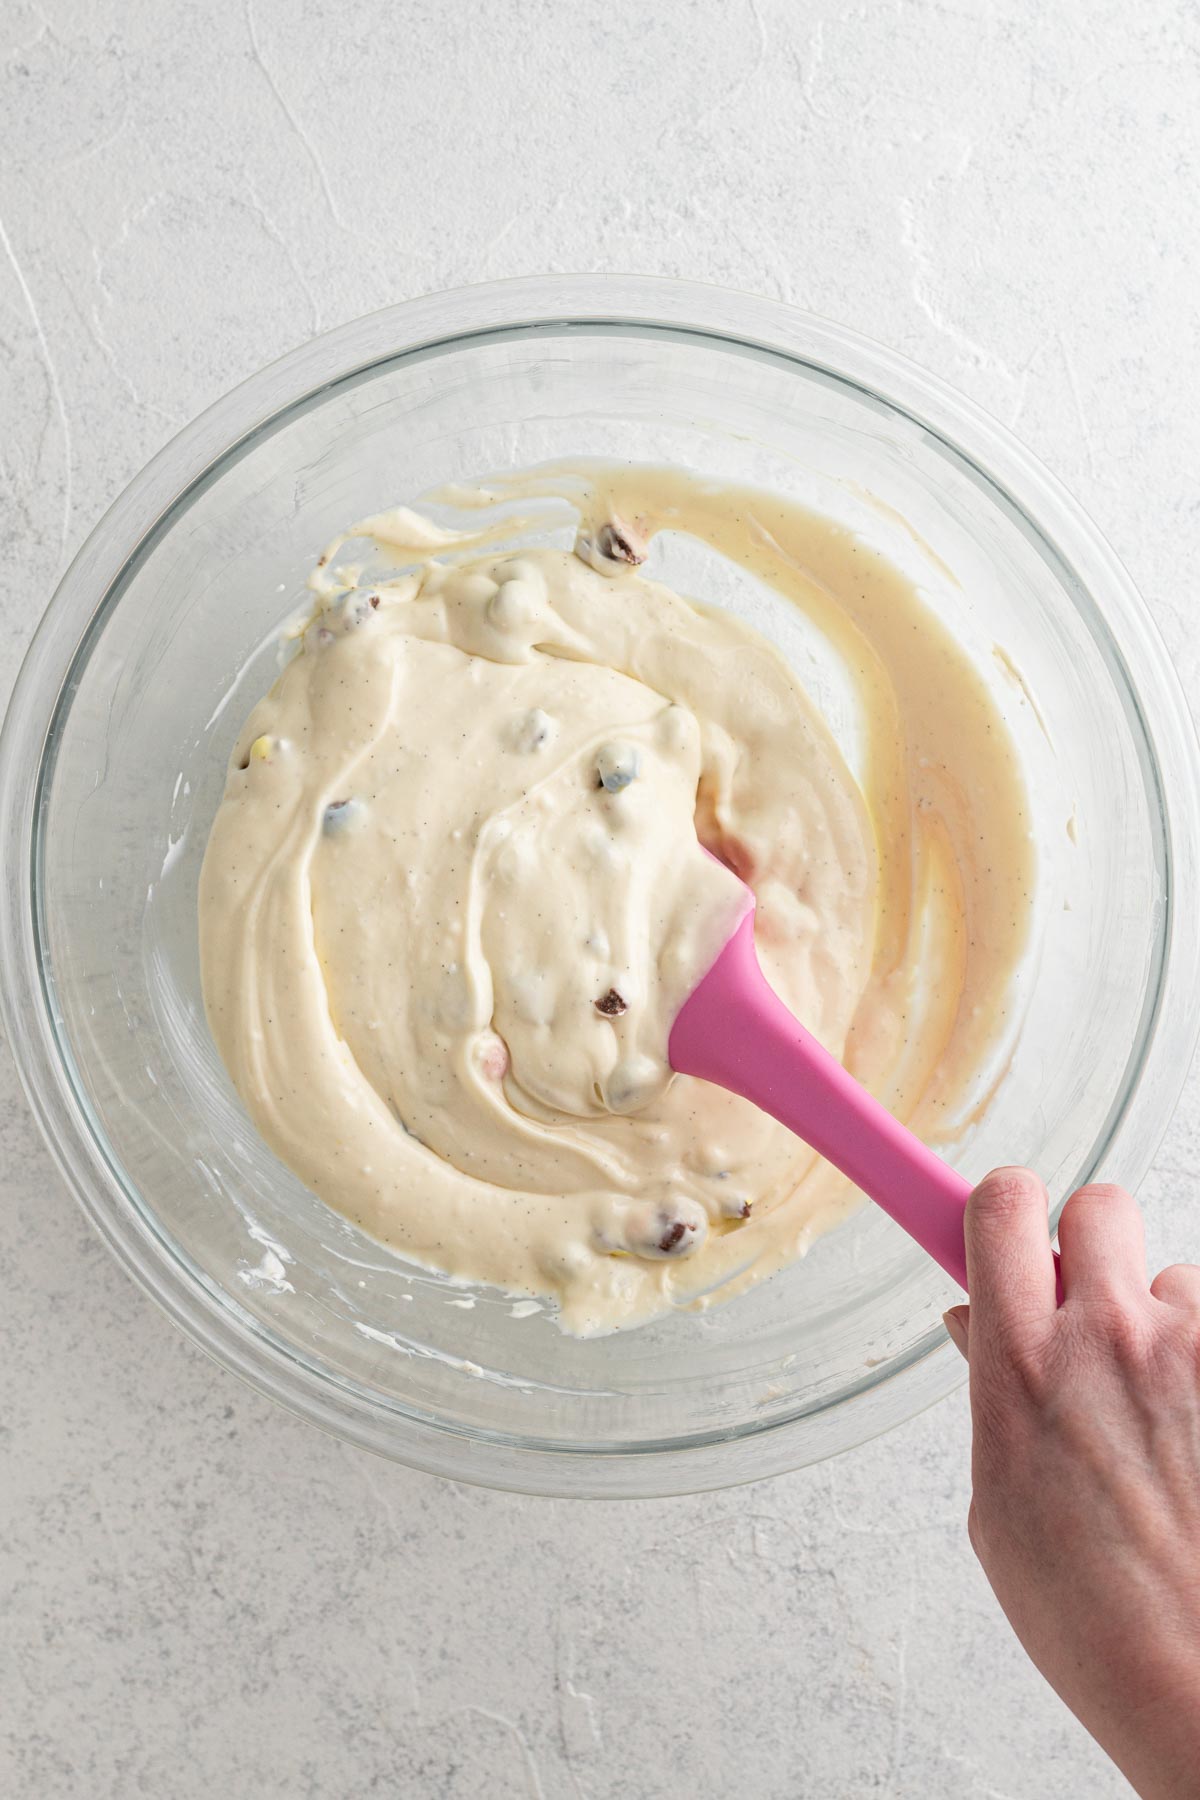
Step 9: Fold crushed mini eggs into the cheesecake batter.

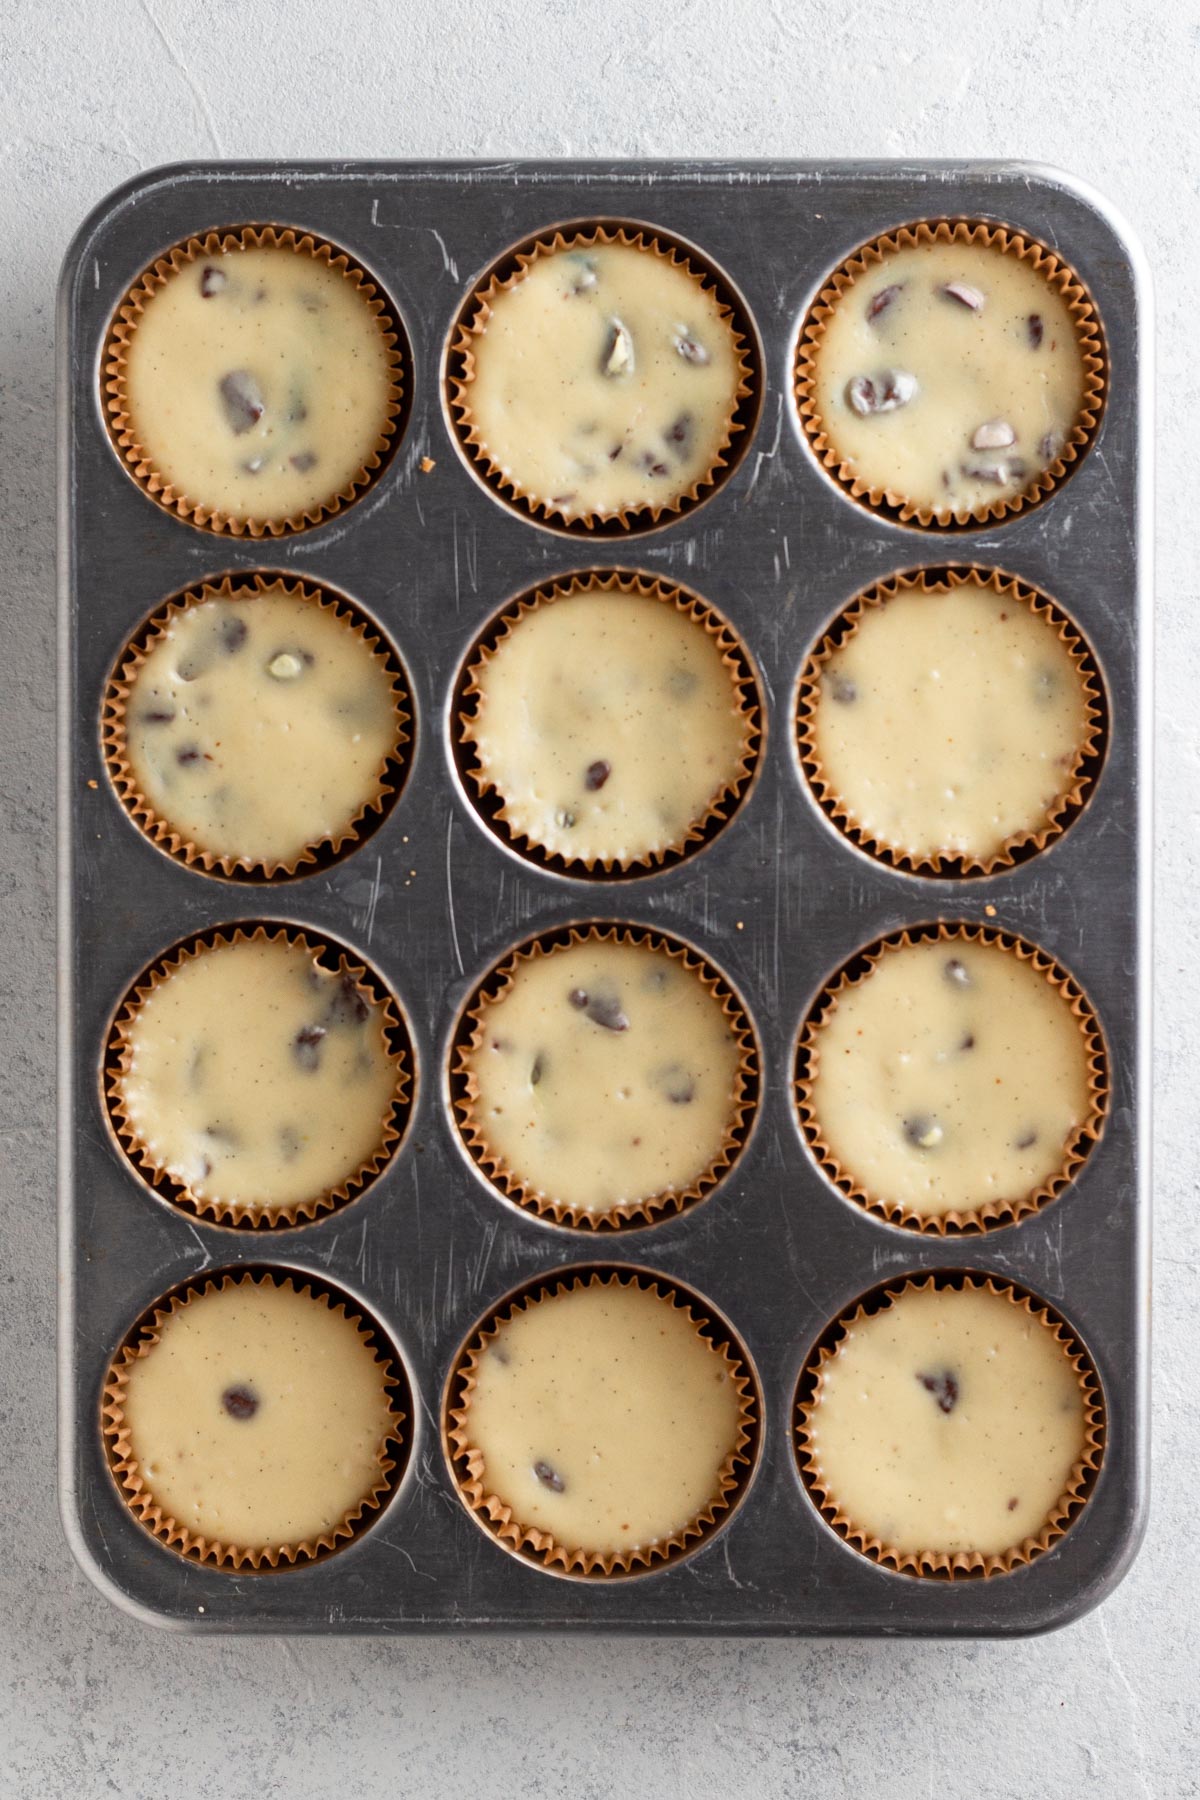
Step 10: Spoon cheesecake onto the crusts so that muffin liners are nearly filled.
Step 11: Return the pan to the 325°F oven and bake for 15 minutes or until the edges of each cheesecake are set but the centers still wobble slightly when you jiggle the pan.
Cooling & Chilling: Turn off the oven and let the cheesecakes sit in the warm oven with the door closed for 10 minutes. Then crack the oven door open and let the cheesecakes sit for another 10 minutes. Next transfer the pan to a wire rack and allow the cheesecakes to cool completely (about 1 hour). Finally, transfer the pan to the fridge and chill the cheesecakes for at least 2 hours and up to overnight.
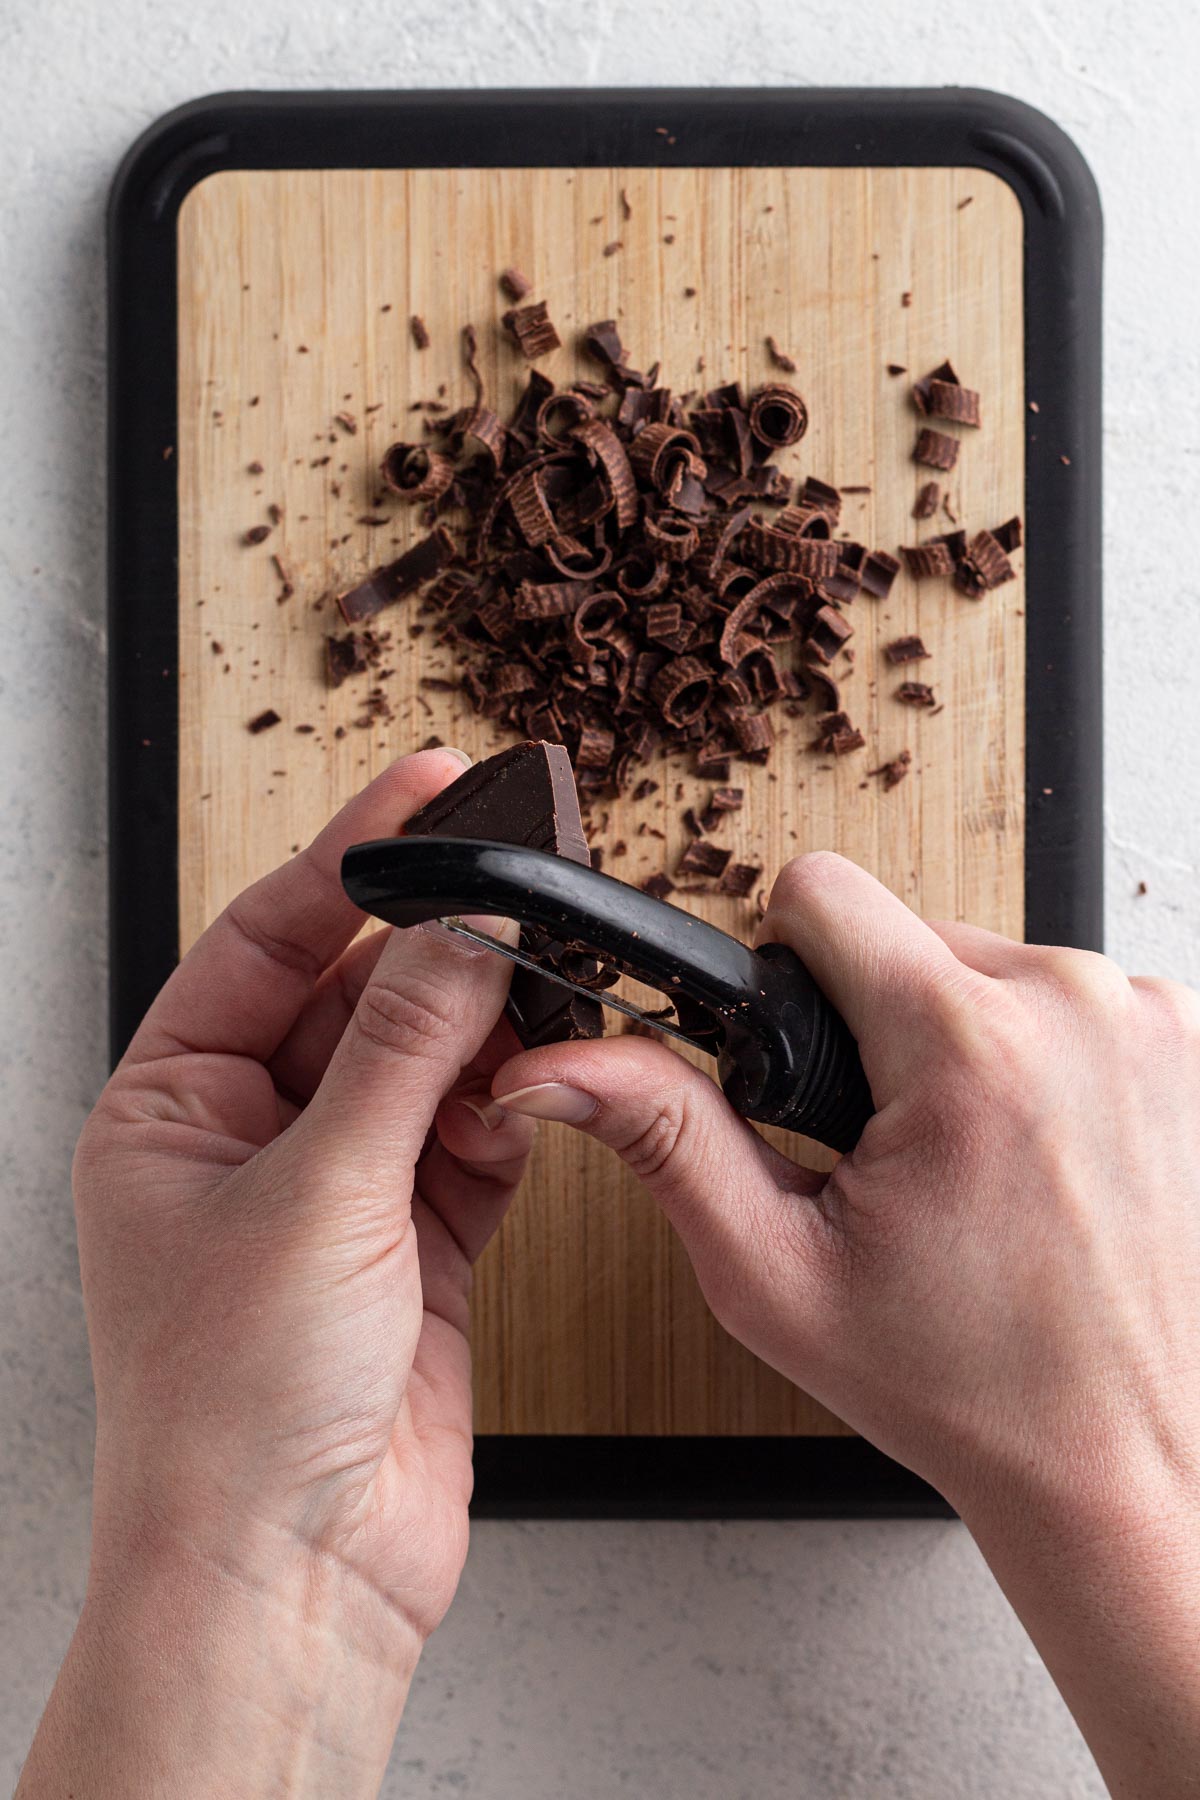
Step 12: While the cheesecakes are chilling, make the chocolate shavings using 1 ½ ounces of the chocolate baking bar. Using one square of the bar at a time, warm the chocolate lightly in the microwave for just 10 seconds on 50% power. Use a vegetable peeler repeatedly along the edge of the chocolate square to create chocolate shavings. Repeat with the other squares. Set shavings aside.

Step 13: Once the cheesecakes have chilled and set, make the ganache. Chop the remaining 2 ounces of chocolate baking bar and place into a small glass bowl. Heat the heavy cream in the microwave or on the stove just until simmering. Pour the heated cream over the chocolate and let it sit for 2 minutes. Then stir until the chocolate is completely melted and the mixture is smooth and shiny.

Step 14: Spoon 1 teaspoon of chocolate ganache onto each cheesecake, using the back of the spoon to spread the ganache towards the edges of the cheesecake.

Step 15: Carefully sprinkle chocolate shavings around the edges of the ganache on each cheesecake, leaving space in the center of the circle.
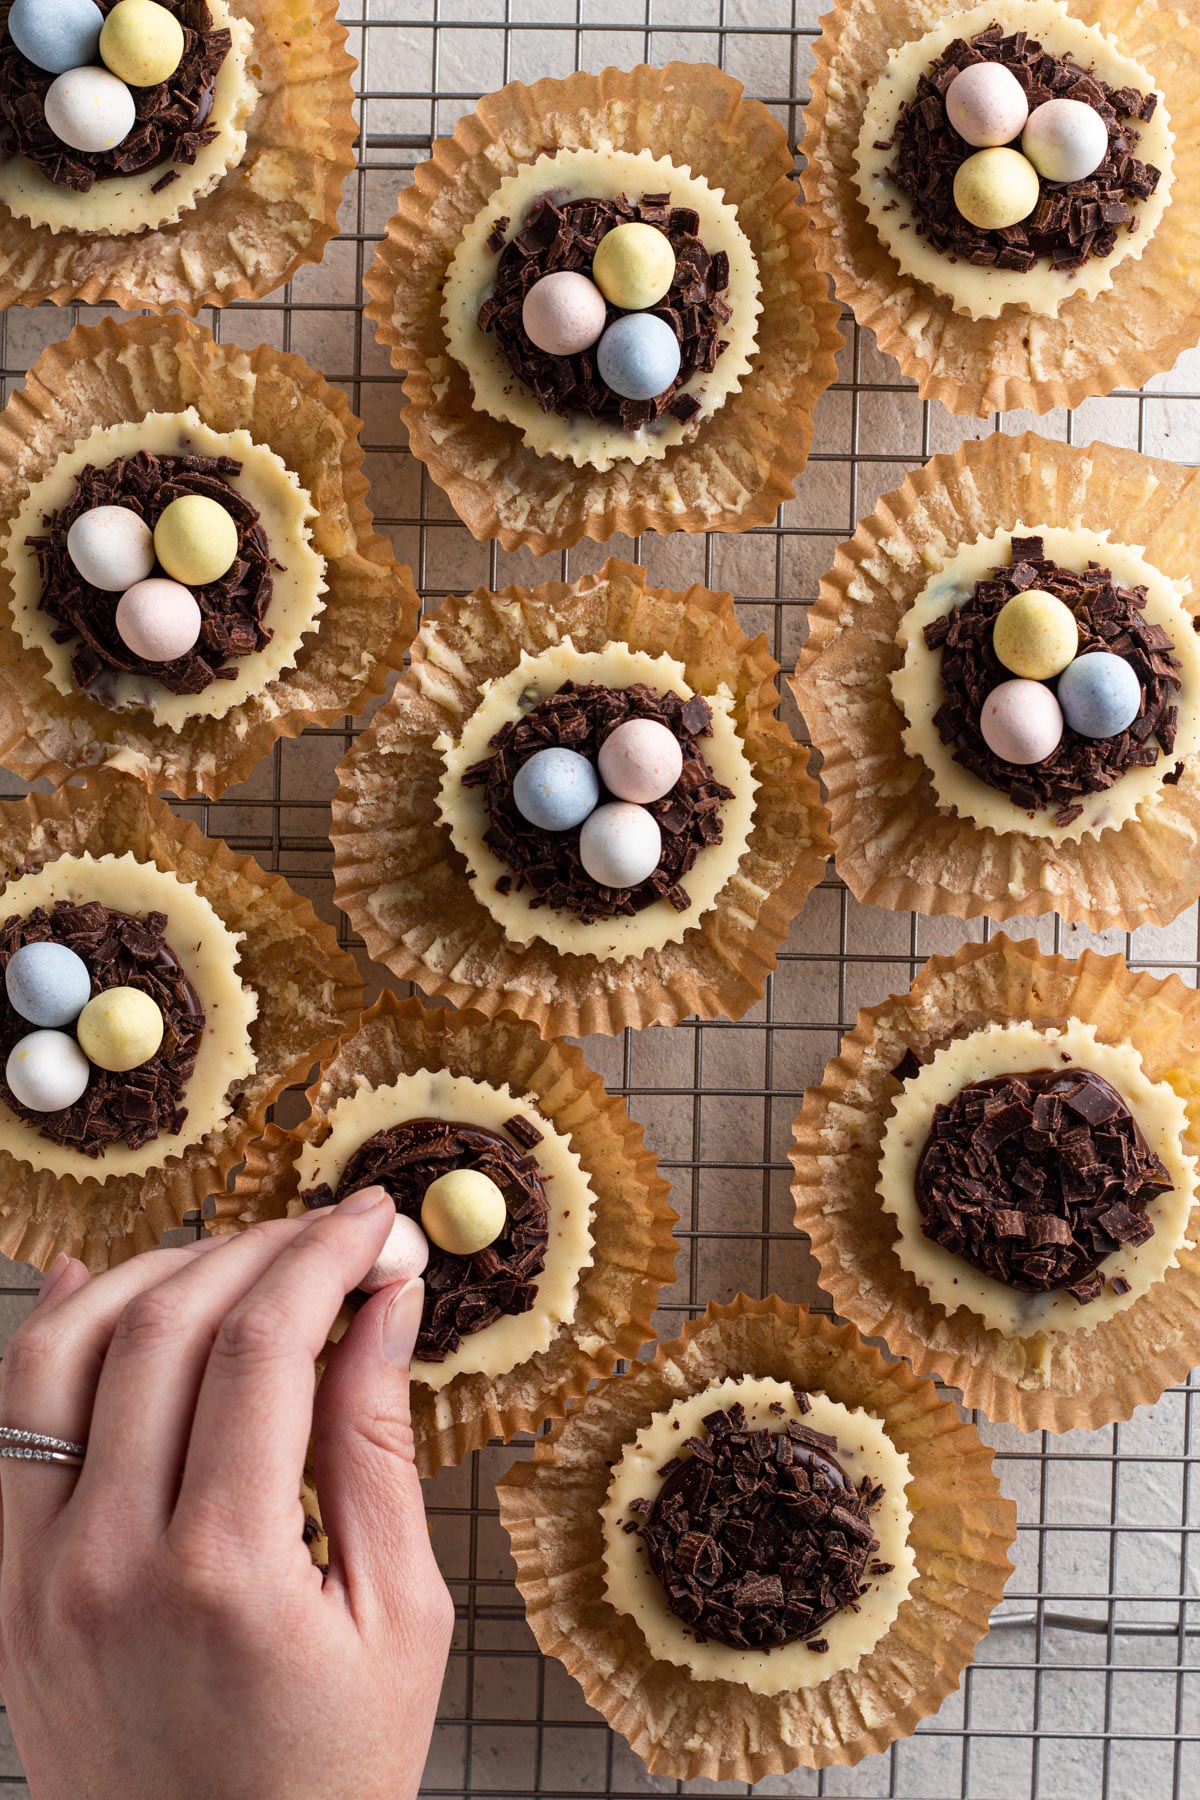
Step 16: Add 3 Cadbury mini eggs into the center of each chocolate "nest" atop each cheesecake.
Allison's Top Tips
For smooth, lump-free cheesecake, be sure to let all of the dairy ingredients (cream cheese, sour cream, and heavy cream) and eggs come to room temperature before you begin baking. If you need to warm up your cream cheese quickly, cut it into smaller cubes and let it sit on the counter until it comes to room temperature.
If you have them, cookie scoops are great for portioning the cheesecake into the muffin liners.

Recipe FAQs
I always use a standard muffin/cupcake pan for making mini cheesecakes. There is no need to buy a special pan when this trusty kitchen staple works so perfectly. Using muffin liners makes it easy to remove the baked cheesecakes from the pan, and there's no risk of leakage like there is with a springform pan.
The secrets to avoiding cracks and sinking lie in how the batter is mixed and how the cheesecakes cool. Be sure to mix on low speed after the eggs are added to the batter to avoid adding too much air to the eggs, which could cause the cheesecakes to crack and then sink after baking. Also be sure to let the cheesecakes cool gradually by first letting them sit in the oven after turning it off, then cracking the oven door, then moving them to a cooling rack at room temperature.
If your cheesecakes do end up cracking and sinking, it's okay! The toppings will help to cover it up anyway.
Storage Instructions
Because of it's high dairy content, never leave cheesecake at room temperature for more than 2 hours.
Refrigerator: Cheesecakes can be stored in the fridge for up to 3 days, sealed in an airtight container. Let the cheesecakes sit at room temperature for 10 minutes before serving. The mini eggs will start to bleed their coating/color after about a day in the fridge, so it's best to refrigerate the cheesecakes without the eggs and add then just before serving.
Freezing: Undecorated mini cheesecakes can be frozen, sealed in an airtight container, for up to one month. Let them thaw overnight in the fridge before decorating and serving.


Love this recipe? Please leave a star rating and review on the recipe below! And don't forget to subscribe to Always Eat Dessert for even more easy dessert recipes and helpful baking tips.
Recipe

Mini Egg Cheesecakes
Special Equipment
- 1 standard muffin pan
- 12 muffin liners
- 1 food processor
Ingredients
Crust:
- 3 ounces (85 grams) graham crackers (about 6 full graham cracker sheets)
- 1 teaspoon (4 grams) light brown sugar
- 2 Tablespoons (28 grams) unsalted butter, melted
Cheesecake:
- 1 cup (184 grams) Cadbury mini eggs, crushed
- 12 ounces (340 grams) full-fat block cream cheese, room temperature
- ⅜ cup (75 grams) granulated sugar
- ¼ cup (58 grams) sour cream, room temperature
- 2 Tablespoons (30 grams) heavy cream, room temperature
- 1 Tablespoon (15 grams) vanilla bean paste (or extract)
- ¼ teaspoon (1.5 grams) salt
- 1 large egg plus 1 large egg yolk, room temperature
Topping:
- 3 ½ ounces (99 grams) semi-sweet chocolate baking bar, divided
- 2 ounces (57 grams) heavy cream
- 36 Cadbury mini eggs
Instructions
- Preheat oven to 375°F. Place 12 muffin liners into a standard muffin pan and set aside.
Make the crust.
- Add graham crackers and brown sugar to the bowl of a food processor. Pulse until there are fine crumbs with no large chunks remaining.
- Add melted butter and blend until combined and the crumbs begin to stick together.
- Divide the crust among the 12 muffin liners (about 1 Tablespoon of crust per liner) and press the crumbs into a solid crust using the back of a spoon.
- Bake the crusts for 5 minutes, then remove the pan from the oven and turn the oven down to 325°F. Let the crusts cool while you prepare the cheesecake.
Make the cheesecake.
- Place the mini eggs into a plastic food storage bag. Seal the bag and place it on a hard, durable surface (like a cutting board). Use a rolling pin to smash the candies. Set aside.
- In a large bowl, add cream cheese, sugar, sour cream, heavy cream, vanilla, and salt. Using an electric handheld mixer, beat well on medium speed until smooth.
- Add egg and yolk and beat on low speed just until combined.
- Fold crushed mini eggs into the cheesecake batter.
- Spoon cheesecake onto the crusts so that muffin liners are nearly filled. (You'll use about 3 Tablespoons of cheesecake per liner.)
- Return the pan to the 325°F oven and bake for 15 minutes or until the edges of each cheesecake are set but the centers still wobble slightly when you jiggle the pan. Turn off the oven and let the cheesecakes sit in the warm oven with the door closed for 10 minutes. Then crack the oven door open and let the cheesecakes sit for another 10 minutes. Next transfer the pan to a wire rack and allow the cheesecakes to cool completely (about 1 hour). Finally, transfer the pan to the fridge and chill the cheesecakes for at least 2 hours and up to overnight.
Decorate the cheesecakes.
- While the cheesecakes are chilling, make the chocolate shavings using 1 ½ ounces of the chocolate baking bar. Using one square of the bar at a time, warm the chocolate lightly in the microwave for just 10 seconds on 50% power. Use a vegetable peeler repeatedly along the edge of the chocolate square to create chocolate shavings. Repeat with the other squares. Set shavings aside.
- Once the cheesecakes have chilled and set, make the ganache. Chop the remaining 2 ounces of chocolate baking bar and place into a small glass bowl. Heat the heavy cream in the microwave or on the stove just until simmering. Pour the heated cream over the chocolate and let it sit for 2 minutes. Then stir until the chocolate is completely melted and the mixture is smooth and shiny.
- Spoon 1 teaspoon of chocolate ganache onto each cheesecake, using the back of the spoon to spread the ganache towards the edges of the cheesecake.
- Carefully sprinkle chocolate shavings around the edges of the ganache on each cheesecake, leaving space in the center of the circle.
- Add 3 Cadbury mini eggs into the center of each chocolate "nest" atop each cheesecake.
- Serve immediately or refrigerate. If refrigerating before serving, let cheesecakes sit at room temperature for 5 to 10 minutes immediately before serving.

June says
I recently made these and everyone loved them. I wanted to know if I can made them but just omit the mini eggs. TIA
Allison Ferraro says
I'm so glad to hear that, June! Yes, you can absolutely make them the same exact way just leaving out the mini eggs.
- Allison
Allison says
Made this for Easter. Super easy and absolutely delicious! I made two versions, one with the graham cracker and one with an oreo base. I will definitely make again!!! Both were equally amazing. Thank you!!
Allison Ferraro says
I'm so glad to hear this recipe was a hit! I bet it was delicious with an Oreo crust, too. Thanks so much for leaving a review!
- Allison