
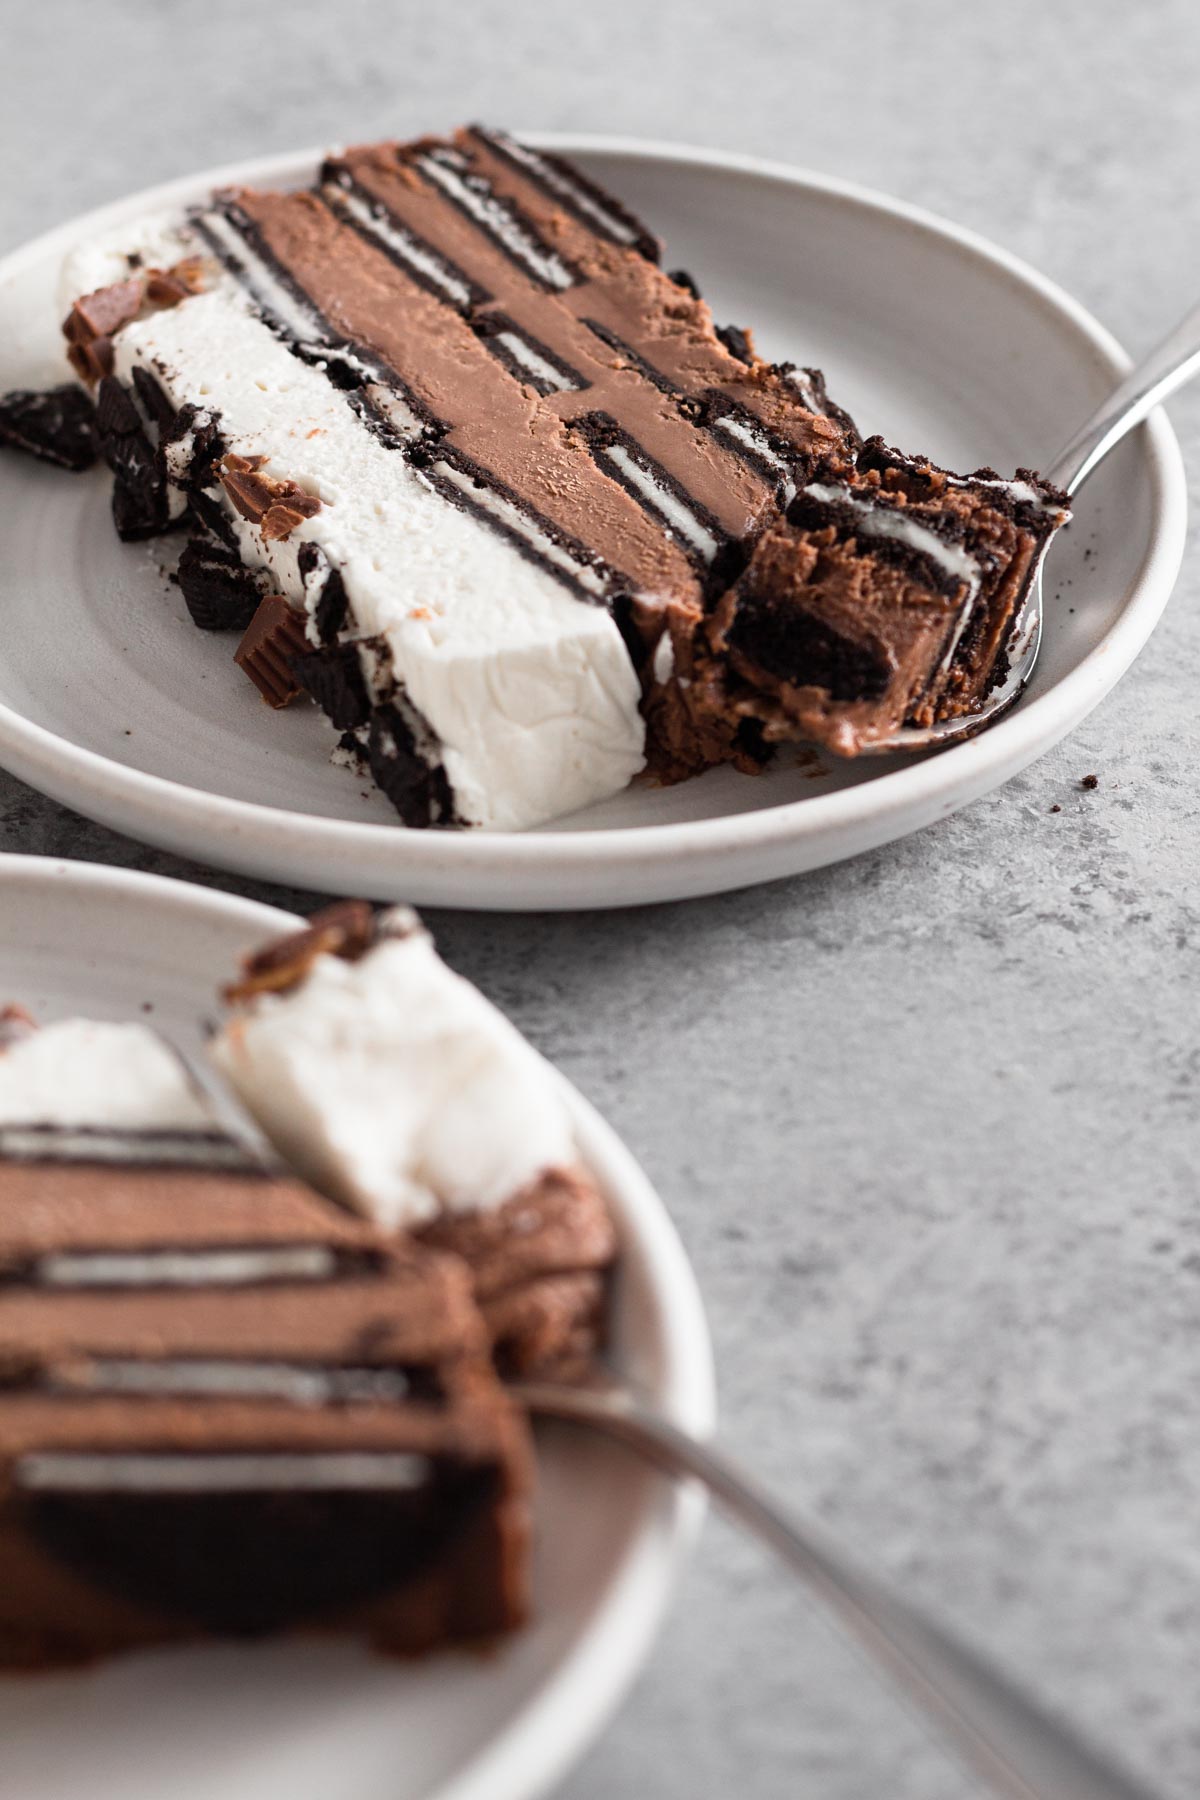
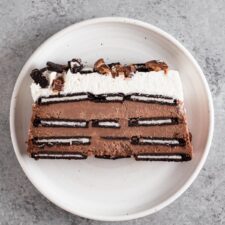
Rich peanut butter and chocolate flavor. Smooth, creamy, melt-in-your-mouth texture. And you don't even need to turn on the oven! With layers of vanilla and chocolate peanut butter whipped cream, this no-bake chocolate peanut butter Oreo icebox cake is a summer dessert staple that you'll want to enjoy all year long!

If you've never made an icebox cake, you're going to want to hop right onto this glorious no-bake summer dessert train! Icebox cakes are made by layering and chilling simple ingredients - usually a variation of whipped cream and thin cookies like graham crackers or chocolate wafers - to create a cake that's cool and creamy. They're the perfect dessert when you want something impressive but it's too hot to turn on the oven.
I wanted to create a chocolate peanut butter dessert that packs this match-made-in-heaven flavor combo but that feels light enough to enjoy on a hot summer day. One bite of this chocolate peanut butter Oreo icebox cake and you'll immediately understand why icebox cakes are so great!
This simple recipe is made by layering a batch of vanilla whipped cream, three batches of chocolate peanut butter whipped cream, and Oreos (or the chocolate wafer cookie of your choice) in a loaf pan and chilling the "cake" in the freezer. As it chills, the whipped cream becomes a bit more firm (almost like a soft ice cream) while also softening the chocolate wafer cookies. The result is a luxuriously rich "cake" with creamy, melt-in-your-mouth texture. You'll surely be craving another slice of this cake all summer long!
Ingredient Notes & Substitutions
See recipe card at the bottom of this post for full ingredient list and measurements.
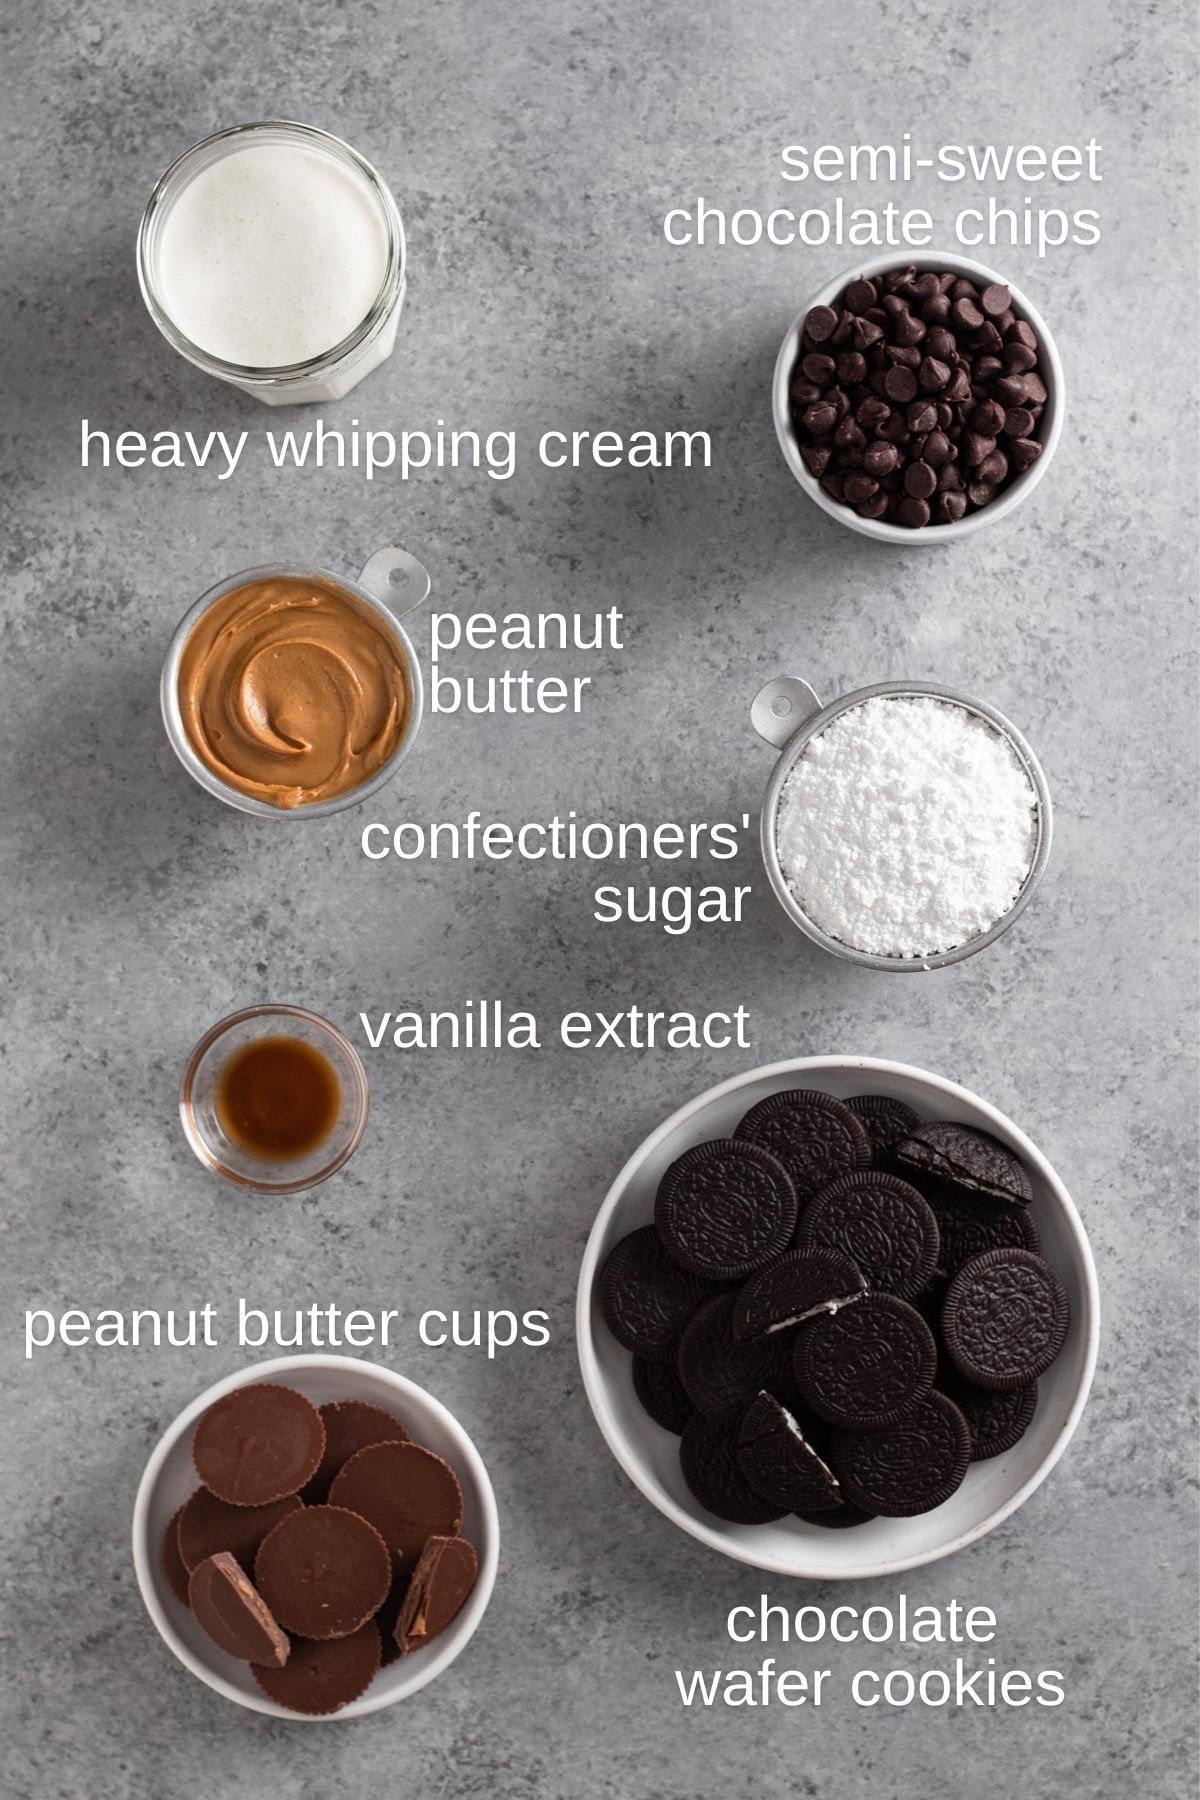
Semi-Sweet Chocolate Chips - You can't have a chocolate icebox cake without the chocolate! Chocolate chips are an easy, always-on-hand ingredient, but an equal measure of a chopped chocolate baking bar will work in their place.
Creamy Peanut Butter - Steer clear of natural peanut butter, which won't provide the rich, creamy texture we're aiming for.
Heavy Whipping Cream - Be sure to use cream that's well chilled, since room temperature cream won't whip properly. Both heavy whipping cream and heavy cream can be used in this recipe. (Check out my whipped cream recipe to learn more about the different types of cream and which are best for making whipped cream.)
Chocolate Wafer Cookies - In my opinion, Oreo Thins are the ideal cookie for this icebox cake, since they include a thin chocolate wafer plus cream filling, which adds a nice visual layer to the cake. Any chocolate wafer cookie, such as regular Oreos or Nabisco Famous Chocolate Wafer Cookies can also be used, depending on your preferences.
Peanut Butter Cups - These are used as a garnish, so they're technically optional and you can use any type of peanut butter cup you like. I opted for Reese's Thins for consistency with the Oreo Thins.
Step-By-Step Recipe Instructions
See recipe card at the bottom of this post for detailed recipe instructions.

Step 1: Prep the chocolate peanut butter whipped cream. Pour warmed cream into a bowl with chopped chocolate and peanut butter. Gently stir the mixture until smooth. Refrigerate for 2 to 4 hours until well chilled.

Step 2: Make the whipped cream. Beat heavy whipping cream, confectioners' sugar, and vanilla until it reaches stiff peaks.

Step 3: Begin assembling the icebox cake. Line a standard loaf pan with plastic wrap so that all sides are covered and the wrap hangs over the edges. Spread the whipped cream into an even layer in the bottom of the pan. Cover with a layer of chocolate wafer cookies. Freeze.

Step 4: Finish making the chocolate peanut butter whipped cream. Once the chocolate peanut butter cream has chilled, add confectioners' sugar and whip until fluffy and lighter in color.
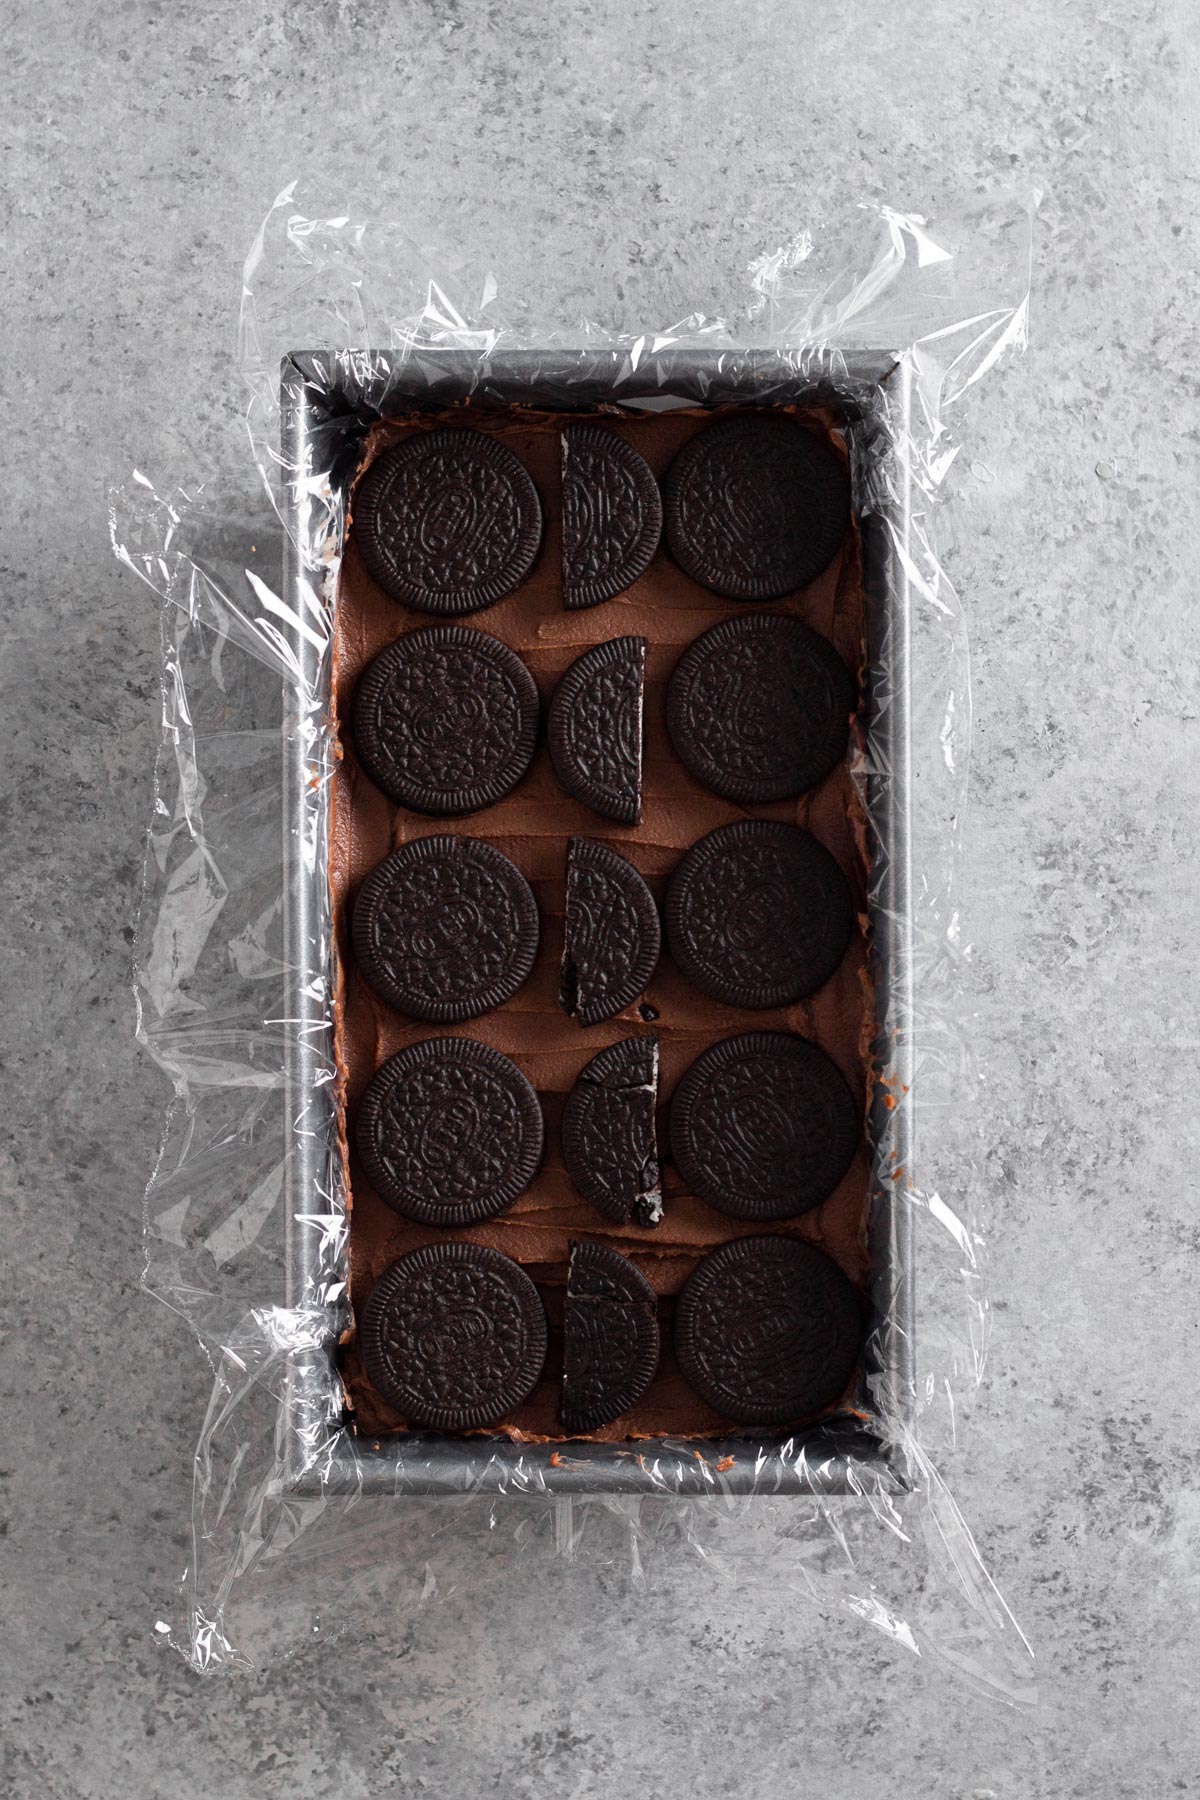
Step 5: Finish assembling the icebox cake. Spread a third of the chocolate peanut butter whipped cream over the frozen whipped cream and cookie layer, then top with another layer of cookies. Repeat this step 2 more times. Freeze the cake for at least 8 hours or overnight.
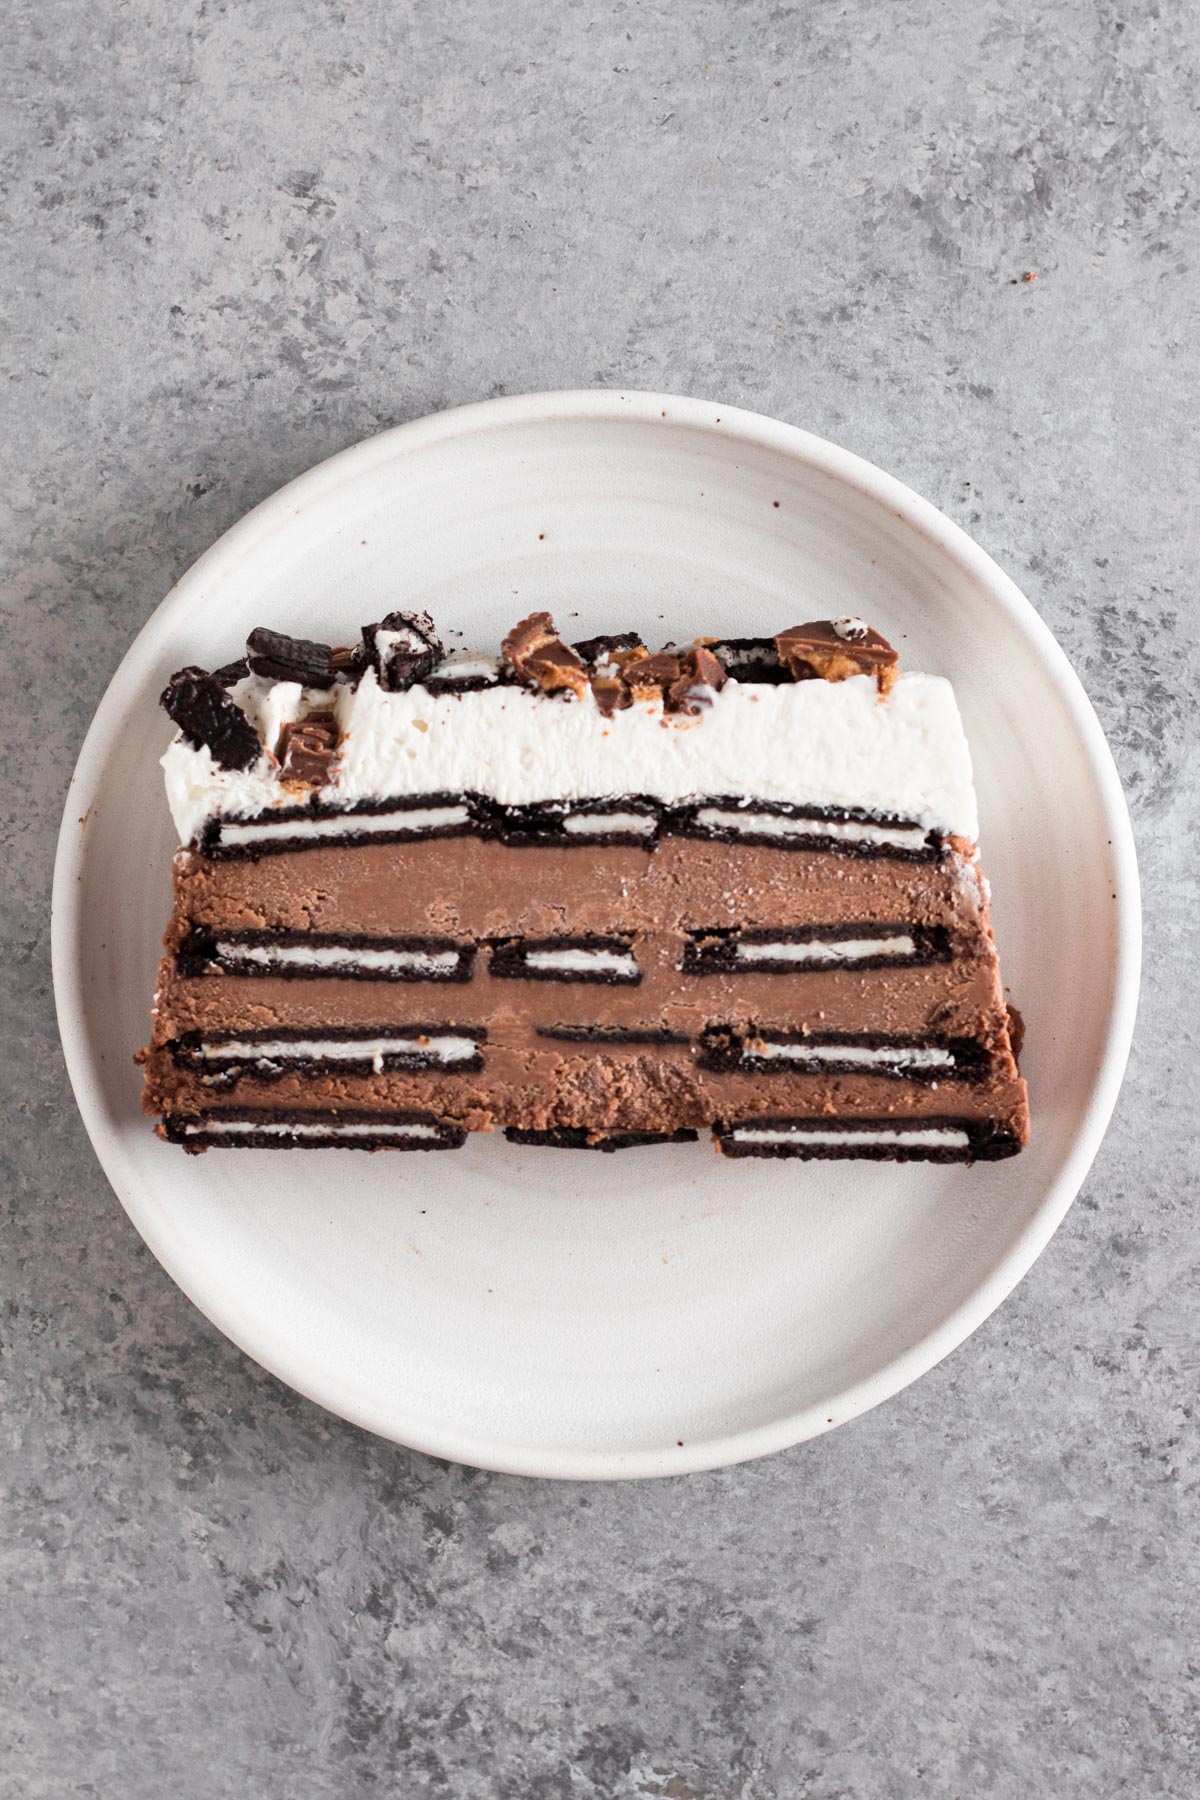
Step 6: Serve the cake. When you're ready to serve the icebox cake, flip the pan over onto a cutting board to release the cake. Sprinkle broken bits of chocolate wafer cookies and chopped peanut butter cups over the top for garnish. Slice the cake into 10 slices and serve immediately.

Love this recipe? Please leave a star rating and review on the recipe below! And don't forget to subscribe to Always Eat Dessert for even more easy dessert recipes and helpful baking tips.
Recipe
Chocolate Peanut Butter Oreo Icebox Cake
Ingredients
- 1 ½ cups (270 grams) semi-sweet chocolate chips
- ¾ cup (193.5 grams) creamy peanut butter
- 4 cups (952 grams) heavy whipping cream, chilled and divided
- ½ cup (60 grams) confectioners' sugar, divided
- 1 teaspoon (4 grams) vanilla extract
- about 50 chocolate wafer cookies*
- about 10 peanut butter cups, for garnish (optional)
Instructions
Make the Chocolate Peanut Butter Whipped Cream
- Add chocolate chips and peanut butter to a large bowl. Set aside.
- In a small saucepan, heat 3 cups of the cream until hot but not yet simmering.
- Pour the heated cream over the chocolate chips and peanut butter. Let sit without stirring for 5 minutes, then gently whisk the mixture until smooth. Cover the bowl with plastic wrap and refrigerate for 2 to 4 hours until well chilled.
Make the Whipped Cream
- Add remaining 1 cup heavy whipping cream, 2 Tbsp. of the confectioners' sugar, and vanilla to a large bowl or the bowl of a stand mixer. Using a handheld electric mixer or a stand mixer with the whisk attachment, beat the mixture on medium-high speed until it reaches stiff peaks. (To test for stiff peaks, turn off the beaters and lift them straight up out of the bowl. It lifting the beaters formed peaks with tips that remain upright, you're ready to go!)
Assemble the Icebox Cake
- Line a standard loaf pan (roughly 8.4"x4.5" with plastic wrap so that all sides are covered and the wrap hangs over the edges. Spread the whipped cream into an even layer in the bottom of the pan. Cover with a layer of chocolate wafer cookies.
- Cover the loaf pan with aluminum foil and place in the freezer while you move on to the next step. (This will allow the whipped cream to firm up, making it easier to spread the layers of chocolate peanut butter whipped cream on top.)
- Once the chocolate peanut butter cream has chilled, remove the bowl from the fridge and add the remaining ⅜ cup (6 Tbsp.) confectioners' sugar. Using a handheld electric mixer, whip the mixture on low speed until fluffy and a bit lighter in color. Be careful not to over-whip the mixture; it should be smooth and fluffy but thick, and over-whipping will cause it to become lumpy.
- Remove the loaf pan from the freezer and uncover. Spread a third of the chocolate peanut butter whipped cream on top of the cookie layer, then top with another layer of cookies. Repeat this step 2 more times. You will now have 1 layer of whipped cream and 3 layers of chocolate peanut butter whipped cream, each separated by a layer of chocolate wafer cookies and with a final layer of chocolate wafer cookies on the top of the loaf pan.
Chill the Cake
- Cover the loaf pan once again with plastic wrap and foil and place it in the freezer for at least 8 hours or overnight.
Serve the Cake
- When you're ready to serve the icebox cake, invert the loaf pan onto a cutting board. The cake should pop out of the pan, and the whipped cream layer will now be on top. Sprinkle broken bits of chocolate wafer cookies and chopped peanut butter cups over the cake for garnish. Slice the cake into 10 slices and serve immediately.


Comments
No Comments