These detailed instructions for how to freeze pie crust dough and pies (both unbaked and baked) will save you SO much stress this holiday season! Prep and freeze your crusts and pies in advance to free up your oven for other holiday dishes and to free up some of your time to actually relax and enjoy the holiday with loved ones!
I've said it before and I'll say it again: the freezer is your friend, and learning to properly freeze baked goods (like freezing cookie dough and cookies) is a total game changer when it comes to prepping for holiday baking!
Thanksgiving dinner and dessert is one of the best meals of the year. But if you're on the hook to host (or even if you volunteered to bring something to the feast), it's can also one of the most stressful meals of the year. Doing as much of the baking prep in advance as possible helps to free up time on Thanksgiving day so that you can actually enjoy the holiday. And when we're talking about doing baking prep work in advance, that's when the freezer comes in handy!
When done correctly, you can prep and freeze pie crust dough and pies ahead of time without your guests ever knowing your secret! Keep reading for all of my tips for how to freeze pies and pie crust dough.
Jump to:
Best Pies for Freezing
Before you freeze a pie, consider the type of pie you're making and the best way to freeze it.
- Pie crust dough freezes and thaws very well. This is a simple and reliable way to utilize the freezer to get ahead of your holiday baking.
- Fruit pies (like apple pie) freeze well and can be frozen before or after baking. See instructions below.
- Custard pies (like pumpkin pie) should not be frozen before baking. If you want to freeze a custard pie, it's best to bake the pie before freezing. The same goes for pecan pie. See instructions below.
- Cream or mousse-filled pies generally do not freeze well.
- Do not freeze pies with whipped or meringue toppings; instead make the topping fresh and add it to the pie the same day you'll serve it.
What You'll Need
- Freezer space (and a clean-smelling freezer). You'll obviously need to clear some space in your freezer to fit the pie or pie crust dough, but you'll also want to make sure that there aren't lingering odors in your freezer that could be absorbed by your pie. Remove any pungent foods (like onion) and wipe down the interior of the freezer if necessary to remove any smells before freezing your pie or crust.
- Plastic wrap, to seal the food you'll be freezing.
- Freezer-safe containers or plastic bags (if freezing pie crust dough).
- Aluminum foil (if freezing pies).
- A marker, for labeling the items you'll be freezing.
How to Freeze Pie Crust Dough
Step 1: Prepare the pie crust dough and let it chill in the refrigerator according to the recipe. Once the dough has chilled, remove it from the fridge.
Tip: My recipe for perfect pie crust dough is easy to make and packed with tips for getting it just right. And the dough freezes perfectly!
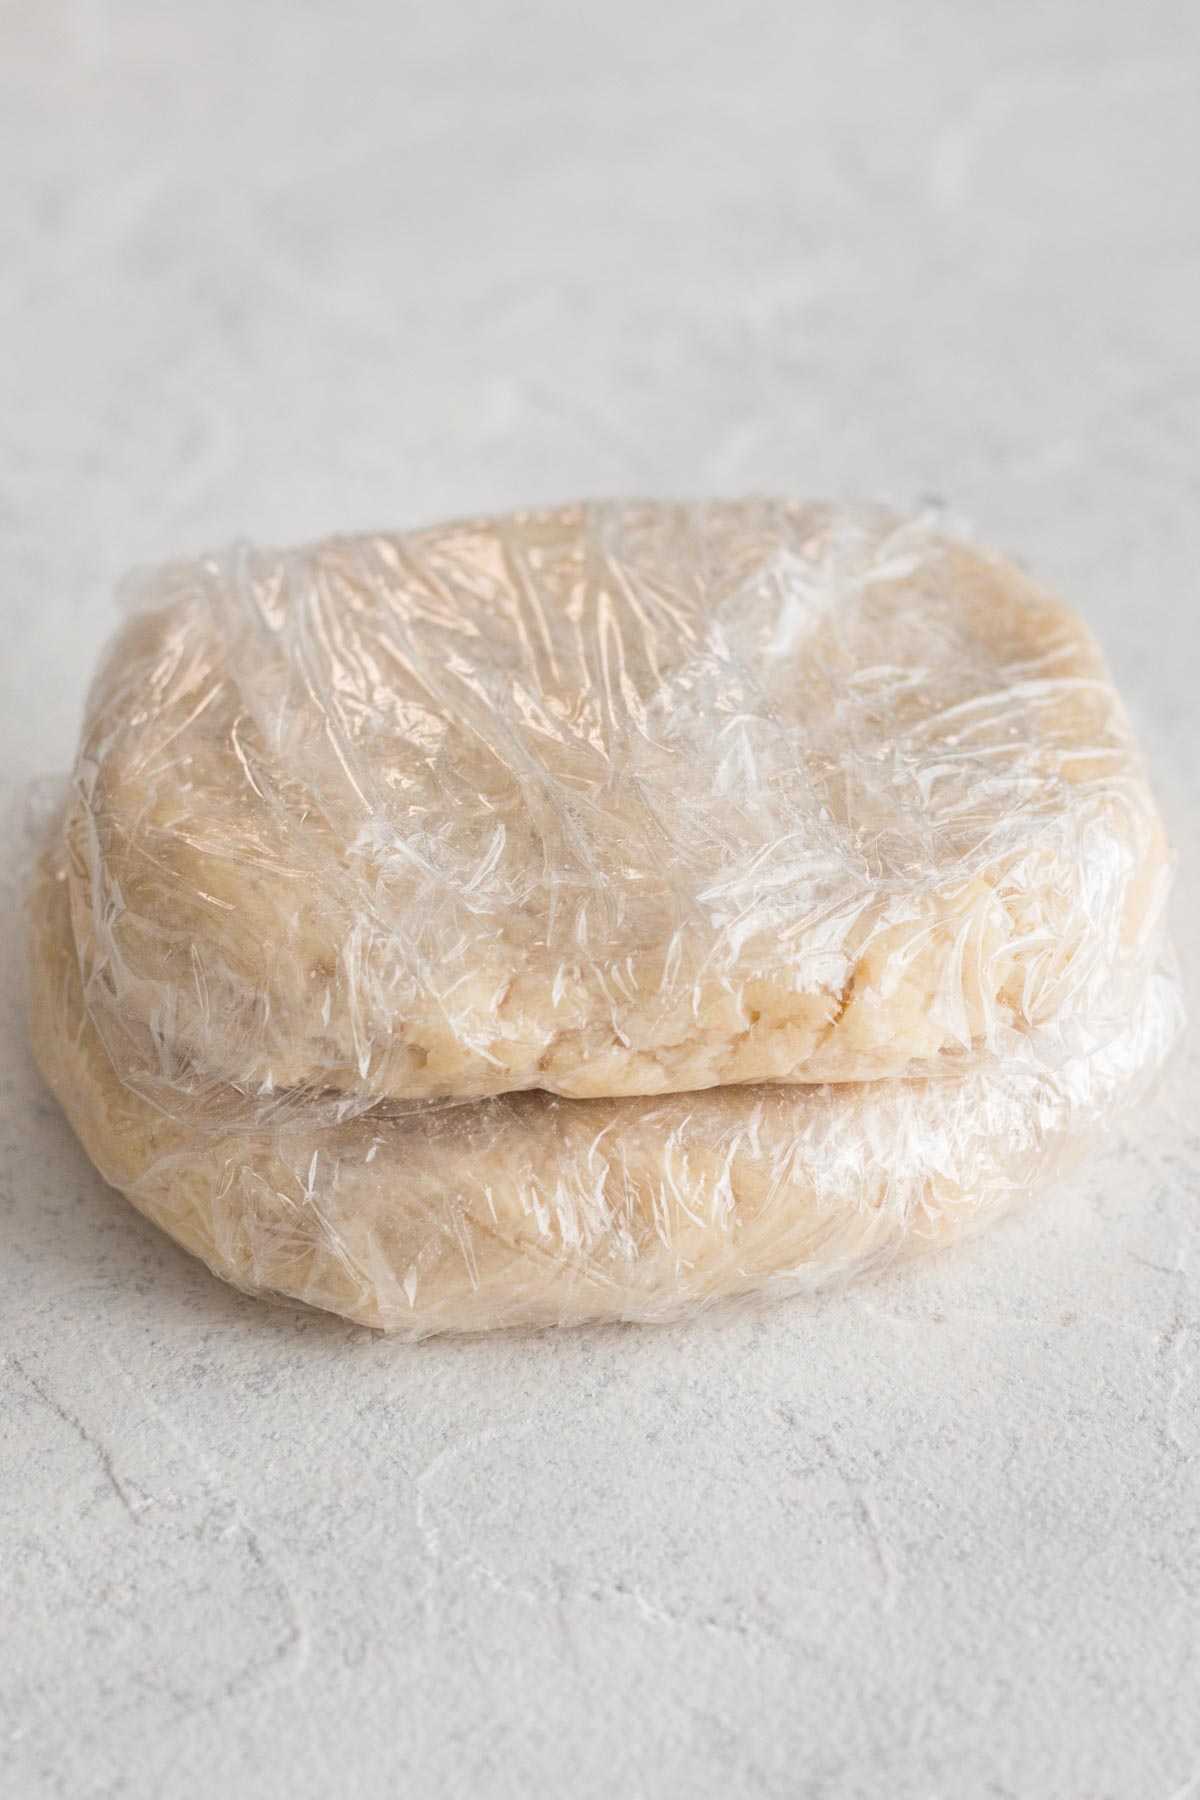
Step 2: Ensure the dough is wrapped tightly with plastic wrap. Place the tightly wrapped dough into a freezer safe container or plastic bag and label it with today's date.
Step 3: Place the wrapped pie crust dough in the freezer and freeze for up to 3 months.
Note: Pie crust dough can be stored in the fridge (wrapped tightly in plastic wrap) for up to 3 days before rolling and baking, so you may not even need to freeze your pie crust dough if you wanted to make it just a few days in advance.
To Prep for Baking: The night before you plan to bake your pie, transfer the dough to the fridge to thaw. Allow the dough to thaw overnight before rolling it out.
How to Freeze Apple Pie (& Fruit Pies)
Fruit pies are the best type of pie to freeze and can be frozen either before or after baking. Below are the steps for freezing either unbaked or baked fruit pies.
Unbaked Fruit Pie
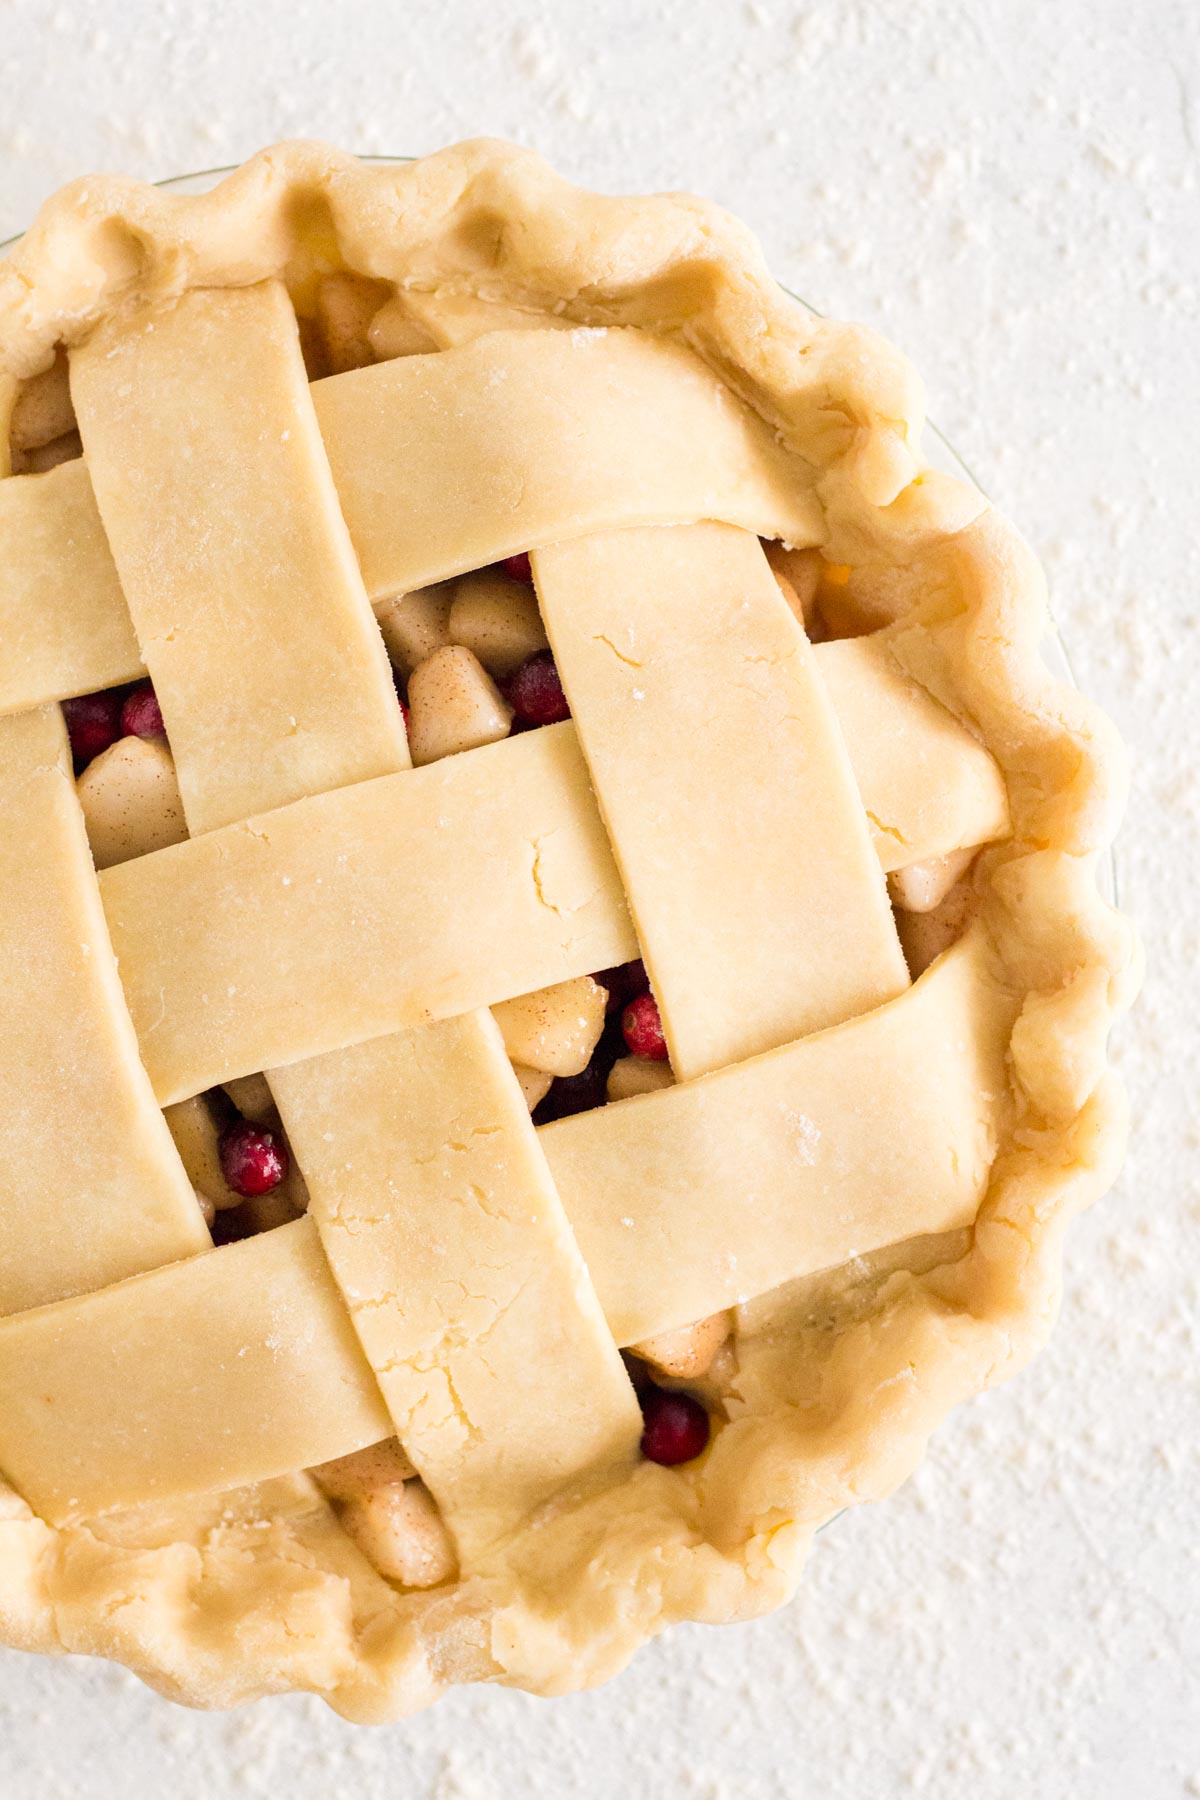
Step 1: Fully assemble the pie according to the recipe's instructions.
Step 2: Place the pie, unwrapped, in the freezer for 2 to 3 hours to set the filling and firm up the crust (so that you don't spill the pie's filling or squish the beautiful crust when you wrap the pie).
Step 3: Remove the pie from the freezer and wrap the entire pie and pie plate with plastic wrap so that it's completely covered. I recommend using three layers of wrap at alternating angles to ensure that it's well sealed.
Step 4: Wrap the entire pie again in aluminum foil and label it with the type of pie, today's date, and the recipe's baking instructions (temperature and duration).
Step 5: Place the pie on a level surface in the freezer and freeze for up to 3 months.
Instructions for how to bake the frozen unbaked fruit pie are below.
How to Bake Frozen Fruit Pie
Option 1 (Thaw Before Baking): The night before you want to bake your pie, take the pie out of the freezer, remove the wrapping, and cover loosely with fresh plastic wrap (or place into a pie keeper with the lid vented). Place the pie in the refrigerator to thaw overnight. Remove the pie from the fridge and let it stand at room temperature for 30 minutes before baking. Finally, bake the pie according to the recipe's instructions.
Option 2 (Bake Directly from Frozen): Take the pie directly from the freezer to the preheated oven (first removing the wrapping, of course). Remember to be careful about which pie plate you'll be using if you plan to do this. You'll need to bake the still-frozen pie longer than the recipe states (typically about 20-40 minutes extra, and this will vary based on the recipe).
Baked Fruit Pie
Step 1: Bake the pie according to the recipe's instructions, then let the pie cool completely on a wire rack. This may take a few hours.
Step 2: Once the pie has cooled completely, place the unwrapped pie in the freezer for 1 to 2 hours to firm up the crust (so that you don't squash the flaky edges when you wrap the pie).
Step 3: Remove the pie from the freezer and wrap the entire pie and pie plate with plastic wrap so that it's completely covered. I recommend using three layers of wrap at alternating angles to ensure that it's well sealed.
Step 4: Wrap the entire pie again in aluminum foil and label it with the type of pie and today's date.
Step 5: Place the pie on a level surface in the freezer and freeze for up to 2 months.
Instructions for how to reheat the frozen baked fruit pie are below.
How to Reheat Frozen Fruit Pie
Step 1: The night before you want to serve the pie, take the pie out of the freezer, remove the wrapping, and cover loosely with fresh plastic wrap (or place into a pie keeper with the lid vented). Place the pie in the refrigerator to thaw overnight.
Step 2: Shortly (30-60 minutes) before serving the pie, let it sit at room temperature to take off the chill from the fridge. Or if you'd prefer to serve the pie warm, briefly reheat it in a warm oven.
How to Freeze Custard Pies (like Pumpkin & Pecan)
Custard pies can be a bit more finicky than fruit pies, but they usually freeze well after they're baked, and the steps for freezing and thawing a custard pie are basically the same as a fruit pie. As I mentioned above, I do not recommend freezing unbaked custard pies.
Baked Custard Pie
Step 1: Bake the pie according to the recipe's instructions, then let the pie cool completely on a wire rack. This may take a few hours.
Step 2: Once the pie has cooled completely, place the unwrapped pie in the freezer for 1 to 2 hours to firm up the crust (so that you don't squash the flaky edges dent the filling when you wrap the pie).
Step 3: Remove the pie from the freezer and wrap the entire pie and pie plate with plastic wrap so that it's completely covered. I recommend using three layers of wrap at alternating angles to ensure that it's well sealed.
Step 4: Wrap the entire pie again in aluminum foil and label it with the type of pie and today's date.
Step 5: Place the pie on a level surface in the freezer and freeze for up to 1 month.
Instructions for how to reheat the frozen baked custard pie are below.
How to Reheat Frozen Custard Pie
Step 1: The night before you want to serve the pie, take the pie out of the freezer, remove the wrapping, and cover loosely with fresh plastic wrap (or place into a pie keeper with the lid vented). Place the pie in the refrigerator to thaw overnight.
Step 2: Shortly (30-60 minutes) before serving the pie, let it sit at room temperature to take off the chill from the fridge. Or if you'd prefer to serve the pie warm, briefly reheat it in a warm oven.
Tips & Tricks
Choose the right pie plate for freezing your pie. If you're going to thaw the unbaked pie before baking it, any freezer-safe pie plate will do (so long as you won't need it for other baking projects while the pie is in the freezer). If you want to take your pie straight from the freezer to the oven, I recommend a disposable aluminum pie plate. Do NOT put a frozen glass pie plate in the oven; it could explode!
When freezing baked pies, it's critical that the pie be completely cooled before it goes in the freezer. Allow plenty of time for the pie to cool after baking, and be certain that it has cooled completely before wrapping and freezing.
Don't skip briefly freezing the pie before wrapping it and freezing it. Wrapping the pie after it's already frozen will help to maintain it's shape and appearance.
FAQs
Yes, absolutely! In fact, apple pie is probably the best type of pie to freeze since it will freeze, thaw, and reheat well.
For the best flavor and texture, homemade apple pie can be frozen for up to 3 months is unbaked and up to 2 months if baked.
To reheat a frozen apple pie, first let it thaw overnight in the fridge. The pie can sit at room temperature for 30-60 minutes before serving if you just want to to take off the chill from the fridge. Or if you'd prefer to serve the pie warm, briefly reheat it in a warm oven. I recommend 30 minutes in a 300°F oven, but this could vary by recipe and oven, so be sure to keep an eye on it so it doesn't brown further while reheating.
It's best to freeze pumpkin pie after baking. Custard pies have a greater risk of becoming soggy, so I don't like to leave unbaked filling in pie crust and therefore do not recommend freezing an unbaked pumpkin pie.
If you freeze your pies, you can go ahead and make them up to 3 months ahead of the holiday! The length of time they should be frozen will vary by the type of pie and whether or not it was baked before freezing. Pie crust dough can also be made and frozen up to 3 months ahead of time and then used to bake a fresh pie 1 to 2 days before serving.
More Baking Tips
Love this baking tutorial? Be sure to check out these other great baking tips linked above! And don't forget to subscribe to Always Eat Dessert for even more baking tips and simple dessert recipes.




Comments
No Comments