Say hello to your new go-to sugar cookie recipe! This no spread, no chill sugar cookie recipe makes melt-in-your-mouth soft and buttery cut out sugar cookies that hold their shape when baked. They're perfect for decorating for Christmas or any holiday (or just because!). The recipe also includes a simple vanilla icing for decorating.
I've been baking sugar cookies for years, and this recipe is always my go to. (In fact, it's the same sugar cookie dough that I use for my Valentine heart sugar cookie sandwiches.) Sugar cookies should be beautiful, sure... but what's the point if they don't taste good? This recipe is super quick and easy, but we're not taking any shortcuts on flavor. Soft and buttery sugar cookies that taste delicious and actually hold their shape when baked? Yes please!
Jump to:
Why This Recipe Works
I can go on and on about why this is the best cut out sugar cookie recipe, so here's a whole list of reasons why it's the best for baking homemade cut out sugar cookies.
- First and foremost, they taste delicious and have a sweet, buttery flavor. It doesn't matter how pretty they look; if sugar cookies don't taste delicious, they're not worth our time!
- These sugar cookies don't spread in the oven. The dough holds its shape when baked, so you'll have beautiful cookie cut outs for decorating.
- This sugar cookie dough is seriously quick and easy to make. It all comes together in the food processor in less than 30 minutes.
- No dough chilling! Chilling the dough isn't necessary for this recipe, which means it takes even less time (and fridge space) to whip up a batch.
- No waiting for the butter to soften. This recipe calls for cold - not room temperature - butter, so you don't have to remember to take the butter out of the fridge before baking.
Ingredient Notes & Substitutions
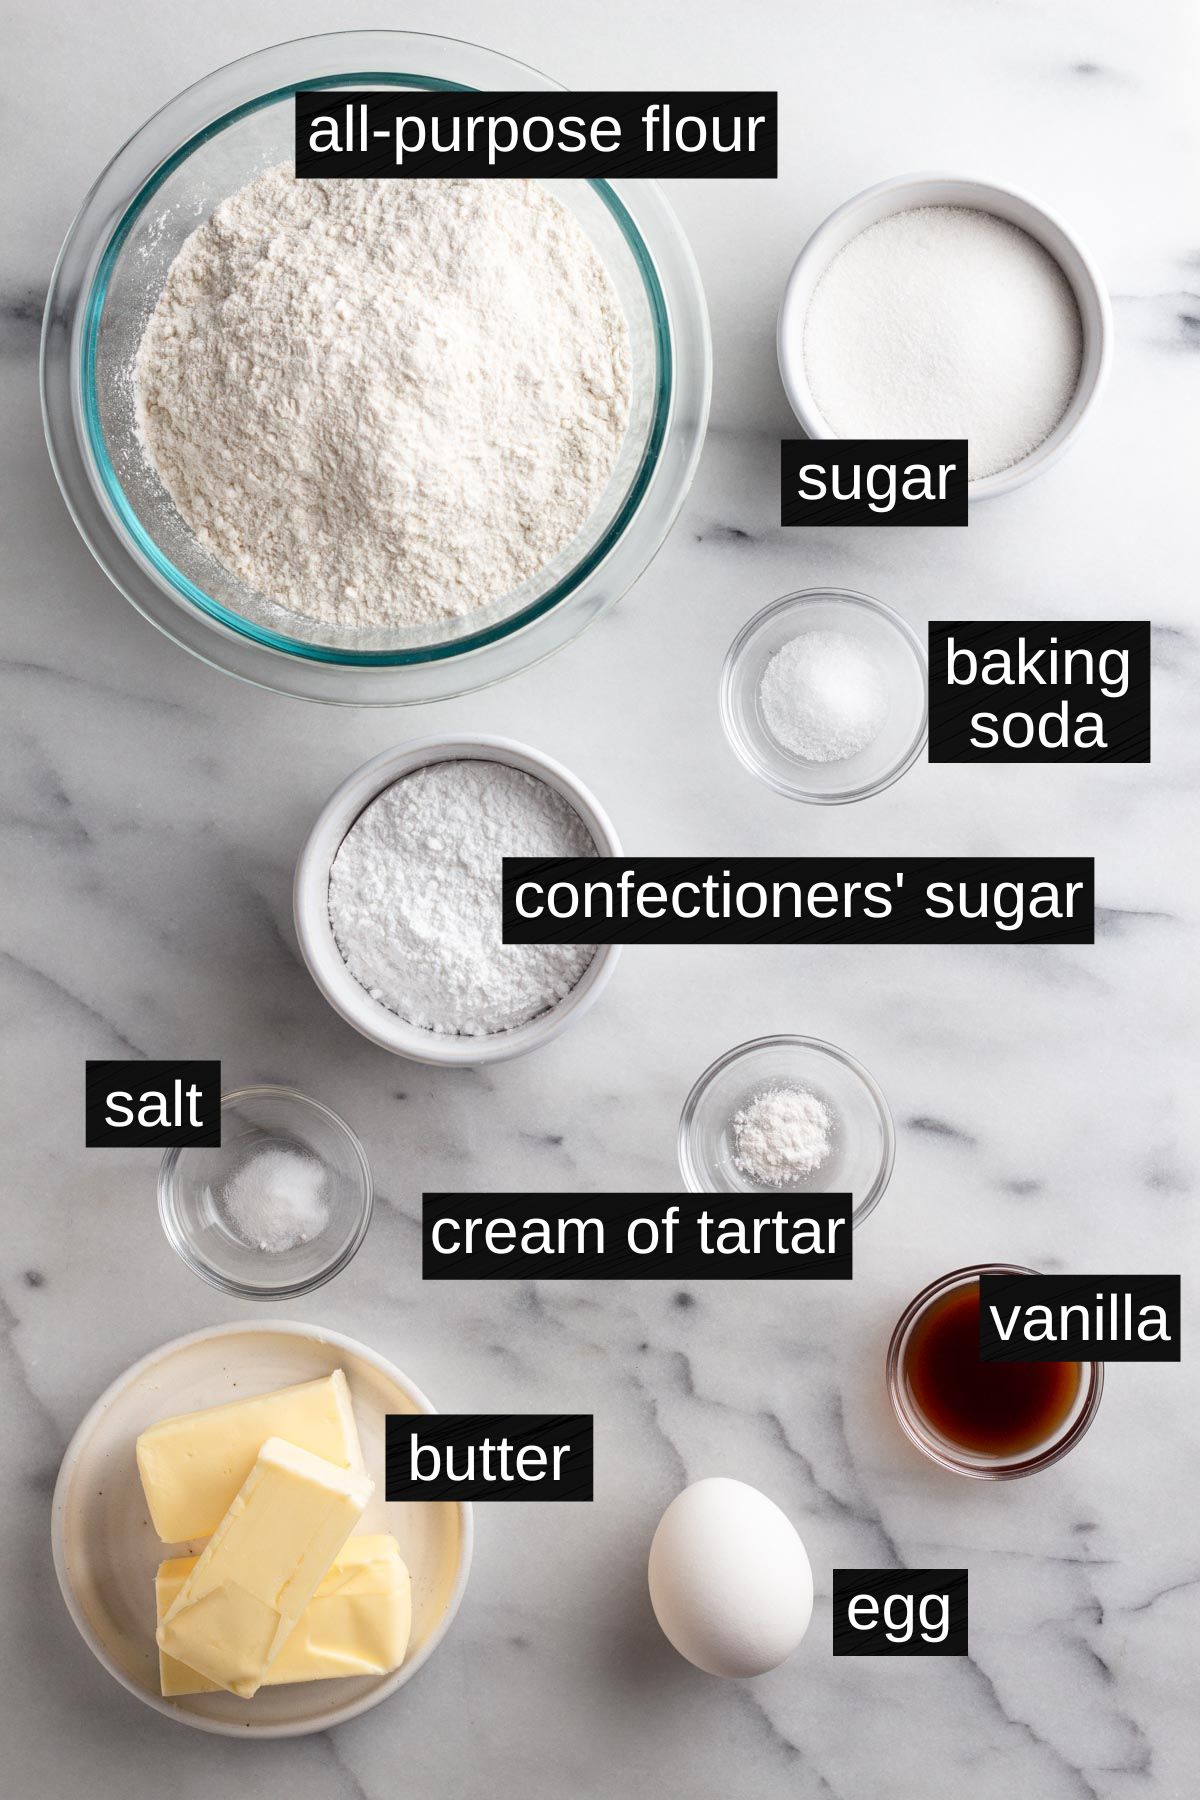
Confectioners' Sugar - This recipe uses a mix of regular granulated sugar and confectioners' sugar for sweetness. The confectioners' sugar helps to create an incredibly smooth cookie that doesn't feel at all gritty when you bite into it.
Baking Soda - A tiny bit of baking soda gives these cookies just a little bit of rise, helping to keep them soft without allowing them to spread when baked.
Cream of Tartar - This may seem like an unusual ingredient, and there isn't even very much of it in the recipe, but it plays an important role in these cookies. Actually two roles! Cream of tartar stops sugar from crystallizing, which helps to create a chewier texture. It also stops cookies from browning as they bake, so none of our cookies will end up with edges that are too golden for decorating.
Unsalted Butter - Unsalted butter is always my go-to for baking so that I can control the amount of salt I'm adding to the recipe. If you prefer to use salted butter, skip adding salt to the dough with the dry ingredients. And either way, you'll want to use cold, cubed butter, not butter that's softened or room temperature.
See recipe card at the bottom of this post for full ingredient list and measurements.
Special Equipment
In addition to essential baking equipment (like a whisk and spatula), I recommend some special tools for making this recipe.
- A food processor, for mixing the cookie dough.
- A rolling pin, for rolling out the cookie dough.
- Cookie cutters (any shape you like), for cutting out the cookie shapes.
- Piping bag and tip, for piping icing onto the cookies.
Step-By-Step Recipe Instructions
Step 1: Make the cookie dough. Place the dry ingredients in a food processor and process just until mixed.
Step 2: Add cubed butter and process until the dough resembles coarse meal.
Step 3: Stir together the egg and vanilla together. With the processor running on low speed, pour the egg mixture through the feed tube and process until the dough comes together.
Step 4: Remove the dough from the processor, place it on a clean surface, and knead it for several seconds, until no dry bits remain and the dough is cohesive throughout.
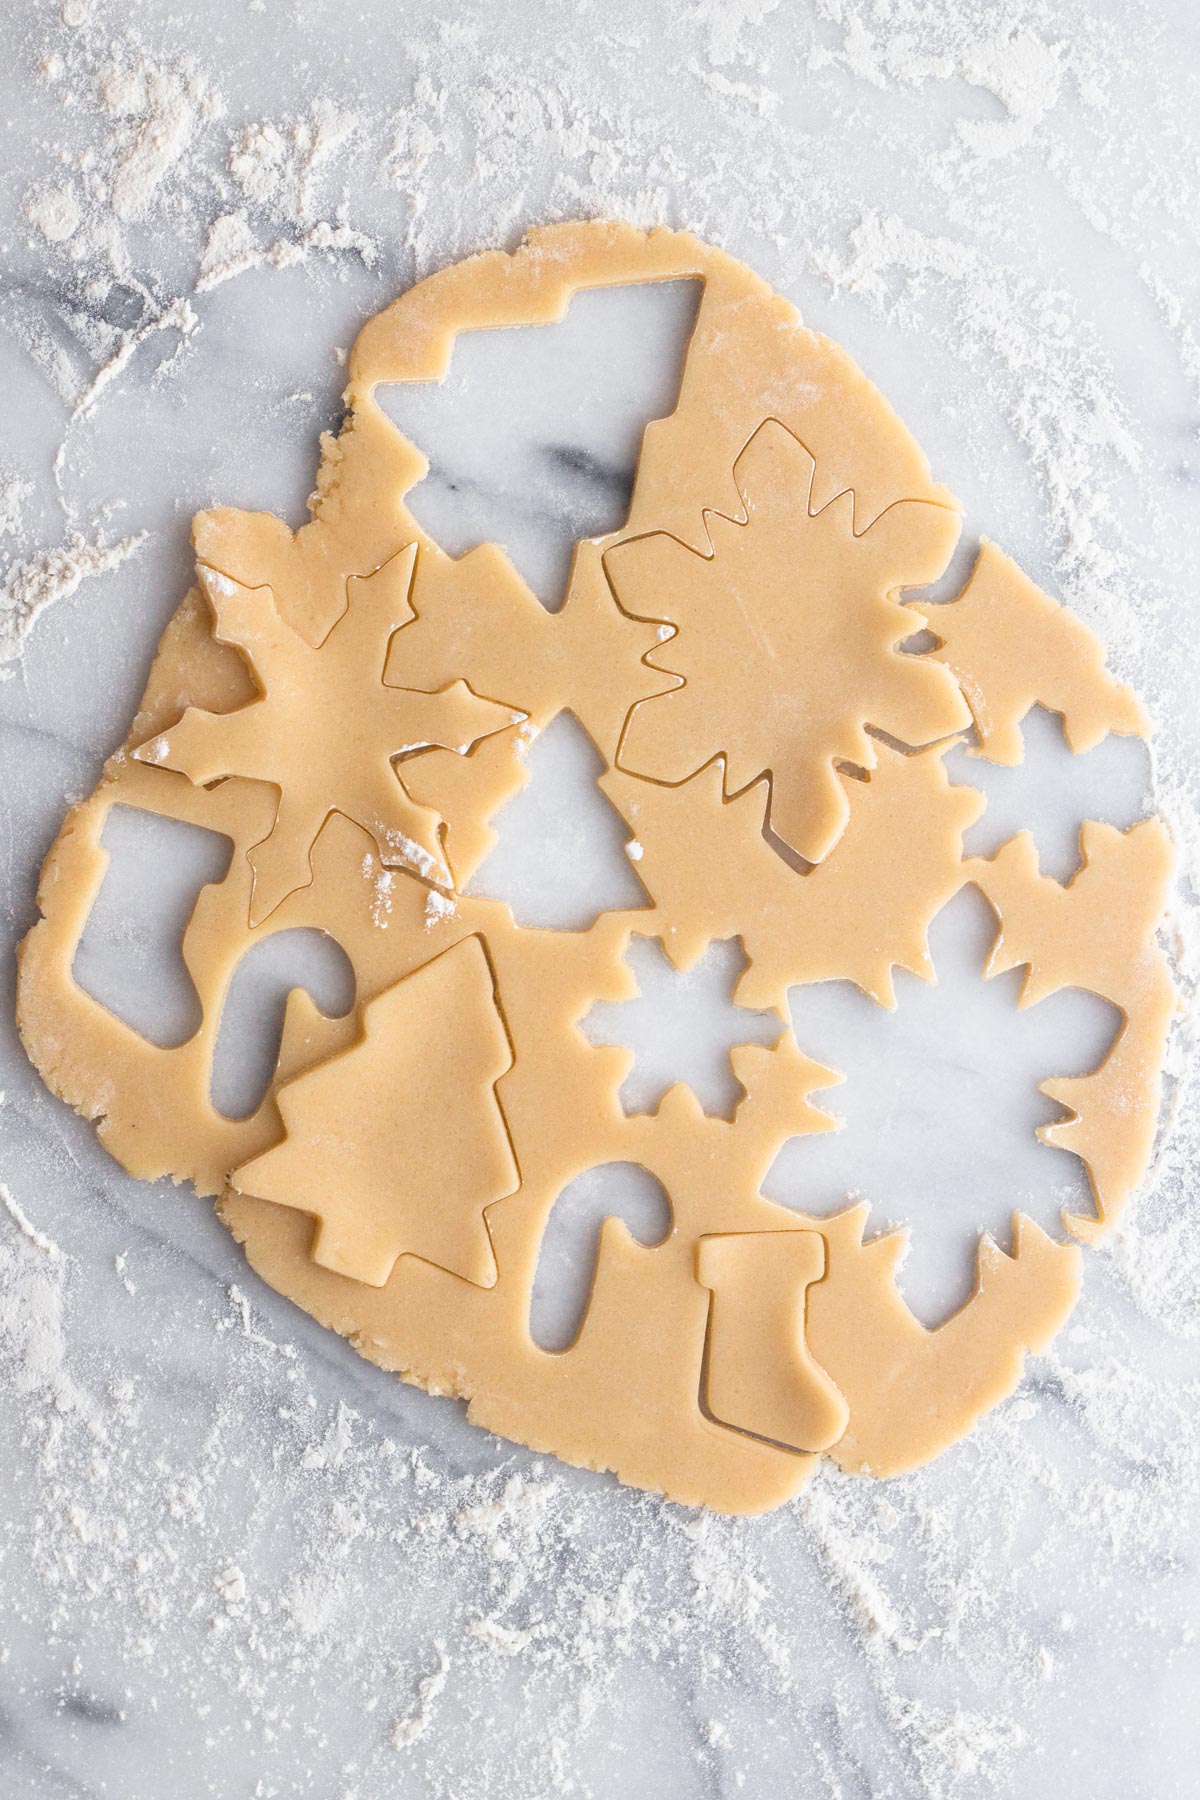
Step 5: On a lightly floured surface, roll the dough to ¼ inch thickness. Cut cookies using any cookie cutter shapes you like.
Step 6: Bake the cookies at 350°F for 8-10 minutes. You'll know the cookies are finished baking when they're no longer shiny and become lightly golden. Let cookies cool completely on the baking sheet atop a wire rack.
Step 7: Make the icing. Whisk the icing ingredients together until smooth. The mixture should slowly drip, but not run, when poured from a spoon. If the mixture is too runny, add a little bit more sugar. If it’s too thick, add a little bit more milk.
Step 8: Decorate the cookies. When the cookies have cooled completely, get ready to decorate. Spoon the icing into a piping bag or a plastic squeeze bottle and pipe the icing onto the cookies.

How to Keep Sugar Cookies from Spreading
If your sugar cookies aren't holding their shapes when baked, the recipe is likely the issue. Too much butter or sugar in the recipe will cause cookies to spread as they bake, which means that they won't hold the cookie cutter's shape. The amount of leavener (baking soda or baking powder) is also a factor in baking cookies that hold their shape. This recipe is designed to hold its shape when baked, and you don't even need to chill the dough!
If you trust the recipe but your sugar cookies are still spreading, here are some troubleshooting tips:
- If your oven isn't hot enough, the cookies will need more time to bake, which increases the risk that they'll spread. Use an oven thermometer to make sure your oven is the temperature is accurate.
- Baking the cookies on baking sheets lined with silicone baking mats or parchment paper also helps to minimize cookie spread.
- Too-thick cookies are more likely to spread when baked, so be sure you're rolling out your cookie dough to the thickness specified in the recipe before cutting and baking your cookies.
- Last but certainly not least, be sure that you're measuring your ingredients accurately and adding the correct amount of each ingredient to the recipe. This post about how to measure ingredients for baking can help!
How to Decorate
The great thing about sugar cookies is that you can cut them into any shape you want and decorate them any way you like! This recipe uses a simple vanilla icing that tastes delicious and dries firm but not hard. You can also decorate the cookies using royal icing, buttercream frosting, or sprinkles.
Recipe Variations

My Valentine Heart Sugar Cookies use this same cookie dough to create sugar cookie sandwiches filled with creamy raspberry buttercream frosting!

I can't even take credit for these Halloween sugar cookies because my kids decorated them! We used this same cookie dough recipe and decorated them for Halloween using buttercream frosting and A LOT of sprinkles. (And if you're wondering why there's a butterfly among the ghost and pumpkin cookies, it's because 3 year olds want what they want haha.)
Recipe FAQs
I suppose this is a matter of opinion, though I'm certain most people will agree that soft and tender sugar cookies are best. Confectioners' sugar and a tiny bit of cream of tartar help to produce a soft cookie, as does being careful not to over mix the dough or over bake the cookies.
Sugar cookie dough should be rolled to ¼ inch before cutting and baking. This is the ideal thickness for a soft sugar cookie that is still thick enough to be sturdy for decorating.
We've all had sugar cookies that look beautiful but are dry and tasteless, but there's no need for sugar cookies to be flavorless. Butter gives these simple cookies a delightfully rich flavor, and pure vanilla extract (a full Tablespoon!) really makes them sing.
Most cut out sugar cookie recipes require chilling, since chilling the butter will help to stop the cookies from spreading as they bake. This recipe, however, uses just the right ratios of butter, sugar, and baking soda so that the cookies will keep their shape as they bake without having to chill the dough.

Storage Instructions
Room Temperature: These sugar cookies can be stored in an airtight container at room temperature for up to 5 days. Be careful when stacking decorated cookies and be sure to let the icing set before stacking. Once set, the icing is firm but not rock-solid and may become slightly squished when cookies are stacked.
Freezing: These cookies also freeze well and can be frozen, stored in an airtight container, for up to 3 months. Check out my post all about freezing cookie dough and cookies for more information.
Love this recipe? Please leave a star rating and review on the recipe below! And don't forget to subscribe to Always Eat Dessert for even more simple recipes, baking tips, and inspiration.
Recipe

Soft Cut Out Sugar Cookies
Special Equipment
- food processor
- Rolling Pin
- Cookie cutters
- Piping bag and tip
Ingredients
Cookies:
- 2 ¼ cups all-purpose flour
- ½ cup granulated sugar
- ½ cup confectioners' sugar
- ½ teaspoon salt
- ⅛ teaspoon baking soda
- ⅛ teaspoon cream of tartar
- 12 ½ Tablespoons unsalted butter cold
- 1 large egg
- 1 Tablespoon vanilla extract
Icing:
- 1 cup confectioners' sugar
- 1 ½ Tablespoons milk
- ⅛ teaspoon vanilla extract
Instructions
- Line baking sheets with silicone baking mats or parchment paper and set aside.
Make the sugar cookie dough.
- Place the flour, both sugars, salt, baking soda, and cream of tartar in the bowl of a food processor and process just until mixed.
- Cut the butter into small pieces and distribute over the flour mixture. Process until the dough resembles coarse meal, about 30 seconds.
- Stir the egg and vanilla together in a cup. With the processor running on low speed, pour the egg mixture through the feed tube and process until the dough comes together, about 30 to 60 seconds.
- Remove the dough from the processor, place it on a clean surface, and knead it for several seconds, until no dry bits remain and the dough is cohesive throughout.
- Preheat the oven to 350°F.
- On a lightly floured surface, roll the dough to ¼ inch thickness. Cut cookies using any cookie cutter shapes you like. Transfer the cookie cutouts to the prepared baking sheets using a spatula.
Bake the cookies.
- Bake the cookies for 8-10 minutes. You'll know the cookies are finished baking when they're no longer shiny and become lightly golden. Let cookies cool completely on the baking sheet atop a wire rack.
Make the vanilla icing.
- Whisk the icing ingredients together in a medium-sized bowl until the mixture is smooth. The mixture should slowly drip, but not run, when poured from a spoon. If the mixture is too runny, add a little bit more sugar. If it’s too thick, add a little bit more milk.
Decorate the cookies.
- When the cookies have cooled completely, get ready to decorate. Spoon the icing into a piping bag or a plastic squeeze bottle and pipe the icing onto the cookies.





Jennifer Lewis
I've been searching for a replacement for an old, family recipe for sour milk cut-out cookies. It has been difficult to make space in my crowded refrigerator to chill the dough and then the pans of cut-outs before baking. This no-chill recipe is the replacement! I didn't use a food processor but a Kitchen Aid hand mixer, mixing all of the chilled butter into half of the sifted, dry ingredients and gradually mixing in the remaining half of the dry ingredients. I used a fork to mash the few, small butter pieces the mixer didn't incorporate. The dough is not sticky to handle, rolls easily, and holds its shape during baking. It tastes similar to my old recipe and I like the soft, tender texture. I frosted the cookies with buttercream and topped with sprinkles. The family agrees - this recipe is the winner!
Allison Ferraro
Hi Jennifer! Thanks so much for taking the time to leave a review! No dough chilling is one of my favorite things about this recipe... who has room in their fridge during the holidays for chilling trays of cookie dough cut outs? Thanks for letting us know that you were able to make the dough with a hand mixer. So glad to hear this was a hit with your family!
- Allison
Jeff Caldwell
What if you don't have a food processor? Can you use a regular hand mixer?
Allison Ferraro
Hi Jeff! The food processor is used to cut the cold butter into the flour mixture, the same way you would when making pie or biscuit dough. A hand mixer isn't able to cut cold butter into dry ingredients in this way, but you could certainly use a pastry blender for this step! You could then use a hand mixer to blend the egg and vanilla into the dough.
- Allison
Jeff
Thank you. I just remembered that I had bought a hand blender that has a food processor attachment a while ago and I forgot about what attachments came with it. Guess I'm all set. Looking forward to making these cookies. Thanks again!
Allison Ferraro
You're so welcome! Happy baking.
- Allison