
Brownie lovers, say hello to your new favorite indulgence: homemade bronuts! Decadent brownies meet rich, chocolatey baked donuts in this ultimate chocolate lovers dessert mashup!

Jump to:
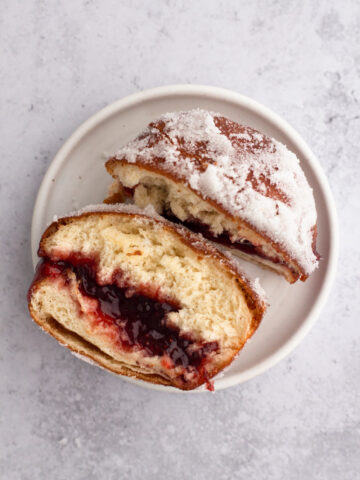
What are bronuts?
As the name suggests, this deliciously rich and chocolatey treat is what happens when brownie meets donut. Bronuts are not merely round brownies. They combine the deep chocolate flavor of a brownie with a donut's round shape, lightly airy texture, and decorative topping to create a seriously indulgent treat!
Why This Recipe Works
There are lots of reasons to love this recipe! The batter is adapted from my all-time favorite brownie recipe, so you know it's packing a rich chocolate flavor.
These bronuts are deeply chocolatey without being overly dense or fudgy. These brownie donuts are naturally leavened by whipping air into eggs (rather than using chemical leaveners baking soda or baking powder) which gives them a slight bit of rise, a nod to a donut's airy texture.
Perhaps best of all, this bronut recipe allows you to customize the chocolate flavor to your liking. Check out the recipe ingredient notes below (and in the Notes section of the Recipe Card) to help you select the chocolate and cocoa powder that will provide your ideal chocolate flavor.
Ingredient Notes & Substitutions
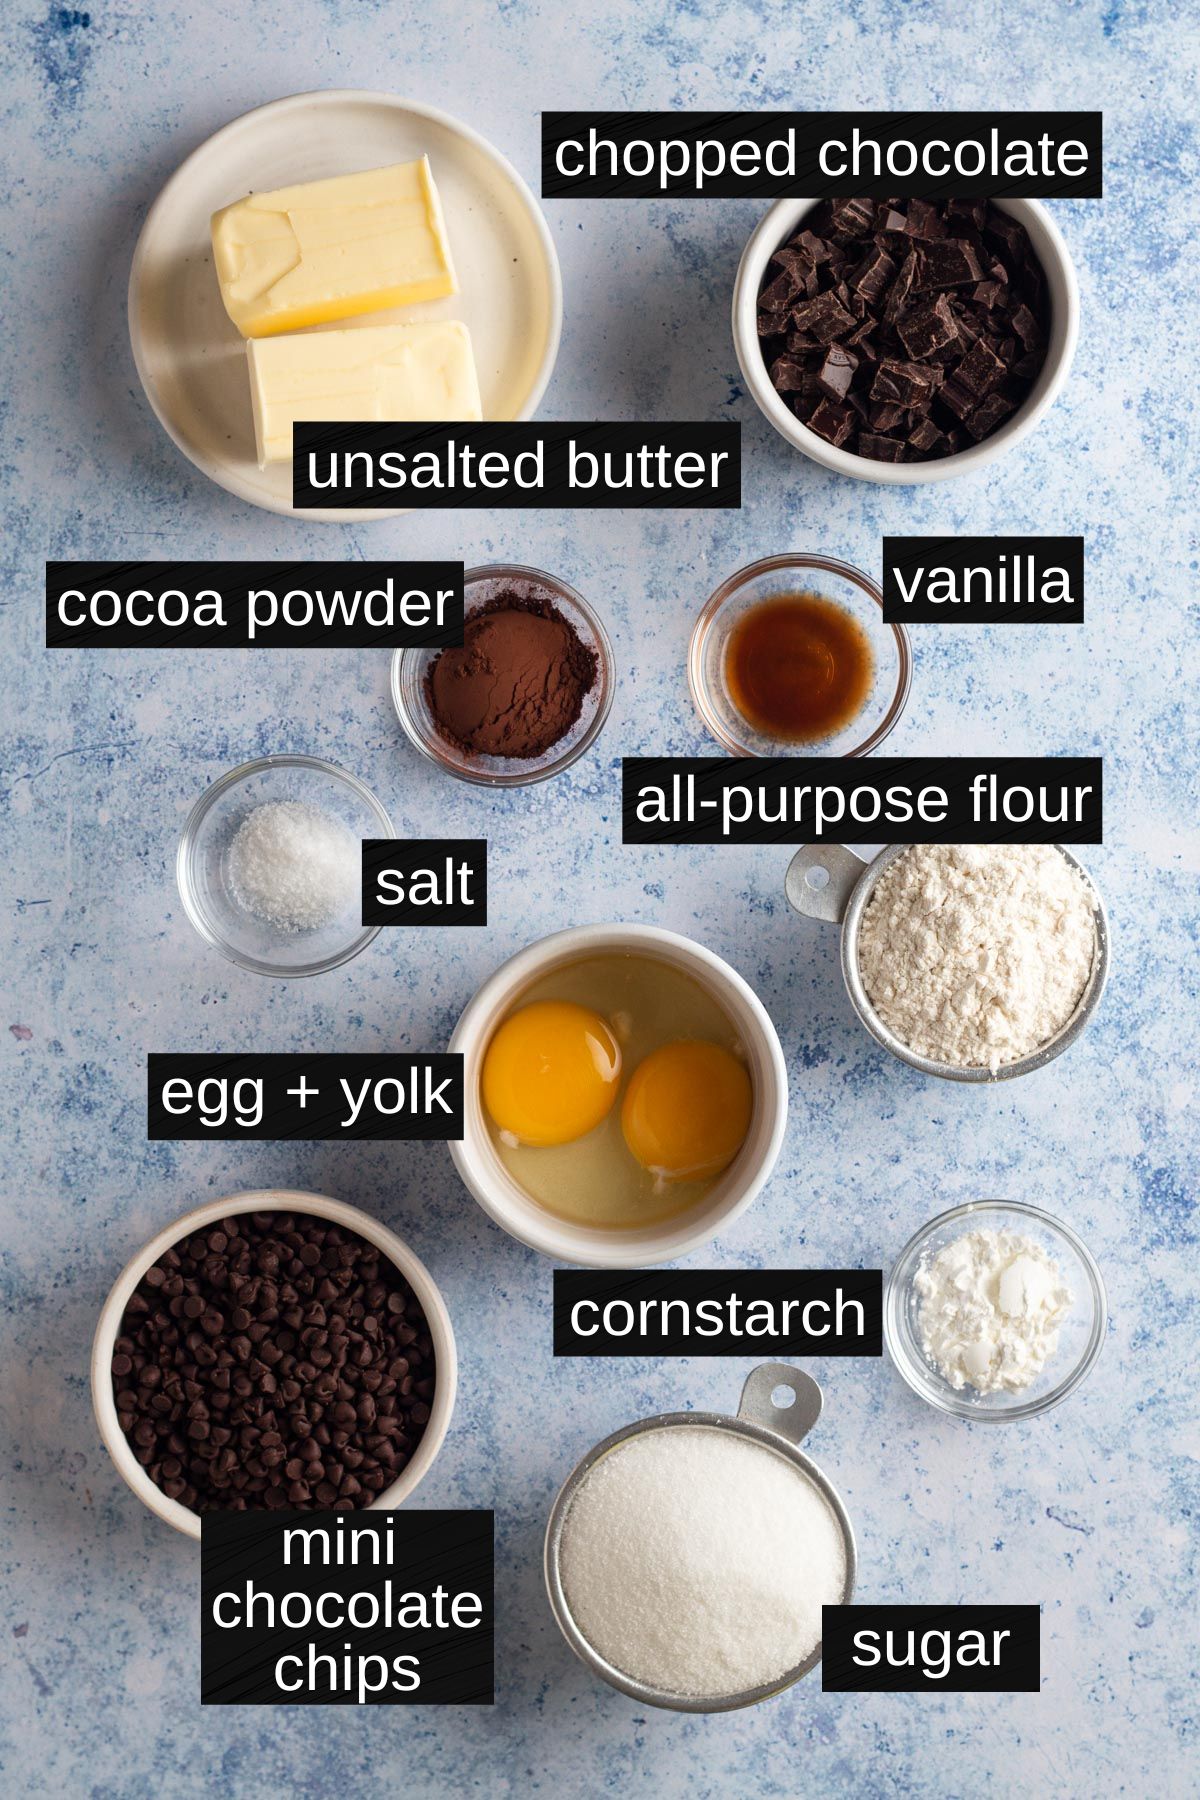
Chocolate Baking Bar - I recommend a chocolate baking bar for the best chocolate flavor and texture. Use bittersweet for a deeper chocolate flavor or semi-sweet for a slightly sweeter chocolate flavor. Chocolate chips can also be used (in equal measure), but they contain stabilizers which makes them less ideal for melting and flavoring baked goods.
Cocoa Powder - Used in conjunction with the melted chocolate baking bar, cocoa powder gives these bronuts rich chocolate flavor. You can use either natural unsweetened (deeper chocolate flavor that's slightly bitter) or dutch-process cocoa powder (neutral and smooth chocolate flavor) in this recipe.
Cornstarch - When combined with flour, cornstarch helps to soften proteins and create chewy baked goods. I love adding it to chocolate chip cookies and brownies for this reason! Since I know someone will ask, yes, you can leave out the cornstarch; the resulting bronuts just won't be quite as chewy as they would with cornstarch.
Mini Chocolate Chips - Chocolate chips add a little bit of extra chocolatey flavor and texture to these brownie donuts. I like mini chocolate chips for a more subtle texture, but you can use regular size or omit the chocolate chips altogether to suit your texture preferences.
See recipe card at the bottom of this post for full ingredient list and measurements.
Step-By-Step Recipe Instructions
Step 1: Preheat oven to 325°F.
Step 2: Spray a 6-well silicone donut pan with cooking spray. Place the donut pan onto a baking sheet and set aside.
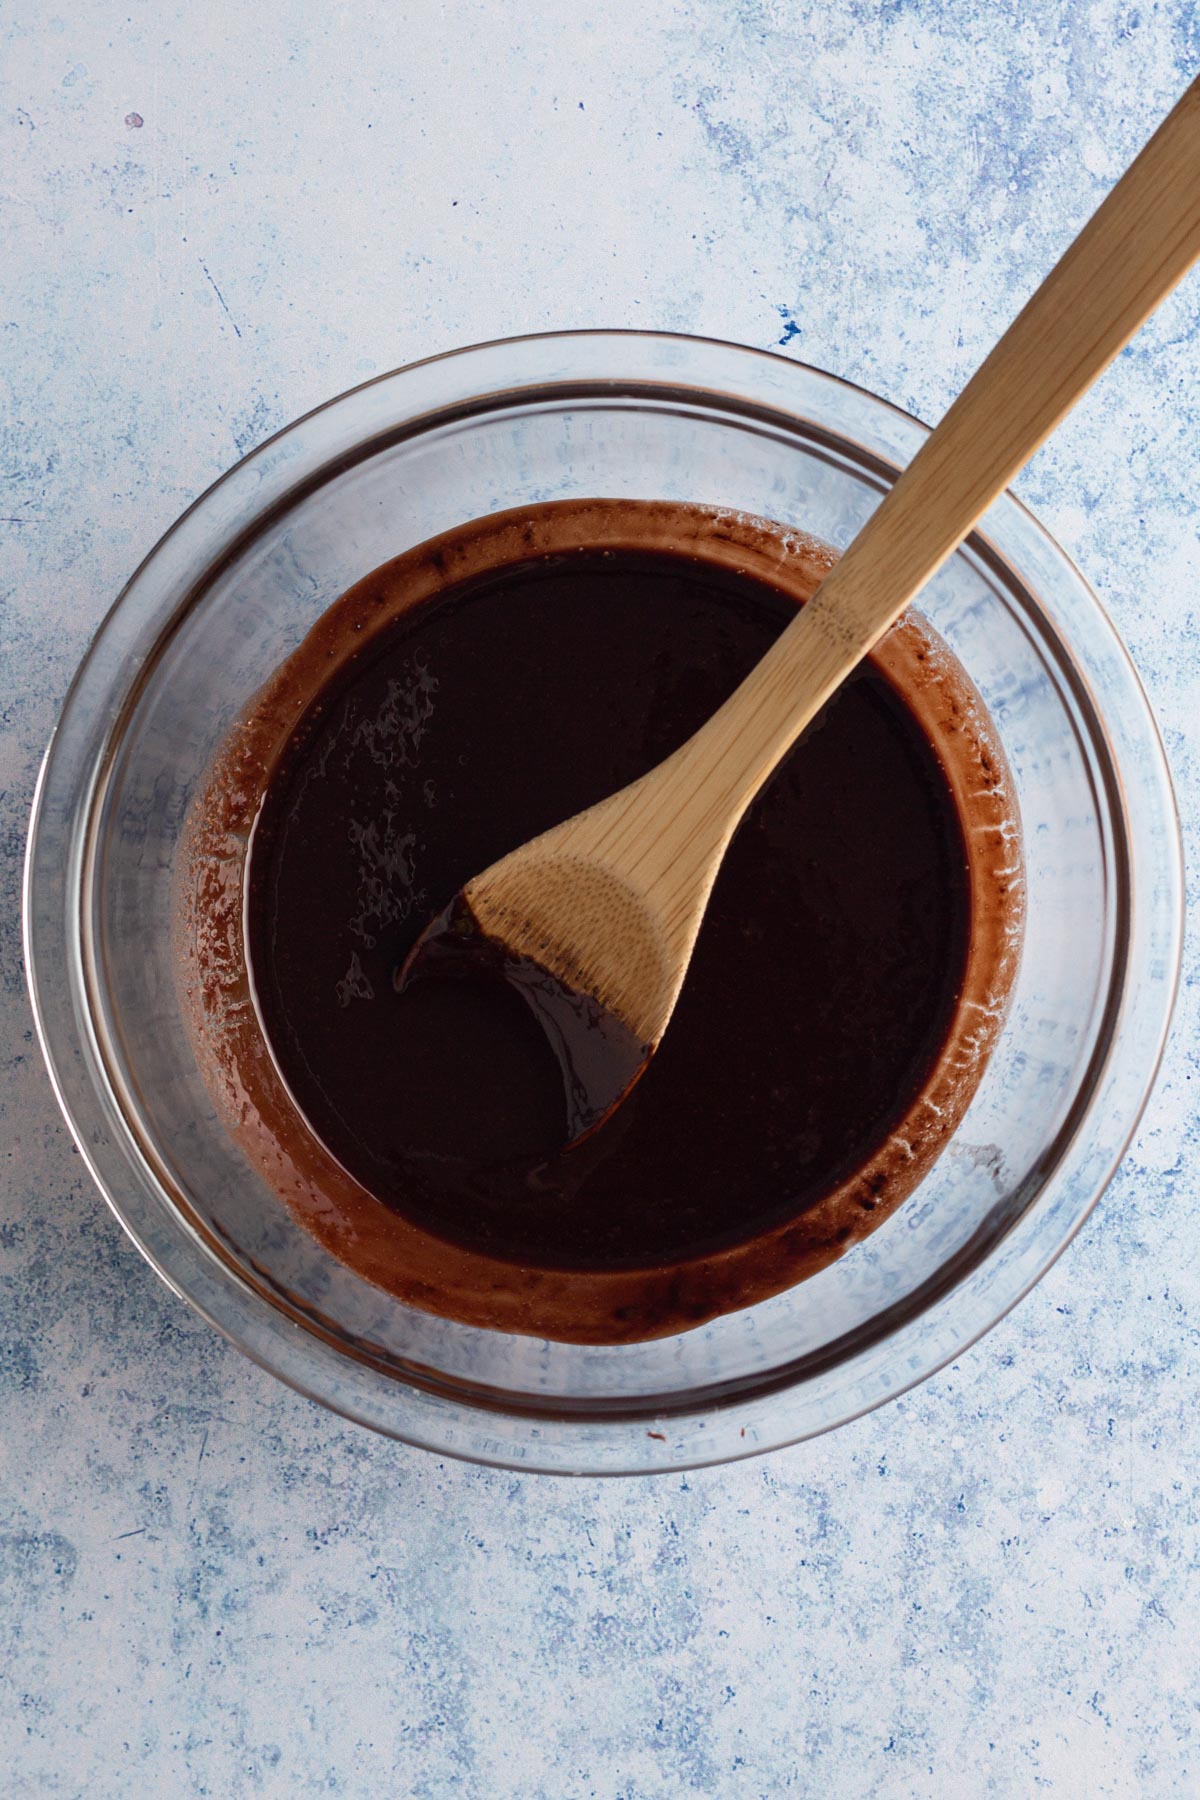
Step 3: Add butter to a heatproof, medium bowl and melt the butter in the microwave. Immediately add the chopped chocolate, cocoa powder, and vanilla to the melted butter and stir until the chocolate is completely melted and the mixture is smooth and shiny. Set the chocolate mixture aside to cool slightly while you move on to the next step.
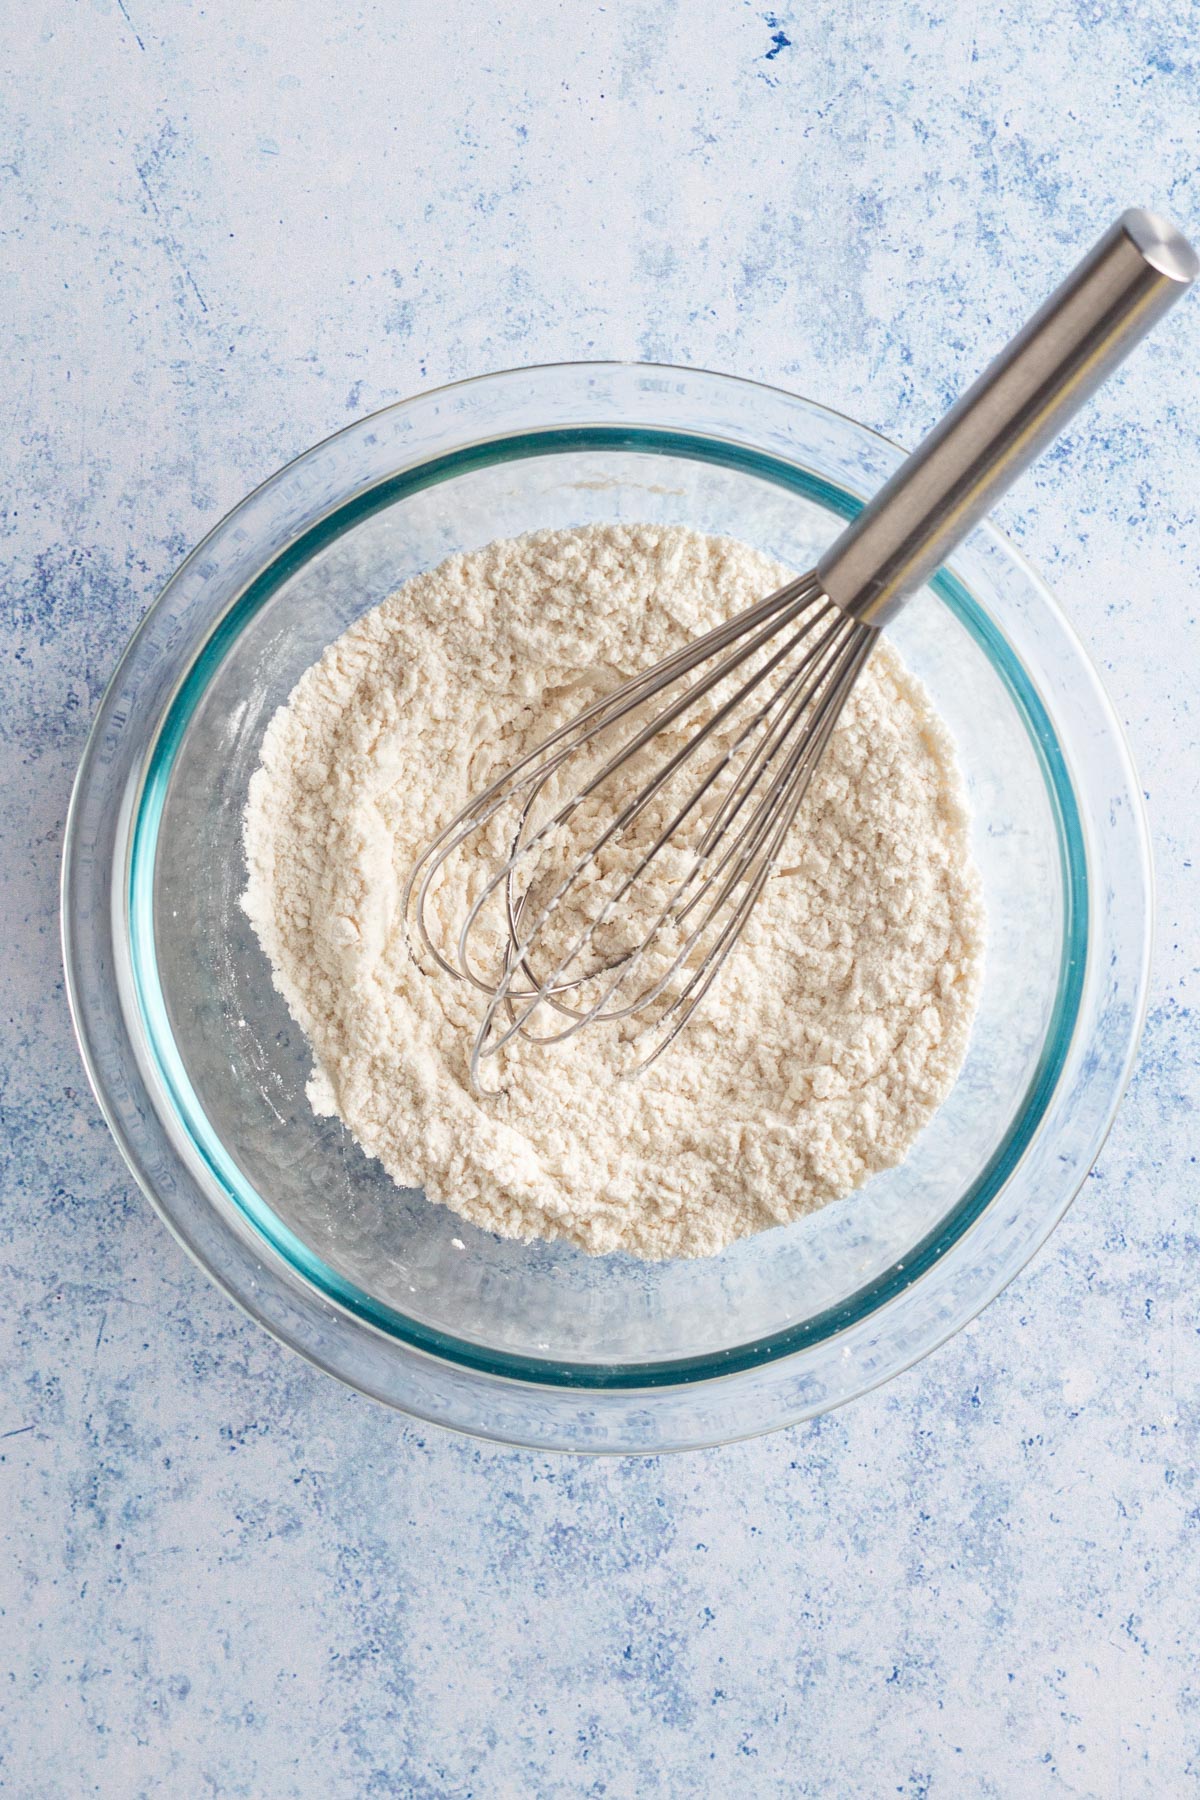
Step 4: In a small bowl, whisk together flour, cornstarch, and salt. Set aside.
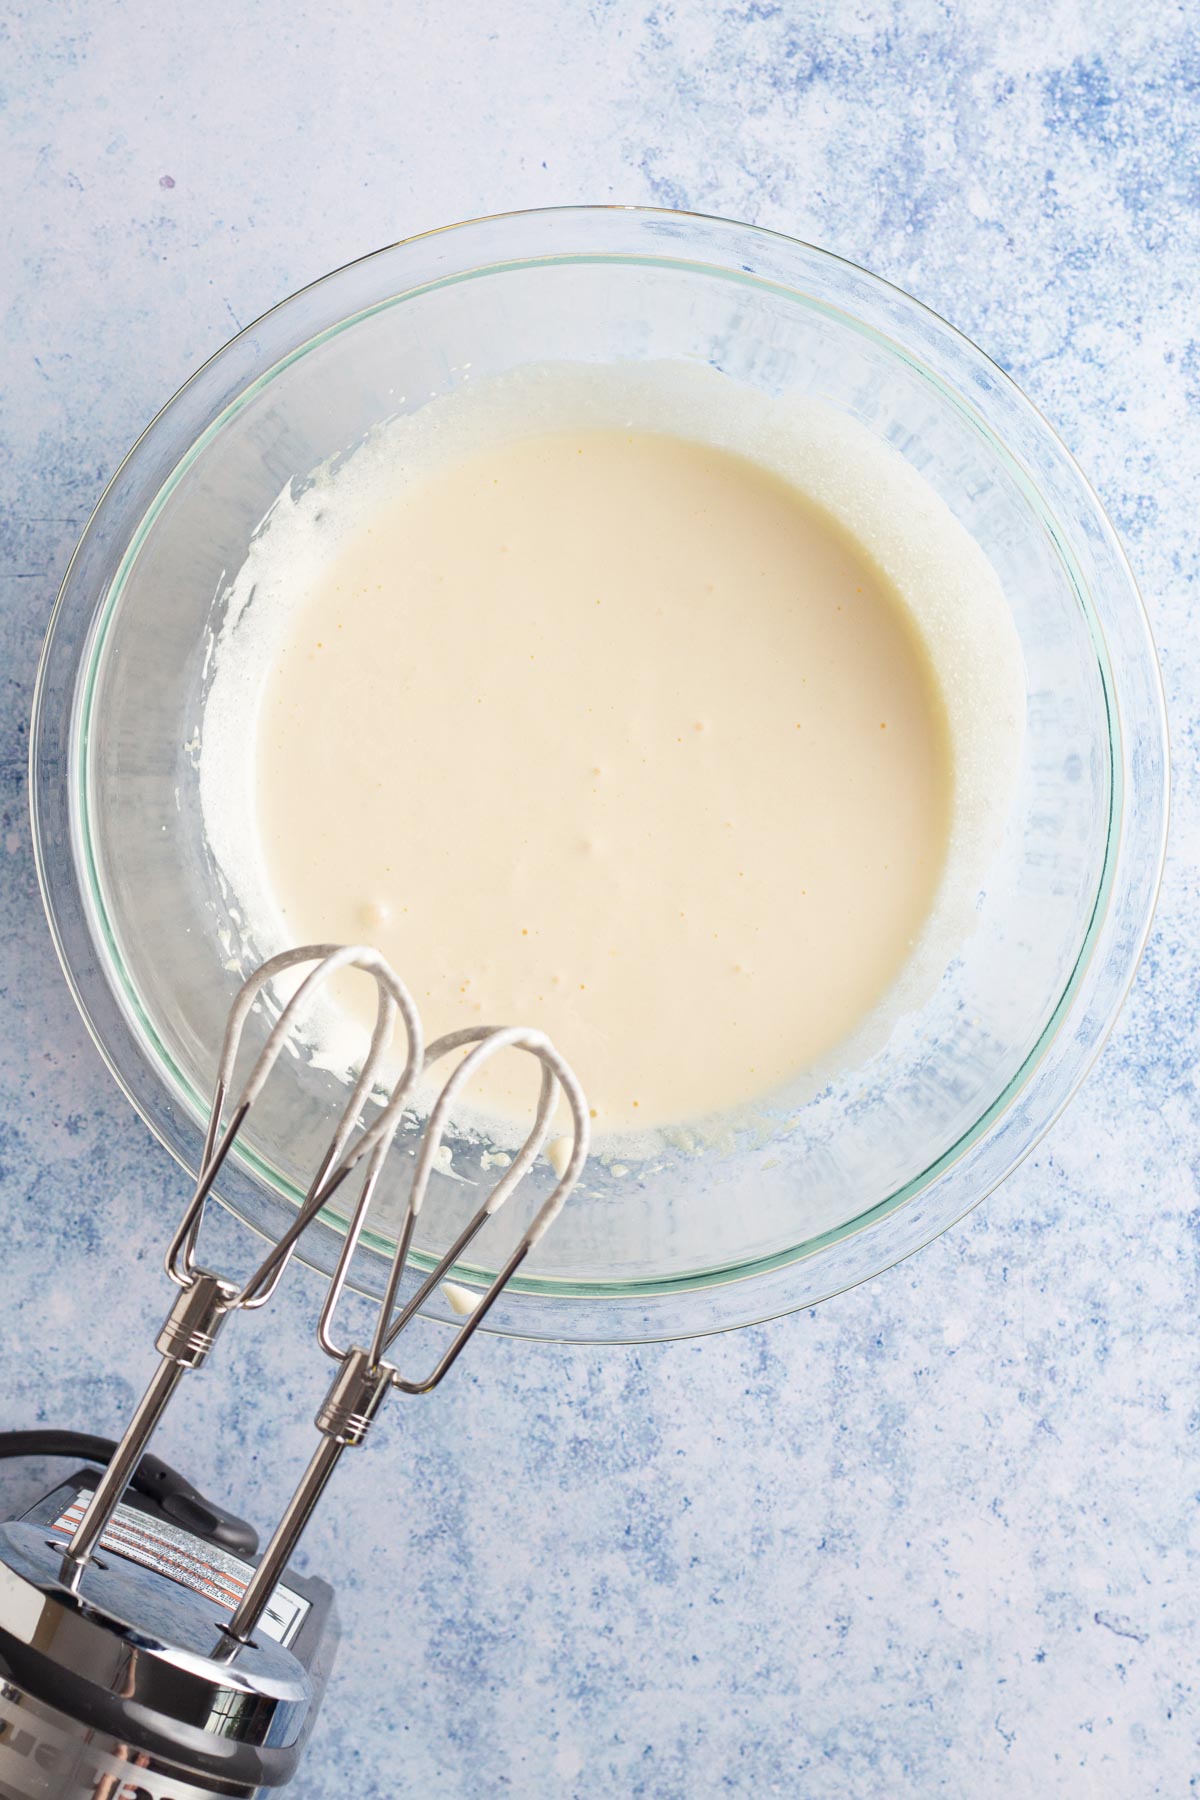
Step 5: In a the bowl of a stand mixer using the whisk attachment (or in a large bowl using a handheld electric mixer), beat together eggs and sugar on medium-high speed until the mixture is light, fluffy, and pale yellow, about 2 minutes.
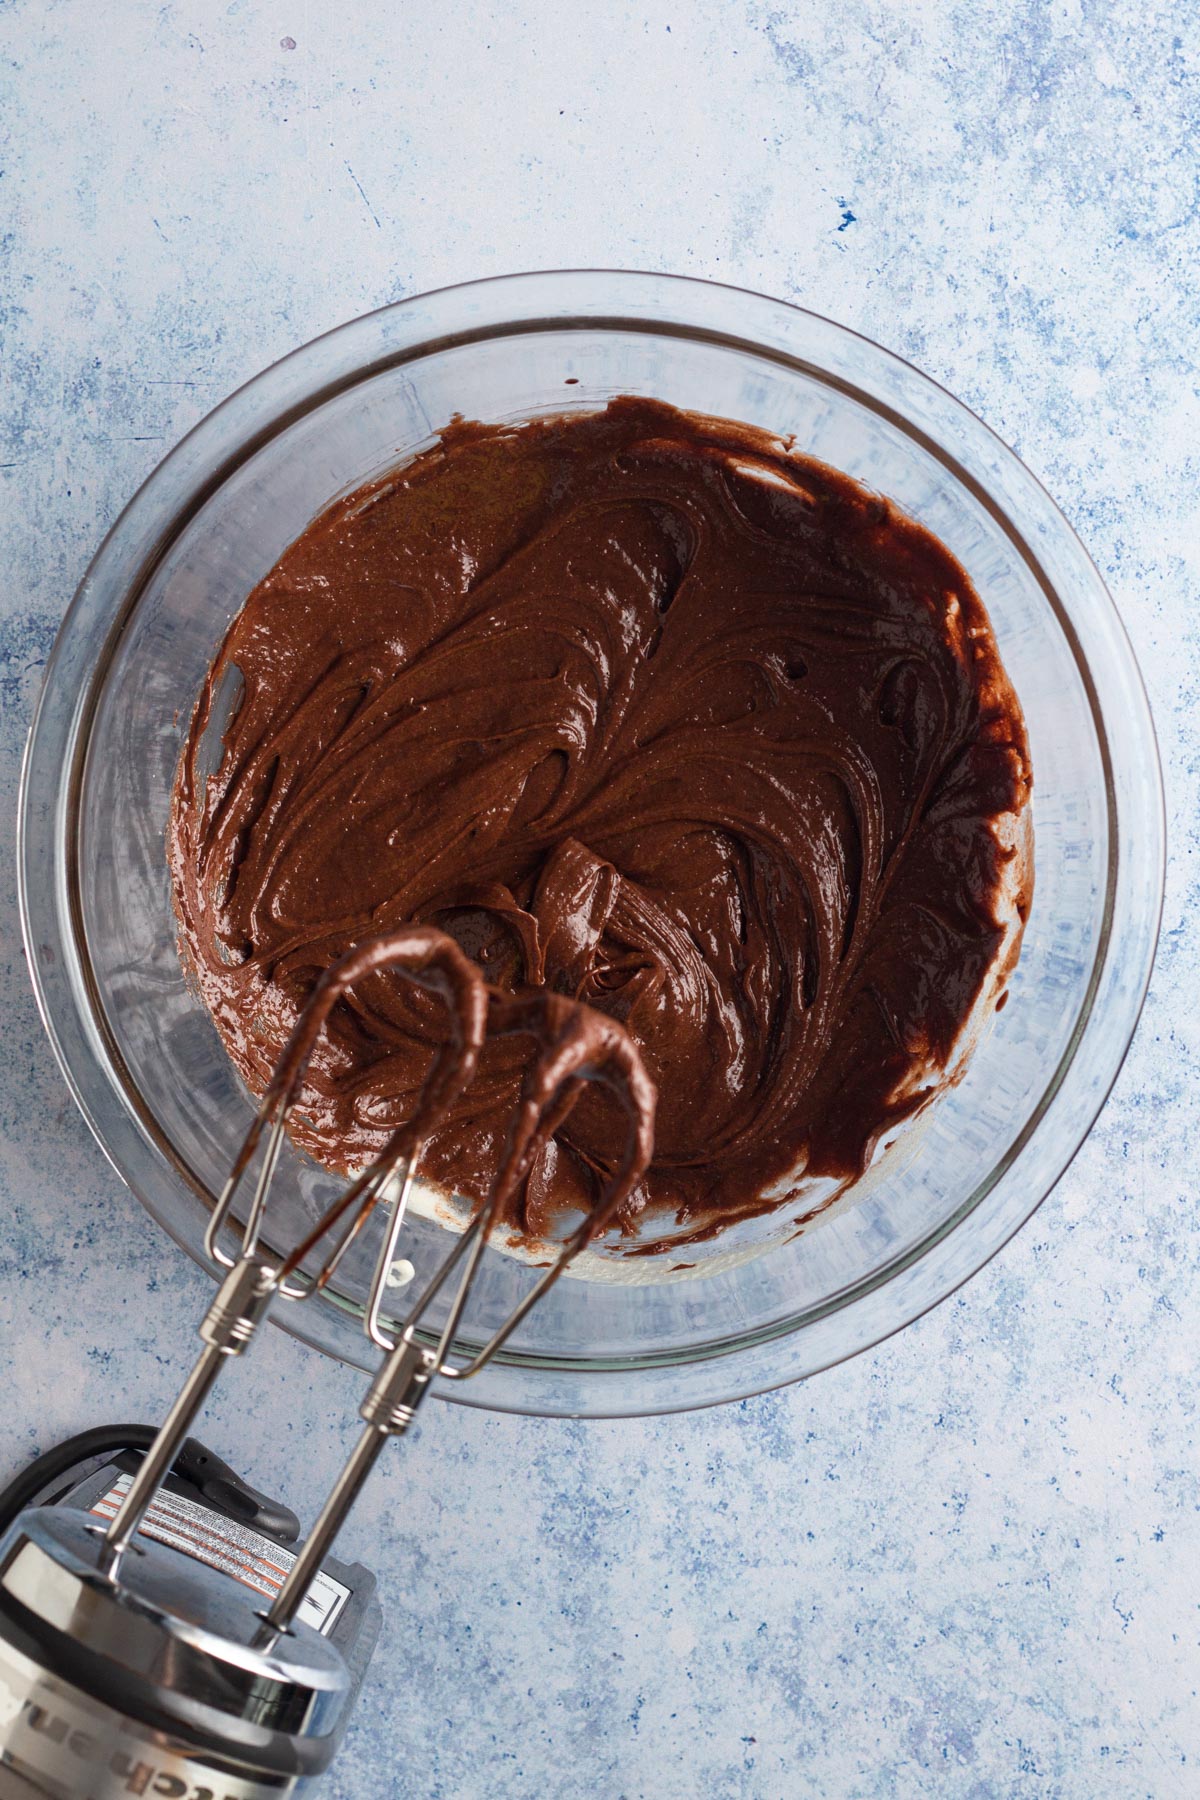
Step 6: With the mixer running on medium speed, slowly pour the slightly cooled chocolate mixture into the egg mixture. Continue to beat the mixture on medium speed until well combined, about 30 seconds.
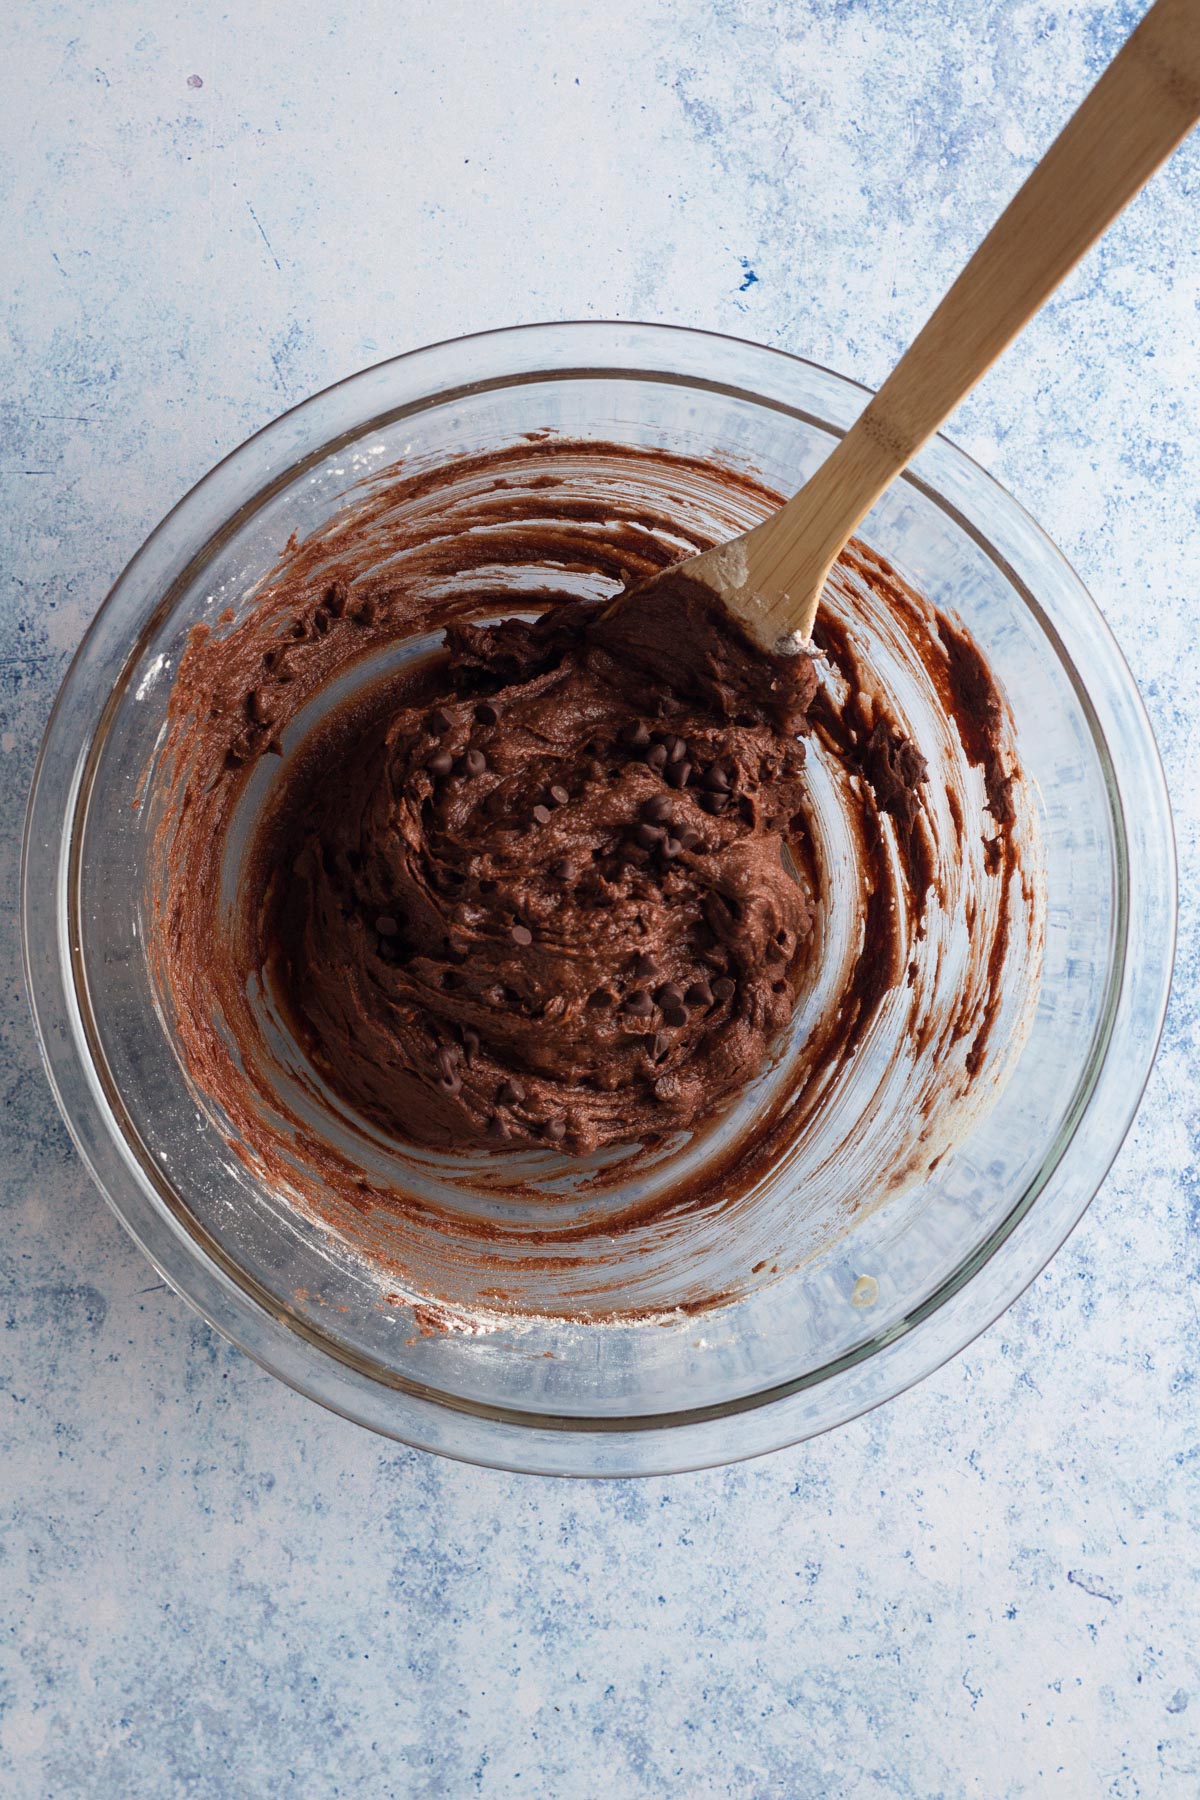
Step 7: Remove the bowl from the stand mixer (if using) and add the flour mixture. Using a rubber spatula or wooden spoon, gently fold the flour mixture into the batter. When nearly all of the flour is combined, add the chocolate chips and continue to fold until all flour and chocolate chips are combined, being careful not to over mix. Batter will be thick.
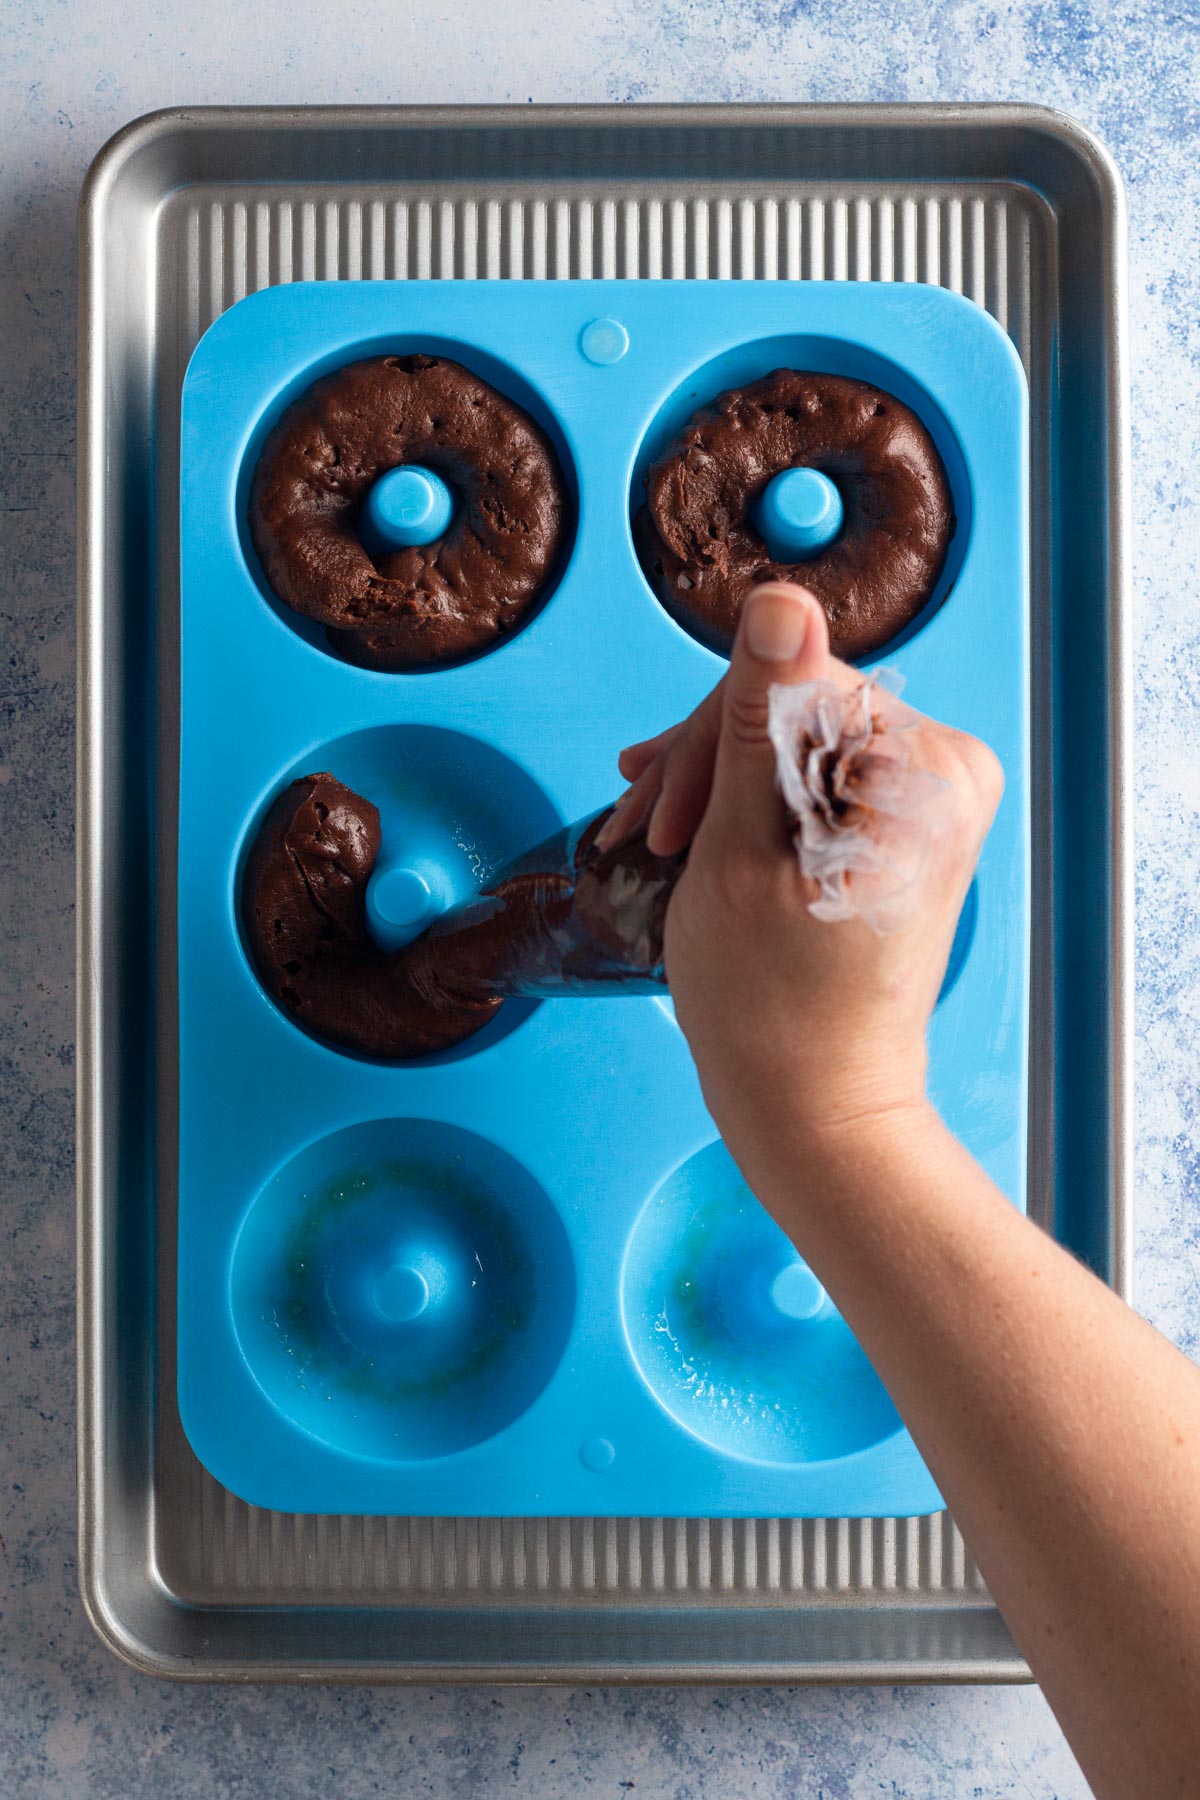
Step 8: Transfer the batter to a piping bag and cut off the end so there's a large hole (or use a plastic food storage bag with one corner cut off). Pipe the batter into the prepared donut pan so that each well is nearly full.
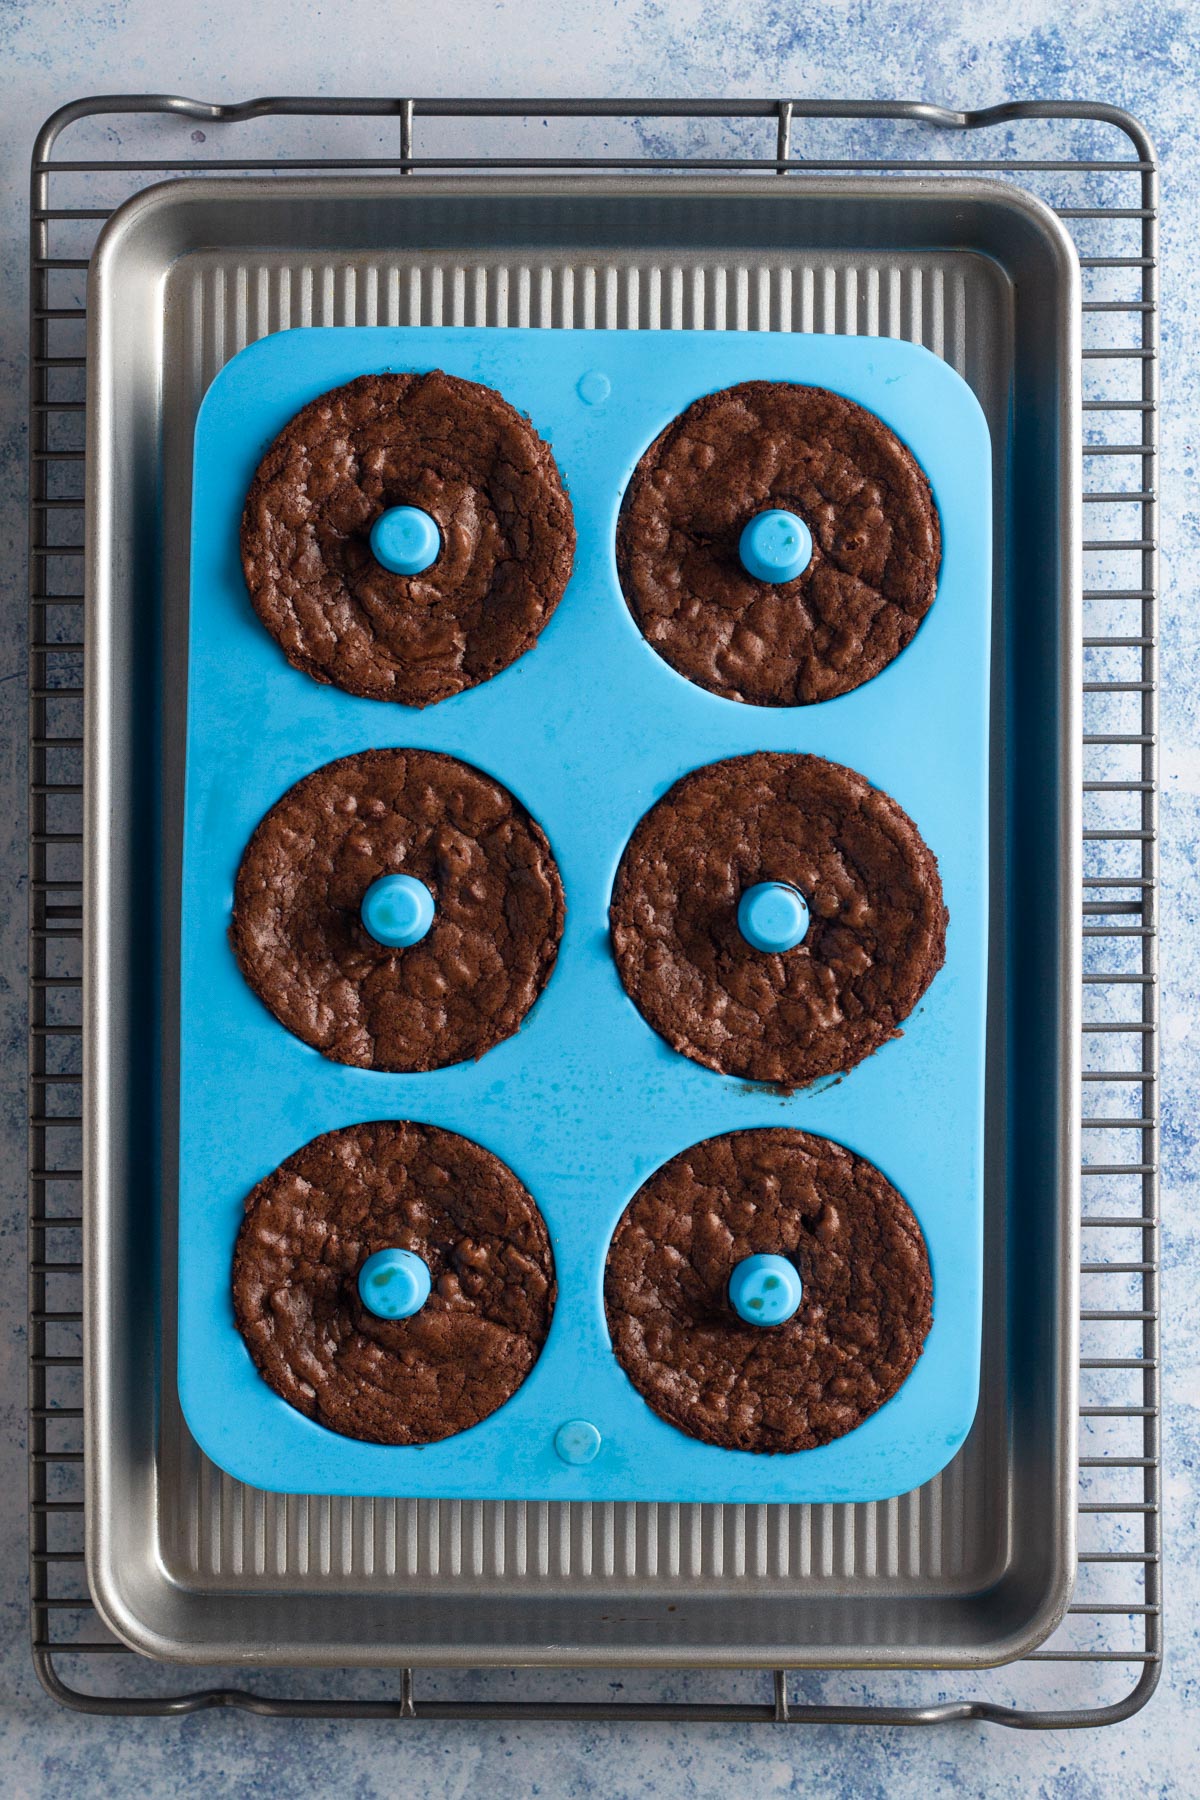
Step 9: Keeping the baking sheet under the donut pan, put the pans into the preheated oven and bake the bronuts for about 24-28 minutes or until they have risen slightly and a paper-thin crust has formed atop each. The bronuts are finished baking when a toothpick inserted into the center of the pan comes out with just a few moist crumbs and no raw batter.
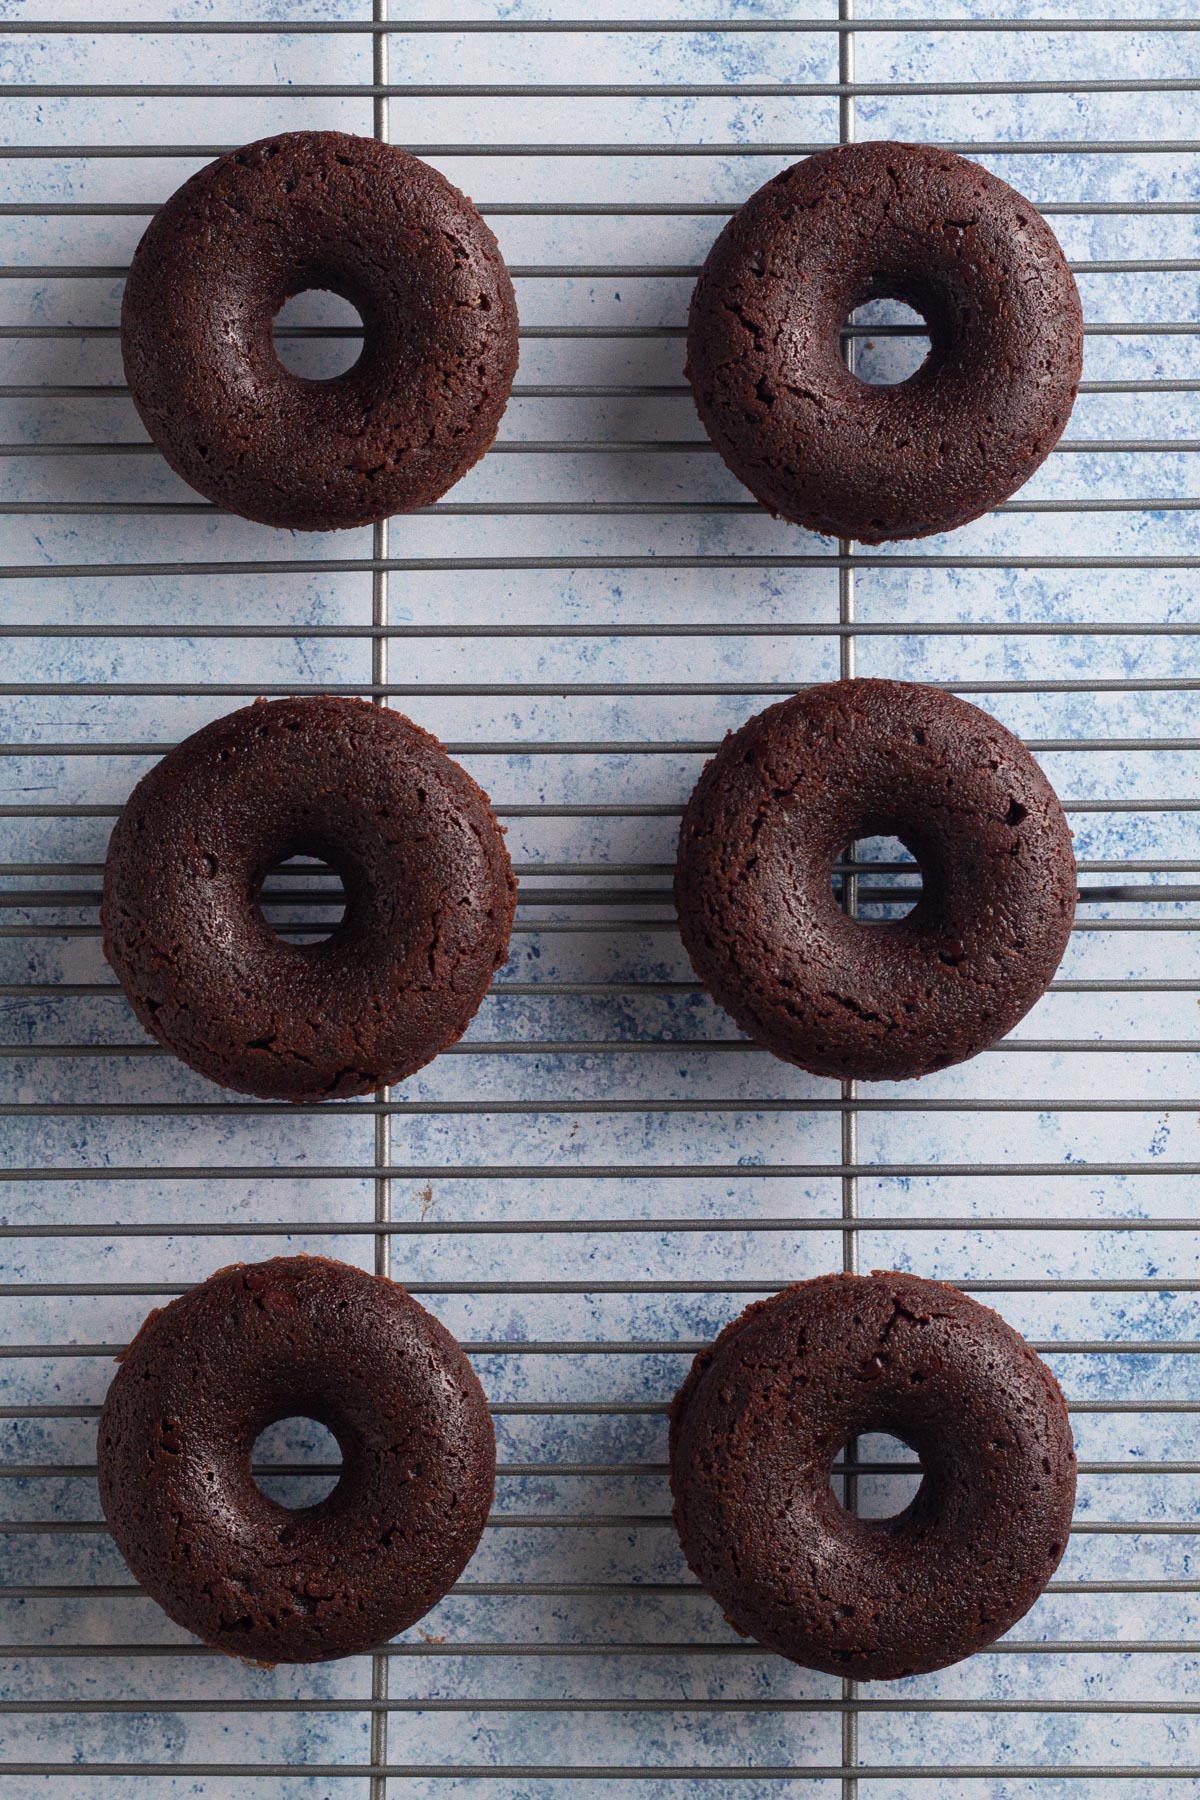
Step 10: Place the pan on a wire rack and allow the bronuts to cool completely in the pan. Once completely cooled, remove bronuts from the pan by placing one hand flat under each well and pushing upward rather then peeling one corner of the well away from the bronut, which could break the bronut.
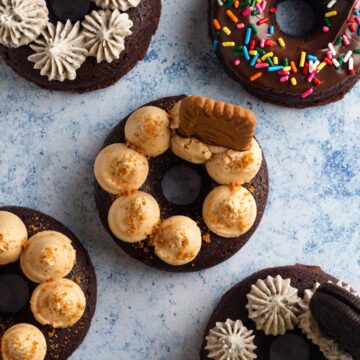
Step 11: Decorate bronuts as desired and enjoy!
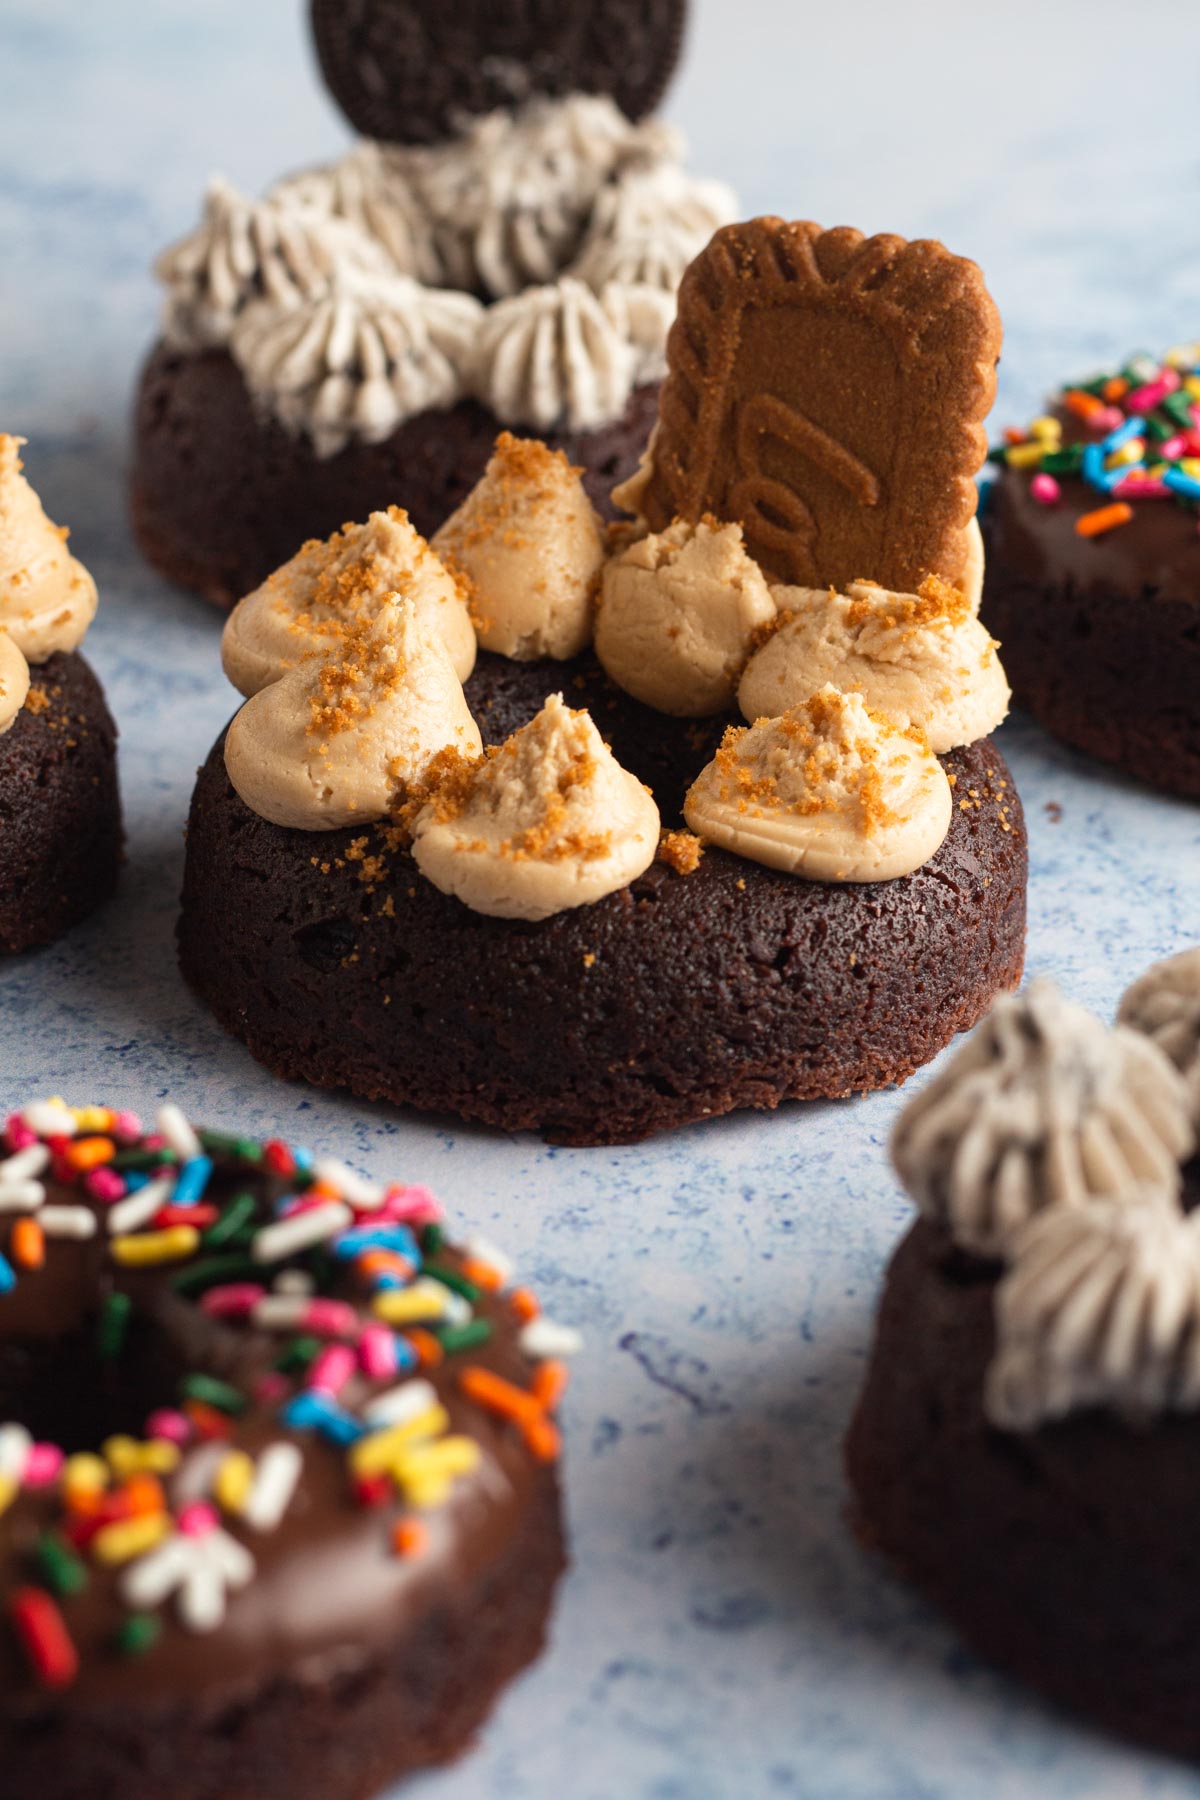
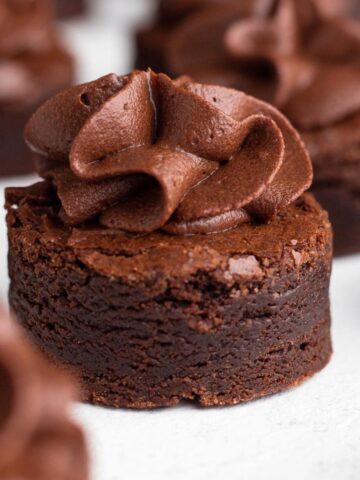
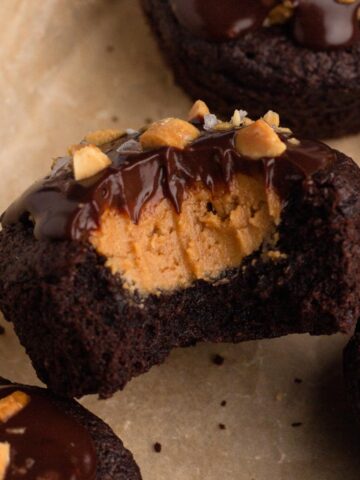
Here you're seeing bronuts topped with cookies and cream butter cream, cookie butter buttercream and biscoff cookie crumbs, and melted chocolate with sprinkles, but the possibilities are endless! Keep scrolling for lots of toppings inspiration.
Bronut Toppings Ideas
Anything that pairs well with chocolate would be delicious atop a bronut! Here's a list of some of my favorite toppings ideas, but don't be afraid to get creative and experiment with your own toppings.
- Cookies and cream buttercream frosting with an Oreo cookie
- Cookie butter buttercream frosting with biscoff cookie crumbs
- Melted chocolate and sprinkles
- Chocolate glaze
- Vanilla glaze
- Buttercream frosting (vanilla, chocolate, raspberry, etc.)
- Chocolate drizzle
- Peanut butter drizzle
- Salted caramel sauce
- Chocolate hazelnut spread (Nutella)
- Chocolate ganache
- Sprinkles
- M&Ms
- Marshmallow creme
- Irish chocolate frosting (made with Irish whiskey)
- Cream cheese frosting
- Crushed cookies
- Crushed/chopped candies
- Cereal
- Crushed pretzel bits
- Chopped nuts
Allison's Top Tips
Use a silicone donut pan for baking bronuts. I typically prefer metal pans because they're good conductors of heat and allow for even browning, but silicone is the way to go here. These bronuts baked beautifully in a silicone pan and were very easy to remove from the pan once cooled (which was not the case with a metal pan). Here's the affordable silicone donut pan I used for this recipe. Also, I typically try to avoid buying super specific kitchen gadgets (since I like efficiency and only have so much storage space in my kitchen), but now that I own one of these pans I'm dreaming up about a million different baked donut recipes too, so I know it will get a lot of use!
Place the silicone donut pan onto a metal baking sheet for baking. The silicone pan will be floppy, so putting it onto a baking sheet will make it much easier to put the pan in and out of the oven.
How to remove bronuts from pan: Once completely cooled, remove bronuts from the pan by placing one hand flat under the well and pushing straight upward rather then peeling one corner of the well away from the bronut, which could break the bronut. Repeat for each brownie donut.
Recipe FAQs
Any way you want! Dipping them in a glaze is a popular choice, or they can be topped with frosting. And don't forget to garnish with a drizzle, candies, or crushed cookies. Check out a list of decorating ideas above or get creative and try something different!
Bronuts, once completely cooled, should be stored in an airtight container at room temperature for up to 3 days.
If you decorate your bronuts with a topping that must be refrigerated then store them in an airtight container in the fridge and bring back to room temperature before serving. Note that the fridge will dry out your brownies more quickly, so if you must refrigerate them it would be best to enjoy them within 1 to 2 days.
Yes! Bronuts should be completely cooled and sealed in an airtight container before freezing for up to 3 months. You may want to add a piece of parchment between the bronuts if stacking them in the container to keep them from sticking together.
Ideally bronuts should be frozen undecorated, but if you find yourself with leftovers that you want to freeze you certainly can (just don't stack them or you'll squish the decorations).
Sure you can, following the same baking instructions as the recipe card below, but why not make them from scratch using this easy-to-follow recipe?
Storage Instructions
See FAQs above for more information about storing bronuts at room temperature or freezing them. For even more information about how to keep brownies fresh, click the link to discover everything you need to know about how to store brownies.
More Brownie & Donut Recipes
Love this recipe? Please leave a star rating and review on the recipe below! And don't forget to subscribe to Always Eat Dessert for even more easy dessert recipes and helpful baking tips.
Recipe
Bronuts (Brownie Donuts)
Ingredients
- ½ cup (114 grams) unsalted butter
- 3 ½ ounces (99 grams) chocolate baking bar (bittersweet or semisweet), chopped
- 1 Tablespoon (5 grams) cocoa powder (natural or Dutch-process)
- 1 teaspoon (4 grams) vanilla extract
- ½ cup (63 grams) all-purpose flour
- ½ Tablespoon (4 grams) cornstarch
- ½ teaspoon (3 grams) fine sea salt
- 1 large egg plus 1 large egg yolk, room temperature
- ¾ cup (150 grams) granulated sugar
- ½ cup (90 grams) mini chocolate chips
Instructions
- Preheat oven to 325°F.
- Spray a 6-well silicone donut pan with cooking spray. Place the donut pan onto a baking sheet and set aside.
- Add butter to a heatproof, medium bowl and melt the butter in the microwave. Immediately add the chopped chocolate, cocoa powder, and vanilla to the melted butter and stir until the chocolate is completely melted and the mixture is smooth and shiny. Set the chocolate mixture aside to cool slightly while you move on to the next step.
- In a small bowl, whisk together flour, cornstarch, and salt. Set aside.
- In a the bowl of a stand mixer using the whisk attachment (or in a large bowl using a handheld electric mixer), beat together eggs and sugar on medium-high speed until the mixture is light, fluffy, and pale yellow, about 2 minutes.
- With the mixer running on medium speed, slowly pour the slightly cooled chocolate mixture into the egg mixture. Continue to beat the mixture on medium speed until well combined, about 30 seconds.
- Remove the bowl from the stand mixer (if using) and add the flour mixture. Using a rubber spatula or wooden spoon, gently fold the flour mixture into the batter. When nearly all of the flour is combined, add the chocolate chips and continue to fold until all flour and chocolate chips are combined, being careful not to over mix. Batter will be thick.
- Transfer the batter to a piping bag and cut off the end so there's a large hole (or use a plastic food storage bag with one corner cut off). Pipe the batter into the prepared donut pan so that each well is nearly full.
- Keeping the baking sheet under the donut pan, put the pans into the preheated oven and bake the bronuts for about 24-28 minutes or until they have risen slightly and a paper-thin crust has formed atop each. The bronuts are finished baking when a toothpick inserted into the center of the pan comes out with just a few moist crumbs and no raw batter.
- Place the pan on a wire rack and allow the bronuts to cool completely in the pan. Once completely cooled, remove bronuts from the pan by placing one hand flat under each well and pushing upward rather then peeling one corner of the well away from the bronut, which could break the bronut.
- Decorate bronuts as desired and enjoy!
Adam says
These are so good! They are basically just brownies in donut shape, but you get the perfect amount of "edge" and "center" in every one of them. Crispy and chewy and fudgy -- everything I want in a brownie. I used 95% dark chocolate. I made them gluten free by subbing the 63g flour with 30g teff, 20g sweet rice, and 13g tapioca flours -- I think a 1:1 blend would also work fine here, but may come out a little drier.
Allison Ferraro says
Hi Adam! I'm so glad you loved this recipe! And thank you for your advice on how to make them gluten-free... so helpful!
- Allison
Cindy says
I can't believe there are no comments yet. These are perfect! I haven't put any icing on them yet but they are perfect without any. A little crunch and wonderfully chewy. Baked perfectly in the silicone donut molds. If you don't like too chocolaty, omit chocolate chips. Very excited to share these with friends.my mold is 3.5 inches and made 8 donuts.
Jocelyn says
The reason there are no comments is because this is not a good recipe. Sorry but between the baking temp, ingredients and funny way of mixing and incorporating... it's a failure. There are better ones out there. Or just make a real brownie recipe in metal donut pans. Works far better than this... and yes, I did make it. Not good.
Allison Ferraro says
Everyone has their favorite type of brownie, with different preferences for texture richness, flavor, and more. It sounds like this recipe doesn't match your preferences. Thanks for taking the time to try it and leave a review. I hope you find a recipe that you love!
- Allison